
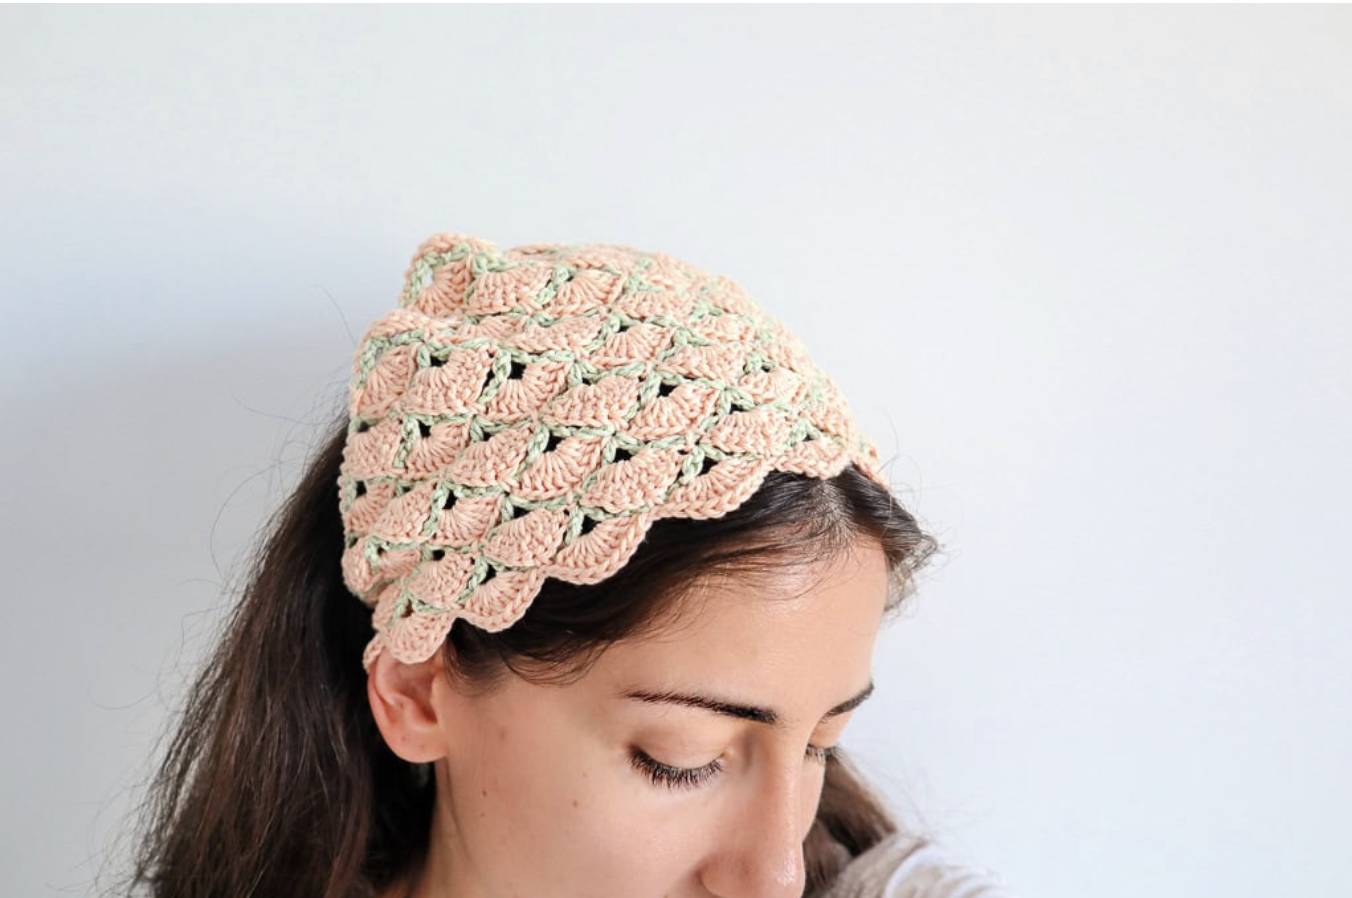
How to Crochet the Beautiful Shells Bandana: A Complete Colorwork and Finishing Workshop
The Beautiful Shells Bandana is a small but highly effective crochet project for learning how a simple framework can support a much richer decorative stitch. Instead of building every decorative row independently, this design alternates between open V-stitch framework rows and dense shell rows. The result is a fabric that looks intricate while relying on a clear and repeatable construction system.
This project is especially useful if you enjoy crochet colorwork but prefer not to manage several strands of yarn at the same time. Each row is worked in a single color, while the two colors alternate from row to row. The clever color-change method means you do not have to cut the yarn after every row, and you also avoid carrying a strand horizontally across the back of the work.
The bandana is worked from the bottom corner upward, so it is also an excellent project for understanding how a stitch pattern can grow naturally from a small starting point. Once you understand the construction, the same Beautiful Shells stitch can be continued beyond the bandana size to create a much larger piece such as a shawl.
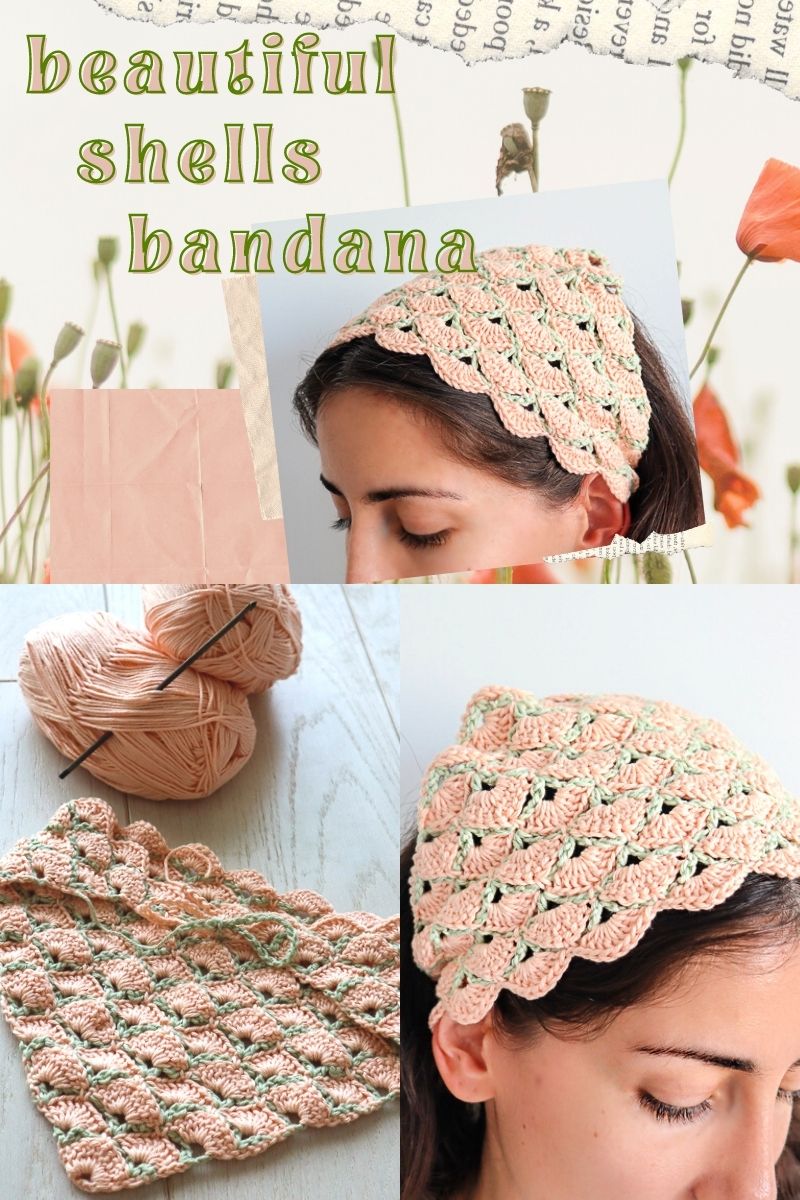
The Idea Behind the Beautiful Shells Stitch
The most useful way to understand this pattern is to think of the fabric as having two layers of construction. The first layer is the scaffold. It is made with V stitches separated by chain spaces, creating open locations where the next shell row can be built.
The second layer is the decorative shell. On the shell row, multiple double crochet stitches are placed into each V stitch. Between those shells, a single crochet anchors the row to the chain-five space created by the previous framework row.
This strategy is one reason the stitch is visually impressive without being unnecessarily complicated. The framework determines where the next shells belong, while the shell row fills those spaces with dense stitches.
The Beautiful Shells stitch is described as a simpler cousin of the Virus Stitch because it uses a related scaffold-and-build strategy. However, this bandana provides a much smaller project in which to practice the idea before committing to a larger shawl.
Project Snapshot
- Project: Beautiful Shells Bandana
- Construction: Bottom corner-up
- Yarn: DK weight cotton yarn
- Color A: Green, Paintbox Yarns Cotton DK
- Color B: Peach, an exact dupe from Ice Yarns called Baby Cotton
- Yarn quantity: Less than 50 yards of each of the two colors
- Crochet hook: 3.5mm crochet hook
- Finished measurement: 18 inches (46cm) along the long side
- Original row count: 25 rows
- Finishing: Chains several inches long made from the available working yarn to create headband ties
Because the bandana grows from a bottom corner, you can experiment with yarn weight and hook size if you want to explore how the stitch behaves. The original project, however, uses DK weight cotton yarn and a 3.5mm crochet hook, and the original finished measurement is 18 inches (46cm) along the long side.
Materials and Working Information
Gather the following supplies before starting. Keeping both colors available throughout the project makes the special color-change technique much easier to manage.
- Less than 50 yards of green DK weight cotton yarn
- Less than 50 yards of peach DK weight cotton yarn
- 3.5mm crochet hook
The green yarn used for the original is Paintbox Yarns Cotton DK. The peach yarn is an exact dupe from Ice Yarns called Baby Cotton.
The pattern does not require a complicated collection of tools. The main challenge is learning to recognize the live loops and understand how the color-change system keeps both colors available without carrying either one across the completed row.
Abbreviations and Stitch Language
The pattern uses familiar crochet stitches. Understanding the following terms will make the instructions easier to follow.
- ch: chain
- sl st: slip stitch
- sc: single crochet
- dc: double crochet
A V stitch in this pattern consists of 1dc, ch1, 1dc worked into the same stitch or location. The shell is the group of 9dc built into a V stitch, with the starting chain counted as one of those double crochet stitches.
Do not treat the chain-five spaces as decorative gaps that can be skipped. They are structural parts of the scaffold. The single crochet on the shell row anchors the work to these spaces and helps establish the locations needed for subsequent V stitches.
Before You Begin: Understand the Two-Row Rhythm
The easiest way to keep the pattern organized is to recognize that the project develops in a repeating two-row rhythm.
One row creates the dense shell structure. The next row creates the open scaffold that prepares the fabric for another shell row. The colors alternate as this happens, so the finished fabric gains its colorwork effect without requiring multiple colors to be actively worked across one row.
This distinction is important. A shell row is not simply another decorative row. It depends on the V stitches established previously. Likewise, the framework row is not merely an open row; it positions the next generation of shells.
When checking your work, therefore, ask two questions: “Am I on a shell row or a scaffold row?” and “Are my V stitches appearing in the expected locations?” Those two checks will catch many mistakes before they become difficult to correct.
The Special Color-Change Method
The most unusual part of this project is the way the colors are changed. Normally, a crocheter might finish a row, cut the yarn, and join a new color. This design avoids that process.
It also does not carry the unused color across the row. Instead, the second color remains attached through a live loop, and the working color is pulled through that loop at the beginning of the next row.
Follow this sequence carefully:
- Leave the live Color B loop on the hook.
- Insert the hook into the live Color A loop.
- With Color A only, chain 3.
- Pull the Color A loop through the Color B loop.
- Again chain 3 in Color A while carrying Color B up the chain.
- Turn the work.
The original instructions specifically direct you to see the accompanying video for this technique. The important principle is that the color you are about to use becomes the active working color while the other color is carried upward through the beginning chain rather than being carried across the row.
Take your time with this maneuver on the first few transitions. Once the movement becomes familiar, it greatly simplifies the appearance of the two-color fabric.
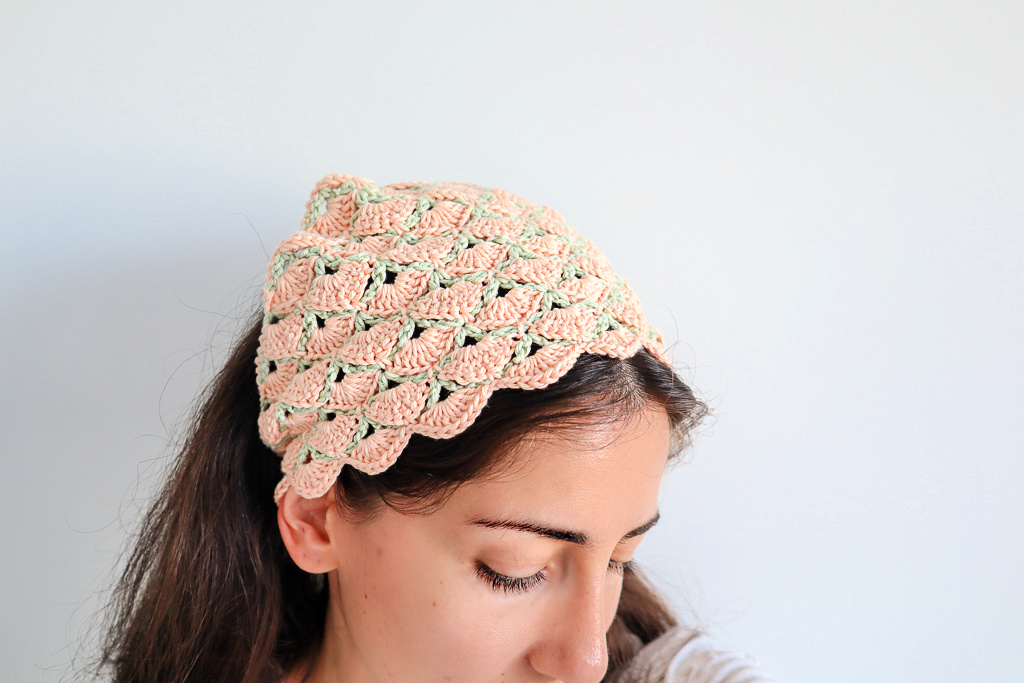
Construction Map: From Corner to Bandana
The project begins with a small six-chain ring. From there, the first row establishes the center of the starting shell structure. The second row introduces the first V-stitch scaffold. The third row fills those V stitches with shells, and the fourth row expands the scaffold again.
After these introductory rows, the same basic relationship continues. Shells are made into V stitches, and scaffold rows create the next set of V stitches and chain-five spaces.
This means the piece grows outward while remaining structurally organized. The increase in the number of V stitches on scaffold rows creates the triangular expansion characteristic of the bandana.
Foundation and First Shell
Begin in Color A
Chain 6 and slip stitch to the first chain to join in a round.
This small ring is the starting point for the entire project. Keep the center ring open enough to receive the stitches comfortably, but do not deliberately enlarge it beyond what is created by the six chains.
Row 1
Chain 3. This chain counts as 1dc. Work 8dc into the center of the ch6 ring, creating 9dc total.
When the row is complete, pull the last loop up long and remove the hook.
The extended loop is intentional because the next stage uses the live-loop color-change method. Do not cut the yarn simply because the row has ended.
Building the First Scaffold
Row 2 in Color B
Insert the hook into the top of the starting ch3 from the previous row.
Using Color B, chain 4. This counts as 1dc, ch1. Work 1dc into the same stitch to complete the first V stitch.
Next, chain 5.
Work one more V stitch, consisting of 1dc, ch1, 1dc, all into the last stitch of the row.
At this point, the fabric has changed from the dense opening shell to an open framework. This scaffold is what the next shell row will use as its foundation.
Apply the special color-change method so that the next row can be worked in Color A without cutting either color.
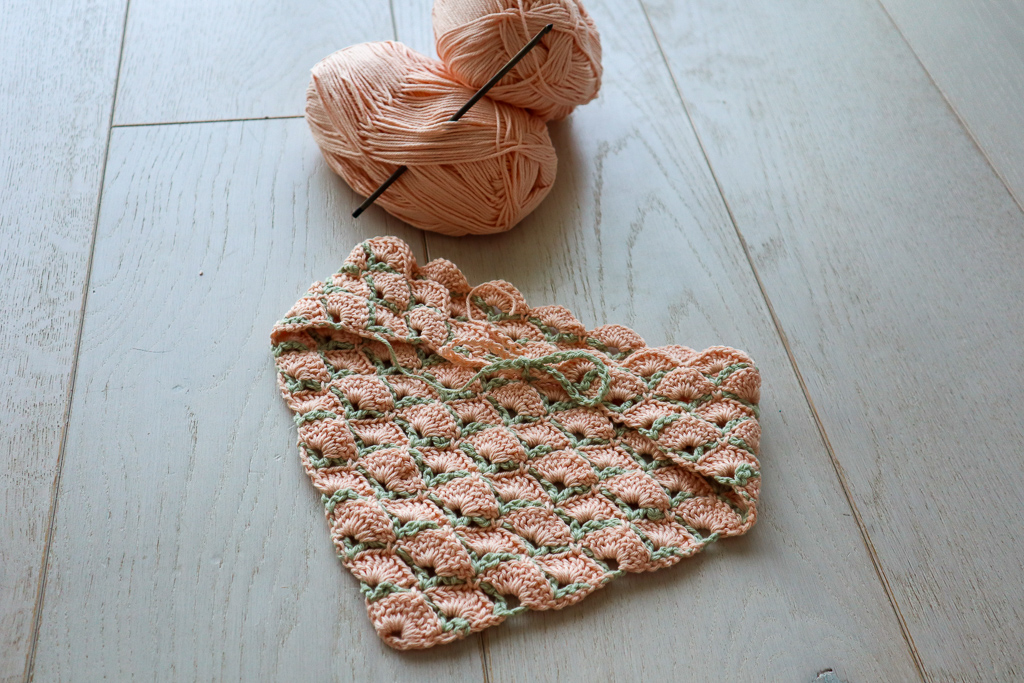
Creating the First Full Shell Row
Row 3 in Color A
Work 8dc into the first V stitch. Counting the starting ch3 from the color-change instructions, this produces 9dc.
Next, work 1sc in the 5th dc from the previous shell stitch, working on top of the ch5 from the previous row.
Then work 9dc in the next V stitch.
Once the row is complete, pull the last loop long and remove the hook.
This is the first row where the scaffold becomes visibly transformed into the dense shell design. The nine double crochet stitches create the fuller texture, while the single crochet maintains the connection between shell groups.
The placement of the single crochet is worth checking carefully. It is worked on top of the ch5 from the previous row, specifically in the 5th dc from the previous shell stitch. If the center connection looks misplaced, review this point before continuing.
Expanding the Scaffold Again
Row 4 in Color B
Insert the hook into the top of the starting ch3 from the previous row.
Using Color B, chain 4. This counts as 1dc, ch1. Work 1dc into the same stitch to complete the first V stitch.
Chain 5.
Work a V stitch into the single crochet from the previous row.
Chain 5 again.
Work one more V stitch, consisting of 1dc, ch1, 1dc, all into the last stitch of the row.
Repeat the special color-change instructions so that the next shell row can be worked in the same direction without cutting the yarn.
At this point, the repeating structure should be easy to recognize: V stitch, chain-five space, V stitch, chain-five space, and V stitch. The next shell row will use those V stitches as its primary working locations.
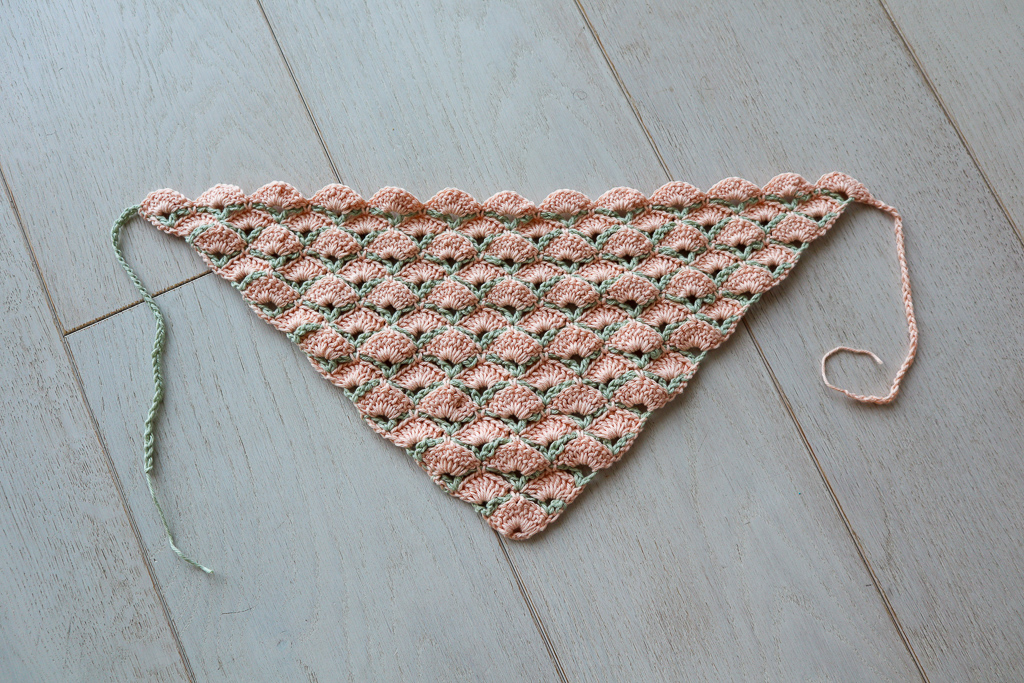
Continue the Shell-and-Scaffold Sequence
After Row 4, continue making shells into each V stitch and V-stitch scaffold rows after shell rows. The same construction principle remains in place as the bandana grows.
Each scaffold row prepares the locations required by the next shell row. Each shell row then fills those locations and uses the chain-five spaces to connect the decorative groups.
Continue until the piece measures 18 inches (46cm) along the long side. In the original project, this measurement was reached at 25 rows.
The measurement is the final guide for the original bandana. If your tension differs slightly, use the stated measurement as the important finishing checkpoint while remembering that the original project reached it at 25 rows.
Stitch Checkpoints for Quality Control
Rather than waiting until the end to discover an error, inspect the fabric after each stage. The following checkpoints help you confirm that the structure is developing correctly.
Checkpoint 1: The Starting Ring
After the foundation, make sure the ch6 has been joined into a round and that the first row contains 9dc total, including the starting ch3.
Checkpoint 2: The First V-Stitch Row
After Row 2, you should be able to identify two V stitches with a ch5 space between them. This is the first scaffold.
Checkpoint 3: The First Shell Row
After Row 3, each V stitch should support a nine-double-crochet shell when the starting ch3 is counted. The single crochet should sit on top of the ch5 area from the previous row.
Checkpoint 4: The Expanded Scaffold
After Row 4, the scaffold should contain the new central V stitch worked into the single crochet from the previous row, with chain-five spaces separating the V-stitch locations.
Checkpoint 5: Final Shape
At the end, confirm that the bandana measures 18 inches (46cm) along the long side and that the original row count is 25 rows.
Managing Tension Without Losing the Shape
Because the project combines open chain spaces with dense shell groups, consistent tension is helpful. If your chain-five spaces become dramatically tighter than the surrounding stitches, the scaffold may pull the fabric inward. If they become excessively loose, the framework can look unusually open.
The goal is not to force every stitch to look identical. Instead, aim for a relaxed, consistent motion so that the V stitches and shell groups maintain their intended relationship.
When changing colors, avoid pulling the carried loop too tightly through the beginning chains. The special color-change method needs enough flexibility for the new row to turn naturally.
Common Problems and Practical Fixes
The Color Change Feels Confusing
The color transition is the most unfamiliar part of the pattern for many crocheters. Slow down and identify which color currently has the live loop. The instructions require you to insert the hook into the live Color A loop while Color B is live on the hook, then chain with Color A and pull its loop through Color B.
Do not cut either color after every row. The whole point of the technique is to keep the colors available.
The Shell Looks Too Small
Check whether the starting chain has been counted correctly. The shell row uses 8dc into the V stitch plus the starting ch3, giving 9dc total.
The Center Connection Looks Wrong
On Row 3, the single crochet is worked in the 5th dc from the previous shell stitch, on top of the ch5 from the previous row. Review that placement before continuing.
The Scaffold Does Not Look Symmetrical
Review the V-stitch placement on the framework row. In Row 4, the middle V stitch is worked into the single crochet from the previous row. The outer V stitches are formed at the ends of the row as specified.
The Piece Is Not Reaching the Intended Measurement
Check your tension and compare the project with the original measurement of 18 inches (46cm) along the long side. Remember that the pattern allows experimentation with different yarn weights and hook sizes because the project grows from a bottom corner, but the original specifications use DK weight cotton yarn and a 3.5mm hook.
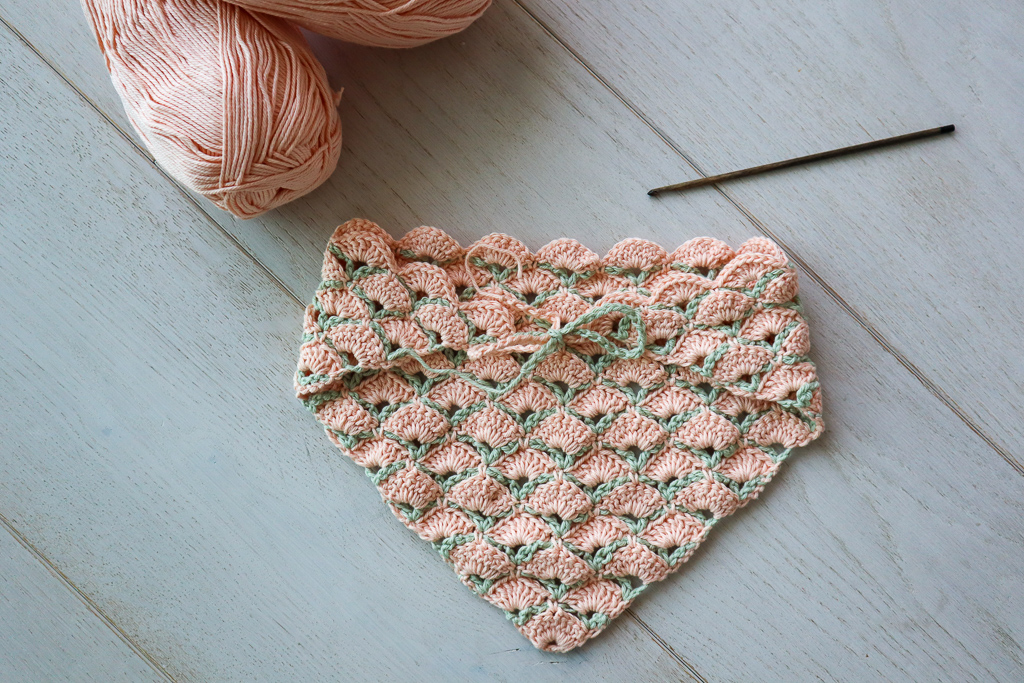
Finishing the Bandana
Once the bandana reaches the required size, use the available working yarn on either end to make chains a few inches long. These chains serve as the ties for the headband.
This finishing method makes use of the yarn already available at the ends of the project rather than requiring a separate tie construction. Keep the chains long enough to perform their intended function while maintaining a neat appearance.
Because the design is a wearable accessory, take a moment to inspect the edges before considering it finished. Look for consistent shell placement, secure yarn ends, and a balanced overall shape. The shell fabric should remain recognizable as the alternating scaffold-and-shell construction established throughout the pattern.
Why the Construction Can Be Used for a Larger Project
One of the most interesting features of this pattern is that the bandana is essentially an introduction to a larger stitch concept. Since the Beautiful Shells stitch is worked bottom-up, the same stitch sequence can be continued to create a larger fabric.
The small bandana is therefore useful as a practice project. You can learn how the V-stitch scaffold behaves, how the shell row interacts with it, and how the color-change technique works before attempting a much larger piece.
The original instructions specifically note that the stitch can be continued to make a whole shawl. The bandana is simply a compact way to learn the construction.
A Practical Workflow for Future Projects
If you want to use this stitch again, begin by identifying the framework before concentrating on the decorative appearance. The scaffold tells you where the next shell groups will be placed. Once you can recognize that relationship, the stitch becomes much easier to read.
Next, become comfortable with the two-color transition. The absence of yarn cutting is one of the design’s most useful features, particularly for a larger project where cutting and rejoining after every row would create many additional ends.
Finally, use measurements rather than visual judgment alone. The original bandana reaches 18 inches (46cm) along the long side at 25 rows. These concrete checkpoints make it easier to compare your work with the intended project.
Frequently Asked Questions
Is this bandana suitable for a beginner?
The project introduces a few concepts that may be new to a beginner, particularly the scaffold-and-shell construction and the special color-change technique. However, the stitch pattern itself is based on familiar crochet stitches such as chains, single crochet, double crochet, and slip stitches. A beginner who is comfortable with those stitches can use the bandana as a structured way to learn the technique.
Do I need to cut the yarn after every row?
No. The special color-change technique is specifically designed so that you do not cut the yarn after every row.
Are both colors carried across the row?
No. The unused color is not carried horizontally across the row. Instead, the live color is brought upward through the beginning chain according to the special color-change instructions.
What yarn was used in the original?
The original uses DK weight cotton yarn. The green is Paintbox Yarns Cotton DK, and the peach is an exact dupe from Ice Yarns called Baby Cotton.
How much yarn is required?
The original project uses less than 50 yards of each of the two colors.
What hook size is used?
The original pattern uses a 3.5mm crochet hook.
How large is the finished bandana?
The original bandana measures 18 inches (46cm) along the long side.
How many rows did the original project use?
The original project reached its stated measurement at 25 rows.
Can I make this stitch into a larger item?
Yes. Because the stitch is worked bottom-up, the pattern can be continued to create a larger project such as a whole shawl.
Quick Pattern Reference
- Yarn: DK weight cotton yarn
- Color A: Green, Paintbox Yarns Cotton DK
- Color B: Peach, Ice Yarns Baby Cotton
- Quantity: Less than 50 yards each
- Hook: 3.5mm
- Foundation: ch6, sl st to first ch to join in round
- Row 1: ch3, 8dc into center of ch6 ring, 9dc total
- Row 2: Color B V stitch, ch5, second V stitch
- Row 3: Color A, 9dc in first V, 1sc in 5th dc on ch5 area, 9dc in next V
- Row 4: Color B, V stitch, ch5, V stitch into sc, ch5, final V stitch
- Repeat: Continue shells into V stitches and V-stitch scaffold rows
- Original size: 18 inches (46cm) along the long side
- Original row count: 25 rows
- Finishing: Make chains a few inches long from available working yarn on either end for headband ties
Final Workshop Checklist
- Confirm that the project uses DK weight cotton yarn.
- Confirm that both original colors are available.
- Use the original 3.5mm crochet hook if following the original specifications.
- Check the 9dc total in Row 1.
- Recognize the V stitches created on scaffold rows.
- Build 9dc shells into the appropriate V stitches.
- Keep the single crochet connection correctly positioned on the shell row.
- Use the special live-loop color-change method.
- Do not cut the yarn after every row.
- Do not carry yarn across the completed rows.
- Continue the shell-and-scaffold sequence in the required construction order.
- Measure the finished bandana along the long side.
- Use 18 inches (46cm) as the original finished measurement.
- Remember that the original project reached that measurement at 25 rows.
- Finish with chains a few inches long for the headband ties.
Finished Project
The Beautiful Shells Bandana demonstrates how much visual interest can come from a carefully organized stitch structure. The open V-stitch scaffold creates the framework, while the dense shell rows transform that framework into the recognizable Beautiful Shells texture. Alternating the colors every row gives the fabric additional dimension without requiring multiple colors to be worked simultaneously.
For a crocheter learning decorative colorwork, the project offers several useful lessons in one small accessory: working from a corner, building a scaffold, placing shells into predetermined spaces, maintaining stitch relationships, and managing two colors without repeatedly cutting the yarn.
Most importantly, the bandana is more than a finished accessory. It is a compact introduction to a stitch that can grow into a much larger design. Once the relationship between the V-stitch framework and the shell rows becomes familiar, the same technique can be explored beyond the original 18-inch (46cm) bandana.
Follow the original stitch counts, color-change method, row sequence, and measurements carefully, and the project provides a practical way to experience the Beautiful Shells stitch from its first six-chain ring through the final headband ties.