
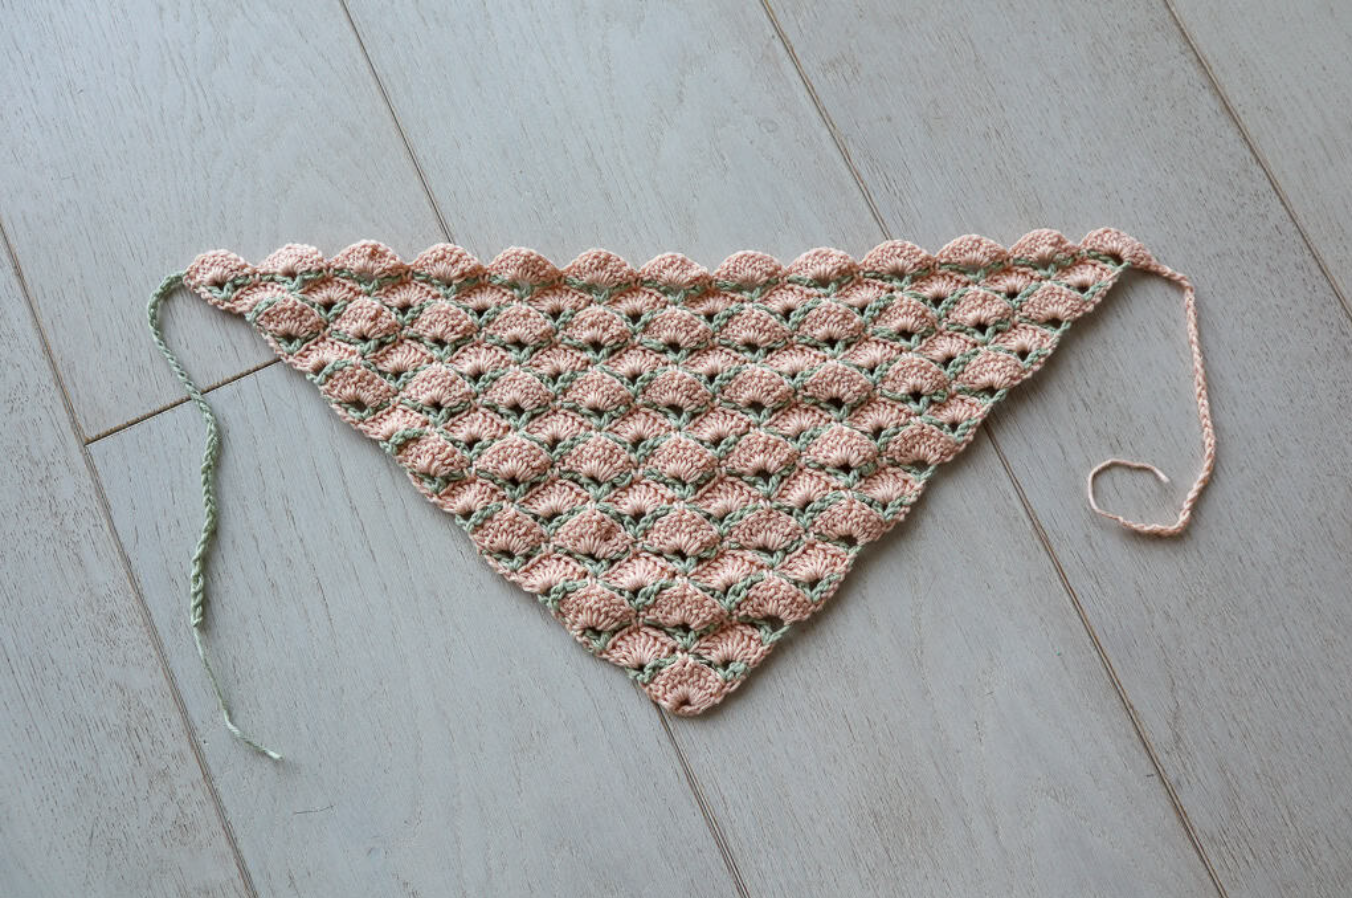
Beautiful Shells Crochet Bandana Pattern: A Stitch-by-Stitch Guide from Corner to Finish
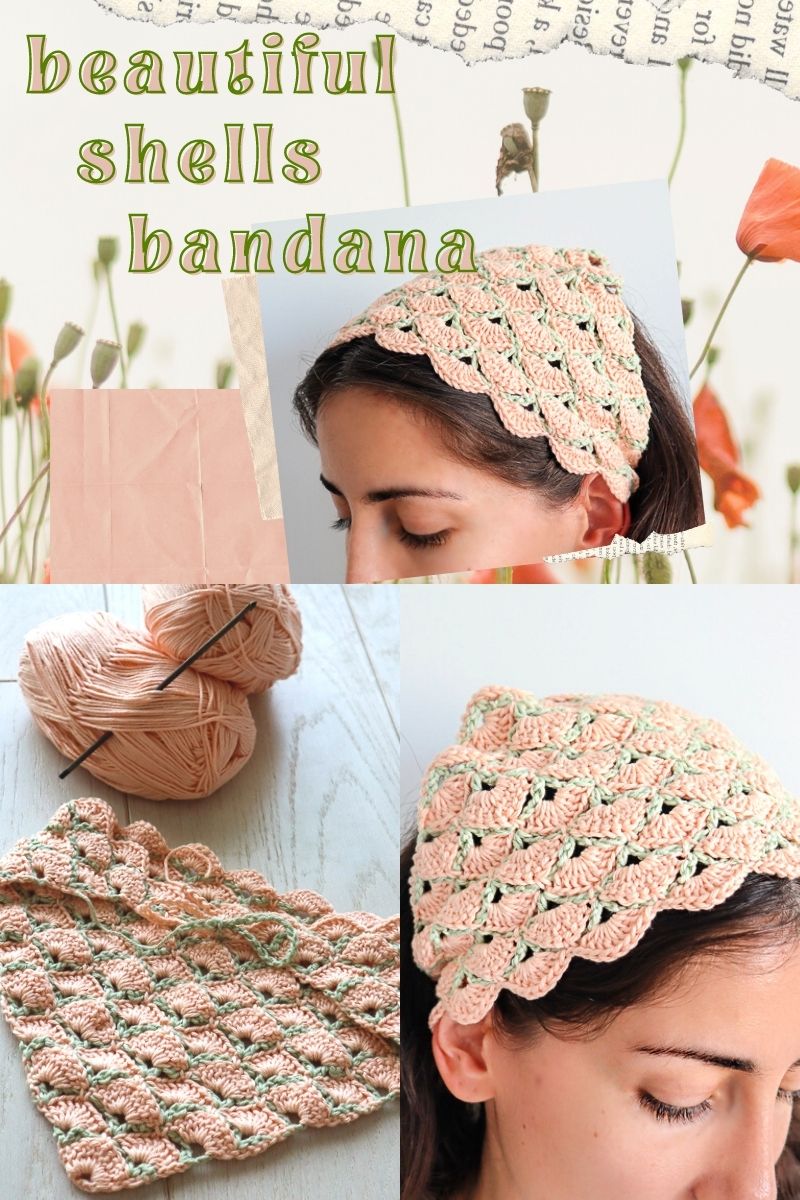
The Beautiful Shells Bandana is a compact crochet project built around an especially clever stitch construction. Instead of forming a solid fabric row by row in the usual way, the design first creates an open chain framework and then uses that framework as the foundation for large, decorative shells. The result is a fabric that looks intricate while relying on a relatively small collection of familiar crochet stitches.
This project is particularly useful for crocheters who want to learn how a scaffold-style stitch works in practice. The finished bandana is small enough to make the learning process manageable, yet the underlying construction is interesting enough to remain useful long after the accessory is finished.
The original design also introduces a two-color technique that makes the finished piece especially attractive. One color is used for each row, and the yarn does not need to be cut after every color change. Instead, the pattern uses a live-loop transition that moves the next color into position while avoiding the need to carry the yarn across the row.
Below, the complete construction is explained in a different way from a conventional quick pattern listing. The emphasis is on understanding the checkpoints, the relationship between the rows, and the reasons behind the placement of the stitches while preserving the original technical information.
Project Snapshot
- Project: Beautiful Shells Bandana
- Original yarn: DK weight cotton
- Colors: Two colors
- Yarn quantity: Less than 50 yards of each color
- Original green yarn: Paintbox Yarns Cotton DK
- Original peach yarn: Baby Cotton from Ice Yarns
- Crochet hook: 3.5mm
- Original finished measurement: 18 inches (46cm) along the long side
- Original row count: 25 rows
- Construction: Worked from the bottom corner upward
- Finishing: Chains a few inches long made from the available working yarn on either end to form ties
The original pattern specifically notes that different yarn weights and hook sizes can be used for experimentation because the piece grows from the very bottom corner. The dimensions and row count above refer to the original version.
Why the Fabric Has a “Scaffold”
The most useful way to understand this stitch is to imagine that the crochet chains create a temporary framework. The framework contains V stitches and chain-5 sections. These open areas may look incomplete when viewed by themselves, but they are intentionally placed so the next row can build substantial shell groups on top of them.
This is the clever part of the design. Instead of simply stacking stitches directly above the previous row, the crocheter alternates between creating support and filling that support.
The concept can be found in several intricate-looking crochet techniques, including the popular Virus Stitch. The Beautiful Shells stitch is a simpler cousin of that general idea, making it a useful introduction for anyone who has not previously worked with chain-based scaffolding.
The small bandana format is especially practical because you do not have to commit to a large shawl while learning. If the technique appeals to you, however, the bottom-up construction means that it can continue beyond the bandana size.
Materials for the Original Version
The original project is economical in terms of yarn. Only a few yards are needed, with less than 50 yards of each of two colors of DK weight cotton yarn.
The green yarn used for the original project was Paintbox Yarns Cotton DK. The peach yarn was Baby Cotton from Ice Yarns. These are the yarn references associated with the original version, so they provide the clearest benchmark for reproducing the project as shown.
A 3.5mm crochet hook is used.
You can experiment with another yarn weight and hook size if you want to explore how the stitch behaves. However, a change in yarn or hook can affect the density of the shells, the openness of the framework, the drape, and the finished measurements. For the original specifications, keep the DK cotton and 3.5mm hook combination in mind.
Important Abbreviations
The pattern uses basic crochet stitches, but the V stitch deserves particular attention because it is the foundation into which the shells are worked.
- ch: chain
- sl st: slip stitch
- sc: single crochet
- dc: double crochet
- V stitch: 1dc, ch1, 1dc worked into the same stitch or space
Another important detail is the starting chain-3. When the instructions state that it counts as 1dc, it must be included in the stitch count. This is why the first row contains 9dc total even though only 8 actual double crochet stitches are worked into the ring after the starting chain.
Before You Make the First Stitch
Choose which yarn will be Color A and which will be Color B. The original project begins with Color A.
It is also worth becoming comfortable with the idea of leaving a live loop at the end of a row. This project does not use the usual “finish off and rejoin” approach for every color change. The live loop becomes part of the transition between colors.
If this is your first time using such a method, work slowly during the first few transitions. Keeping the loops loose enough to identify them clearly is helpful. Once you understand which loop belongs to which color, the process becomes much easier to repeat.
Foundation: Forming the Six-Chain Ring
Start with Color A.
Chain 6.
Make a slip stitch into the first chain to join the foundation into a ring.
This small ring is the center of the first row. It is important that the chain is not twisted before joining. The first group of double crochet stitches will be worked into the center of this ring, so keeping the opening accessible will make the next step easier.
Row 1: Establish the First Nine Double Crochets
Begin with chain 3. This chain-3 counts as 1dc.
Work 8dc into the center of the chain-6 ring.
When the starting chain-3 is included, the row contains 9dc total.
This is the first important stitch-count checkpoint. If you have fewer or more than 9dc total, correct the row before proceeding because the next framework row depends on the starting structure being accurate.
At the end of Row 1, pull the last loop up long so that it cannot be lost. Remove your hook from the loop.
Do not tighten or pull this loop away. The live loop is needed for the upcoming color change.
Checkpoint One: Confirm the Starting Structure
Before moving on, check three things:
- The foundation is a closed chain-6 ring.
- The first row contains 9dc total, including the starting ch3.
- The final loop has been pulled long and left available for the color transition.
These simple checks establish a reliable foundation for everything that follows.
Row 2: Create the First Open Framework
Insert your hook into the top of the starting ch3 from the previous row.
With Color B, chain 4. This chain-4 counts as 1dc, ch1.
Make 1dc into the same stitch. These stitches form the first V stitch.
The structure is:
1dc, ch1, 1dc.
Next, chain 5.
Make one more V stitch, again consisting of 1dc, ch1, 1dc, all into the last stitch of the row.
At this stage, the fabric becomes more open. This is intentional. Row 2 is establishing the scaffold that Row 3 will use.
The Color-Change Technique Without Cutting the Yarn
One of the cleverest features of the pattern is the way the two colors are managed.
With the live Color B loop on your hook, insert your hook into the live Color A loop.
Chain 3 in Color A only.
Pull the Color A loop through the Color B loop.
Again chain 3 in Color A while carrying Color B up the chain.
Turn your work.
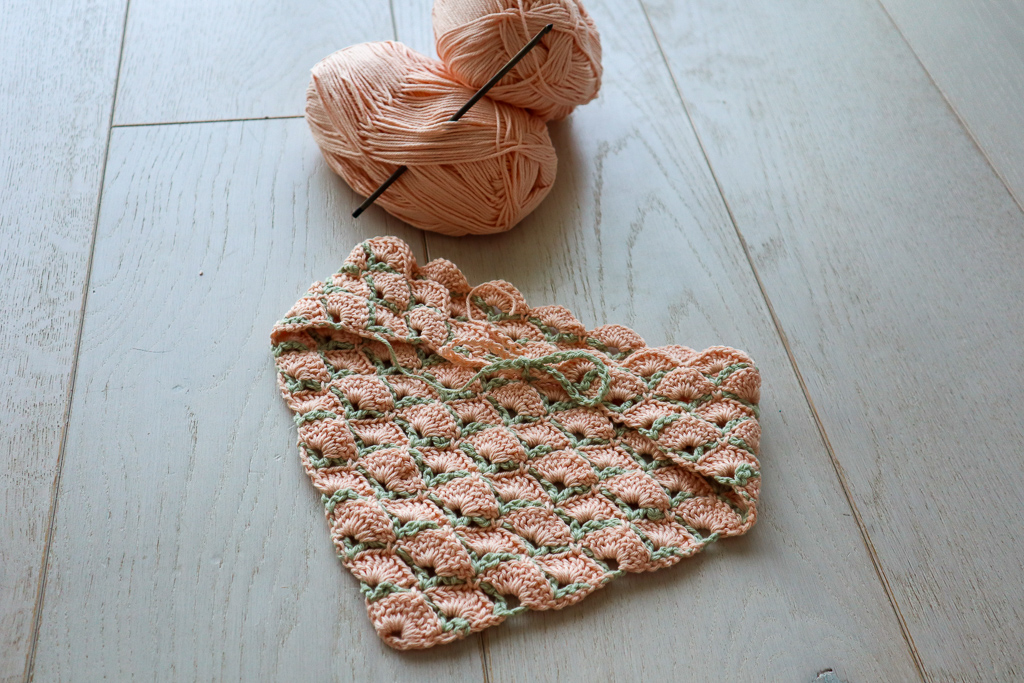
This technique lets the colors alternate from row to row without requiring the yarn to be cut at the end of each row. It also avoids carrying the yarn across the entire row.
That combination is particularly useful for this design because the color changes are a major part of the finished appearance.
Why This Color Change Is Different
Many crocheters learn color changes by fastening off the old color and attaching the new one. This pattern deliberately avoids that process. Instead, the yarn remains available and the active loops are manipulated during the transition.
The technique can feel slightly awkward the first time because both colors remain part of the project. The most useful strategy is to identify the live loop of each color before inserting the hook.
Do not rush through the transition simply because the basic stitches are familiar. The color change is a separate technique and deserves the same attention as the shell construction.
Row 3: Turning the Scaffold into Shells
Work Row 3 in Color A.
Make 8dc into the first V stitch.
The starting ch3 from the color-change instructions counts as part of the shell, giving you 9dc in total for that shell.
Next, make 1sc in the 5th dc from the previous shell stitch, working on top of the ch5 from the previous row.
Then make 9dc in the next V stitch.
Pull the last loop long and remove your hook.
This is the first major transformation in the fabric. The open V-stitch framework from Row 2 has now become the foundation for the dense shell groups.
Understanding the Single Crochet in Row 3
The single crochet between the shells is easy to overlook, especially when the large groups of double crochet attract most of the attention.
The instruction is to make 1sc in the 5th dc from the previous shell stitch, working on top of the ch5 from the previous row.
This stitch helps anchor the central area between the two shell groups. It is also important for Row 4 because the next framework row will place a V stitch into this single crochet.
In other words, this single crochet is not an isolated detail. It becomes part of the next stage of the scaffold.
Row 4: Build the Next Framework
Insert your hook into the top of the starting ch3 from the previous row.
With Color B, chain 4. Again, this counts as 1dc, ch1.
Make 1dc into the same stitch to complete a V stitch.
Chain 5.
Make a V stitch into the single crochet from the previous row.
Chain 5.
Make one more V stitch, consisting of 1dc, ch1, 1dc, all into the last stitch of the row.
Repeat the color-change instructions so that the work continues in the same direction every two rows without cutting the yarn.
This row demonstrates the repeating architecture particularly well. The shell row created a new single crochet anchor, and the following framework row uses that location to create another V stitch.
The Four-Row Foundation of the Pattern
After completing the first four rows, you have established the basic language of the entire project.
Row 1 creates the starting group of double crochet stitches.
Row 2 establishes the first V-stitch framework.
Row 3 fills those V stitches with shells and uses a single crochet over the chain-5 area.
Row 4 creates another framework, including a V stitch worked into the single crochet from Row 3.
From here, the project continues through the same general relationship between shell rows and scaffold rows.
How to Recognize a Correct Shell Row
A shell row should have prominent groups of double crochet stitches. The original Row 3 provides the first clear example: 9dc in the first V stitch, 1sc in the specified location over the previous chain-5 area, and 9dc in the next V stitch.
When later shell rows are worked, use the V stitches of the preceding framework row as your landmarks. If the V stitch is clearly visible, it should be easier to identify where the shell belongs.
This visual approach is particularly useful after several repeats, when counting every chain and double crochet from the beginning of the project would become cumbersome.
Keeping the Repeating Rows Organized
Once the first four rows are complete, the pattern becomes repetitive, but it is still useful to keep track of what each row is accomplishing.
A framework row creates the spaces.
A shell row fills those spaces.
The colors alternate so that the two functions are visually separated.
If you prefer to think in terms of checkpoints rather than memorizing a long sequence, inspect the project after every pair of rows. Look for the newly created V stitches and then confirm that the following shell row is being worked into those locations.
This approach can make the pattern less intimidating, particularly for crocheters who prefer to understand the structure rather than memorize instructions.
Row-by-Row Progress Check
- After Row 1: 9dc total should be visible.
- After Row 2: The first open V-stitch framework should be established.
- After the first color change: The yarn should remain connected and the work should turn as instructed.
- After Row 3: The first shell groups should be visible, with 9dc in each shell when the starting ch3 is included.
- After Row 4: The next framework should contain a V stitch worked into the previous row’s single crochet.
- During later repeats: Continue alternating shell rows and V-stitch scaffold rows.
- At the original finishing point: The long side should measure 18 inches (46cm), which took 25 rows in the original project.
What to Watch for Around the Edges
Because the bandana grows from the bottom corner upward, the shape of the outer edges provides another useful visual reference.
Consistent tension is especially important when making the chains used during the color transitions. If these chains are pulled too tightly, they can restrict the edge. If they are extremely loose, they can look noticeably different from the surrounding stitches.
The goal is not to force every stitch to look identical, but to maintain a comfortable, consistent tension that lets the triangular fabric expand naturally.
Common Problems and Practical Checks
The first row has the wrong number of stitches.
Return to the starting chain-6 ring and confirm that the starting ch3 counts as 1dc. Then check that 8dc were worked into the center of the ring. Together, these produce 9dc total.
I cannot find the V stitch for the next shell.
Look for the opening formed by 1dc, ch1, 1dc. The chain-1 sits between the two double crochet stitches and forms the center of the V.
The shell looks much smaller than the others.
Check that the shell was worked into the correct V stitch and that the starting chain-3 was included as part of the shell count. The original shell structure uses 9dc when that starting ch3 is included.
The framework row looks too loose.
The framework is intentionally more open than the shell row. Its purpose is to create spaces for the following shells, so a looser appearance is expected.
I am tempted to cut the yarn after every row.
The pattern specifically provides a method for avoiding that. Follow the live-loop color change so the two colors remain connected while you continue in the same direction every two rows.
My finished measurement differs from the original.
The original version measures 18 inches (46cm) along the long side after 25 rows. Different yarn weights, hook sizes, and individual tension can change the dimensions.
Colorwork Without Stranding Across the Row
One particularly appealing aspect of this project is that the color changes do not require carrying the inactive yarn across a long row. This keeps the colorwork technique relatively compact.
Because the piece is built from a small corner and grows outward, the transition occurs close to the working edge. The live-loop method then brings the next color into position for the following row.
When learning this technique, pay attention to the phrase “while carrying Color B up the chain.” This is different from carrying the yarn horizontally behind the stitches. The color is moved through the chain during the transition.
Once you understand that distinction, the color-change sequence becomes easier to visualize.
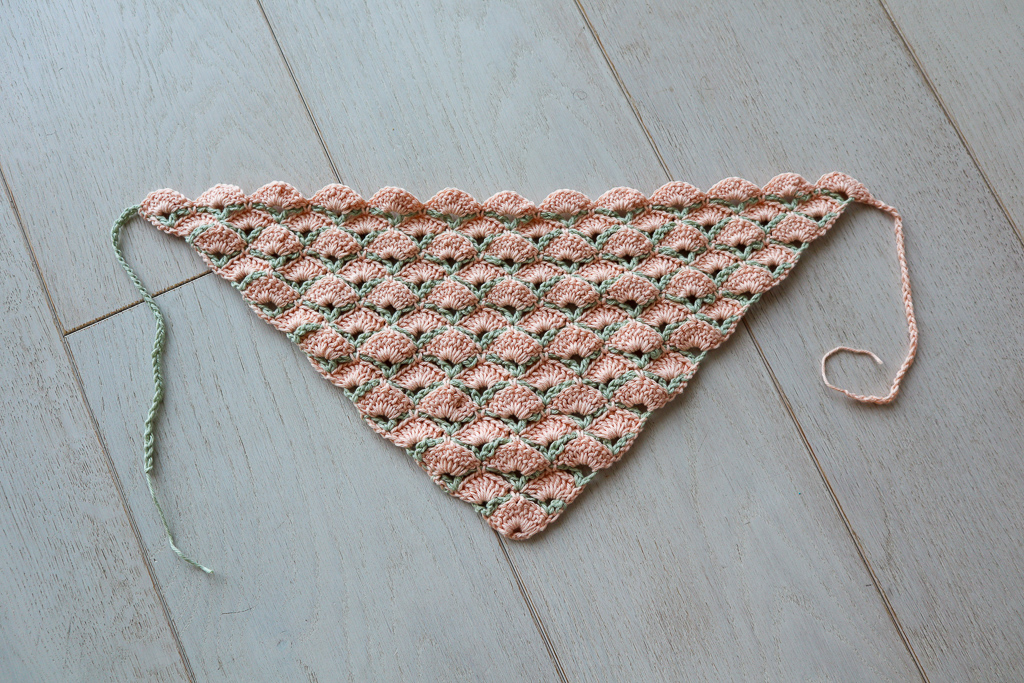
Measuring the Finished Bandana
The original target is 18 inches (46cm) along the long side.
For the original version, this measurement was reached in 25 rows.
It is useful to distinguish between the measurement and the row count. The measurement is the finished-size reference, while 25 rows describes how many rows were needed in the original project to reach it.
If your tension or materials differ, your fabric may reach 18 inches in a different number of rows. The pattern allows experimentation with yarn weight and hook size, so this variation is expected when making a customized version.
Finishing the Bandana with Simple Ties
When the piece reaches the desired size, use the available working yarn on either end to make chains a few inches long.
These chains become the ties for the headband.
The finishing technique is intentionally straightforward. The main attraction of the project is the Beautiful Shells fabric, so the ties provide the necessary functionality without introducing a separate complicated finishing pattern.
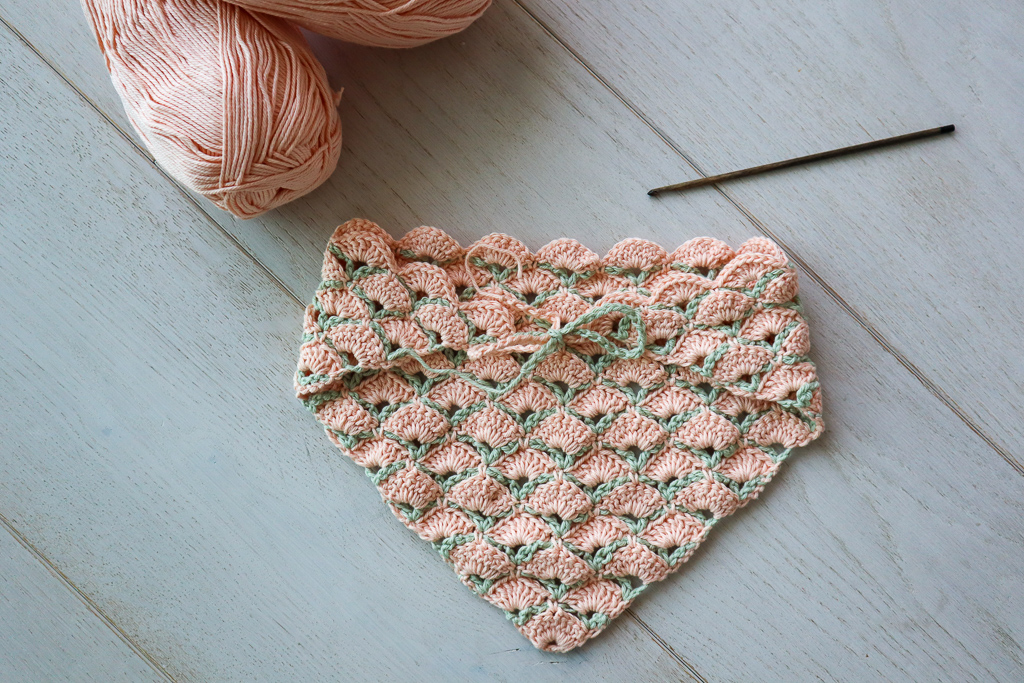
Why the Bottom-Up Construction Matters
The bottom-up construction is more than a shaping detail. It is what makes the pattern flexible in terms of size.
You begin with a tiny foundation at one corner and gradually enlarge the fabric through the repeating shell and framework rows. This means the project can stop at the bandana size or continue growing if you want to explore the stitch on a larger scale.
The original source notes that the same stitch can be continued to create a whole shawl. The bandana therefore acts as a small-scale introduction to a construction that can be expanded substantially.
Tips for Crocheters Learning This Technique
Use the fabric as a map
Once several rows are complete, the fabric itself can help you identify where the next stitches belong. Find the V stitches and use them as your primary landmarks.
Do not judge the framework too early
The open scaffold may look unfinished. Remember that the next shell row is designed to transform those spaces.
Keep Color A and Color B clearly identified
The pattern switches between the two colors repeatedly. Labeling or physically organizing the two yarns can reduce confusion while learning the live-loop transition.
Pause after each color change
Check that the active color is correct and that the work has been turned as instructed. Catching a problem immediately is easier than correcting it several rows later.
Measure instead of guessing
If you are aiming for the original size, check the long side as the project grows. The reference measurement is 18 inches (46cm).
Frequently Asked Questions
Is the Beautiful Shells Bandana a beginner project?
It can be a useful learning project for someone who knows the basic crochet stitches and wants to try a new construction method. The individual stitches are familiar, but the scaffold and live-loop color change require some attention.
What is the original hook size?
The original pattern uses a 3.5mm crochet hook.
What yarn weight is recommended for the original?
The original project uses DK weight cotton yarn.
How much of each color is needed?
Less than 50 yards of each of the two colors is used in the original project.
What is the original finished measurement?
The bandana measures 18 inches (46cm) along the long side.
How many rows are in the original version?
The original project reaches the stated 18-inch (46cm) long-side measurement in 25 rows.
Can I change the yarn weight?
Yes. The source notes that you can experiment with any yarn weight and hook size because the bandana grows from the very bottom corner. Such changes can affect the final size and appearance.
What makes the stitch different from ordinary shells?
The shells are not simply worked directly into a solid previous row. They are built into V stitches created by a separate framework row. This scaffold-based construction is the defining feature of the technique.
Do I have to cut the yarn for every color change?
No. The pattern provides a live-loop method that allows the colors to alternate without cutting the yarn after every row and without carrying the yarn across the row.
Can I make a larger item using this stitch?
Yes. Because the pattern grows from the bottom-up, the construction can continue beyond the bandana. The original source specifically notes that it can be extended into a shawl.
Original Pattern Reference
For quick review, the original construction can be summarized as follows:
- In Color A, chain 6 and join with a slip stitch to form a ring.
- For Row 1, ch3, then work 8dc into the center of the ring for 9dc total.
- Pull the final loop long and remove the hook.
- For Row 2, insert the hook into the top of the starting ch3 and use Color B to create the first V stitch, ch5, and the second V stitch.
- Use the specified live-loop method to change color without cutting the yarn.
- For Row 3, use Color A to make 8dc into the first V stitch, with the starting ch3 making 9dc total, then work the specified 1sc over the previous ch5 area, followed by 9dc in the next V stitch.
- For Row 4, use Color B to create the next framework, including a V stitch worked into the previous row’s single crochet.
- Continue alternating shell rows and V-stitch scaffold rows.
- Continue until the long side measures 18 inches (46cm); the original project required 25 rows.
- Use the available working yarn on either end to create chains a few inches long for the ties.
A Closer Look at the Finished Texture
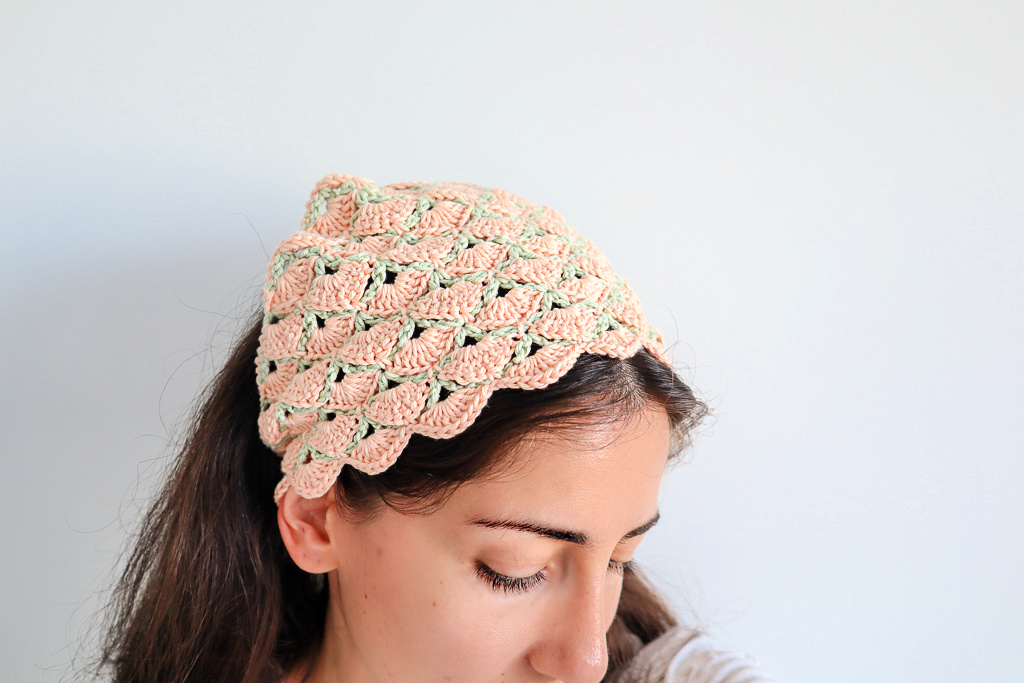
One of the reasons the finished bandana is so appealing is the contrast between its structural elements. The shell sections are visually full and substantial, while the framework rows introduce open spaces and lines of color.
Using one color per row makes that contrast especially clear. The color changes are not simply decorative stripes placed onto an ordinary fabric. They emphasize the actual construction of the stitch.
This is also why the project works well as a teaching piece. A crocheter can look at the finished fabric and trace the progression from the open scaffold to the filled shell sections.
What to Remember Most
If you remember only a few principles while making this project, focus on the following:
- The project starts with a chain-6 ring.
- Row 1 contains 9dc total, including the starting ch3.
- V stitches are the foundation for the shells.
- Chain-5 spaces form part of the framework.
- The shell row fills the V stitches with groups of double crochet stitches.
- The color changes happen every row.
- The special live-loop technique avoids cutting the yarn after each row.
- The work continues in the same direction every two rows.
- The original finished measurement is 18 inches (46cm) along the long side.
- The original version reaches that measurement in 25 rows.
Final Thoughts
The Beautiful Shells Bandana is a wonderful example of how an apparently complicated crochet fabric can be broken down into a repeatable structural idea. The framework rows create the spaces, and the shell rows use those spaces to build the decorative fabric. Once this relationship becomes familiar, the stitch is much easier to understand.
The project is also a practical introduction to color management. With two colors of DK weight cotton yarn and one color used per row, the finished design develops a lively striped appearance. The special live-loop technique means the yarn does not have to be cut after every row, and the inactive color is not carried horizontally across the entire row.
For the original project, the technical reference points remain clear: use DK weight cotton yarn in two colors, less than 50 yards of each color, and a 3.5mm crochet hook. Begin in Color A with a chain-6 ring, create 9dc in Row 1, establish the V-stitch scaffold in Row 2, build the first shells in Row 3, and create the next framework in Row 4.
From there, continue the shell and scaffold sequence until the bandana measures 18 inches (46cm) along the long side. In the original version, this required 25 rows. Finally, use the available working yarn on either end to make chains a few inches long for the headband ties.
What makes this project especially valuable is that it can remain a small finished accessory while also serving as a gateway to a larger crochet technique. If you enjoy the rhythm of creating a framework and then building shells on top of it, the same bottom-up construction can be continued into a much larger piece, including a shawl.
Take your time with the first color transition, use the V stitches as visual landmarks, and check the early stitch counts carefully. Once those foundations are secure, the repeating structure becomes much more intuitive, and the Beautiful Shells pattern turns into an enjoyable combination of texture, color, and clever crochet construction.