
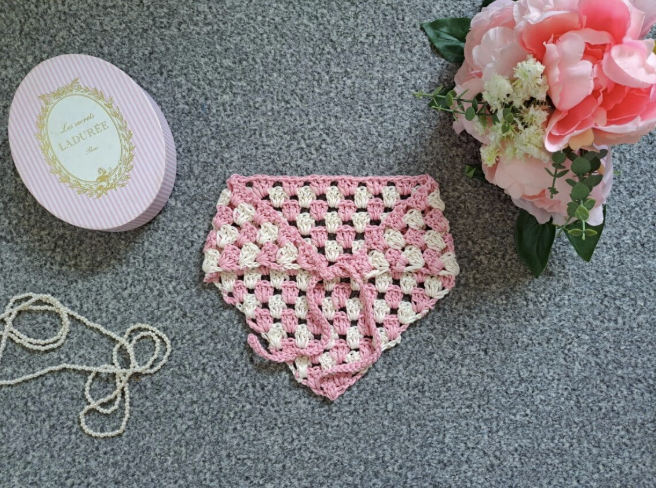
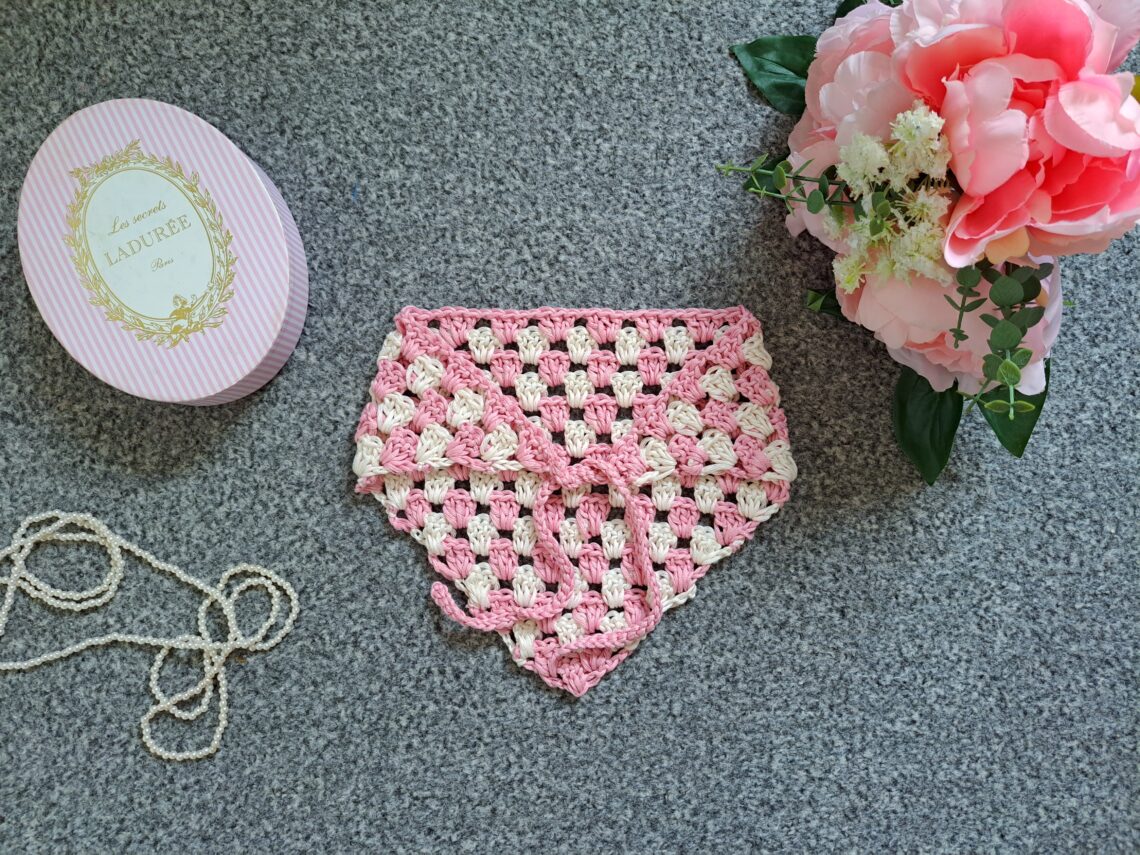
There is something especially appealing about a crochet accessory that feels both useful and romantic. The Crochet Cottagecore Bandana brings together the relaxed character of handmade crochet with the soft, nostalgic feeling of Cottagecore fashion. It is a small project, but the finished result has plenty of personality thanks to its triangular shape, alternating colors, and simple ties.
This version is built around the Granny Triangle stitch, a classic crochet technique that is particularly well suited to triangular accessories. The construction starts with a tiny ring and expands row by row until the bandana reaches its finished dimensions. The pattern remains approachable because the basic stitch sequence does not change dramatically as the project grows.
The original design uses Drops Muskat yarn in shade 06 Desert Rose and shade 08 Off White. The colors are alternated from row to row, creating a gentle striped effect. The final triangular body is completed through Row 16, with the last row worked in Desert Rose so that the attached yarn can immediately be used to create the first strap.
The Cottagecore Inspiration Behind the Design
Cottagecore is closely associated with rural-inspired living, romantic clothing, handmade objects, soft colors, natural textures, and vintage influences. Crochet accessories fit beautifully into this aesthetic because they have a distinctly handcrafted appearance that is difficult to reproduce with mass-produced accessories.
This bandana takes a simple approach to the Cottagecore look. Rather than using an elaborate floral motif or complicated lacework, the design relies on a classic Granny Triangle structure and a gentle two-color palette.

The Desert Rose shade adds the romantic pink element, while Off White provides a calm contrast. Because the colors are changed after each row, the finished fabric develops a sequence of soft horizontal bands that emphasize the shape of the triangle.
The result is simple enough for everyday wear while still having the handmade charm that makes Cottagecore-inspired accessories so appealing.
What You Will Make
The main portion of the project is a triangular bandana worked over 16 rows. It begins with a small foundation ring and gradually becomes wider through Granny Triangle increases. Once the triangular body is complete, two thin straps are added to the opposite sides of the widest point.
The finished size of the bandana, excluding the ties on each side, is 8.5 inches x 17 inches (21.5 cm x 43 cm). The pattern gives a gauge of 4 inches (10 cm): 8 rows of Granny Triangle pattern.
The project is rated easy/beginner. It is particularly suitable for crocheters who already know basic chains, slip stitches, and Double Crochet stitches and want to practice working a repeated triangular pattern.
Materials and Tools
One of the advantages of this project is the short materials list. You only need two yarn shades and a few basic crochet tools.
- 1 skein of Drops Muskat in shade 06 Desert Rose
- 1 skein of Drops Muskat in shade 08 Off White
- A 4 mm crochet hook
- A pair of scissors
- A tapestry needle

It is useful to have both skeins available before you begin because the pattern changes color from row to row. You will also need your scissors and tapestry needle during the finishing stages.
Pattern Language and Abbreviations
The instructions use US crochet terms, with the British equivalent supplied for Double Crochet.
- Ch: chain
- St: stitch
- Sl st: slip stitch
- DC: Double Crochet (UK Treble Crochet)
- EOR: End of row
Keep the terminology in mind if you normally follow UK crochet patterns. In this pattern, every reference to DC means Double Crochet in US terminology.
Before Starting the First Row
Begin with shade 06 Desert Rose. Make a slip knot with the pink yarn and chain 4. Slip stitch through the first chain to form a ring.
The first few rows create the foundation of the entire project. At this stage, the work will be very small, so concentrate on the individual spaces and stitches rather than trying to judge the final shape.
Row 1: Establishing the Triangle
Chain 4. The chain counts as 1 DC plus a chain space. Work 3 DC in the circle. Chain 1, then work 1 DC in the circle.
This creates the first compact section of the Granny Triangle. The chain spaces will become important as the following rows are worked because the groups of 3 DC are placed into these spaces.
Row 2: Beginning the Increase
Turn your work. Chain 4, counting as 1 DC plus a chain space. Place 3 DC inside the next space. Chain 1. Work 3 DC, chain 1, and 1 DC inside the next and last space.
Fasten off the yarn after completing Row 2.

Introducing the Two-Color Construction
One of the most distinctive features of this bandana is the alternating color sequence. After completing Row 2 in Desert Rose, attach shade 08 Off White to the same corner where the pink yarn was fastened off.
Changing colors at the same corner keeps the edge organized and creates the clean striped appearance that continues throughout the project.
Row 3: First Off White Row
Turn your work. Chain 4, counting as 1 DC plus a chain space. Place 3 DC in the next space. Chain 1, then place 3 DC in the next space. Chain 1, 3 DC, chain 1, and 1 DC in the next and last space.
Fasten off the Off White yarn at the end of Row 3.

Attach shade 06 Desert Rose to the same corner where you just fastened off. From here, the alternating color rhythm becomes an important visual guide for the rest of the project.
Row 4: Expanding the Granny Triangle
For Row 4, chain 4, counting as 1 DC plus a chain 1 space. Place 3 DC in the next space. Then work [ch 1, 3 DC in next sp] 2 times. Finish with ch 1, 3 DC, ch 1, and 1 DC in the next and last space.
Fasten off the yarn after completing the row and attach the opposite shade for the following row.

Reading the Repeating Rows
From Row 5 onward, the construction becomes highly systematic. Every row starts with the same chain-4 sequence and 3 DC in the next space. The central bracketed repeat then increases by one repetition with each new row.
This is an important feature to understand before moving into the longer rows. You do not need to learn a completely different stitch sequence for every row. Instead, the pattern grows by adding another [ch 1, 3 DC in next sp] repeat.
Row 5
Ch 4 (=1 DC + ch 1 sp), place 3 DC in next sp; [ch 1, 3 DC in next sp] 3 times; ch 1, 3 DC, ch 1, 1 DC in next and last sp.
Row 6
Ch 4 (=1 DC + ch 1 sp), place 3 DC in next sp; [ch 1, 3 DC in next sp] 4 times; ch 1, 3 DC, ch 1, 1 DC in next and last sp.
Row 7
Ch 4 (=1 DC + ch 1 sp), place 3 DC in next sp; [ch 1, 3 DC in next sp] 5 times; ch 1, 3 DC, ch 1, 1 DC in next and last sp.
Row 8
Ch 4 (=1 DC + ch 1 sp), place 3 DC in next sp; [ch 1, 3 DC in next sp] 6 times; ch 1, 3 DC, ch 1, 1 DC in next and last sp.
Row 9
Ch 4 (=1 DC + ch 1 sp), place 3 DC in next sp; [ch 1, 3 DC in next sp] 7 times; ch 1, 3 DC, ch 1, 1 DC in next and last sp.
Row 10
Ch 4 (=1 DC + ch 1 sp), place 3 DC in next sp; [ch 1, 3 DC in next sp] 8 times; ch 1, 3 DC, ch 1, 1 DC in next and last sp.
Row 11
Ch 4 (=1 DC + ch 1 sp), place 3 DC in next sp; [ch 1, 3 DC in next sp] 9 times; ch 1, 3 DC, ch 1, 1 DC in next and last sp.
Row 12
Ch 4 (=1 DC + ch 1 sp), place 3 DC in next sp; [ch 1, 3 DC in next sp] 10 times; ch 1, 3 DC, ch 1, 1 DC in next and last sp.
Row 13
Ch 4 (=1 DC + ch 1 sp), place 3 DC in next sp; [ch 1, 3 DC in next sp] 11 times; ch 1, 3 DC, ch 1, 1 DC in next and last sp.
Row 14
Ch 4 (=1 DC + ch 1 sp), place 3 DC in next sp; [ch 1, 3 DC in next sp] 12 times; ch 1, 3 DC, ch 1, 1 DC in next and last sp.
Row 15
Ch 4 (=1 DC + ch 1 sp), place 3 DC in next sp; [ch 1, 3 DC in next sp] 13 times; ch 1, 3 DC, ch 1, 1 DC in next and last sp.
Row 16
Ch 4 (=1 DC + ch 1 sp), place 3 DC in next sp; [ch 1, 3 DC in next sp] 14 times; ch 1, 3 DC, ch 1, 1 DC in next and last sp.
The final row, Row 16, must be completed in shade 06 Desert Rose. Do not fasten off this yarn when the row is finished because it will be used to create Strap 1.
A Row-by-Row Progress Check
When a crochet project is repetitive, it can be easy to lose track of where you are. This pattern gives you a convenient built-in checkpoint: the number of central repeats.
- Row 5: 3 repeats
- Row 6: 4 repeats
- Row 7: 5 repeats
- Row 8: 6 repeats
- Row 9: 7 repeats
- Row 10: 8 repeats
- Row 11: 9 repeats
- Row 12: 10 repeats
- Row 13: 11 repeats
- Row 14: 12 repeats
- Row 15: 13 repeats
- Row 16: 14 repeats
If you are unsure whether a row is correct, counting these repeated sections is a useful way to check your progress. The number should increase by exactly one as you move from one row to the next in this section of the pattern.
Keeping the Color Changes Organized
The project uses a simple alternating sequence, but frequent fastening off and reattachment can still require attention. After each row, fasten off the yarn you are using and attach the other shade so that the colors continue alternating.
The sequence begins with Desert Rose, followed by the continuation of the pattern in alternating shades. The final row is specifically Desert Rose.
It can help to pause after every row and identify three things before beginning the next one: the row number, the color required, and the number of central repeats. These three checkpoints correspond directly to the technical structure of the pattern.
Understanding the Finished Shape
As the rows accumulate, the project changes from a tiny foundation into a broad triangular piece. This is the defining feature of the Granny Triangle construction. Each additional repeat contributes to the increasing width of the row while preserving the overall triangular shape.
The finished bandana body measures 8.5 inches x 17 inches (21.5 cm x 43 cm), not including the ties. This measurement gives you a useful reference for understanding the intended scale of the project.

Because the design is based on a repeating structure, the final shape should develop gradually rather than suddenly. If the triangle seems to be changing shape unexpectedly, review the chain spaces and the number of repeated groups in the most recent rows.
Creating Strap 1
Once Row 16 is complete, the triangular body is finished. The next step is to create the first thin strap.
Keep the Desert Rose yarn attached to the bandana. Chain 35.
After completing the chain of 35, slip stitch through the second chain and every chain across. Continue across the entire chain until you reach its end.
Once you reach the end, slip stitch through the Double Crochet on the side of the bandana to secure the strap fully onto the project.

Fasten off after securing Strap 1.
Creating Strap 2
The second strap is worked from the opposite side corner of the bandana. Attach the yarn to the other side corner and chain 35.

Once you have chained 35, slip stitch through the second chain and every chain across. At the end of the chain, slip stitch through the Double Crochet on the side of the bandana to secure Strap 2 fully onto the project.
Both straps therefore follow the same basic construction: a 35-chain foundation, slip stitches through the chain beginning with the second chain, and a final slip stitch into the side Double Crochet of the bandana.
Tips for Working the Triangle Neatly
Even though the pattern is beginner-friendly, careful attention to the repeated spaces can make a noticeable difference in the final appearance.
Use the Spaces as Your Main Guide
The Granny Triangle is organized around chain spaces. When working a new row, identify the next space before inserting your hook. This can make the instructions much easier to follow than trying to count individual Double Crochet stitches across the entire row.
Count the Repeated Groups
As the triangle becomes larger, counting every stitch individually can become tedious. The bracketed repeat provides a more practical checkpoint. Remember that Rows 5 through 16 increase from 3 repeats to 14 repeats.
Watch the Row Color
Because the colors alternate, the yarn shade is an additional way to verify your position. If you are about to begin a row and the yarn color does not match the intended sequence, pause and check the previous row.
Keep the Edge Consistent
The beginning and ending portions of each row remain important even though the middle becomes longer. Follow the specified opening chain, the first 3 DC group, the bracketed repeat, and the final chain and Double Crochet sequence in the order given.
Gauge and Measurements
The stated gauge is 4 inches (10 cm): 8 rows of Granny Triangle pattern. The finished body measures 8.5 inches x 17 inches (21.5 cm x 43 cm), excluding the ties.
Gauge provides a useful reference for crocheters who want to compare their tension with the pattern specifications. The project calls for a 4 mm crochet hook and Drops Muskat yarn, so these specified materials should be retained when following the original pattern.
The finished dimensions refer specifically to the bandana body. The two straps are additional elements and are not included in the stated 8.5-inch by 17-inch measurement.
What Beginners Can Practice With This Pattern
This small accessory is more than just a quick wearable project. It combines several foundational crochet skills in a compact format.
- Making a slip knot
- Creating a foundation ring with chains and a slip stitch
- Working Double Crochet stitches into a space
- Turning crochet rows
- Following repeated instructions
- Increasing the width of a triangular fabric
- Changing colors between rows
- Fastening off yarn
- Reattaching yarn at a specific corner
- Creating chains for straps
- Working slip stitches through a chain
- Securing a strap to the edge of the project
The project therefore offers a useful combination of repetition and technique. The Granny Triangle section reinforces pattern reading, while the two straps provide a simple finishing exercise.
Common Points to Double-Check
When working through the pattern, several details are particularly useful to keep in mind.
- Rows 1 and 2 are started in Desert Rose.
- Row 3 is worked in Off White.
- The colors continue alternating from row to row.
- Row 16 finishes in Desert Rose.
- Do not fasten off Desert Rose after Row 16.
- Strap 1 begins with 35 chains.
- Strap 2 also begins with 35 chains.
- For each strap, slip stitch through the second chain and every chain across.
- Each strap is secured to the appropriate side Double Crochet.
Quick Construction Guide
- Prepare Drops Muskat in Desert Rose and Off White.
- Use a 4 mm crochet hook.
- Make a slip knot with Desert Rose.
- Chain 4 and slip stitch into the first chain to form a ring.
- Complete Row 1.
- Complete Row 2 and fasten off.
- Attach Off White for Row 3.
- Continue alternating colors from row to row.
- Increase the central repeat by one with each row from Row 5 through Row 16.
- Finish Row 16 in Desert Rose.
- Keep the Desert Rose yarn attached.
- Chain 35 for Strap 1 and work slip stitches across.
- Secure Strap 1 to the side Double Crochet and fasten off.
- Attach yarn at the opposite corner.
- Chain 35 for Strap 2.
- Work slip stitches through the second and every chain across.
- Secure Strap 2 to the side Double Crochet.
Styling the Finished Bandana
The completed accessory has the proportions and construction of a traditional triangular head kerchief. The two thin straps make it possible to secure the piece, while the soft color combination gives it a gentle handmade appearance.
The pink and cream palette naturally complements the Cottagecore aesthetic, particularly when paired with soft fabrics, vintage-inspired pieces, or simple spring and summer clothing. The handmade texture also gives an ordinary outfit a more personal character.
One of the appealing aspects of a project like this is its versatility. The finished bandana is small enough to be an approachable crochet project but distinctive enough to become a recognizable accessory in a handmade wardrobe.
Frequently Asked Questions
What skill level is this bandana?
The pattern is rated easy/beginner. The main construction uses a Granny Triangle pattern with Double Crochet stitches, chain spaces, color changes, and simple straps.
What colors are used?
The original pattern uses Drops Muskat shade 06 Desert Rose and shade 08 Off White. The two colors are alternated from row to row.
What size crochet hook is required?
The pattern specifies a 4 mm crochet hook.
How large is the finished bandana?
The finished bandana body measures 8.5 inches x 17 inches (21.5 cm x 43 cm), excluding the ties on each side.
How many rows make up the main triangle?
The triangular body is completed through Row 16. The final row is worked in Desert Rose.
How many chains are used for each strap?
Each strap begins with a chain of 35.
What does DC mean in this pattern?
DC means Double Crochet in US crochet terminology. The British equivalent is Treble Crochet.
Final Thoughts on This Granny Triangle Workshop
The Crochet Cottagecore Bandana demonstrates how a familiar crochet technique can be transformed into a beautiful wearable accessory with only a few carefully chosen details. The Granny Triangle creates the entire foundation, while the alternating Desert Rose and Off White rows provide the color and character.
For a beginner, the project has a particularly useful rhythm. The first rows introduce the construction, the middle rows establish the repeating pattern, and the final rows allow the triangle to reach its full width. The two 35-chain straps then complete the practical side of the design.
The most important elements to monitor are the chain spaces, the increasing repeat count, and the alternating colors. These checkpoints make it easier to maintain the intended construction without needing to memorize the entire pattern.
With a 4 mm hook, Drops Muskat yarn in the specified shades, and a few basic tools, this project offers a straightforward way to create a romantic handmade accessory. Its soft colors and triangular silhouette make it especially fitting for anyone drawn to Cottagecore fashion, while its repetitive construction makes it an enjoyable project for beginners who want to strengthen their crochet skills.
Once the two straps are secured, the bandana is complete. What began as a tiny foundation ring has developed into an 8.5-inch by 17-inch triangular accessory through a steady sequence of Granny Triangle rows. The simplicity of that transformation is part of what makes this project so satisfying to crochet.