
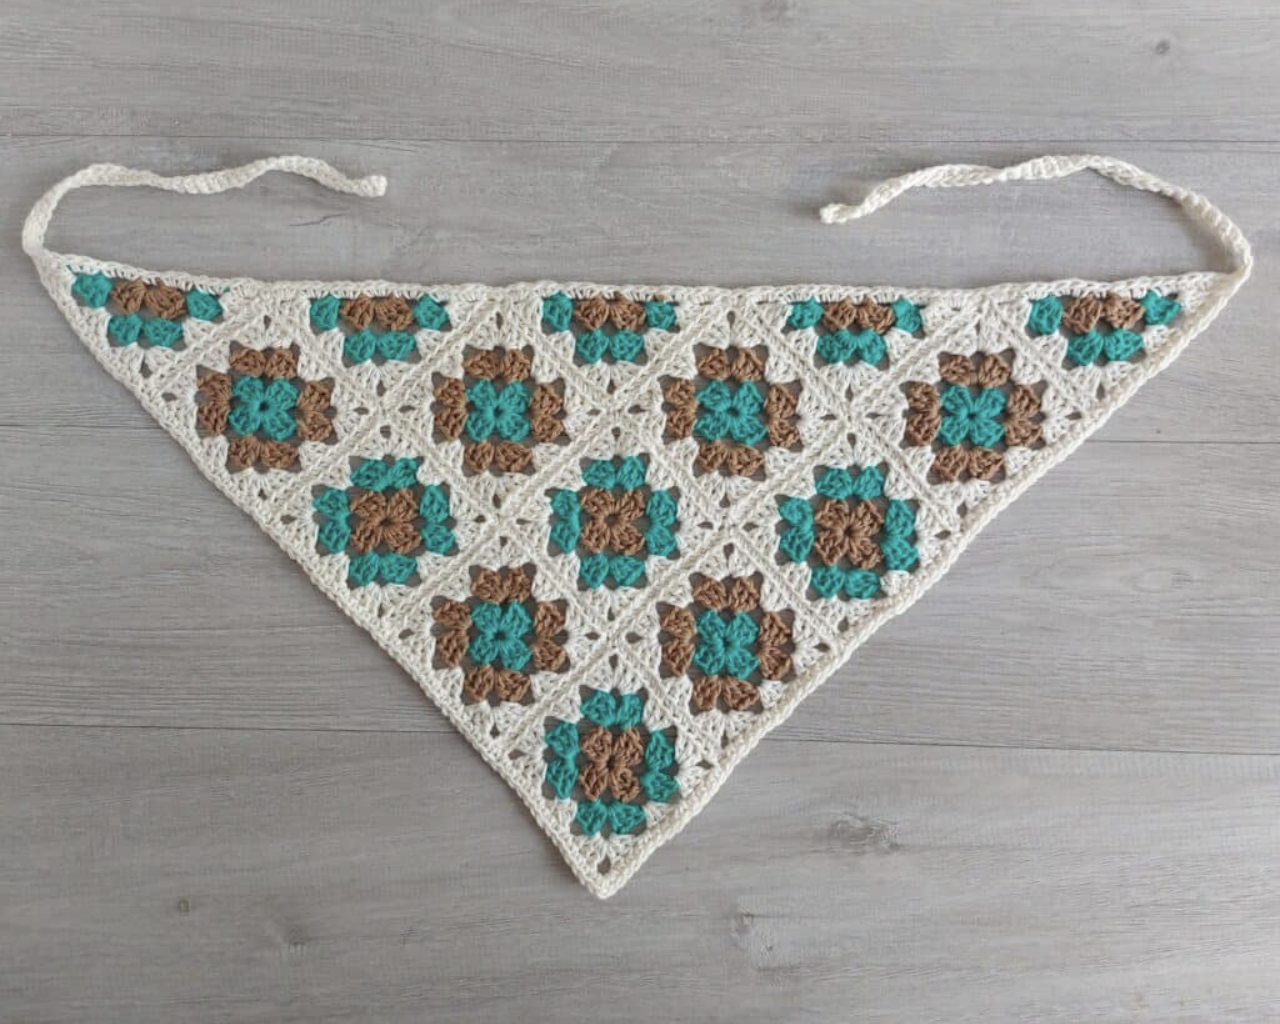
Crochet Bandana Workshop: Stitch Checks, Motif Assembly, and Finishing Guide
Some crochet projects become much easier when you stop thinking of them as one large piece and instead work through a series of small, repeatable checkpoints. This granny square bandana is a perfect example. Rather than crocheting the entire head scarf in one continuous section, you create individual granny squares and triangles, check their shape and size, arrange them into the correct layout, sew them together, and then finish the outer edge with a simple border and two ties.
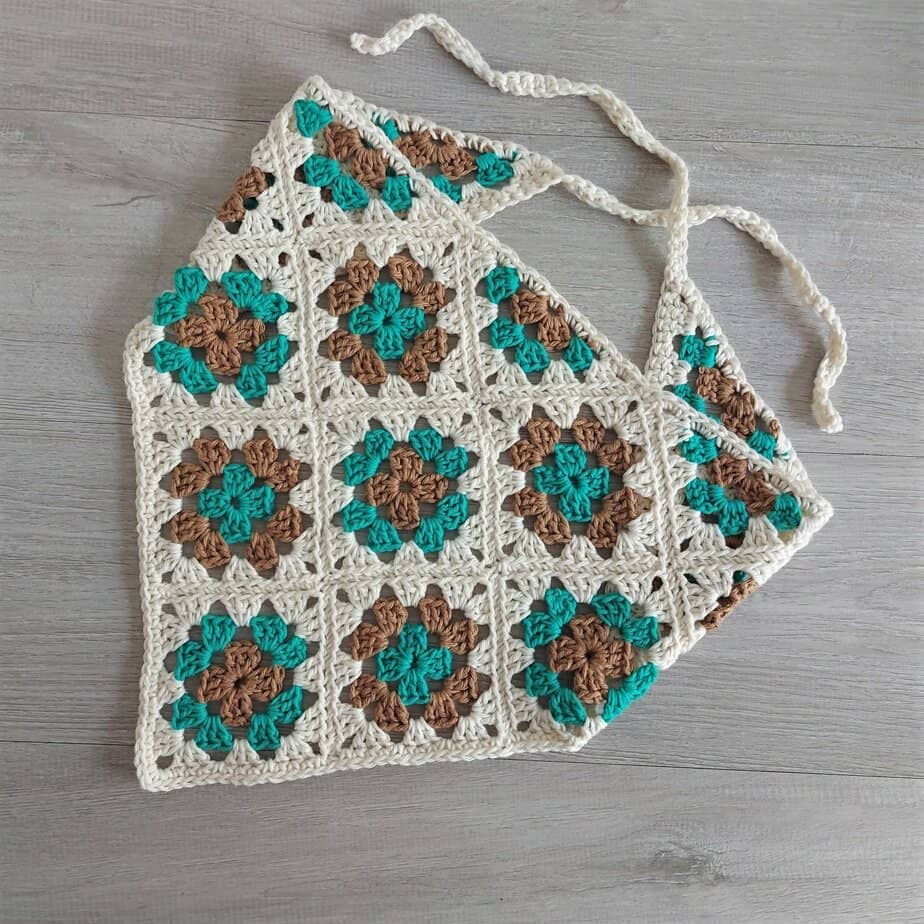
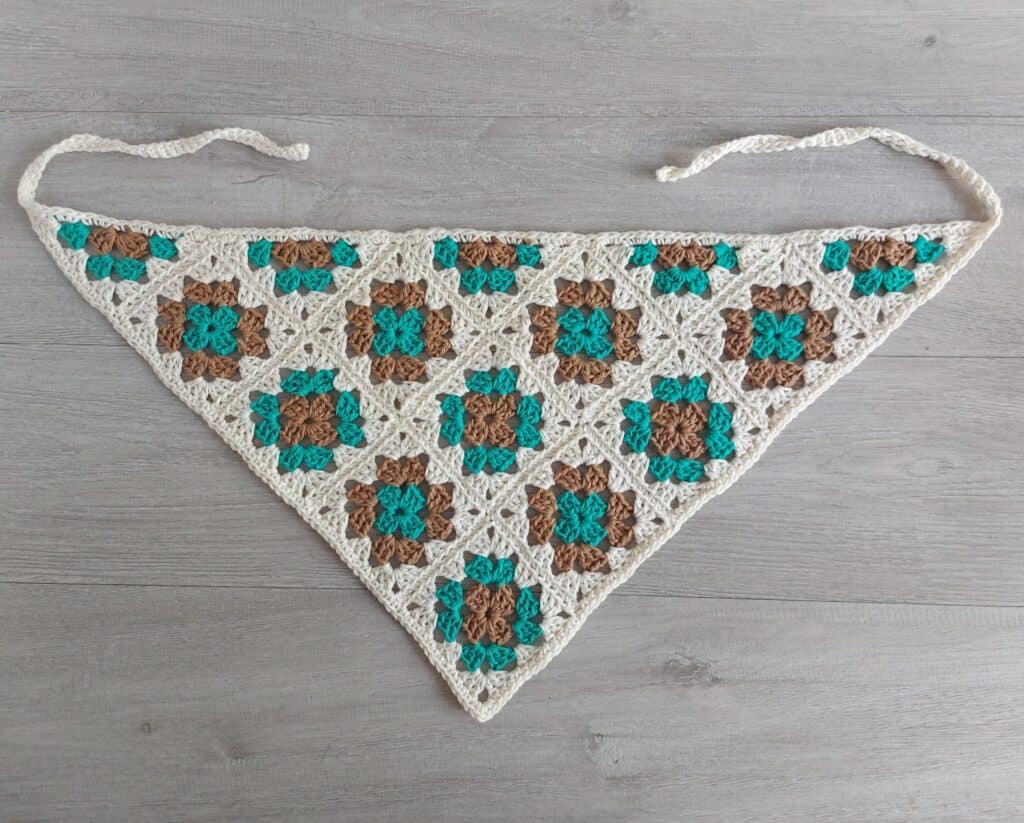
The finished accessory has the classic triangular silhouette of a bandana while using familiar granny-style construction. It is designed as an easy project for a crocheter who already knows how to make a basic granny square. The original pattern is written in US crochet terms and uses basic stitches, making it especially useful as a practical project for building consistency with chains, double crochet groups, slip stitches, color changes, sewing, and simple edging.
This version of the guide focuses on stitch checkpoints and construction control. Instead of rushing from one section to another, you can use each stage to confirm that your motifs, colors, measurements, joining, and border are developing correctly. That approach is particularly helpful when making ten squares and five triangles, because small differences between motifs can become more noticeable once everything is sewn together.
Project Map: What You Are Building
The finished head scarf consists of three main stages:
- Make 10 three-round granny squares.
- Make 5 three-row granny triangles.
- Arrange and sew the motifs together, then add the border and ties.
The finished scarf pictured in the source measures approximately 24 inches [61cm] wide and 12 inches [30cm] deep after light blocking. The ties measure approximately 12 inches [30cm] each, although the pattern allows you to make them longer if desired.
The individual motif targets are also useful quality-control measurements. Each granny square should be approximately 3.5 inches [9cm]. Each triangle should be approximately 3.5 inches x 4.8 inches [9cm x 12cm]. Gauge is not considered important for this project, but keeping the individual pieces close to these measurements helps the finished assembly maintain the intended proportions.
Materials and Color Control
The pattern works with any DK weight/light worsted weight yarn. Cotton is recommended because it holds its shape well, is breathable, and is easy to wash. A cotton/acrylic yarn is also suitable.
- Cotlin from Knitpicks: 123yds [112m], 70% Cotton, 30% Linen, 50gr
- Main Colour Yarn A: 1 ball in Swan
- Yarn B: approximately 50m in Marina
- Yarn C: approximately 50m in Cashew
- 4 mm [G/6] crochet hook
- Scissors
- Yarn needle
The pattern also states that approximately 200m of any DK weight yarn can be used. Because the project requires relatively small amounts of the contrast colors, it is also a useful stash project. One main color can provide the visual foundation while smaller quantities of contrast yarn create the alternating motif colors.
Color Combination Checkpoint
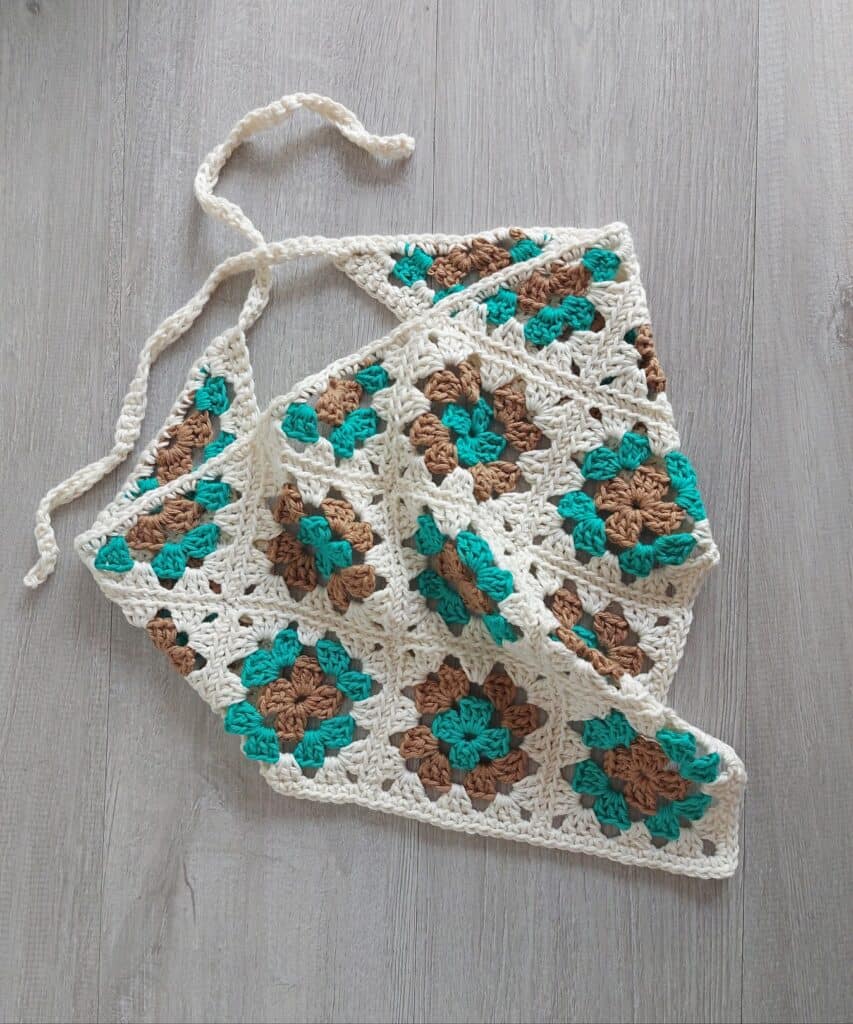
The color arrangement specified by the pattern is:
- 6 squares in yarn B, C, and A.
- 4 squares in yarn C, B, and A.
- 5 triangles in yarn C, B, and A.
Each square is worked in a different color for each round, with Yarn A always used for Round 3 in all motifs. This repeated final-round color helps unify the individual squares when they are placed together.
Pattern Language to Keep Beside Your Hook
The pattern uses US crochet terminology. Keeping the abbreviations nearby makes the written instructions much easier to follow, especially when switching between the square and triangle construction.
- Beg – beginning
- Ch – chain
- St – stitch
- Sl st – slip stitch
- Dc – double crochet
- Yo – yarn over
- Sp – space
- RS – right side
There are two important pattern conventions to remember. A ch 3 at the beginning of a round counts as 1 dc. A ch 4 at the beginning of a row counts as 1 dc and ch-1. These details matter when checking the structure of the motifs and when working the final border.
Motif Station One: The Ten Granny Squares
The first major checkpoint is the production of the ten squares. Every square follows the same three-round construction. The main goal is not simply to finish ten pieces, but to make them consistent enough that they can be assembled neatly later.
Begin with the first color by chaining 5 and joining with a slip stitch to the first chain to form a ring.
Round 1 — Establish the Four Corners
Round 1 (RS): Ch 3 (counts as 1 dc here and throughout at beg of a round), 2 dc in ring, [ch 3, 3 dc in ring] 3 times, ch 3, join with a sl st in 3rd ch of beg ch. Fasten off yarn.
The most useful checkpoint here is the corner structure. The round establishes the four corner spaces that the following rounds will build into. If one corner appears missing or distorted, it is better to correct it now rather than continue through all three rounds.
Round 2 — Build the Square
Join the second color in any corner ch-3 sp.
Round 2: Ch 3, (2 dc, ch 3, 3 dc) in same ch-sp, [ch 1, (3 dc, ch 3, 3 dc) in next ch-3 sp] 3 times, ch 1, join with a sl st in 3rd ch of beg ch. Fasten off yarn.
At this point, the motif should be visibly developing into a square. The chain-3 spaces define the corners, while the chain-1 spaces separate the groups along the sides. Check that the four corners remain easy to identify before moving on.
Round 3 — The Consistency Round
Join the third color in any corner ch-3 sp.
Round 3: Join 3rd colour in any corner ch-3 sp, ch 3, (2 dc, ch 3, 3 dc) in same ch-sp, [ch 1, 3 dc in next ch-1 sp, ch 1, (3 dc, ch 3, 3 dc) in next ch-3 sp] 3 times, ch 1, 3 dc in next ch-1 sp, ch 1, join with a sl st in 3rd ch of beg ch. Fasten off yarn and weave in threads.
Yarn A is used for Round 3 in every motif. This is one of the most important visual consistency points in the entire project. After completing the round, fasten off and weave in the threads.
Square Quality-Control Checklist
Before making the next square, use the finished motif as a reference. The source does not require a strict gauge, but consistency will make the final sewing stage much easier.
- Is the motif approximately 3.5in [9cm]?
- Are all four corners clearly formed?
- Is the square reasonably even rather than strongly rectangular?
- Was Yarn A used for Round 3?
- Were the ends fastened off and woven in?
If your first square is noticeably different from the next pieces, compare your tension and hook handling before continuing. The pattern specifically allows other granny square designs to be substituted, but if doing so, a quick gauge swatch should be used and the hook size adjusted so the squares are 3.5in [9cm].
Motif Station Two: Five Granny Triangles
The triangular motifs create the characteristic pointed shape of the bandana. Five are required. Unlike the squares, the triangles do not have a right side: both sides are the same.
Begin with the first color by chaining 5 and slip stitching to the first chain to form a ring.
Row 1 — Create the Triangle Foundation
Row 1: Ch 4 (counts as 1 dc and ch-1 sp here and throughout at beg of a row), 3 dc, ch 3, 3 dc, ch 1, 1 dc in ring, turn. Fasten off yarn.
The chain-4 beginning is doing two jobs here: it counts as a double crochet and a chain-1 space. This convention continues at the beginning of the later rows.
Row 2 — Expand the Shape
Row 2: Join 2nd colour in last dc made in row 1, ch 4, 3 dc in 1st ch-1 sp, ch 1, (3 dc, ch 3, 3 dc) in corner ch-3 sp, ch 1, (3 dc, ch 1, 1 dc) in last ch-1 sp, turn. Fasten off yarn.
The center ch-3 space is the key point of the triangle. Keep this space clearly defined because it becomes the central point around which the following row expands.
Row 3 — Complete the Five Triangles
Row 3: Join 3rd colour in last dc made in row 2, ch 4, 3 dc in 1st ch-1 sp, ch 1, 3 dc in next ch-1 sp, ch 1, (3 dc, ch 3, 3 dc) in corner ch-3 sp, ch 1, 3 dc in next ch-1 sp, ch 1, (3 dc, ch 1, 1 dc) in last ch-1 sp. Fasten off yarn and weave in threads.
Repeat the same construction until you have five triangles. The target size is approximately 3.5in x 4.8in [9cm x 12cm].
The Blocking Checkpoint
Blocking is recommended before the motifs are attached. This is especially helpful for a project made from many separate pieces because it gives each square and triangle a more even shape before sewing.
Pin each motif to an even shape and spray it with water, or hover a steam iron over each piece. Leave the motifs to dry.
The purpose here is not to change the dimensions dramatically. Instead, blocking helps prepare the pieces for joining. When the motifs have similar shapes, their edges meet more predictably and the finished bandana is easier to arrange.
Assembly Workshop: Arrange Before You Sew
Once all fifteen motifs are complete and blocked, resist the temptation to start sewing immediately. First lay out all the squares and triangles according to the supplied assembly picture. The layout is an essential part of the pattern because the finished triangular scarf depends on the position of each motif.
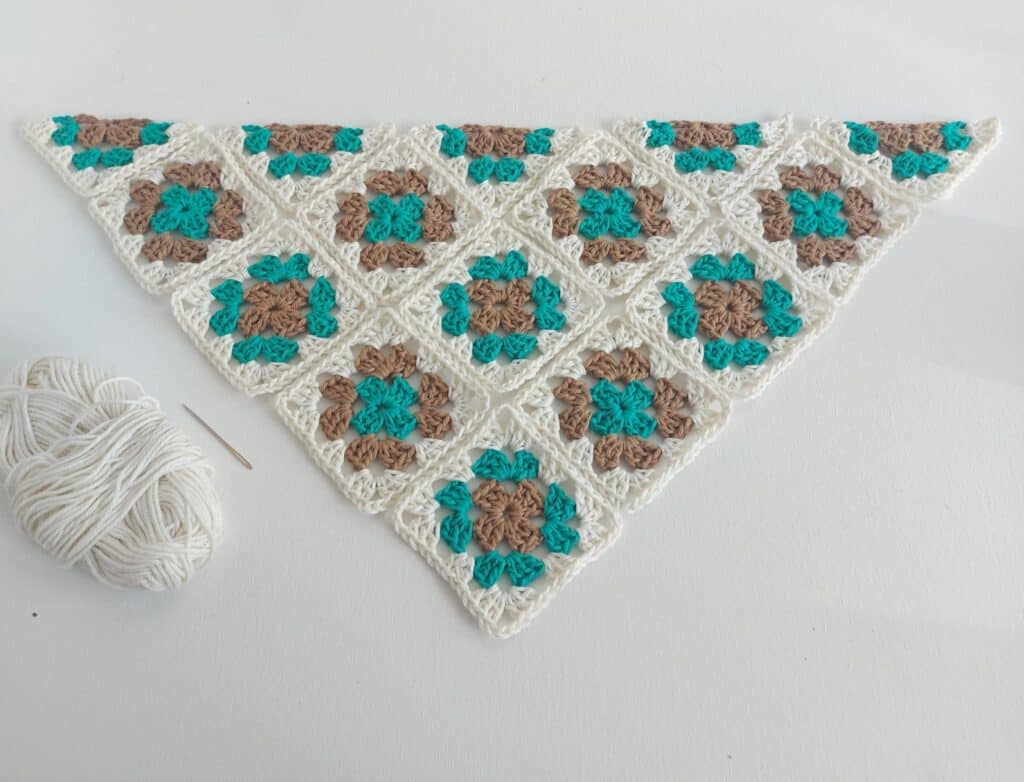
Look at the arrangement from a distance before picking up the yarn needle. Confirm that the color sequence creates the intended pattern and that the triangles are positioned correctly. This is also the best moment to rotate an individual motif if necessary, rather than discovering a placement problem after several seams have been sewn.
The Joining Method
Hold the right sides of the motifs together. The motifs are joined in the back loop only by sewing using whip stitching.
The source specifically recommends keeping the stitches loose enough to avoid puckering and joining the motifs as evenly as possible. This is an important finishing principle. A seam that is pulled too tightly can make otherwise flat motifs draw inward, while uneven sewing can make the assembled edge look irregular.
After the motifs have been joined, pin out the finished piece and steam block lightly.
Seam Checkpoints Before Adding the Border
Before moving to the final edging, examine the entire assembled scarf.
- The ten squares and five triangles should be in the intended layout.
- The seams should be even.
- The joining should not create obvious puckering.
- The pointed lower section should remain clearly defined.
- The top edge should be ready for the final border treatment.
This is the last stage where correcting a motif position is relatively straightforward. Once the border and ties are added, the bandana is essentially finished.
Border and Tie Construction
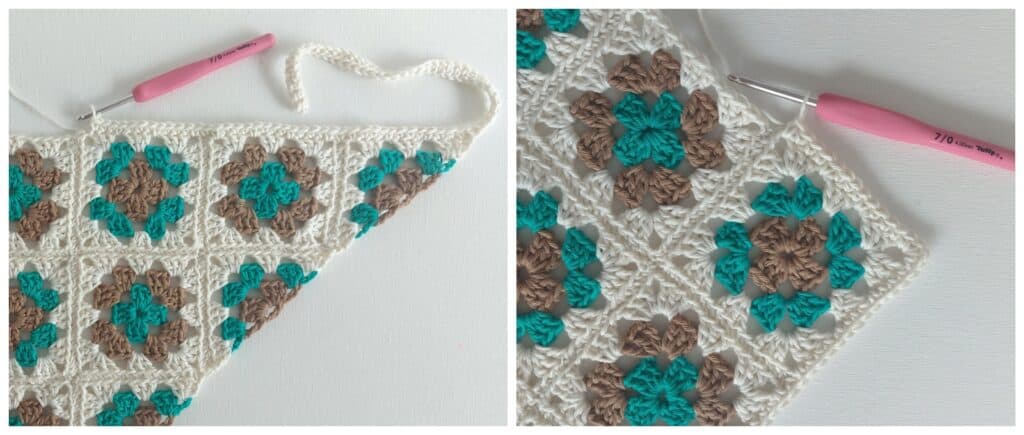
The border is worked with Yarn A. Begin by joining Yarn A in the top left corner of the finished triangle.
Start the first tie with:
Ch 40, 1 sc in 2nd ch from hook and in each ch across (39 sc). Sl st back to main piece.
The 40-chain beginning therefore produces 39 single crochet stitches when worked back across the chain. This same construction is repeated for the second tie on the opposite side.
Work Down the First Side
Make a single crochet in each double crochet and chain-1 space down the side of the piece, making 1 sc in the space between each motif.
When you reach the bottom peak of the triangle, work:
(2 sc, ch 1, 2 sc) in the ch-3 sp at the bottom peak of the triangle.
This creates the shaping at the pointed center. It is an important checkpoint because the bandana’s point needs room to turn neatly rather than becoming pulled or flattened.
Work Up the Opposite Side
Continue upward on the other side to the top right corner. Make a single crochet in each double crochet and chain-1 space, again making 1 sc in the space between each motif.
When you reach the right corner, create the second tie:
Ch 40, 1 sc in 2nd ch from hook and in each ch across (39 sc). Sl st back to main piece.
Finish Across the Top
Work across the top of the head scarf with:
- 3 sc in each row end of each triangle
- 1 sc in each beginning ch 5
- 1 sc in the space between each motif
Join with a slip stitch to the beginning chain and weave in all ends.
The source notes that you may add more chains if you want longer ties. The stated finished tie length for the pictured version is approximately 12in [30cm].
Finished Measurements and Final Inspection
After light blocking, the pictured scarf measures approximately 24in [61cm] wide and 12in [30cm] deep. The ties are approximately 12in [30cm] long.
Use these measurements as a finished-project reference rather than as a reason to force every individual stitch into a particular gauge. The source explicitly states that gauge is not important. The more useful goal is consistency among the ten squares and five triangles.
Troubleshooting by Construction Stage
If the Squares Are Different Sizes
Compare your tension, hook, yarn weight, and stitch grouping. Because the pattern relies on multiple motifs being sewn together, noticeable differences between squares can make assembly harder. The approximate target is 3.5in [9cm] per square.
If a Square Does Not Look Square
Check the four corner ch-3 spaces and the placement of the 3-dc groups. The corners are the structural points of the motif. Blocking can also help prepare a completed motif for a more even shape.
If the Triangle Looks Uneven
Check the center ch-3 corner space and the chain-1 spaces on either side. Remember that triangles have no right side; both sides are the same. The target measurement is approximately 3.5in x 4.8in [9cm x 12cm].
If the Joined Piece Puckers
The source specifically recommends sewing the motifs loosely. If whip stitches are pulled too firmly, the joined edges can contract. Aim for an even seam without excessive tension.
If the Bottom Point Looks Too Tight
Review the border instruction at the bottom peak: (2 sc, ch 1, 2 sc) in the ch-3 space. This shaping is part of the border construction and should be worked at the designated peak.
If You Want Longer Ties
The pattern allows additional chains to be added to make the ties longer. The pictured version uses 40 chains for each starting tie, resulting in 39 sc across each chain.
A Practical Beginner Checkpoint System
If this is your first multi-motif crochet accessory, divide the work into manageable sessions. Complete the squares first, then the triangles, then blocking, assembly, and finally the border.
- Checkpoint 1: 10 completed squares.
- Checkpoint 2: 5 completed triangles.
- Checkpoint 3: All motifs blocked and shaped.
- Checkpoint 4: Motifs arranged according to the layout.
- Checkpoint 5: Motifs sewn together evenly.
- Checkpoint 6: Border worked around the complete piece.
- Checkpoint 7: Both ties completed and all ends woven in.
This approach also makes it easier to stop between stages without losing track of what remains to be done.
Frequently Asked Questions
Is this crochet bandana suitable for beginners?
The source rates the pattern as easy and states that only basic crochet stitches are used. The main requirement is familiarity with making a granny square. The project also introduces triangle motifs, sewing, blocking, and a simple single crochet border.
How many motifs are required?
You need 10 granny squares and 5 granny triangles.
What yarn weight should be used?
The pattern calls for DK weight/light worsted weight yarn. Cotton is recommended, while cotton/acrylic yarn can also work well.
Is gauge important?
No. The source states that gauge is not important. However, each square is approximately 3.5in [9cm] and each triangle is approximately 3.5in x 4.8in [9cm x 12cm], so these measurements are useful checkpoints for consistent motifs.
Can the ties be longer?
Yes. The pictured ties are 12in [30cm] long, and the source notes that more chains can be added to make them longer.
What crochet terminology does the pattern use?
The pattern is written in US crochet terms.
Can another granny square design be substituted?
The source notes that the construction can be used as a template for other granny square designs. If you substitute a different motif, make a quick gauge swatch and adjust the hook size so the squares are 3.5in [9cm].
Final Project Checklist
- 10 granny squares completed.
- 5 granny triangles completed.
- Yarn A used for Round 3 of every square.
- Color combinations followed correctly.
- Squares approximately 3.5in [9cm].
- Triangles approximately 3.5in x 4.8in [9cm x 12cm].
- All motif ends woven in.
- Motifs blocked before joining.
- Layout checked before sewing.
- Motifs joined in the back loop only by whip stitching.
- Seams kept loose enough to prevent puckering.
- Finished piece lightly steam blocked.
- Border worked with Yarn A.
- Each tie begins with Ch 40 and contains 39 sc.
- Bottom peak shaped with (2 sc, ch 1, 2 sc).
- Top edge finished according to the specified border instructions.
- All remaining ends woven in.
Enjoying the Finished Granny Square Bandana
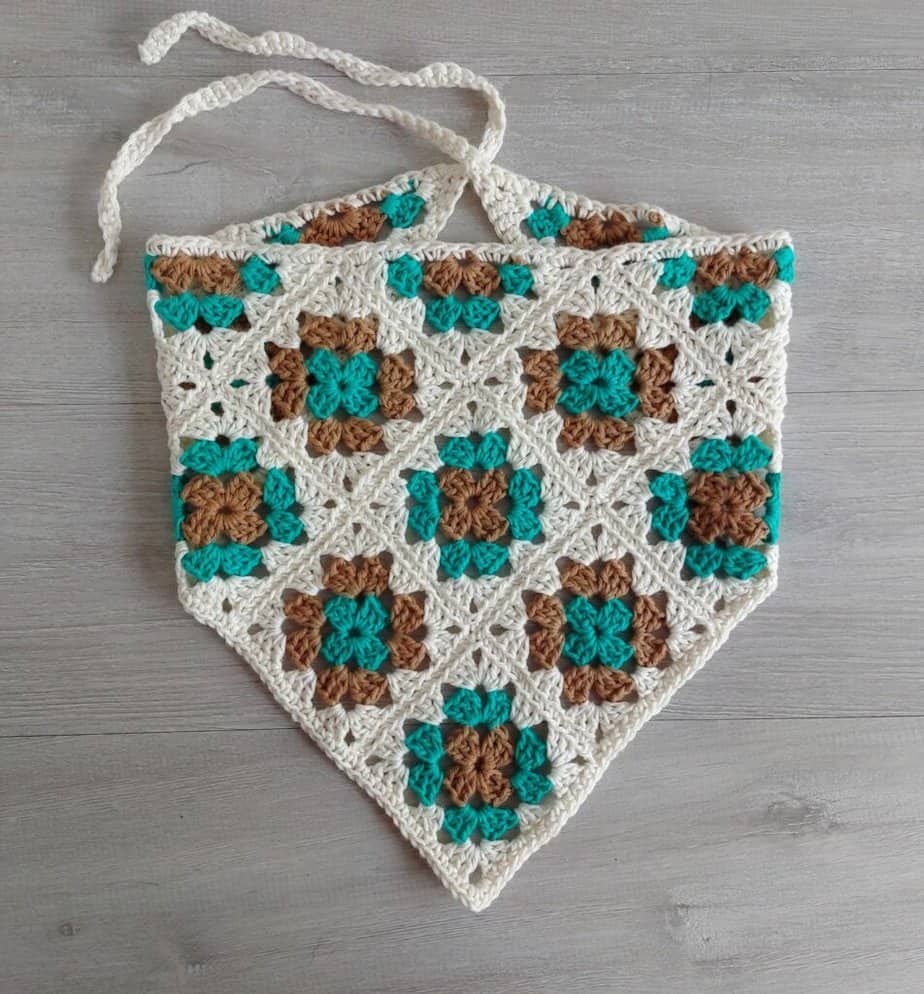
Once the final ends are woven in and the piece has received its light finishing block, the separate motifs become a single wearable accessory. The combination of granny squares and triangles creates a recognizable bandana shape while leaving plenty of room for color variation through the three-color motif sequence.
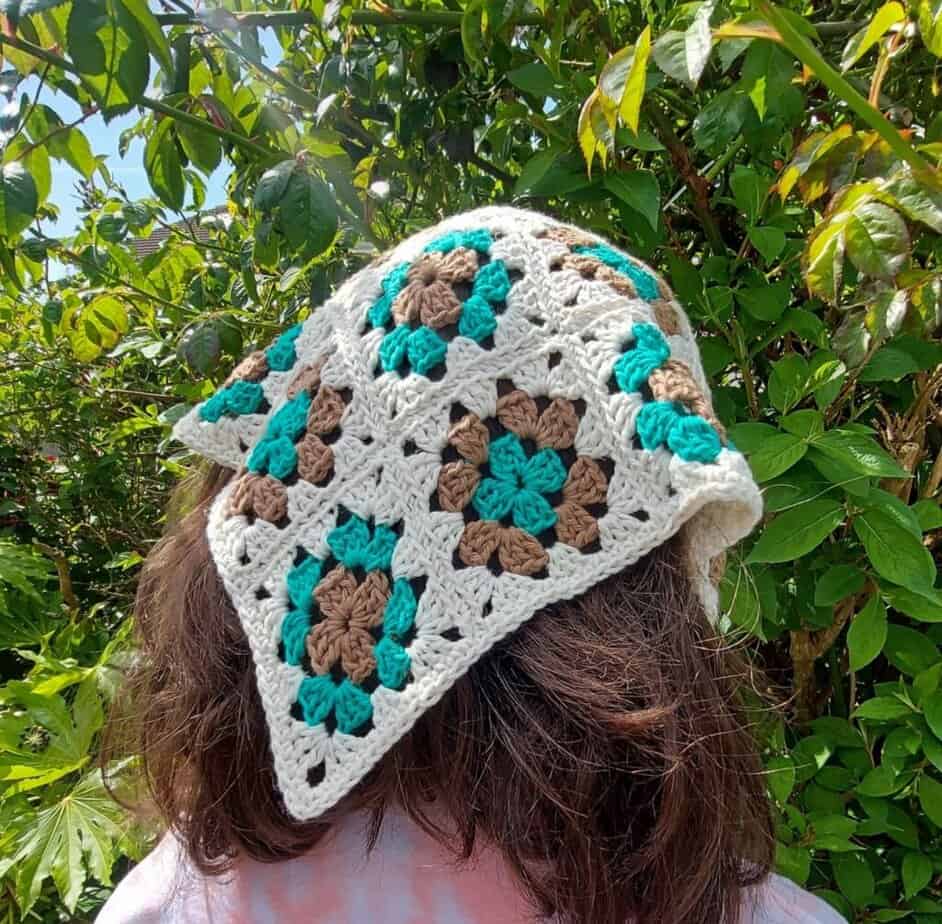
The project is particularly well suited to warm-weather crochet because the recommended cotton yarn is breathable and washable, while the construction uses relatively small quantities of yarn. It can be approached as a focused weekend project or divided into smaller motif-making sessions.
Most importantly, the finished result depends less on complicated stitches than on careful consistency. Keep the squares close to the same size, maintain the specified color sequence, check the triangular motifs before assembly, use the layout as your guide, and avoid pulling the whip stitches too tightly. Those simple checkpoints make the transition from individual motifs to the finished bandana much smoother.
With ten squares, five triangles, a neat joining process, and the final Yarn A border and ties, you have a classic granny-style crochet head scarf measuring approximately 24in [61cm] wide and 12in [30cm] deep after light blocking. The result is a colorful accessory that can be worn for sunny afternoons, beach days, festivals, or whenever you want a handmade finishing touch.