
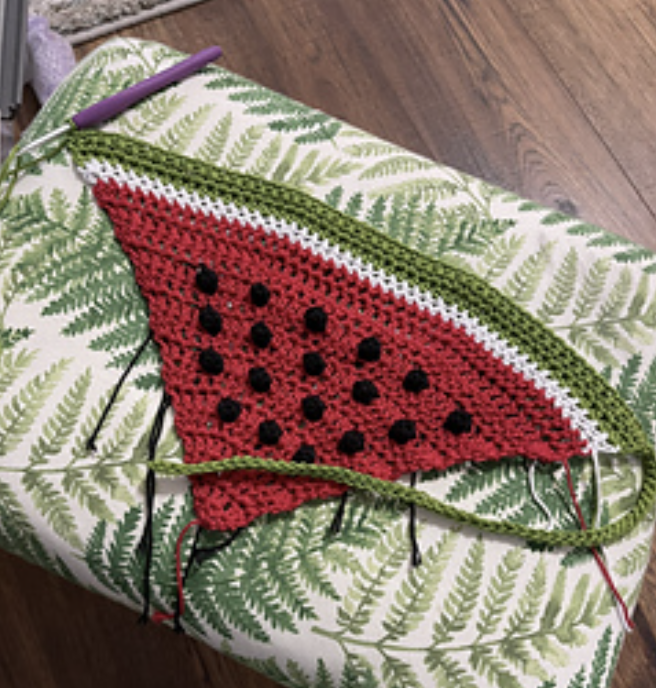
This watermelon bandana is a colorful crochet project built around a simple triangular shape and a carefully arranged watermelon-seed texture. The design begins at the narrow point with red yarn, expands through a series of double crochet increases, introduces black puff stitches on selected right-side rows, and then transitions through white and green sections before the final ties are created.

This version of the tutorial is designed as a visual and stitch-checkpoint workshop. Instead of treating the pattern as a long list of instructions, it breaks the project into recognizable stages so you can understand what should happen to the fabric as you progress. The supplied crochet instructions remain the technical authority throughout, so the original stitch counts, row numbers, color changes, puff-stitch placements, and finishing instructions are preserved.
The pattern uses US crochet terminology, Lion Brand 24/7 Cotton, and a 4.0 mm hook. The four pattern colors are red (A), black (B), white (C), and green (D). The main body is worked flat from the tip upward.
Why This Pattern Is Easier When You Think in Stages
At first glance, the watermelon design may look like a complicated colorwork project. In reality, the construction can be divided into several predictable stages. The first five rows establish the triangle. Rows 6, 8, 10, and 12 introduce the black puff-stitch seeds. Rows 13–15 finish the red triangular body. Rows 16–18 create the white section, and Rows 19–20 create the green band. Row 21 completes the tie construction.
The most useful numerical feature is the stitch-count progression. Starting at 3 stitches, the triangle increases by three stitches on every row through Row 15:
- Row 1: 3 sts
- Row 2: 6 sts
- Row 3: 9 sts
- Row 4: 12 sts
- Row 5: 15 sts
- Row 6: 18 sts
- Row 7: 21 sts
- Row 8: 24 sts
- Row 9: 27 sts
- Row 10: 30 sts
- Row 11: 33 sts
- Row 12: 36 sts
- Row 13: 39 sts
- Row 14: 42 sts
- Row 15: 45 sts
After that, the stitch count remains at 45 stitches through the white and green body sections.
Materials and Color Organization
- Yarn: Lion Brand 24/7 Cotton
- Hook: 4.0 mm
- Color A: Red
- Color B: Black
- Color C: White
- Color D: Green
The supplied source does not provide a total yarn quantity, yardage, meterage, gauge, or fixed finished-size measurement. Those details should not be invented or substituted with estimates. The source does specify that the tie is chained to the desired length, approximately 14 inches.
US Crochet Abbreviations Used in the Pattern
- ch: chain
- sl st: slip stitch
- dc: double crochet
- sc: single crochet
- hdc: half double crochet
- ps: puff stitch / 5 hdc
- WS: wrong side
- RS: right side
There are two essential notes to remember before starting. Puff stitches are only made on the right side. Also, the ch 2 at the beginning of the triangular rows is not counted as a stitch throughout the pattern.
How to Read the Crochet Chart
The chart is especially useful for seeing the overall architecture of the project. It shows the triangle growing from the 3-stitch point through the successive stitch-count levels and illustrates the black seed placements within the red section. It also makes the transition to the white and green rows easier to visualize.
When using the chart together with the written pattern, do not replace the written instructions with an interpretation of the drawing. The chart is a visual aid, while the supplied written pattern remains the technical reference. This is particularly important in Rows 6, 8, 10, and 12 because the exact color-change instructions and puff-stitch positions vary from row to row.
Stage One: Start the Watermelon Triangle
Begin with red (A) and chain 3.
Row 1 — The Starting Point
ROW 1 (WS): 3 dc in the third chain from the hook (3 sts).
This creates the tiny point from which the entire bandana grows. Because there are only three stitches, it is easy to count them individually. Confirm the three stitches before moving to Row 2.
Row 2 — Doubling the Foundation
ROW 2 (RS): ch 2, turn, 2 dc in each st (6 sts).
The beginning ch 2 is not counted as a stitch. Each stitch receives two double crochets, increasing the total to six stitches.
Row 3
ROW 3 (WS): ch 2, turn, [2 dc in next st, 1 dc in next st] three times (9 sts).
Row 4
ROW 4 (RS): ch 2, turn, [2 dc in next st, 1 dc in next 2 sts] three times (12 sts).
Row 5
ROW 5 (WS): ch 2, turn, [2 dc in next st, 1 dc in next 3 sts] three times (15 sts).
At the end of Row 5, pause for the first major checkpoint. You should have 15 stitches and a clearly widening red triangle.
Stage Two: Add the First Watermelon Seeds
The black puff stitches are the most recognizable feature of this pattern. The source defines ps as a puff stitch made from 5 hdc. These decorative stitches appear only on right-side rows.
The four seed rows are Rows 6, 8, 10, and 12. The rows between them are wrong-side increase rows without puff stitches.
Row 6 — 18 Stitches
ROW 6 (RS): ch 2, turn, 2 dc in next st, 1 dc in next 2 sts, [switch to black (B), 1 ps in next st, switch to red (A)], 1 dc in next st, 2 dc in next st, 1 dc in next st, [switch to black (B), 1 ps in next st, switch to red (A)], 1 dc in next 2 sts, 2 dc in next st, [switch to black (B), 1 ps in next st, switch to red (A)], 1 dc in next 3 sts (18 sts).
Row 6 contains three black puff stitches. Pay attention to every color switch. The pattern does not simply say to add black seeds wherever they look balanced; it gives exact positions.
Row 7 — 21 Stitches
ROW 7 (WS): ch 2, turn, [2 dc in next st, 1 dc in next 5 sts] three times (21 sts).
This is a regular red increase row. There are no puff stitches because this is a WS row.
Row 8 — 24 Stitches
ROW 8 (RS): ch 2, turn, 2 dc in next st, 1 dc in next 2 sts, [switch to black (B), 1 ps in next st, switch to red (A)], 1 dc in next 3 sts, [1 dc in next st, switch to black (B), 1 ps in same st, switch to red (A)], 1 dc in next 4 sts, [switch to black (B), 1 ps in next st, switch to red (A)], 1 dc in next st, 2 dc in next st, 1 dc in next st, [switch to black (B), 1 ps in next st, switch to red (A)], 1 dc in next 4 sts (24 sts).
One detail worth highlighting is the instruction containing “1 dc in next st, switch to black (B), 1 ps in same st.” Follow that wording exactly. Do not assume that every puff stitch is worked into a completely unused stitch.
Row 9 — 27 Stitches
ROW 9 (WS): ch 2, turn, [2 dc in next st, 1 dc in next 7 sts] three times (27 sts).
Row 10 — 30 Stitches
ROW 10 (RS): ch 2, turn, 2 dc in next st, 1 dc in next 2 sts, [switch to black (B), 1 ps in next st, switch to red (A)], 1 dc in next 4 sts, [switch to black (B), 1 ps in next st, switch to red (A)], 2 dc in next st, 1 dc in next 2 st, [switch to black (B), 1 ps in next st, switch to red (A)], 1 dc in next 4 sts, [switch to black (B), 1 ps in next st, switch to red (A)], 2 dc in next st, 1 dc in next 2 sts, [switch to black (B), 1 ps in next st, switch to red (A)], 1 dc in next 5 sts (30 sts).
Row 10 contains five puff stitches. The total still increases by three stitches, so use both the stitch sequence and the final count as checks.
Row 11 — 33 Stitches
ROW 11 (WS): ch 2, turn, [2 dc in next st, 1 dc in next 9 sts] three times (33 sts).
Row 12 — 36 Stitches
ROW 12 (RS): ch 2, turn, 2 dc in next st, 1 dc in next 2 sts, [switch to black (B), 1 ps in next st, switch to red (A)], 1 dc in next 4 sts, [switch to black (B), 1 ps in next st, switch to red (A)], 1 dc in next 2 sts, 2 dc in next st, 1 dc in next st, [switch to black (B), 1 ps in next st, switch to red (A)], 1 dc in next 4 sts, [switch to black (B), 1 ps in next st, switch to red (A)], 1 dc in next 3 sts, 2 dc in next st, 1 dc in next st, [switch to black (B), 1 ps in next st, switch to red (A)], 1 dc in next 4 sts, [switch to black (B), 1 ps in next st, switch to red (A)], 1 dc in next 4 sts (36 sts).
After completing Row 12, fasten off black (B). This is the final row that uses black yarn.

Stage Three: Finish the Red Body
The final three red rows return to the regular increase rhythm. There are no additional black seeds.
Row 13
ROW 13 (WS): ch 2, turn, [2 dc in next st, 1 dc in next 11 sts] three times (39 sts).
Row 14
ROW 14 (RS): ch 2, turn, [2 dc in next st, 1 dc in next 12 sts] three times (42 sts).
Row 15
ROW 15 (WS): ch 2, turn, [2 dc in next st, 1 dc in next 13 sts] three times (45 sts).
After Row 15, switch to white (C) and fasten off red (A).
The red triangular body is now complete at 45 stitches. This is one of the most important checkpoints in the entire project.

Stage Four: Work the White Section
The white portion is deliberately simple and maintains the width of the triangle.
ROW 16–18: ch 1 (does not count as st), turn, 1 sc in each st across (45 sts).
Each of these three rows contains 45 stitches. The chain 1 does not count as a stitch.
Because there are no increases in this section, the white rows are an excellent opportunity to check the edges. If your count changes, review the previous row rather than trying to compensate in the next one.
Stage Five: Create the Green Band
Switch to green (D) and fasten off white (C).
ROW 19–20: ch 1 (does not count as st), turn, 1 hdc in each st across (45 sts). DO NOT FASTEN OFF. Chain until you reach your desired length (approximately 14 inches).
The instruction not to fasten off is essential. The green yarn is still needed for Row 21.
The green section also maintains 45 stitches across the bandana body. The additional chain is for the tie length and is not a change to the 45-stitch body count.
Stage Six: Complete Row 21 and the Ties
Row 21 uses the green yarn that was deliberately left attached after Row 20.
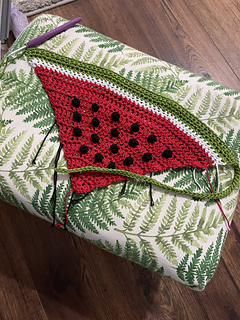
ROW 21: sl st in second ch from hook, sl st across the chain, 1 sc across bandana body, chain to desired length, turn, sl st across chain, sl st into side of bandana (into the hdc of previous row).
The first part of the row works back across the existing chain with slip stitches. The bandana body is then worked across with single crochet. A second chain is made to the desired length, followed by slip stitches back across the chain and a final connection into the side of the bandana.
After Row 21, fasten off green (D) and weave in ends.
How to Use the Finished Shape as a Visual Check
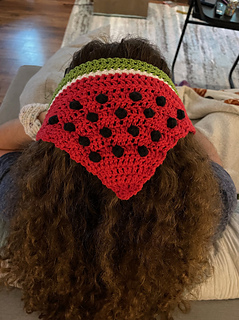
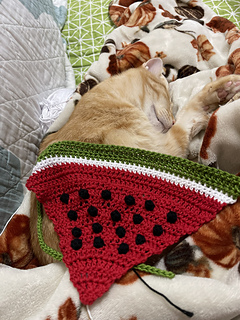
The finished bandana should read visually as a watermelon slice. The red area forms the main triangular fruit section. The black puff stitches appear as raised seed details. The white rows form a clean transition before the green band. The green chain sections become the ties.
A finished view is particularly helpful when checking the overall proportions without using it to replace the technical instructions. The visual result can tell you whether the general shape is developing as expected, while the stitch counts tell you whether the construction is technically on track.
Color-Change Checklist
- Begin with red (A).
- Introduce black (B) for puff stitches in Rows 6, 8, 10, and 12.
- Return to red after each specified black puff stitch.
- Fasten off black after Row 12.
- Continue red through Row 15.
- Switch to white (C) and fasten off red after Row 15.
- Work Rows 16–18 in white.
- Switch to green (D) and fasten off white.
- Work Rows 19–20 in green.
- Do not fasten off green after Row 20.
- Use the attached green yarn for Row 21.
- Fasten off green after Row 21.
Common Mistakes to Avoid
Counting the Beginning Chain
The ch 2 at the beginning of the triangular rows is not counted as a stitch. Counting it can make the stitch totals incorrect.
Putting Puff Stitches on Wrong-Side Rows
Puff stitches are only made on RS rows. The seed rows are 6, 8, 10, and 12.
Assuming Every Seed Row Has the Same Placement
The black puff-stitch positions change between the seed rows. Follow each row individually rather than copying the spacing from the previous row.
Forgetting to Fasten Off Black
Black is fastened off after Row 12. It is not carried into the white section.
Changing Color at the Wrong Time
Red is fastened off after Row 15 when white begins. White is fastened off before green begins. Green remains attached through Row 21.
Fastening Off Green Too Soon
Do not fasten off green after Rows 19–20. The pattern explicitly instructs you not to fasten off because Row 21 uses the same working yarn.
Stitch Count Checkpoints for Every Stage
- Foundation: chain 3
- Row 1: 3 sts
- Row 2: 6 sts
- Row 3: 9 sts
- Row 4: 12 sts
- Row 5: 15 sts
- Row 6: 18 sts
- Row 7: 21 sts
- Row 8: 24 sts
- Row 9: 27 sts
- Row 10: 30 sts
- Row 11: 33 sts
- Row 12: 36 sts
- Row 13: 39 sts
- Row 14: 42 sts
- Row 15: 45 sts
- Rows 16–18: 45 sts
- Rows 19–20: 45 sts
Beginner Workshop Strategy
If this is your first multicolor crochet accessory, avoid trying to work too far ahead. Finish a row, count it, and then identify the next row’s side and color requirements before beginning.
For Rows 1–5, concentrate on the increase pattern. For Rows 6–12, slow down because these are the most detailed rows. For Rows 13–15, return to the regular increase rhythm. For Rows 16–20, concentrate on keeping the 45-stitch width consistent. Finally, keep the green yarn attached until Row 21 is complete.
It is also helpful to distinguish between a visual problem and a counting problem. If the fabric does not look exactly like the final photograph while you are still halfway through the pattern, that does not automatically mean something is wrong. Use the row number and stitch count as your primary checkpoints.
Finishing Advice
After completing Row 21, fasten off green (D) and weave in ends. Avoid pulling the ends so tightly that the fabric becomes distorted. The objective is to secure the yarn neatly while allowing the triangular shape and ties to remain flexible.
Inspect the black puff stitches after finishing. Their raised texture is part of the visual character of the watermelon design, so they should remain clearly defined rather than being pulled tightly into the surrounding red fabric.
Finally, examine the white and green sections for consistent stitch counts and a clean transition. Since the stitch count is stable at 45 through these sections, this is a good place to verify the finished width before wearing the accessory.
Frequently Asked Questions
What yarn is used?
The pattern uses Lion Brand 24/7 Cotton.
What hook size is required?
The supplied pattern uses a 4.0 mm crochet hook.
Which colors are used?
The pattern uses red (A), black (B), white (C), and green (D).
What does ps mean?
Ps means puff stitch, and the source defines it as 5 hdc.
Which rows contain puff stitches?
Puff stitches are used in Rows 6, 8, 10, and 12, and they are made only on the right side.
How many stitches are in Row 15?
Row 15 finishes with 45 stitches.
How many stitches are in the white section?
Rows 16–18 each contain 45 stitches.
How many stitches are in the green section?
Rows 19–20 each contain 45 stitches.
When should black be fastened off?
Fasten off black (B) after Row 12.
When should red be fastened off?
After Row 15, switch to white (C) and fasten off red (A).
When should green be fastened off?
Do not fasten off green after Rows 19–20. Complete Row 21 first, then fasten off green (D) and weave in ends.
How long should the chain be for the tie?
The pattern says to chain until you reach your desired length, approximately 14 inches.
Complete Project Checklist
- 4.0 mm crochet hook ready.
- Lion Brand 24/7 Cotton ready.
- Red, black, white, and green yarn prepared.
- US crochet abbreviations understood.
- Beginning ch 2 understood as not counted.
- RS and WS identified correctly.
- Puff stitch understood as 5 hdc.
- Row 6 completed at 18 stitches.
- Row 8 completed at 24 stitches.
- Row 10 completed at 30 stitches.
- Row 12 completed at 36 stitches.
- Black fastened off after Row 12.
- Row 15 completed at 45 stitches.
- Red fastened off after Row 15.
- Rows 16–18 completed at 45 stitches.
- White fastened off before green.
- Rows 19–20 completed at 45 stitches.
- Green kept attached for Row 21.
- Tie chain made to the desired length, approximately 14 inches.
- Row 21 completed.
- Green fastened off.
- All ends woven in.
The Finished Watermelon Look
Once the final ends are woven in, the project brings together several different crochet techniques without requiring complicated shaping beyond the regular triangle increases. The red center establishes the watermelon body, the black puff stitches give the surface its seed texture, and the white and green sections create the contrasting outer edge.
The finished piece can be viewed flat to appreciate the complete triangular silhouette or worn as a head accessory to see how the ties and widest section work together.
Final Thoughts
The best way to approach this watermelon bandana is to treat it as a sequence of small, verifiable accomplishments. First establish the three-stitch point. Then grow the triangle through the regular three-stitch increases. Next, slow down for the black puff-stitch rows, where accurate color changes matter most. Finish the red triangle at 45 stitches, move through the three white rows, create the green band, and finally complete the ties.
The chart provides a useful visual overview, while the written pattern provides the exact technical sequence. Using both together can make the construction easier to follow without changing any of the original instructions.
The supplied pattern was designed by @creativewasteland.art on Instagram. The source states that the pattern is free to use and encourages donating at least $5 to Operation Olive Branch, Doctors Without Borders, Save The Children, World Central Kitchen, or a local student encampment. The source was last updated 5/13/24.
With the final green tie completed and the ends woven in, the watermelon bandana is ready to wear. Its combination of a growing red triangle, raised black puff-stitch seeds, white transition, and green finishing band creates a distinctive handmade accessory while giving crocheters valuable practice with increases, color changes, texture, stitch counting, and finishing.