
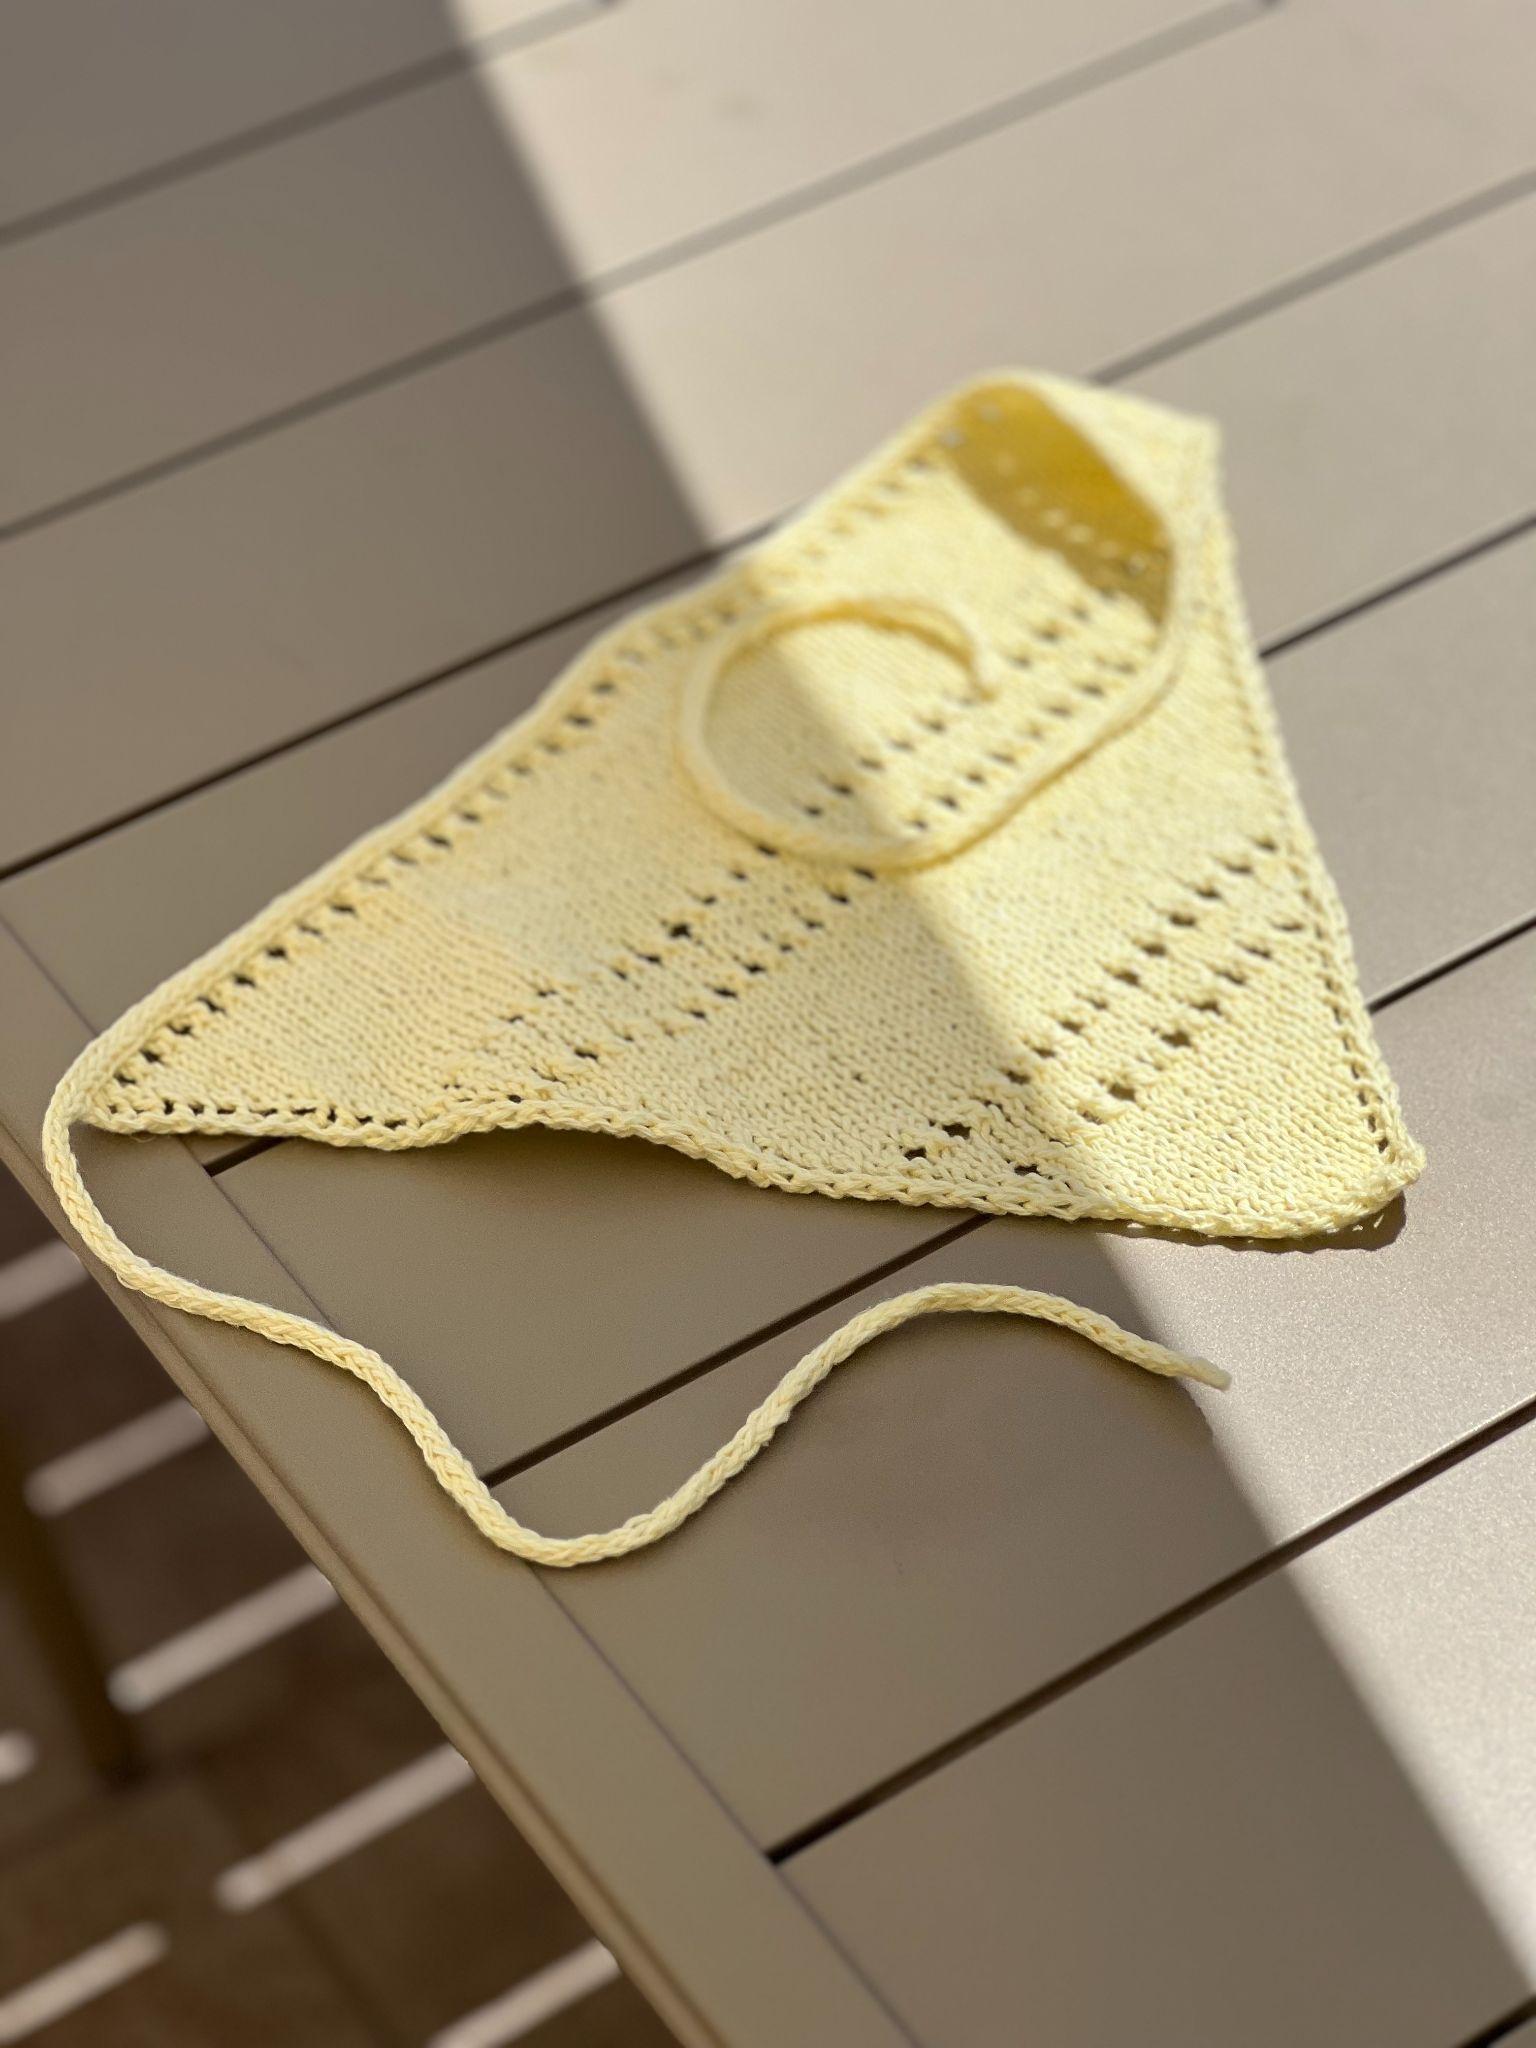
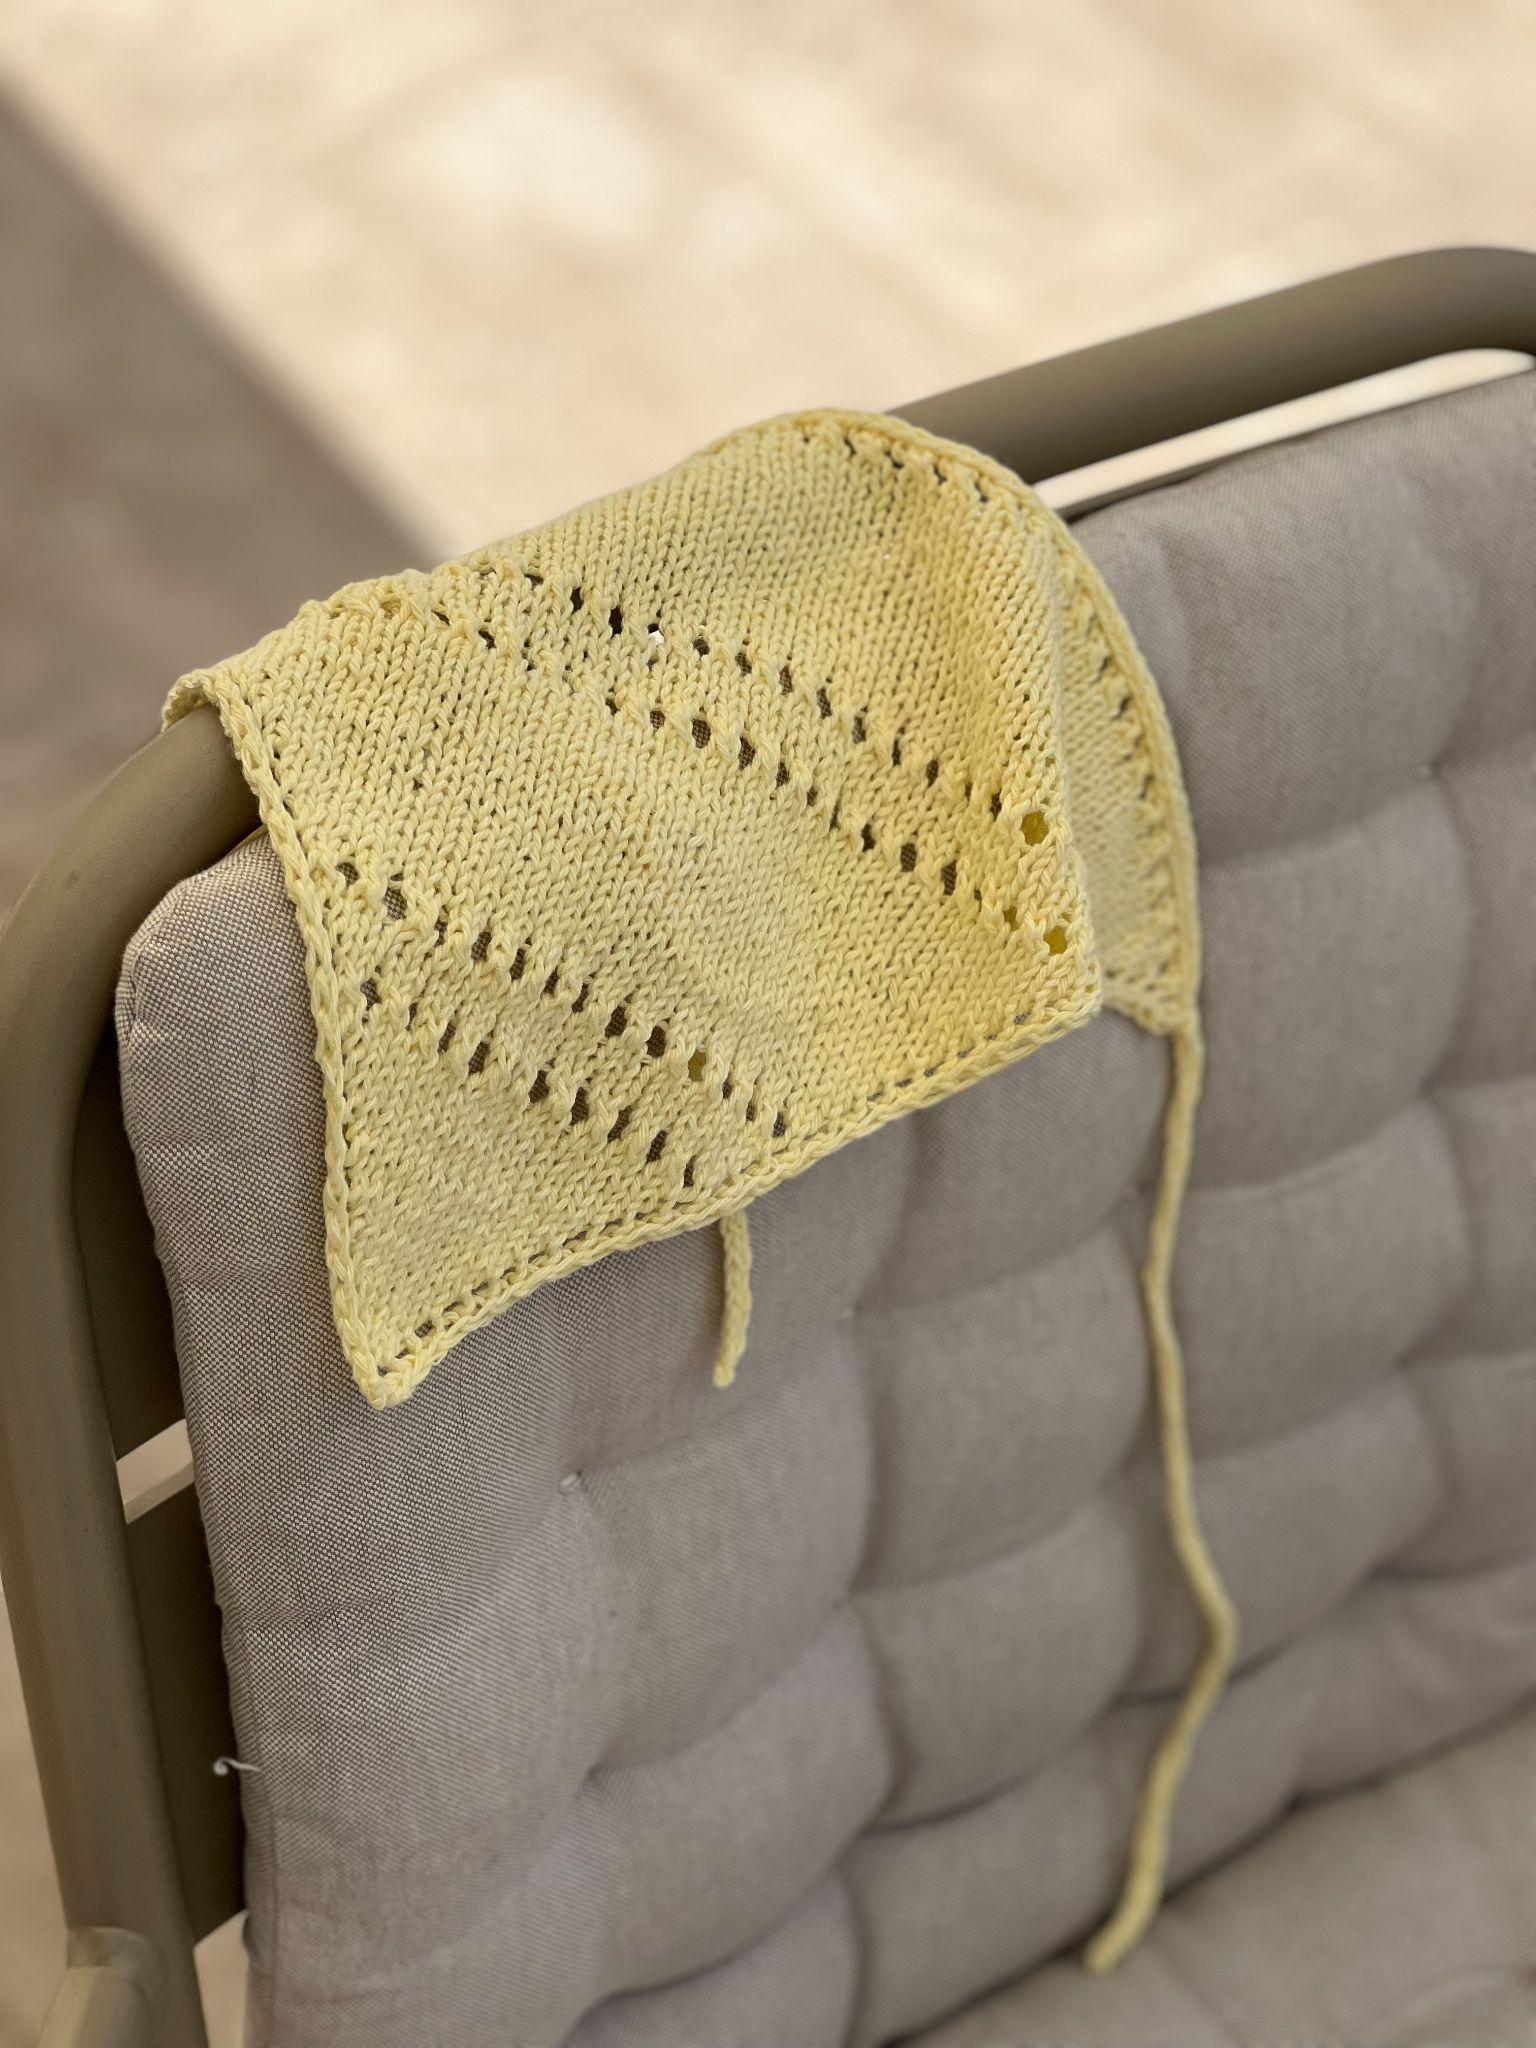
The Sunny Bandana is a compact knitted accessory designed by DriftingInYarn in 2025. It is a particularly useful project when you want something portable, quick to work, and economical with yarn. The original pattern uses one needle size and 30 gr of Sport/Light DK weight yarn, making it practical for travel or for using an awkward quantity left in a yarn stash. Although the finished piece is small, its construction includes several useful techniques: a shaped triangle worked from the tip upward, increases on every right-side row, decorative eyelet sections, simultaneous side finishes, and a continuous I-cord treatment that forms both ties.
This version presents the pattern as a construction-focused workshop. Instead of treating the instructions as a simple list of rows, the guide explains what each section is accomplishing, where the stitch counts change, and which checkpoints are worth confirming before moving forward. The technical instructions remain faithful to the source pattern, including the original needle size, gauge, yarn quantity, finished measurements, stitch counts, row numbers, and I-cord lengths.
At a Glance: What You Are Making
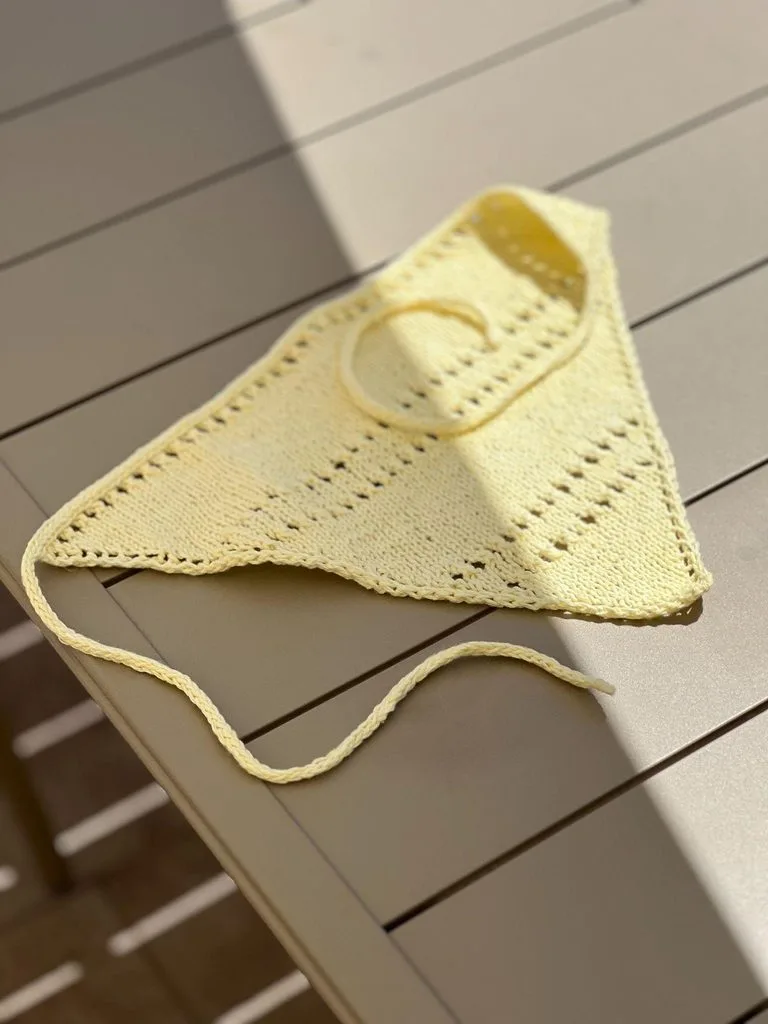
The bandana is worked from the tip up. Its triangular body grows through increases worked on every RS row, while the side finishes are incorporated as the piece is knitted. The decorative eyelet rows create the openwork bands visible across the finished fabric. Once the main body reaches the final stitch count, the stitches are held on barber cord or scrap yarn while the yarn is broken. The ties are then constructed with a 3-stitch I-cord, followed by an applied I-cord that binds the body stitches and continues directly into the second tie.
- Designer: DriftingInYarn, 2025
- Needles: 3 mm / US 2.5
- Yarn: 30 gr of Sport/Light DK weight yarn
- Approximate yarn length: 75 m / 83 y of similar weight yarn
- Gauge: 21 x 32 in 10 cm / 4″
- Blocked width: approximately 23.7 cm / 9.5″
- Blocked length: approximately 37.5 cm / 15″
- Total length including ties: approximately 101 cm / 40.5″
The original pattern also notes that the needle size should be adjusted if necessary to reach gauge. This is important because the listed finished measurements are given after blocking, so both gauge and blocking influence the final proportions.
Materials and Preparation
One of the strengths of this project is its short supply list. You need the specified needle size, a relatively small amount of yarn, and three simple notions. The source pattern lists a tapestry needle, barber cord or scrap yarn, and scissors.
Yarn Specification
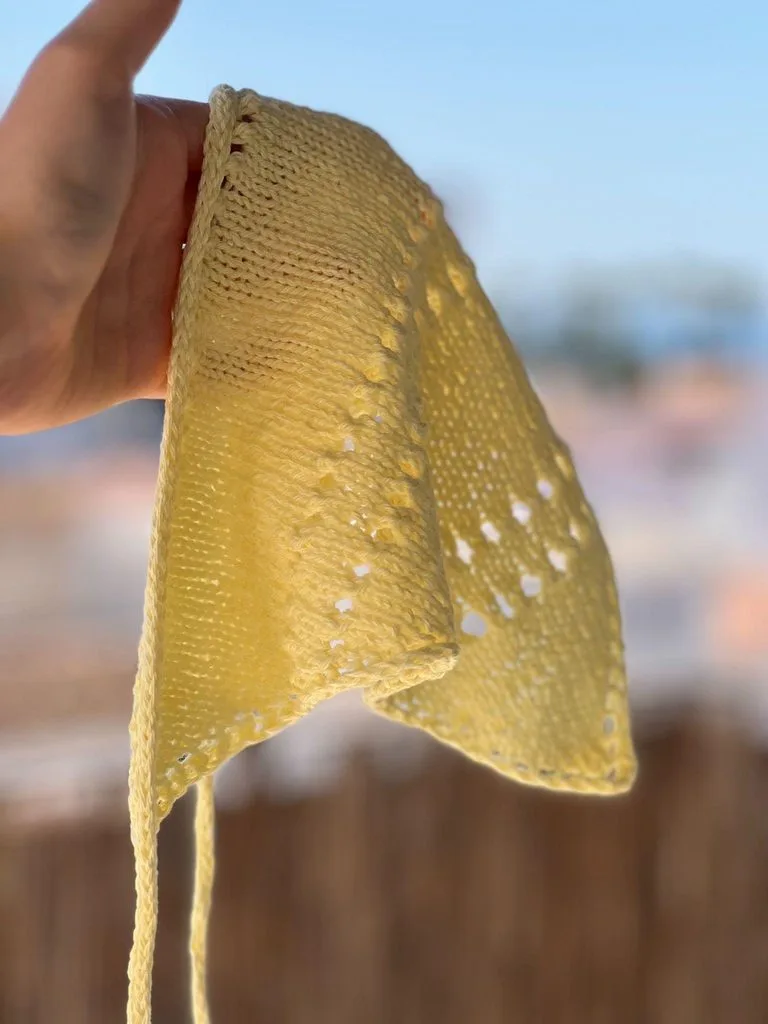
The pattern calls for 30 gr of Sport/Light DK weight yarn, corresponding to 75 m / 83 y of yarn of a similar weight. The sample uses BC Garn Allino, which is described as 50% cotton, 50% linen, with the skein information listed as 50 gr – 125 m / 137 y, in color 24.
Because the project uses less than a full ball, it is also suited to stash yarn. However, the original technical specification should remain your reference point when selecting a substitute: the yarn should be of a similar Sport/Light DK weight, and you should check gauge rather than relying on the label alone.
Gauge and Needle Size
The stated gauge is 21 x 32 in 10 cm / 4″. The specified needles are 3 mm / US 2.5. The pattern explicitly advises adjusting the needle size if necessary to reach gauge.
Before beginning the full bandana, treat gauge as a useful checkpoint rather than a formality. The project has measured width and length, and the eyelet pattern depends on controlled increases and decreases. If your gauge is substantially different, the finished dimensions can also differ. The safest approach is to work toward the stated gauge with the yarn you have selected.
Notions
- Tapestry needle
- Barber cord or scrap yarn
- Scissors
Abbreviations Used in the Pattern
The source defines the following abbreviations. Keep this list nearby while working, especially during the charted section.
- st/sts — stitch/stitches
- K — knit
- P — purl
- YO — yarn over
- Slk — slip 1 stitch knitwise, with yarn at back
- Slp — slip 1 stitch with yarn purlwise, with yarn in front
- K2tog — knit 2 stitches together
The pattern also uses the terms RS for right side and WS for wrong side. During the I-cord finishing section, the instructions use k2tog through the back loop for the applied I-cord join.
Construction Map Before You Start
The easiest way to understand the project is to divide it into five stages. First comes the 4-stitch cast-on and the setup row. Second is Chart A, where the small triangular beginning grows through increases. Third is Chart B, which introduces the longer eyelet pattern and additional stockinette sections. Fourth is the final body section ending at 83 stitches. Finally, the body is finished with a continuous I-cord construction.
- Cast on 4 stitches.
- Work the setup row on the WS.
- Complete Chart A and its repeated Rows 5 and 6.
- Move into Chart B and follow the specified eyelet and stockinette repeats.
- Reach the final stitch count of 83 and place the stitches on barber cord or scrap yarn.
- Break the yarn.
- Work the first 3-stitch I-cord for 30 cm / 12″.
- Return the body stitches to the working needle and work the applied I-cord.
- Continue the second 3-stitch I-cord for 30 cm / 12″.
- Weave in the ends.
Beginning at the Tip
The bandana begins with 4 stitches. Using 3 mm / US 2.5 needles, cast on 4 stitches with a long tail cast-on method. Turn the work and knit the setup row.
Set-Up Row
Set-Up Row (WS): P, K, K, Slp
This short setup row establishes the edge treatment and prepares the fabric for the first charted increase sequence. Because the project is small at this point, it is worth slowing down and confirming that you have exactly 4 stitches before turning to Row 1.
Chart A: Establishing the Triangle
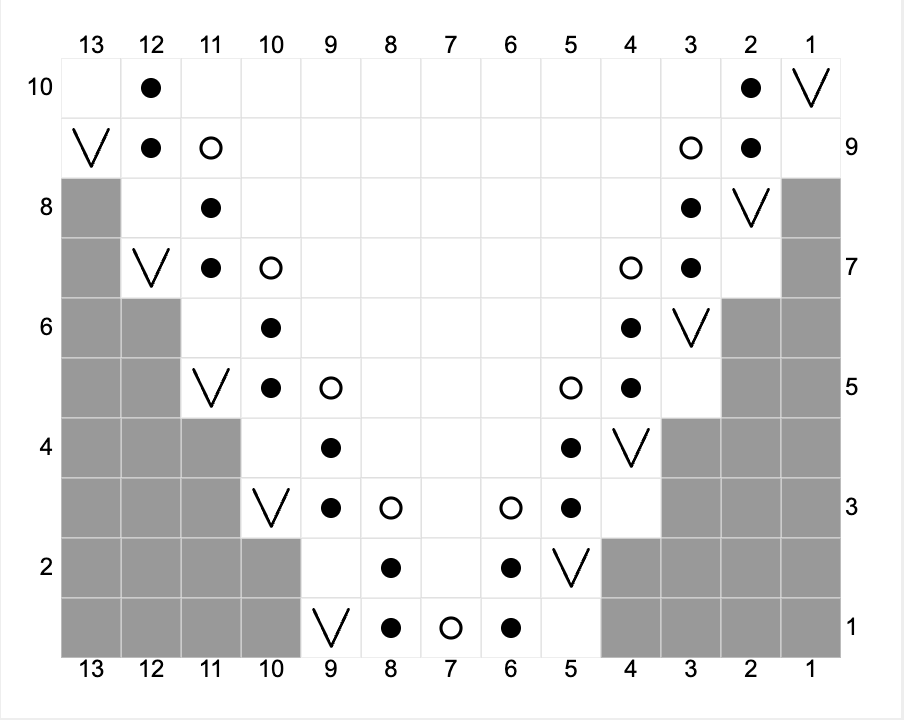
Chart A is the first shaping stage. The written instructions are particularly helpful here because they identify the increase count in the right-side rows. The important idea is that the bandana grows from the point, rather than beginning with a wide edge and narrowing toward the tip.
Chart A Written Rows
Row 1 (RS): K, P, YO, P, Slk (increased 1 st)
Row 2 (WS): P, K, P, K, Slp
Row 3 (RS): K, P, YO, K, YO, P, Slk (increased 2 sts)
Row 4 (WS): P, K, P3, K, Slp
Row 5 (RS): K, P, YO, K to last 2 sts, YO, P, Slk (increased 2 sts)
Row 6 (WS): P, K, P to last 2 sts, K, Slp
Rows 5 and 6 are then repeated 9 times in total, producing 18 increased stitches. At that checkpoint, the stitch count is 25.
Chart A Checkpoint
When you finish the Chart A section, stop and count. The required checkpoint is 25 stitches. This is one of the most useful places to catch a missed yarn over or an accidental extra stitch before proceeding to Chart B.
A practical way to troubleshoot the opening triangle is to compare both sides visually. The increases should produce a balanced triangular shape, while the edge stitches create the neat finishing lines along the sides. If your stitch count is not 25, do not continue by guessing where the difference occurred; review the increase rows and the repeated Rows 5 and 6.
Chart B: Expanding the Body and Eyelet Bands
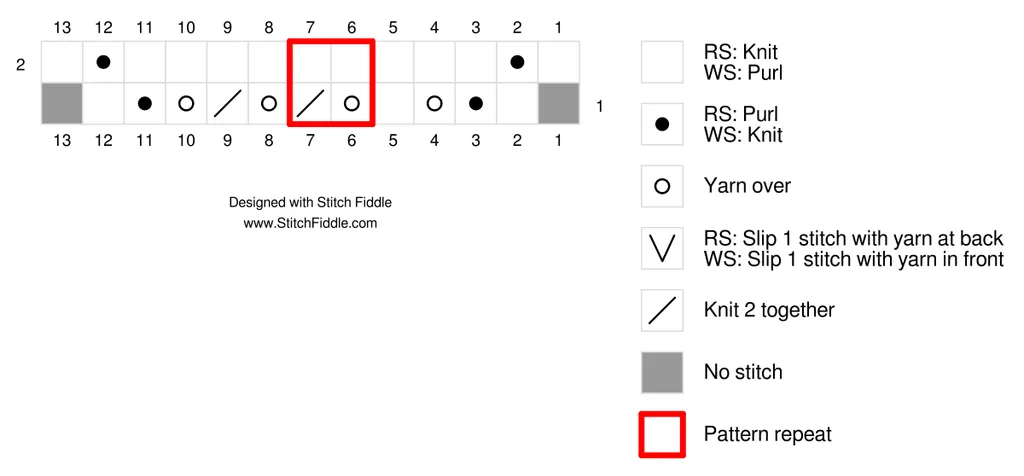
Once the body reaches 25 stitches, Chart B takes over. The source specifies the reading order as follows: knit stitches 1–4, repeat stitches 5–6 till 2 stitches are left, knit stitches 25, 26, 27.
The first decorative section is an eyelet row followed by a wrong-side row.
Eyelet Row 23 (RS): K, P, YO, K, (YO, K2tog) – repeat () to last 2 sts, YO, P, Slk (increased 2 sts)
Row 24 (WS): P, K, P to last 2 sts, K, Slp
The next four rows return to the stockinette stitch pattern represented by Rows 5 and 6:
Rows 25–28: Repeat stockinette stitch pattern (Rows 5 & 6) – 2 times in total (4 rows)
Then the eyelet section returns:
Rows 29 & 30: Repeat Eyelet Row 23 & Row 24
The stitch count at this stage is 33.
Understanding the Repeating Body Rhythm
From this point, the pattern alternates between growth through the stockinette rows and decorative eyelet bands. This rhythm is useful to remember because it gives you a visual checkpoint as well as a numerical one.
First Long Stockinette Section
Repeat Rows 5 & 6 – 10 times in total (20 rows).
Then repeat Rows 23–30.
The resulting stitch count is 61.
Second Long Stockinette Section
Repeat Rows 5 & 6 – 10 times in total (20 rows).
Then repeat Rows 23 & 24.
The final stitch count is 83.
These stitch-count milestones—25, 33, 61, and 83—are excellent checkpoints. They allow you to verify the structure of the project without trying to judge every row only by appearance.

How to Use the Charts Without Losing Your Place
The charts are especially useful for seeing the eyelet architecture. The visual key distinguishes knit and purl stitches, yarn overs, slipped stitches, K2tog, and areas where there is no stitch. The red-outlined pattern repeat in the chart helps identify the repeated portion of the lace structure.
If you prefer written instructions, use the written rows as your primary guide and the chart as a visual confirmation. If you prefer charts, mark your current row and keep the stitch count checkpoints nearby. Either approach works best when you avoid trying to memorize the entire sequence.
Three Useful Checkpoints
- 25 stitches: end of the Chart A growth section.
- 33 stitches: after the first Chart B eyelet sequence.
- 61 stitches: after the next 20-row stockinette section and repeat of Rows 23–30.
- 83 stitches: final body count before moving to the I-cord finishing.
Holding the Main Body
After completing the final section and reaching 83 stitches, place the stitches on the barber cord or a scrap piece of yarn and break the yarn.
This is an intentional pause in the construction. Do not treat the held stitches as a bind-off; they need to return to the working needle for the applied I-cord stage. Keep the live stitches secure and make sure none are accidentally dropped while you prepare the first tie.
Building the First I-Cord Tie
The finishing begins with a fresh 3-stitch I-cord. Using 3 mm / US 2.5 needles, cast on 3 stitches.
Knit I-cord:
K3
Slip all stitches back to the left needle, then repeat until the I-cord measures 30 cm / 12″.
The 3-stitch I-cord creates the first narrow tie. The length is specified in the original pattern, so use the measurement rather than stopping based only on appearance.
Applied I-Cord: Joining the Tie to the Bandana
Now return the main body stitches from the barber cord to the working needle. The instructions specify that the RS should be facing you and that the I-cord stitches are at the beginning of the round.
The applied I-cord sequence is:
K, K, k2tog through the back loop, with the last stitch from the I-cord knitted together with the next stitch from the bandana.
Then slip the 3 stitches back to the left needle and repeat until all of the bandana stitches have been knitted into the applied I-cord.
This is the key finishing transition. The I-cord is not simply sewn onto the body afterward; it is worked directly against the live bandana stitches. Keeping the body positioned correctly with the RS facing you helps preserve the intended finish.
Continue the Second Tie
After all the bandana stitches have been incorporated, continue knitting the 3-stitch I-cord until it measures another 30 cm / 12″.
Finally, weave in your ends.
Blocking and Finished Measurements
The source gives finished measurements after blocking. The bandana measures approximately 23.7 cm / 9.5″ in width (A) and 37.5 cm / 15″ in length (B). The total length with ties, marked as (C), is approximately 101 cm / 40.5″.
Because these measurements are specifically described as post-blocking dimensions, blocking is part of the finishing process when comparing your project to the stated measurements. The openwork eyelet sections can also become easier to see once the fabric has been arranged and blocked.
Common Troubleshooting Checkpoints
My stitch count is wrong after Chart A
The required count is 25 stitches. Recheck the increase rows and the nine total repetitions of Rows 5 and 6. The source specifies 18 increased stitches during those repetitions.
The eyelet pattern does not look symmetrical
Use the chart and the written Eyelet Row 23 together. Pay particular attention to the sequence (YO, K2tog) and the yarn overs near the edges. A missing yarn over or an extra decrease can alter the visual balance.
I reached the wrong count after a Chart B section
Use the pattern’s fixed checkpoints: 33 stitches, then 61 stitches, and finally 83 stitches. If a checkpoint is wrong, review the most recent increase and eyelet sequence before continuing.
The I-cord feels uneven
Keep the 3-stitch I-cord tension consistent and measure the first tie to the specified 30 cm / 12″. During the applied I-cord, work the joining decrease exactly as written: k2tog through the back loop.
Quick Project Reference
- Cast-on: 4 stitches
- Setup: Set-Up Row (WS): P, K, K, Slp
- Chart A checkpoint: 25 stitches
- First Chart B checkpoint: 33 stitches
- Second major checkpoint: 61 stitches
- Final body count: 83 stitches
- First I-cord: 3 stitches, 30 cm / 12″
- Applied I-cord: K, K, k2tog through the back loop; slip 3 stitches back to the left needle and repeat
- Second I-cord: 3 stitches, 30 cm / 12″
- Needles: 3 mm / US 2.5
- Gauge: 21 x 32 in 10 cm / 4″
- Yarn: 30 gr Sport/Light DK, approximately 75 m / 83 y
Frequently Asked Questions
Is the Sunny Bandana a large project?
No. The source describes it as a quick and easy design using one needle size and less than a ball of yarn. The finished blocked body is approximately 23.7 cm / 9.5″ wide and 37.5 cm / 15″ long, with approximately 101 cm / 40.5″ total length including ties.
What yarn weight is required?
The pattern specifies 30 gr of Sport/Light DK weight yarn, corresponding to 75 m / 83 y of similar weight yarn.
What needles are used?
The specified needle size is 3 mm / US 2.5. The pattern advises adjusting needle size if necessary to reach the stated gauge.
What is the final stitch count?
The completed bandana body reaches 83 stitches before the stitches are placed on barber cord or scrap yarn for the I-cord finishing.
How long are the ties?
The first 3-stitch I-cord is worked until it measures 30 cm / 12″. After the applied I-cord passes across the body, the second 3-stitch I-cord is also continued until it measures 30 cm / 12″.
Can I use leftover yarn?
The original pattern specifically notes that the project is great for using awkward quantities in your stash. A substitute should still be of a similar weight, and gauge should be checked rather than assumed.
Final Finishing Checklist
- Confirm the main body has reached 83 stitches.
- Place the live body stitches on barber cord or scrap yarn.
- Break the yarn as instructed.
- Cast on 3 stitches for the first I-cord.
- Work the first I-cord to 30 cm / 12″.
- Return the body stitches to the working needle with RS facing you.
- Position the I-cord stitches at the beginning of the round.
- Work the applied I-cord using K, K, k2tog through the back loop.
- Continue until all body stitches have been incorporated.
- Continue the second 3-stitch I-cord to 30 cm / 12″.
- Weave in the ends.
- Block and compare the finished dimensions with the stated measurements.
Enjoy the Finished Sunny Bandana
The Sunny Bandana combines a small amount of yarn with a construction that is much more interesting than its compact size suggests. The triangle grows systematically from a 4-stitch beginning, the eyelet bands add texture and visual rhythm, and the final I-cord creates a clean transition from the knitted body into the ties.
The most reliable way to approach the pattern is to treat the stitch counts as checkpoints rather than simply racing through the row numbers. Confirm 25 stitches after Chart A, 33 stitches after the first Chart B sequence, 61 stitches after the next major repeat, and 83 stitches before beginning the finishing process. Those numbers provide a clear map through the entire project.
Once the body is complete, the continuous I-cord construction brings the project together without requiring a separate sewn-on edging. Measure each tie carefully, work the applied section with the specified decrease, and finish by weaving in the ends. After blocking, the result is a lightweight triangular bandana with approximately 101 cm / 40.5″ of total length including the ties.
The original design is by DriftingInYarn, 2025. The source pattern is intended for personal use only. The designer also invites makers to share their projects on Instagram using #sunnybandana and tagging @driftinginyarn.
Happy knitting!