
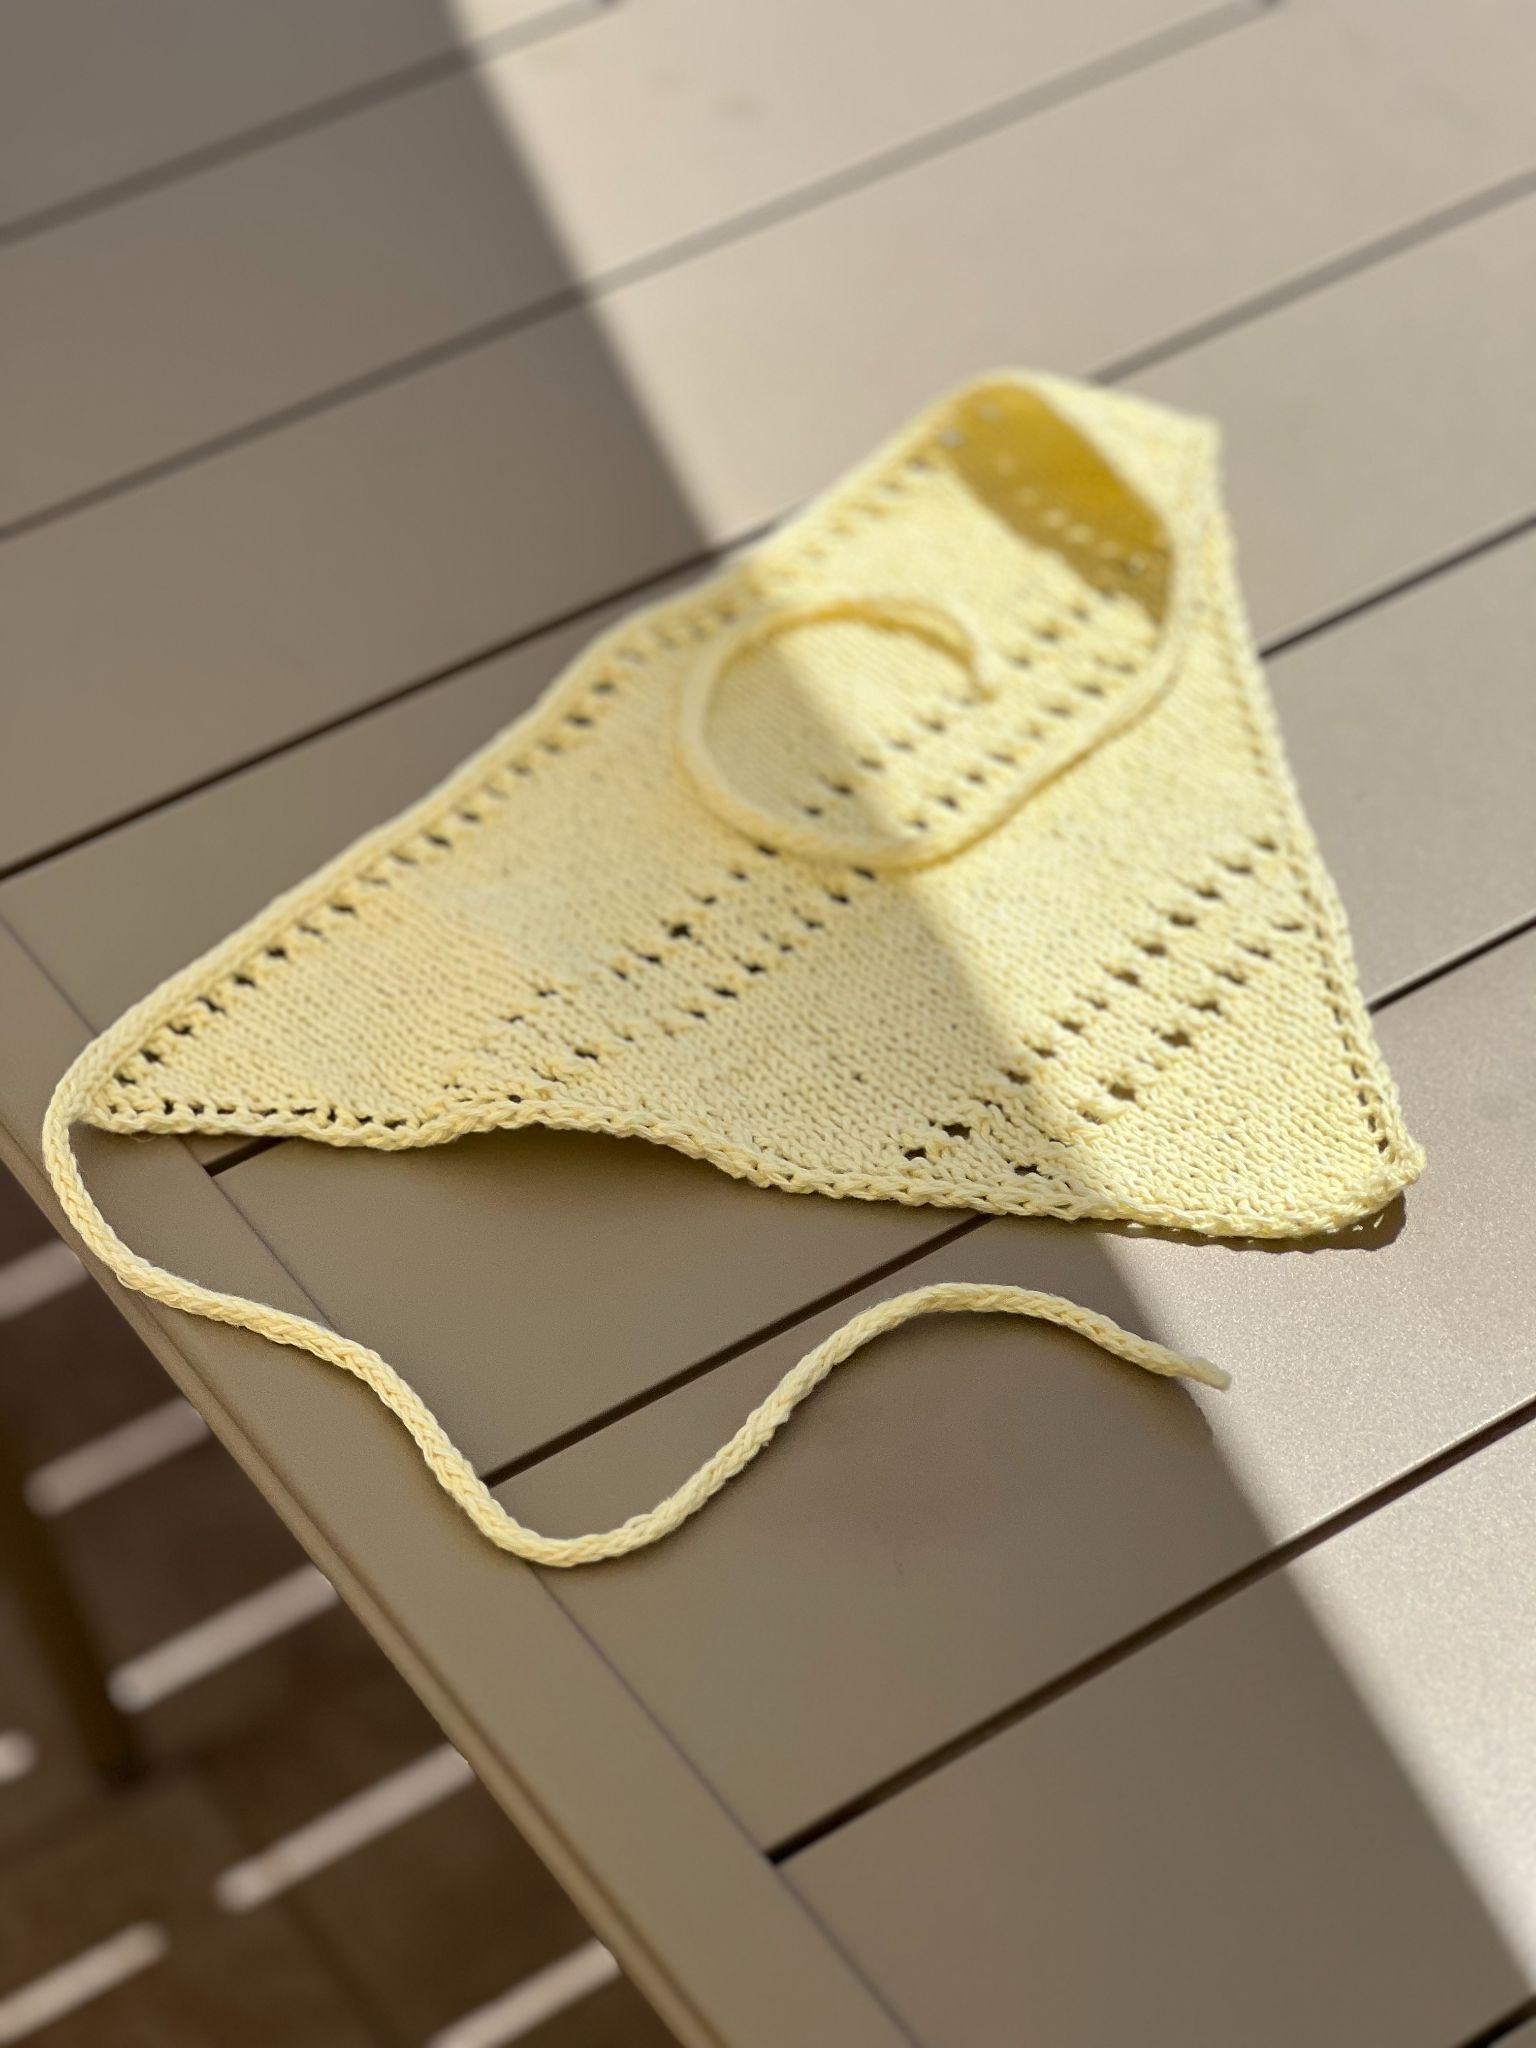
The Sunny Bandana is a small knitted accessory with a carefully staged construction: a four-stitch beginning grows through repeated increases, eyelet bands appear at measured points, and the live body stitches ultimately become part of a continuous applied I-cord. This guide is organized around checkpoints and construction decisions so the pattern can be followed as a complete project rather than as a disconnected list of rows.
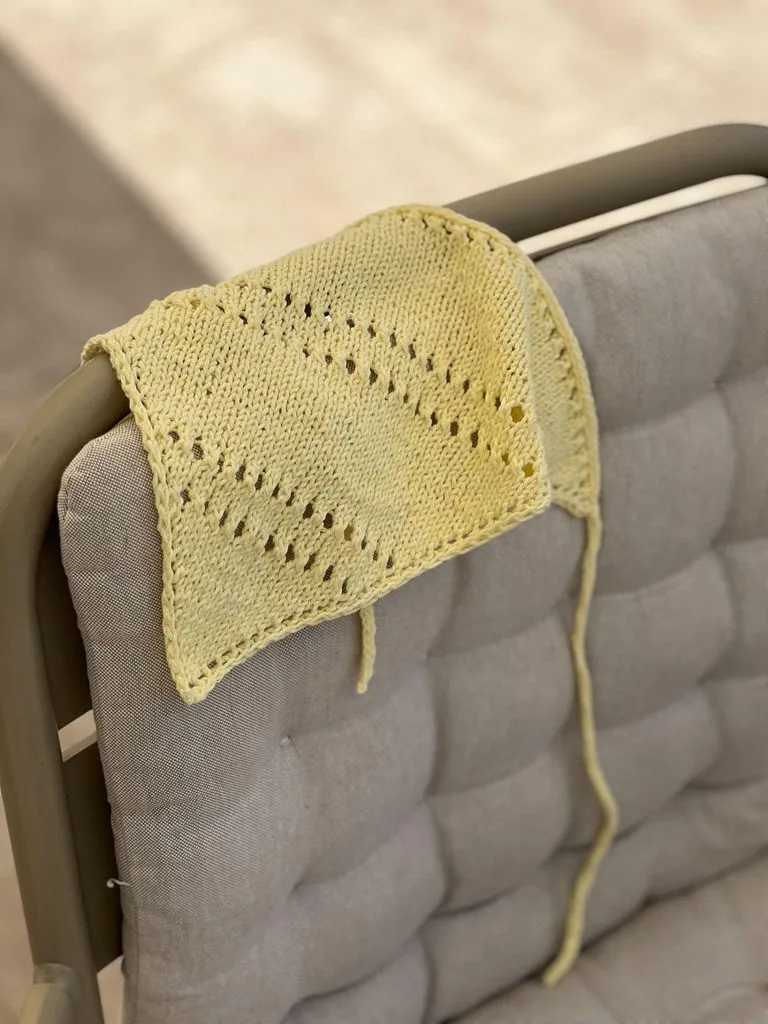
The technical instructions remain faithful to the source pattern by DriftingInYarn from 2025. No stitch count, row number, measurement, yarn quantity, needle size, or finishing length has been altered. The explanatory sections simply make the progression easier to navigate while the original written pattern and charts remain the authority for the actual knitting.
For a compact accessory, the Sunny Bandana offers several useful techniques: increases, yarn overs, K2tog, stockinette-style repeated rows, slipped edge stitches, chart reading, live-stitch holding, and an applied I-cord. The project becomes much easier to follow when you recognize its recurring rhythm: the fabric grows during the increase sections, decorative eyelet structures interrupt that growth at defined points, and the body then expands again.
Keep the original charts close while working. Photographs can help you recognize the shape and texture, but the written instructions determine the exact stitch sequence. The four major stitch counts—25, 33, 61, and 83—are especially valuable as navigation markers because they confirm the completion of major repeated sections.
Sunny Bandana at a Glance
- Project: Sunny Bandana
- Designer: DriftingInYarn, 2025
- Needles: 3 mm / US 2.5
- Yarn: 30 gr Sport/Light DK weight
- Approximate yarn requirement: 75 m / 83 y
- Sample yarn: BC Garn Allino, 50% cotton, 50% linen, 50 gr – 125 m / 137 y, color 24
- Gauge: 21 x 32 in 10 cm / 4″
- Blocked width: approximately 23.7 cm / 9.5″
- Blocked length: approximately 37.5 cm / 15″
- Total length including ties: approximately 101 cm / 40.5″
- Starting stitch count: 4 stitches
- Main body checkpoints: 25, 33, 61, and 83 stitches
- I-cord: 3 stitches, 30 cm / 12″ for each tie section
Tools, Yarn, Gauge, and Preparation
Choose the specified needle size of 3 mm / US 2.5. The pattern calls for approximately 30 gr of Sport/Light DK weight yarn, with an approximate requirement of 75 m / 83 y. The sample is worked in BC Garn Allino, a 50% cotton and 50% linen yarn, using color 24.
The stated gauge is 21 x 32 in 10 cm / 4″. Gauge matters because the final measurements are given after blocking. The source advises adjusting needle size if necessary to reach the stated gauge. When substituting yarn, stay with the specified Sport/Light DK weight and check gauge rather than assuming that a label alone will produce the same fabric.
Useful Abbreviations in the Written Pattern
- K: knit
- P: purl
- YO: yarn over
- K2tog: knit two together
- Slp: slip stitch
- Slk: slipped knit/edge instruction as written in the source
- RS: right side
- WS: wrong side
- I-cord: three-stitch cord used for the ties and applied edging
Because the source uses its own abbreviations exactly as written, keep the original row wording beside you while knitting. In particular, do not replace the final slipped-stitch instructions or the applied I-cord sequence with a different finishing method.
Understand the Triangle Before Following the Pattern
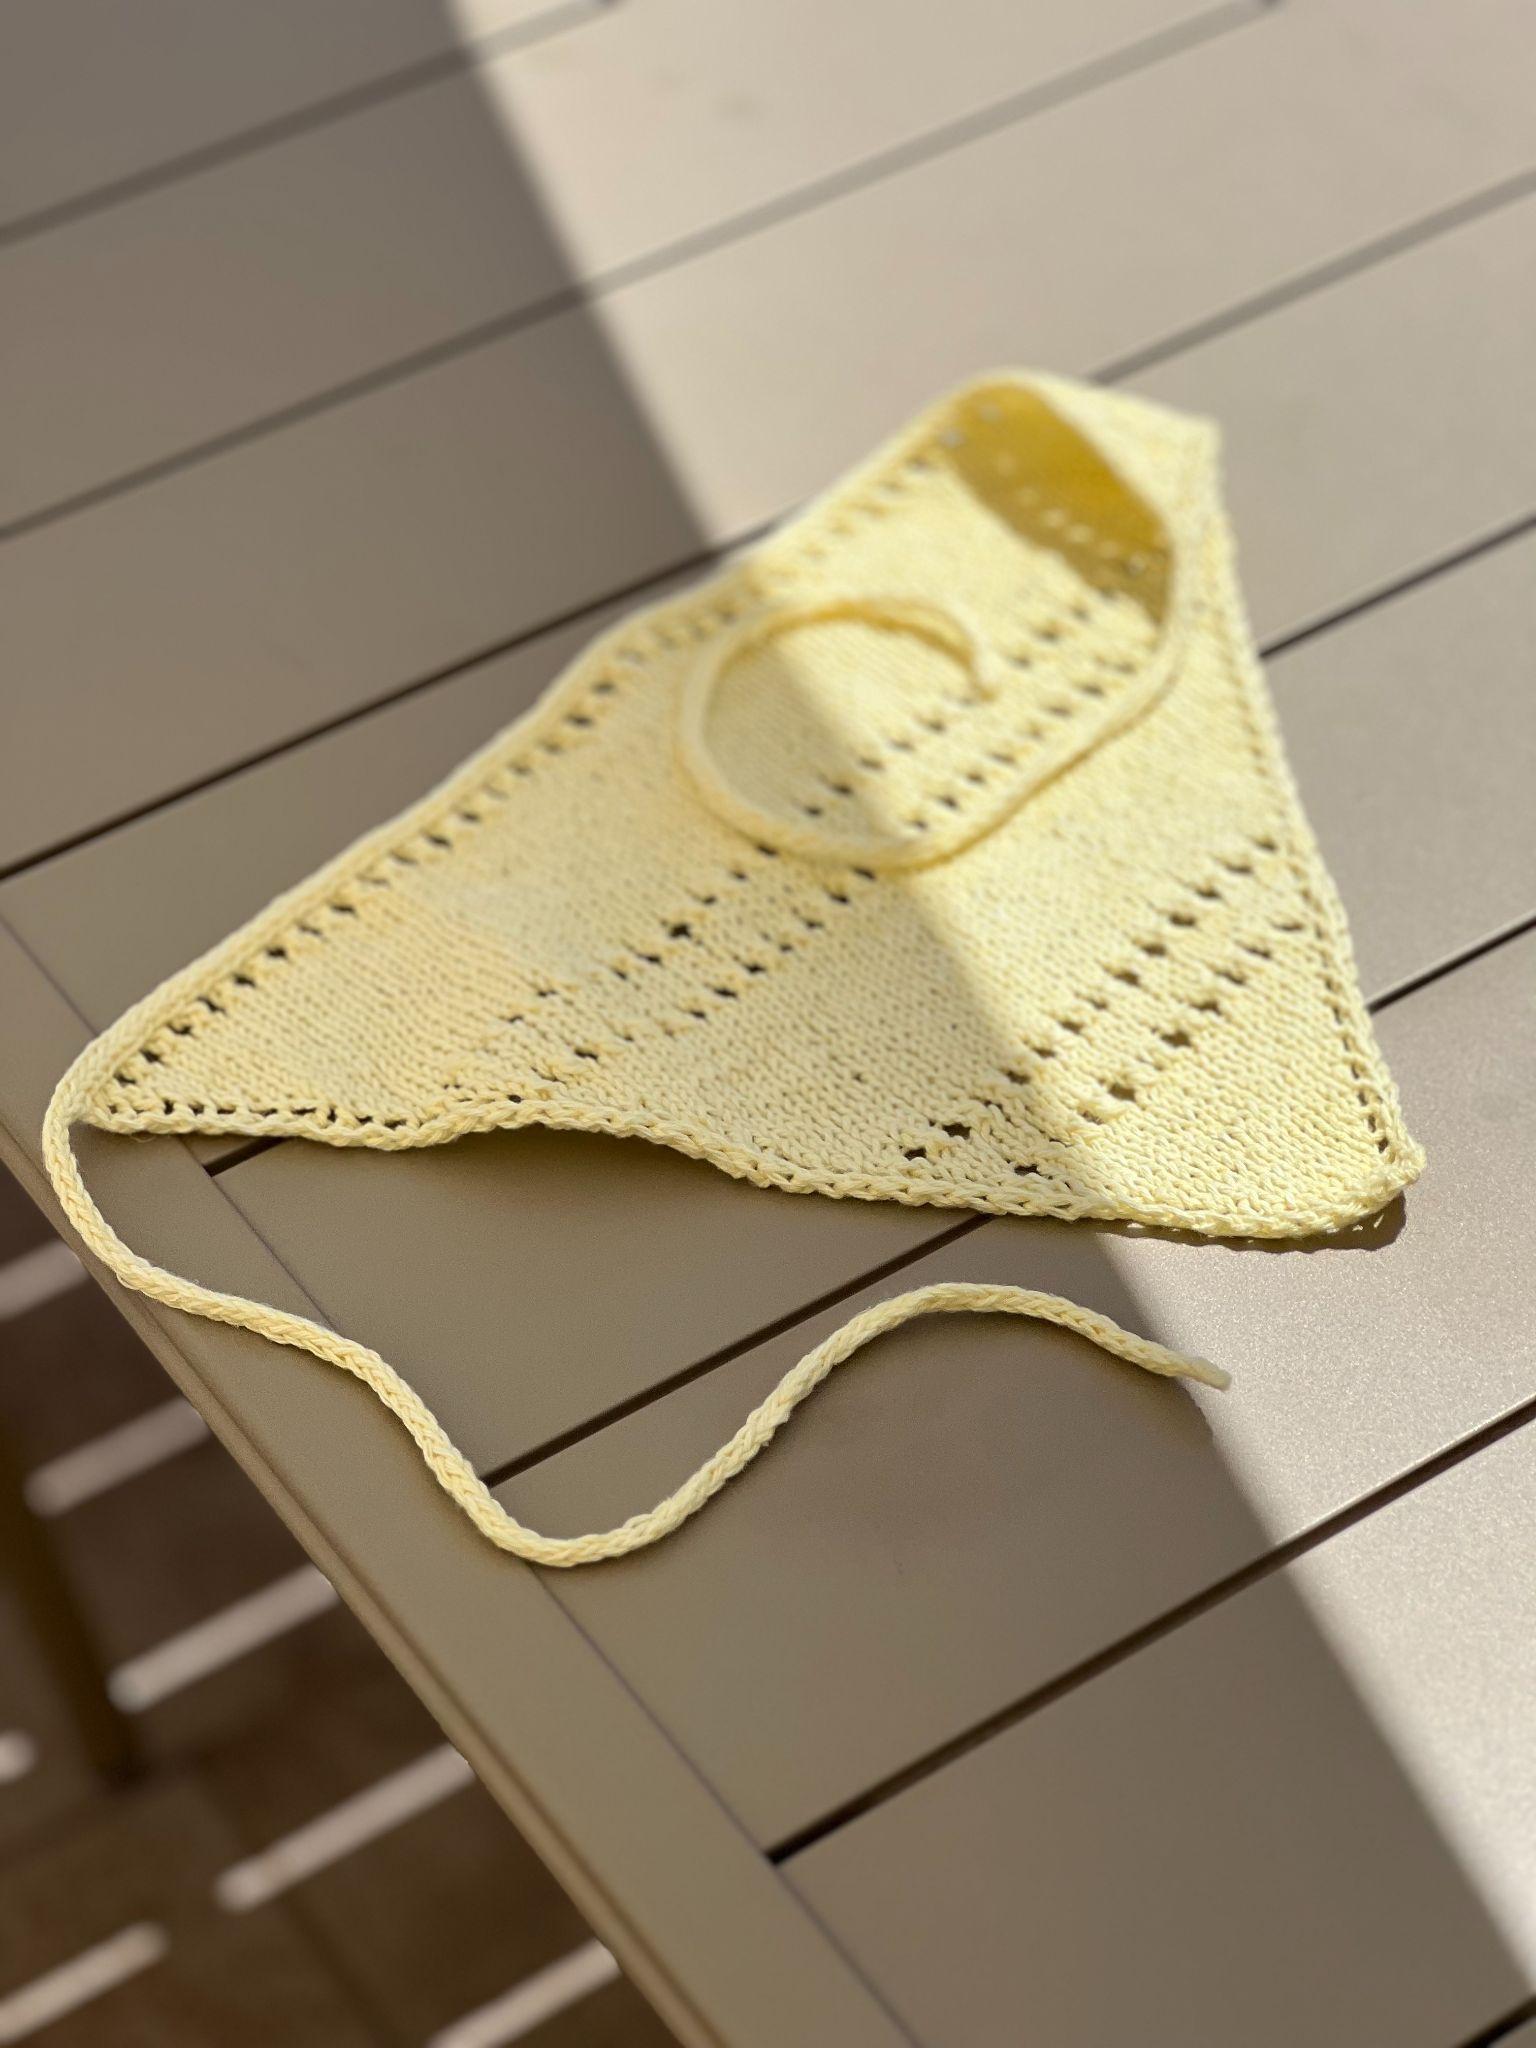
The most useful thing to understand about this project is its direction of growth. The bandana begins at the pointed tip. The first few rows establish the center and edge treatment, and the repeated right-side increases steadily add stitches. As the stitch count grows, eyelet rows appear at intervals, creating the openwork pattern visible in the finished accessory.
This means that the four major stitch counts are more than simple numbers. They are landmarks in the construction. The first major landmark is 25 stitches after the initial increase section. The next is 33 stitches after the first eyelet sequence in Chart B. The body later expands to 61 stitches, and finally to 83 stitches before the stitches are moved to a barber cord or scrap yarn for finishing.
Keeping those landmarks in mind makes the project easier to navigate. If your work does not match a checkpoint, the source does not prescribe a separate correction method; the safest response is to return to the written rows and chart and locate the discrepancy before continuing.
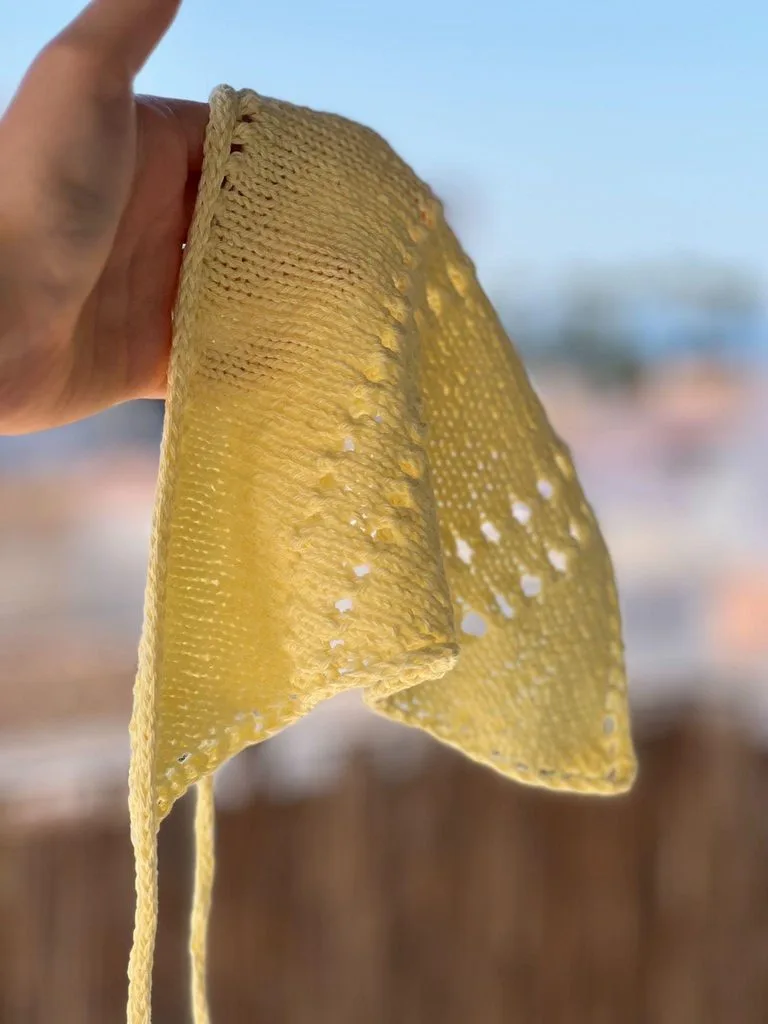
Part One: Build the Opening Point
Using 3 mm / US 2.5 needles, cast on 4 st with a long-tail cast-on method. Turn and work the setup row:
Set-Up Row (WS): P, K, K, Slp
This short setup establishes the starting edge treatment. It is worth identifying RS and WS immediately, because the pattern alternates between them throughout the shaping sequence.
Chart A: The Opening Sequence
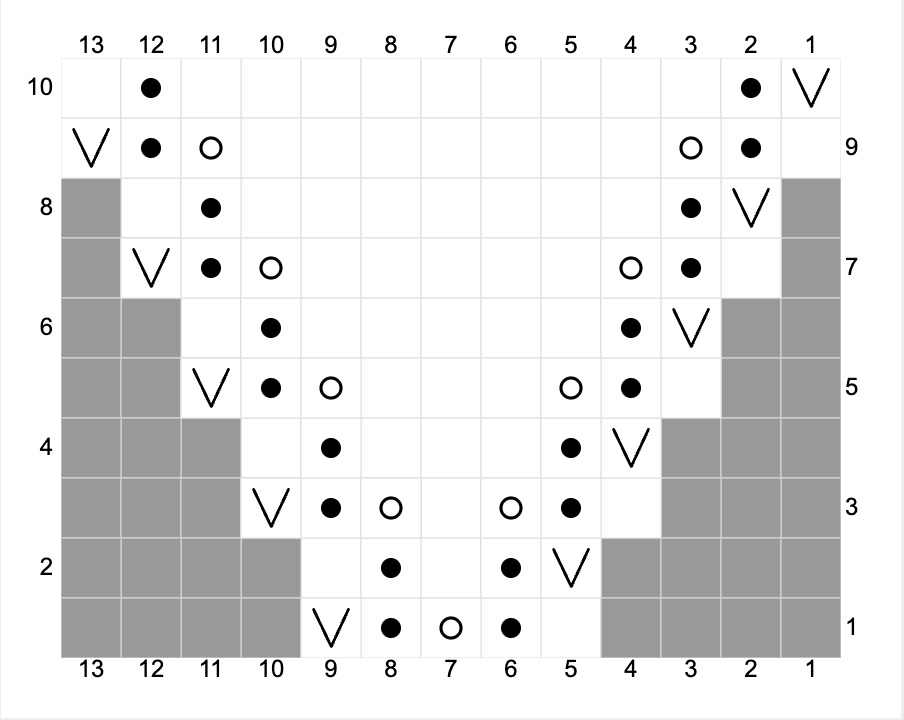
- Row 1 (RS): K, P, YO, P, Slk (increased 1 st)
- Row 2 (WS): P, K, P, K, Slp
- Row 3 (RS): K, P, YO, K, YO, P, Slk (increased 2 sts)
- Row 4 (WS): P, K, P3, K, Slp
- Row 5 (RS): K, P, YO, K to last 2 sts, YO, P, Slk (increased 2 sts)
- Row 6 (WS): P, K, P to last 2 sts, K, Slp
Repeat Rows 5 & 6 in total of 9 times, increasing 18 sts. The required stitch count at the end of this section is 25 stitches.
The First Major Checkpoint: 25 Stitches
Pause here and count deliberately. The source gives 25 stitches as the checkpoint, and this is the first place where a missed yarn over or an accidental extra stitch can become much harder to diagnose later. If the count is not 25, compare the work with Rows 5 and 6 and the chart before moving into the next section.
A useful habit is to count after completing the ninth total repetition rather than trying to remember every increase mentally. The repeated rhythm is simple, but it is also easy to lose your place when working several similar rows in succession.
Part Two: Enter the Eyelet Pattern
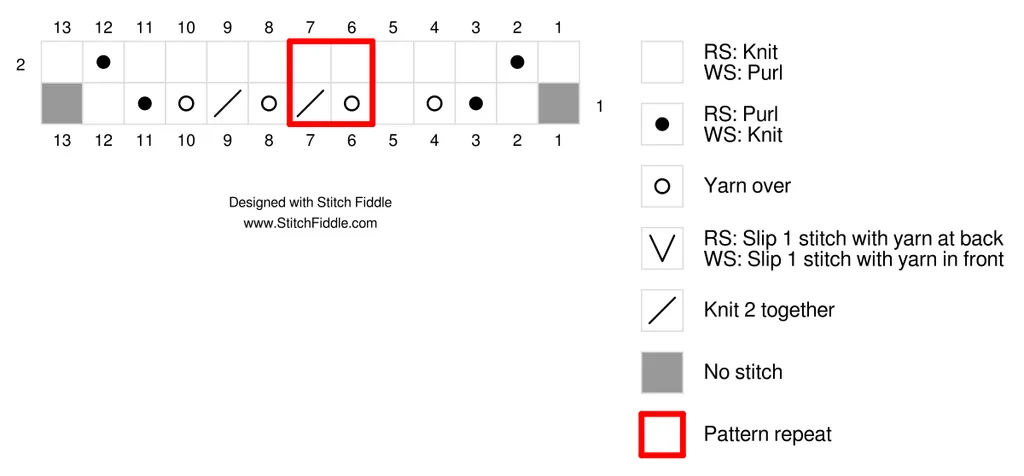
Once the body reaches 25 stitches, the pattern changes from the opening point-building section into the larger repeated structure. The source specifies the Chart B reading order as follows: knit stitches 1–4, repeat stitches 5–6 till 2 stitches are left, knit stitches 25, 26, 27.
Chart B combines the growing stockinette-style sections with repeated eyelet rows. The eyelets are formed by yarn overs paired with K2tog decreases inside the repeated sequence, while the edge increases continue to widen the bandana.
The First Eyelet Cycle
The first decorative row is:
Eyelet Row 23 (RS): K, P, YO, K, (YO, K2tog) – repeat () to last 2 sts, YO, P, Slk (increased 2 sts)
Follow it with:
Row 24 (WS): P, K, P to last 2 sts, K, Slp
Then work Rows 25–28 by repeating the stockinette stitch pattern represented by Rows 5 and 6, 2 times in total (4 rows).
For Rows 29 and 30, repeat Eyelet Row 23 & Row 24. The stitch count at this checkpoint is 33 stitches.
Use the Charts as a Second Set of Eyes

The chart key is useful when the written sequence starts to look repetitive. Rather than trying to memorize the appearance of every eyelet, compare the knitted fabric with the chart structure and then verify the exact row instructions. This is particularly helpful for the yarn-over and K2tog combination, because those operations create the open spaces without permanently increasing the stitch count inside the repeated eyelet pair.
The edge increases are a separate part of the shaping logic. Keep the eyelet repeat and the edge treatment conceptually separate when checking your work: the eyelet motif creates the decorative openings, while the stated increase counts are what move the triangular body from one checkpoint to the next.
Part Three: Expand the Main Body
After reaching 33 stitches, the pattern returns to the repeated shaping rhythm. The next block is deliberately longer, so this is a good point to use a row counter or a written tally.
Repeat Rows 5 & 6 – 10 times in total (20 rows). Then repeat Rows 23–30. At the end of this sequence, the stitch count should be 61 stitches.
The 61-stitch checkpoint is especially valuable because the work has now passed through another long growth section and another complete eyelet sequence. If your count is off, review the most recent repeated block rather than immediately changing the next section.
The Final Expansion Block
Continue with another 10 total repetitions of Rows 5 & 6 (20 rows). After that, repeat Rows 23 & 24. The final body checkpoint is 83 stitches.
At 83 stitches, place the stitches on the barber cord or a scrap piece of yarn and break the yarn. This is the transition from the knitted triangle into the finishing construction.
Four Numbers That Keep You Oriented
| Checkpoint | What it confirms |
|---|---|
| 25 stitches | Completion of the initial Chart A increase section. |
| 33 stitches | Completion of the first Chart B eyelet sequence. |
| 61 stitches | Completion of the next long shaping block and Rows 23–30. |
| 83 stitches | Final body count before moving the live stitches to barber cord or scrap yarn. |
These numbers should not be treated as substitutes for the row instructions. They are verification points. If one is incorrect, the source does not specify a custom correction, so compare the work with the preceding written instructions and chart before progressing.
Reading the Eyelet Repeats Accurately
Eyelet knitting benefits from consistent tension and careful attention to the difference between a yarn over and a decrease. The written Eyelet Row 23 includes both YO and K2tog. The paired operations are part of the decorative repeat, while the row also contains the edge yarn overs that contribute to the overall shaping.
If the fabric looks visually uneven, first compare the section with Chart B and then read the exact row. Do not assume that an open space that looks slightly different should be corrected by adding or removing a stitch. The safest approach is to identify whether the written sequence was followed exactly.
Likewise, the wrong-side rows are not filler. Rows such as Row 24 and Row 6 provide the return structure that supports the following right-side pattern. Keeping RS and WS clearly identified helps prevent the decorative sections from drifting.
Turning the Body into the First Tie
For the finishing section, use 3 mm / US 2.5 needles and cast on 3 stitches.
Work the first I-cord by knitting K3, then slipping all stitches back to the left needle and repeating until the cord measures 30 cm / 12″.
Next, place the main body stitches from the barber cord back onto the working needle with the RS facing you and the I-cord stitches at the beginning of the round.
Applied I-Cord: The Joining Action
The applied I-cord is the part of the finishing where the cord becomes attached directly to the live bandana edge. Work:
K, K, k2tog through the back loop, with the last stitch from the I-cord knitted together with the next stitch from the bandana.
Then slip 3 stitches back to the left needle and repeat until all the stitches from the bandana have been incorporated.
Position matters here. The source specifically states that the RS should face you and that the I-cord stitches should be at the beginning of the round. Do not replace this construction with a sewn-on cord if you want to follow the source method. The applied I-cord is designed to create a continuous transition from one tie, across the triangular body, and into the second tie.
Finish the Second 30 cm / 12″ Tie
Once every body stitch has been incorporated into the applied I-cord, continue knitting the 3-stitch I-cord until it measures 30 cm / 12″. Finally, weave in the ends.
Blocking and Final Shape
The finished measurements in the source are given after blocking, so blocking is the final shaping stage rather than an optional measurement trick. The blocked body is approximately 23.7 cm / 9.5″ wide and 37.5 cm / 15″ long. Including the ties, the total length is approximately 101 cm / 40.5″.
Blocking also helps the eyelet sections read more clearly. Arrange the triangular body so that the shape is even, and compare the result with the stated measurements after blocking. The measurements are approximate, so they are best used as a reference rather than as a reason to force the fabric into an unnatural shape.
Practical Checkpoints for a Calm Knit
- Before starting, confirm the needle size is 3 mm / US 2.5 and the yarn is approximately 30 gr Sport/Light DK.
- After the setup row, make sure you are oriented correctly between RS and WS.
- After Chart A, count 25 stitches.
- After the first Chart B eyelet sequence, count 33 stitches.
- After the longer repeat and Rows 23–30, count 61 stitches.
- After the final growth section and Rows 23 & 24, count 83 stitches.
- Before the first tie, move the body stitches to barber cord or scrap yarn and break the yarn.
- Make the first I-cord exactly 3 stitches and 30 cm / 12″.
- Keep the RS facing you when returning the body stitches for the applied I-cord.
- Use the exact applied I-cord sequence and continue the second tie to 30 cm / 12″.
- Weave in the ends and block the finished bandana.
Troubleshooting Without Changing the Pattern
The first stitch count is not 25
Return to Chart A and review Rows 5 and 6. The source requires those two rows to be repeated 9 times in total, producing 18 increased stitches. The checkpoint is 25 stitches.
The eyelets look inconsistent
Compare the work with Chart B and the written Eyelet Row 23. Check the repeated (YO, K2tog) sequence and the yarn overs near the edges. Avoid inventing a correction that is not stated in the pattern.
The 33-stitch checkpoint is wrong
Review the first Chart B passage: Eyelet Row 23, Row 24, Rows 25–28 repeated from Rows 5 and 6, and Rows 29–30 repeating Eyelet Row 23 and Row 24. The stated result is 33 stitches.
The later count does not reach 61 or 83
Check the long shaping blocks carefully. The pattern calls for Rows 5 & 6 – 10 times in total (20 rows), followed by the specified eyelet repeat. The checkpoints are 61 stitches and later 83 stitches.
The I-cord does not look even
Keep the I-cord at exactly 3 stitches and measure each tie to 30 cm / 12″. During the applied section, follow K, K, k2tog through the back loop and return the 3 I-cord stitches to the left needle after each joining sequence.
By the time you reach this section, the construction has already done the difficult work. The remaining steps are about securing the finish, blocking the fabric, and checking the finished dimensions against the source. The questions below collect the most useful specification checks without changing the pattern itself.
Sunny Bandana FAQ
Is this a crochet pattern?
No. The supplied source is a knitting pattern. It uses knitting needles, knit and purl stitches, yarn overs, K2tog, slipped stitches, and a three-stitch I-cord.
What size needles does the pattern use?
The specified size is 3 mm / US 2.5.
How much yarn is needed?
The source specifies 30 gr of Sport/Light DK weight yarn, approximately 75 m / 83 y. The sample uses BC Garn Allino, 50% cotton and 50% linen, 50 gr – 125 m / 137 y, color 24.
What are the most important stitch counts?
The key checkpoints are 25, 33, 61, and 83 stitches. The final body count is 83 stitches before the finishing process begins.
How long are the ties?
Each tie is made with a 3-stitch I-cord and is worked to 30 cm / 12″.
What is the gauge?
The stated gauge is 21 x 32 in 10 cm / 4″.
What are the blocked dimensions?
The source gives approximately 23.7 cm / 9.5″ wide, 37.5 cm / 15″ long, and approximately 101 cm / 40.5″ total length including the ties.
One-Page Construction Roadmap
- Using 3 mm / US 2.5 needles, cast on 4 stitches with a long-tail cast-on.
- Work Set-Up Row (WS): P, K, K, Slp.
- Work Chart A Rows 1–6 exactly as written.
- Repeat Rows 5 & 6 a total of 9 times, increasing 18 stitches.
- Confirm 25 stitches.
- Work Chart B beginning with its specified stitch-reading order.
- Work Eyelet Row 23 and Row 24.
- Work Rows 25–28, then Rows 29–30 as specified.
- Confirm 33 stitches.
- Repeat Rows 5 & 6 a total of 10 times, then repeat Rows 23–30.
- Confirm 61 stitches.
- Repeat Rows 5 & 6 a total of 10 times, then repeat Rows 23–24.
- Confirm 83 stitches.
- Place the live body stitches on barber cord or scrap yarn and break the yarn.
- Cast on 3 stitches for the I-cord.
- Work K3 and return the stitches to the left needle until the first cord measures 30 cm / 12″.
- Return the body stitches to the working needle with RS facing and the I-cord stitches at the beginning.
- Work the applied I-cord sequence until all body stitches are incorporated.
- Continue the second 3-stitch I-cord until it measures 30 cm / 12″.
- Weave in the ends and block.
Final Dimensions and Quality Check
Before considering the project complete, compare the blocked piece with the source measurements: approximately 23.7 cm / 9.5″ width, 37.5 cm / 15″ length, and approximately 101 cm / 40.5″ total length including ties. The body should have reached 83 stitches before the stitches were moved to the barber cord or scrap yarn.
Also check that the first and second I-cord sections each measure 30 cm / 12″, that the applied I-cord has been worked across all body stitches, and that the final ends have been woven in securely.
Last-Step Checklist
- 83-stitch body confirmed.
- Live stitches transferred to barber cord or scrap yarn.
- Yarn broken before beginning the I-cord finishing.
- First I-cord worked with 3 stitches to 30 cm / 12″.
- Body stitches returned with RS facing.
- I-cord stitches positioned at the beginning as specified.
- Applied I-cord worked with K, K, k2tog through the back loop.
- All body stitches incorporated into the applied edging.
- Second 3-stitch I-cord continued to 30 cm / 12″.
- Ends woven in.
- Bandana blocked and checked against the stated approximate measurements.
The Sunny Bandana is a good example of how a small knitted accessory can combine shaping, openwork, and finishing techniques in one continuous project. Its construction is easiest to manage when you think in landmarks: 4 stitches at the beginning, 25 after Chart A, 33 after the first eyelet passage, 61 after the next major repeat, and 83 before the I-cord finishing.
Keep the written rows and charts together, respect the RS and WS sequence, and use the stitch counts as checkpoints rather than replacing the pattern with them. Once the body is complete, the applied I-cord provides a continuous finish that carries the edging into the two ties. After the ends are woven in and the bandana is blocked, compare the finished piece with the stated approximate dimensions.
Pattern credit: Sunny Bandana, designed by DriftingInYarn, 2025. The original pattern states that it is designed for personal use only. The designer invites makers to share projects on Instagram using #sunnybandana and tagging @driftinginyarn.
Happy knitting!