
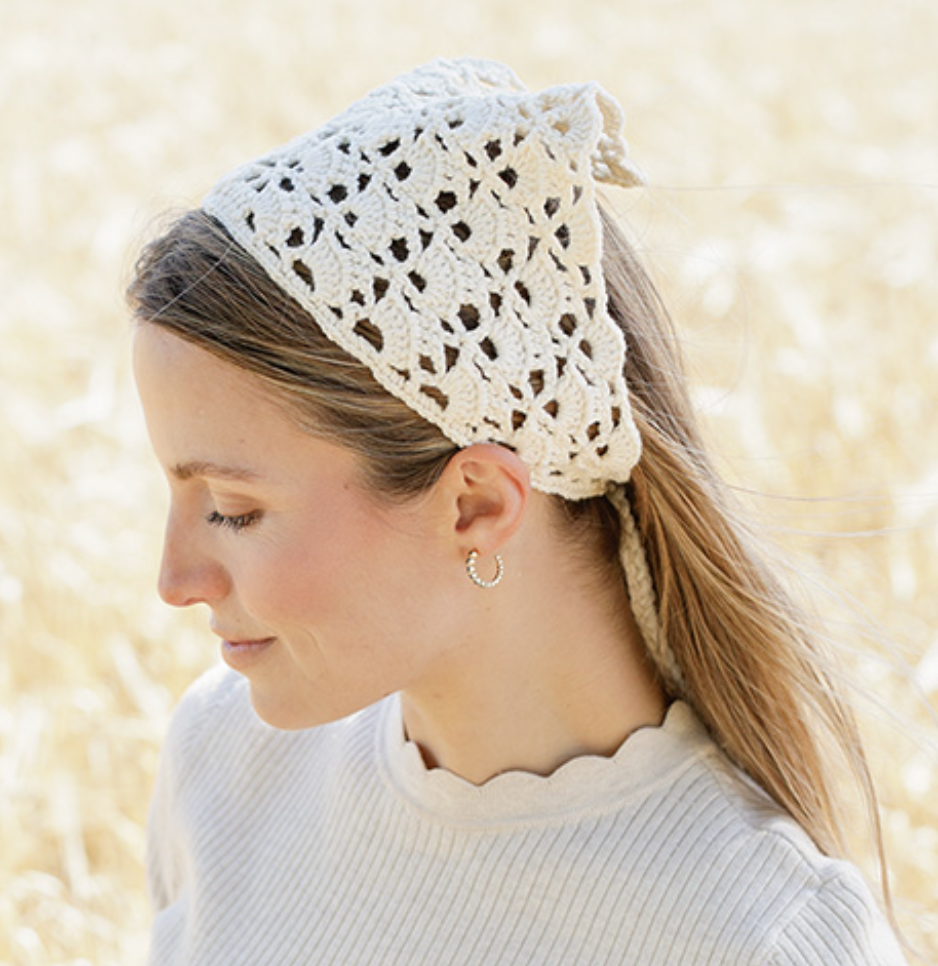
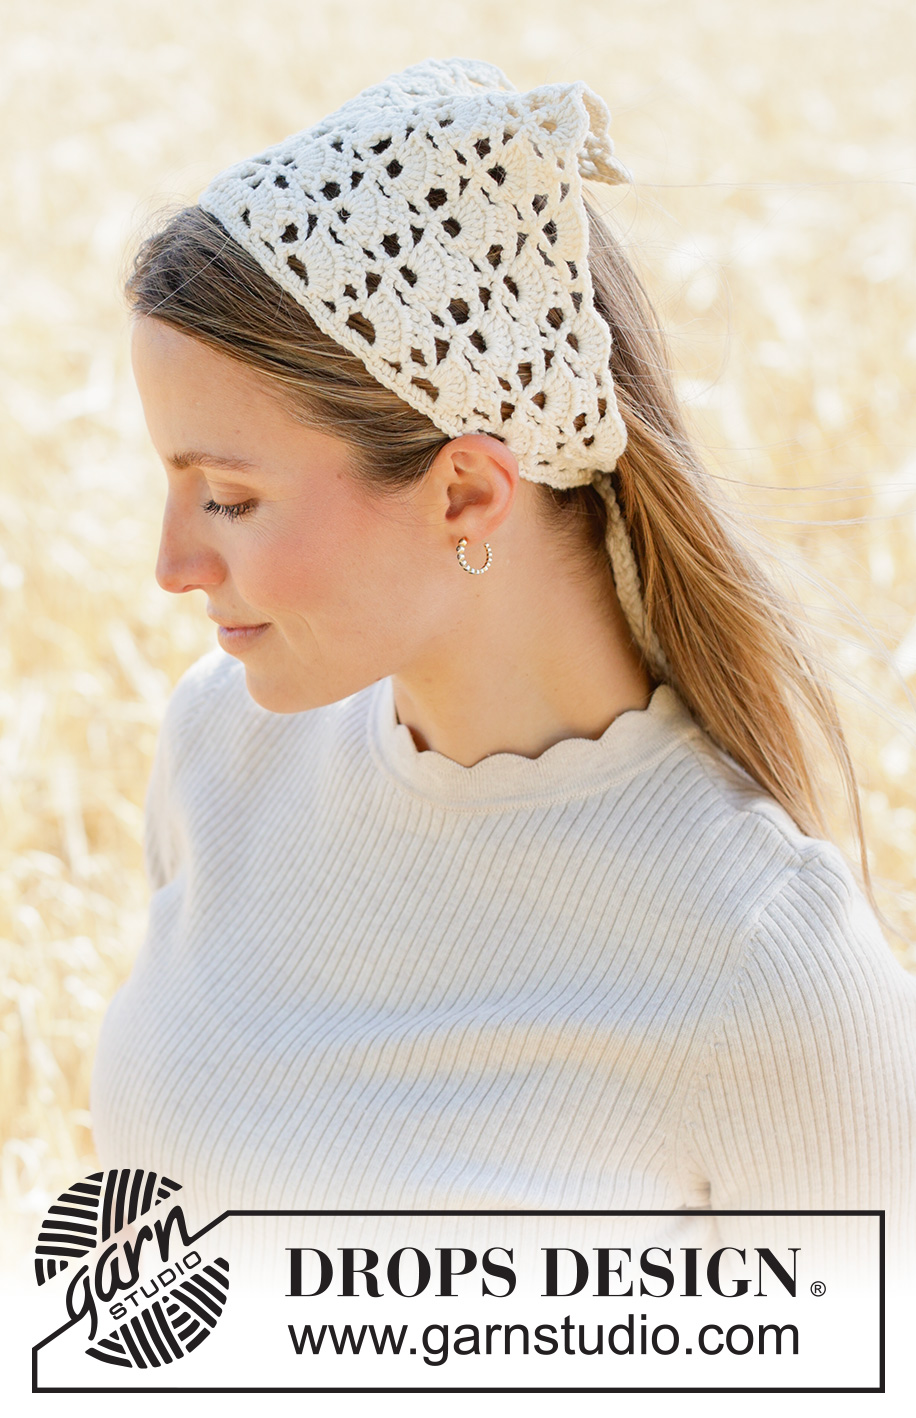
The Moon Dust Bandana is a charming crochet accessory built around a fan pattern, a triangular shape, and two braided ties. Its finished dimensions are compact, but the construction gives crocheters an opportunity to practice chart reading, chain-spaces, treble crochets, controlled increases through repeated sections, decorative edging, and simple cord-making.
This complete tutorial is designed as a practical reference for working through the project from beginning to end. The technical information follows the original Moon Dust Bandana pattern exactly, including the yarn, hook, gauge, measurements, chart sequence, construction instructions, and cord dimensions.
The bandana is worked back and forth with a fan pattern. The main fabric begins with A.1 and then continues through A.2 to A.6. Once the triangular body reaches the required size, the longest side receives a row of double crochets followed by A.7. The final step is to make two braided cords and attach them at the ends of the long side.
Moon Dust Bandana at a Glance
- Pattern: Moon Dust Bandana, DROPS 265-7
- DROPS Design: Pattern cm-162
- Yarn: DROPS COTTON MERINO from Garnstudio
- Yarn group: B
- Colour: 01, Off White
- Quantity: 50 g
- Hook: DROPS CROCHET HOOK SIZE 3.5 MM
- Finished length: 44 cm without cords
- Finished height: 18 cm
- Gauge: 20 treble crochets in width and 10 rows in height with hook size 3.5 mm = 10 x 10 cm
The original pattern uses British crochet terminology. Throughout this tutorial, the terminology is kept consistent with the source. In particular, the instructions refer to treble crochets and double crochets, so those terms should not be replaced with terminology from another crochet system when following the actual pattern.
Before Picking Up the Hook
A good preparation stage can make the rest of this project much easier. Gather the specified yarn and hook before beginning, and keep the diagrams available while you work. This is particularly useful because the main body is chart-based and several sections depend on recognizing previously worked stitches.
The required yarn is DROPS COTTON MERINO from Garnstudio, yarn group B, in colour 01, Off White. You need 50 g.
The specified hook is a 3.5 mm DROPS crochet hook.
The gauge is 20 treble crochets in width and 10 rows in height with the 3.5 mm hook, giving 10 x 10 cm. If you have too many stitches within 10 cm, change to a larger hook. If you have too few stitches within 10 cm, change to a smaller hook.
Once your materials and tension are ready, the project can be approached as a sequence of clearly defined stages rather than as one long instruction.
The Overall Construction Roadmap
Before starting, it helps to understand where the project is going. The complete construction can be viewed as the following progression:
- Work the first chart section, A.1.
- Continue with A.2 through A.6 to develop the fan-patterned triangle.
- Maintain crochet tension while the repeated sections expand the fabric.
- Continue until the piece measures 18 cm along the middle.
- Finish after a complete repeat in height.
- Do not cut the strand at this point.
- Work a row of double crochets along the longest side.
- Work A.7 along the long side.
- Cut and fasten the strand.
- Make two braided cords and attach them at opposite ends of the long side.
Having this roadmap in mind is especially helpful when moving from the main body to the finishing work. The long-side edging and braided cords are separate finishing stages and should not be started before the triangular body is complete.
Recognizing the Shape as It Develops
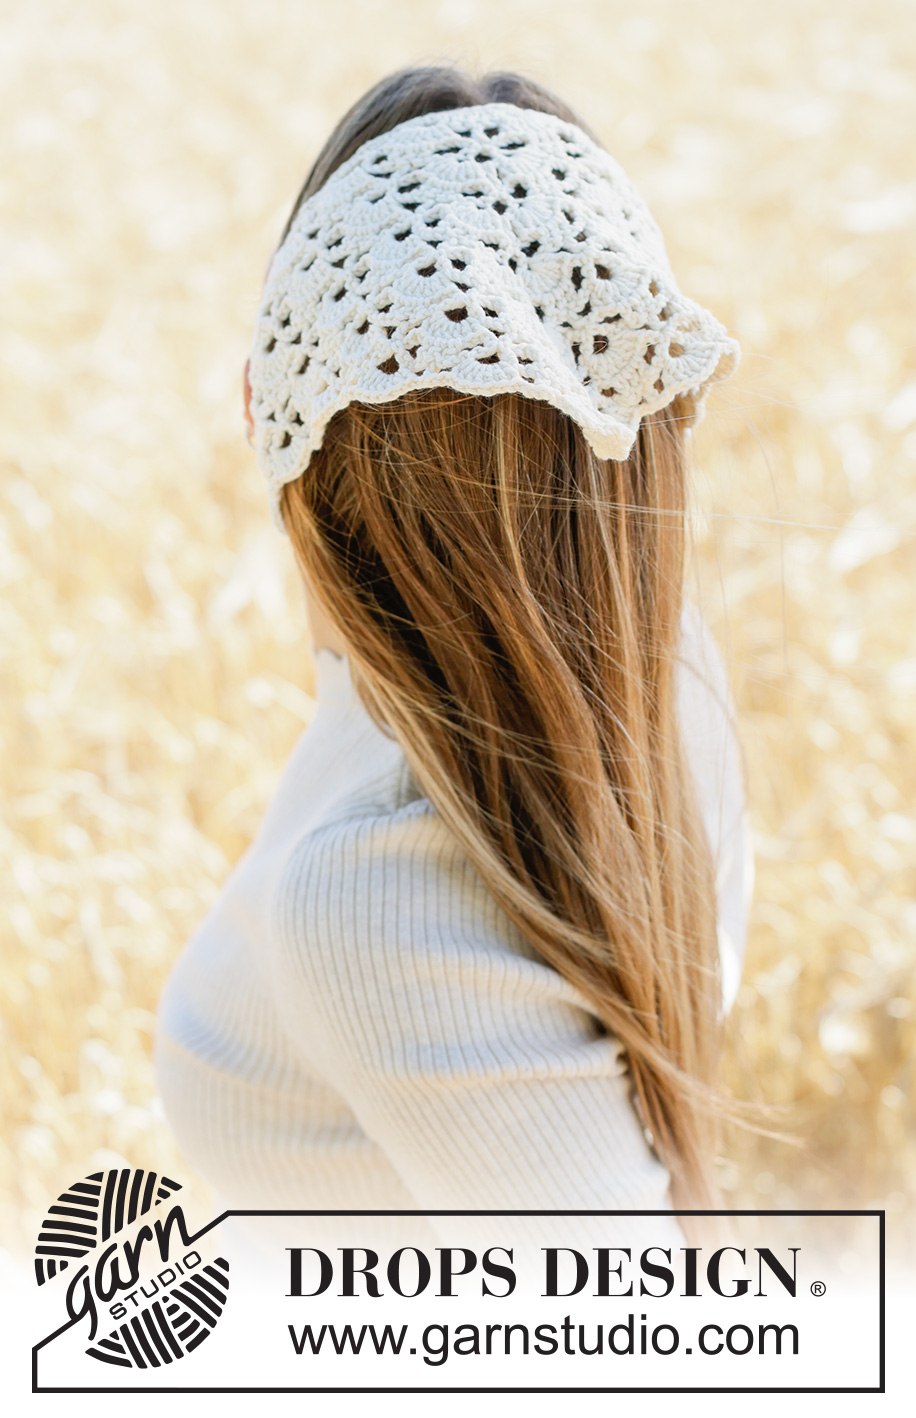
The finished crochet piece is a triangle. This is an important visual reference while working because the project does not grow as a simple rectangle with equal-width rows.
The fan pattern creates the visual character of the fabric, while the repeated chart sections allow the sides of the triangle to expand. The center remains an important reference point, and the outer portions develop through repeated A.3 and A.4 sections.
Do not try to force the fabric into its final shape while crocheting. Instead, allow the chart construction and repeated sections to create the shape naturally. Regular visual checks are useful, but the written instructions and diagrams remain the authority for the actual stitch sequence.
Reading the Diagrams Without Losing Your Place
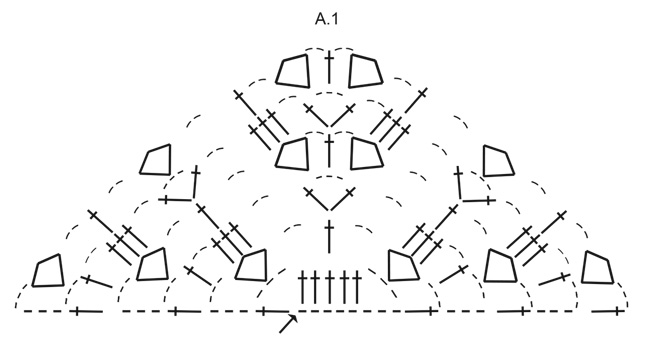
The Moon Dust Bandana uses diagrams A.1 to A.7. The chart system contains an important visual convention that should be understood before moving beyond the first section.
When working A.2 to A.6, the grey section shows A.1. This section has already been worked. Its purpose is to show how the diagrams continue in relation to the fabric that is already there.
Therefore, the grey area should be treated as a visual reference rather than a separate instruction to crochet again.
The same principle is used in A.7. The grey section helps show how the stitches in A.7 are worked in relation to the existing edge.
The chart symbols represent chain stitches, treble crochets in stitches below or around chain-spaces below, the starting point, seven treble crochets around a chain-space below, an already-worked row showing how the row above is worked, a slip stitch in the 3rd chain stitch from the row below, and double crochet worked around or in a stitch below.
If you are more comfortable with written instructions than charts, keep the written construction sequence beside the diagrams. The two work together rather than replacing one another.
Stage One: Building A.1
Use the 3.5 mm hook and DROPS Cotton Merino. Work according to A.1.
This is the foundation of the project. It is worth checking the chart carefully at this stage because the later sections use A.1 as the established fabric and reference point.
Pay attention to the chain-spaces and treble crochets. The fan pattern depends on their placement, and later instructions refer directly to chain-spaces and groups of stitches already created in the initial section.
Once A.1 is complete, you are ready to move into the main repeating construction.
Stage Two: Following A.2 Through A.6
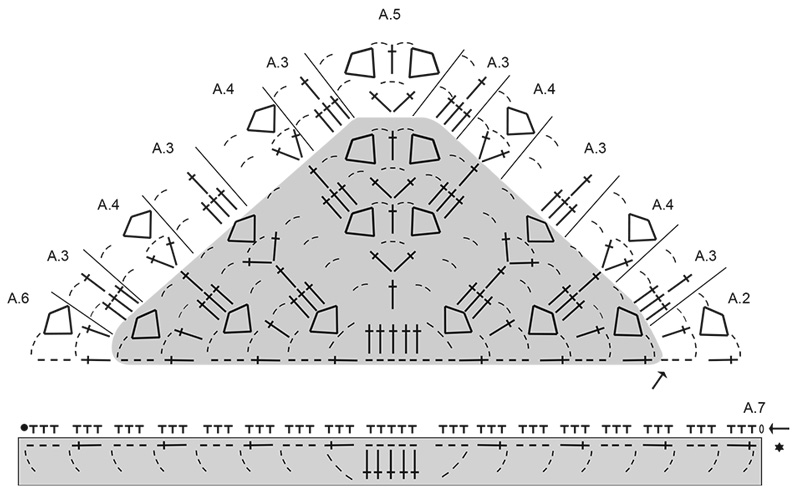
After completing A.1, continue with A.2 to A.6.
At the beginning of the row, work A.2 around the chain-space.
Then work A.3 and A.4 until there are 7 treble crochets left before the chain-space in the middle of A.1.
Work A.3.
Next, work A.5 across the stitches in the middle.
Continue with A.3 and A.4 until there are 7 treble crochets left before the chain-space at the end of the row.
Work A.3 and then A.6 around the chain-space.
This sequence gives you a useful way to divide each section mentally: beginning, first side, center, second side, and ending. Keeping those landmarks in mind can make the chart much easier to navigate.
The Two-Row Expansion Rhythm
One of the most useful structural details in the pattern is the way the fan pattern expands.
Each time the 2 rows in A.2 to A.6 are worked, there is room for 2 more repeats of A.3 and A.4 on each side.
This means that the developing fabric becomes wider as the pattern continues. You do not need to invent an increase or add an extra section manually. The expansion is already built into the chart sequence.
For a beginner, this is a good place to develop the habit of comparing the current work with the previous section. The repeated A.3 and A.4 areas should develop consistently on both sides of the center.
If your fabric suddenly looks unbalanced, stop and check the previous repeat before continuing. It is usually easier to find a misplaced stitch while the section is still fresh than after several additional repeats have been completed.
Keeping the Center Symmetrical
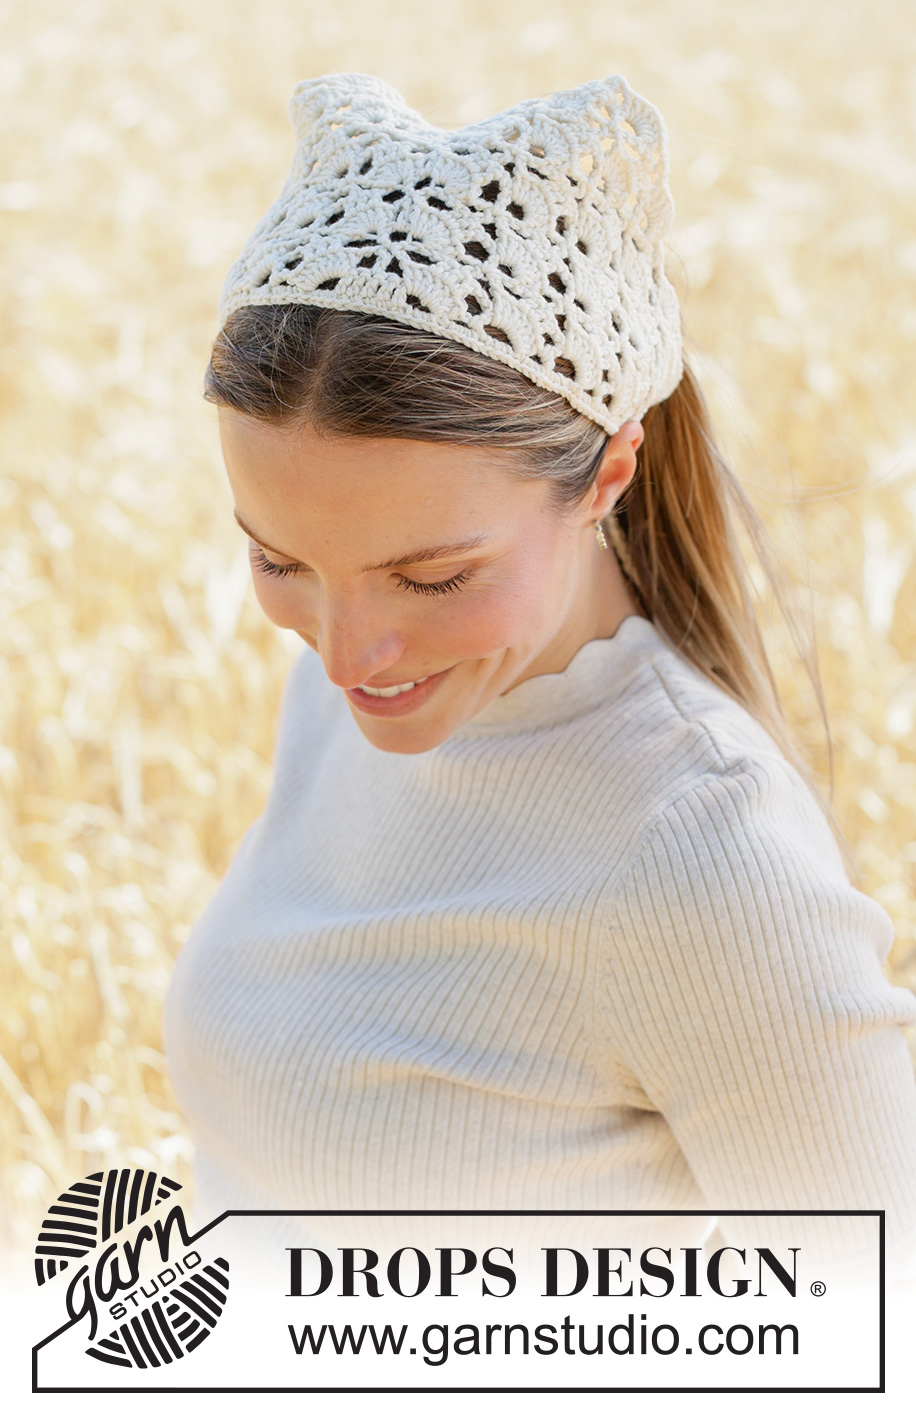
The center of the project provides one of the best checkpoints for maintaining the shape.
The instructions tell you to work A.3 and A.4 until there are 7 treble crochets left before the chain-space in the middle of A.1. Then work A.3 and A.5 across the middle before continuing with the corresponding sections on the opposite side.
Use this information as a navigation tool. When you reach the center, slow down and verify that you are at the correct point before moving on.
Symmetry is also a visual aid. Compare the two sides of the triangle periodically. This does not replace counting or following the chart, but it can quickly alert you to a possible mistake.
Maintaining Crochet Tension Throughout the Body
The pattern specifically instructs you to maintain crochet tension. This is particularly important for a lace-like fan pattern because loose and tight stitches can affect both the appearance and dimensions of the finished piece.
Try to keep the hook movement and yarn tension consistent from one section to the next. Avoid deliberately tightening the chain-spaces simply because they feel loose. Those spaces are part of the design and are used by later instructions.
Likewise, avoid stretching the work while measuring. The stated finished height is 18 cm measured along the middle, so measurements should be taken in a consistent and natural manner.
Knowing When the Main Body Is Finished
Continue working the pattern until the piece measures 18 cm, measured along the middle.
There is one additional condition: finish after a complete repeat in height.
These two points belong together. Do not stop halfway through a repeat simply because the piece has reached approximately 18 cm. Complete the repeat in height as specified by the pattern.
Once the correct stopping point is reached, do not cut the strand.
The attached strand is needed for the next construction stage, where the longest side is finished with a row of double crochets.
Preparing the Long Edge

Once the main triangle is complete, work a row of double crochets along the longest side. Rotate the piece so that you continue from the same side.
This is a transition point between the main fan-patterned body and the finishing edge. Take a moment to orient the triangle correctly before beginning this row so that the long side is clearly identified.
The row of double crochets creates the foundation for the decorative A.7 section that follows.
Adding A.7 to the Longest Side
After the row of double crochets, work A.7 along the long side.
The A.7 diagram shows the beginning, middle, and end rather than every row. Use those chart references to understand how the edging continues across the long side.
The grey section in A.7 shows how the stitches relate to the existing fabric. As with the earlier diagrams, it is intended to make the continuation easier to understand.
When A.7 is complete, cut and fasten the strand.
At this stage, the crochet portion of the bandana is finished. The remaining work consists of making and attaching the braided cords.
How to Make the Braided Cords
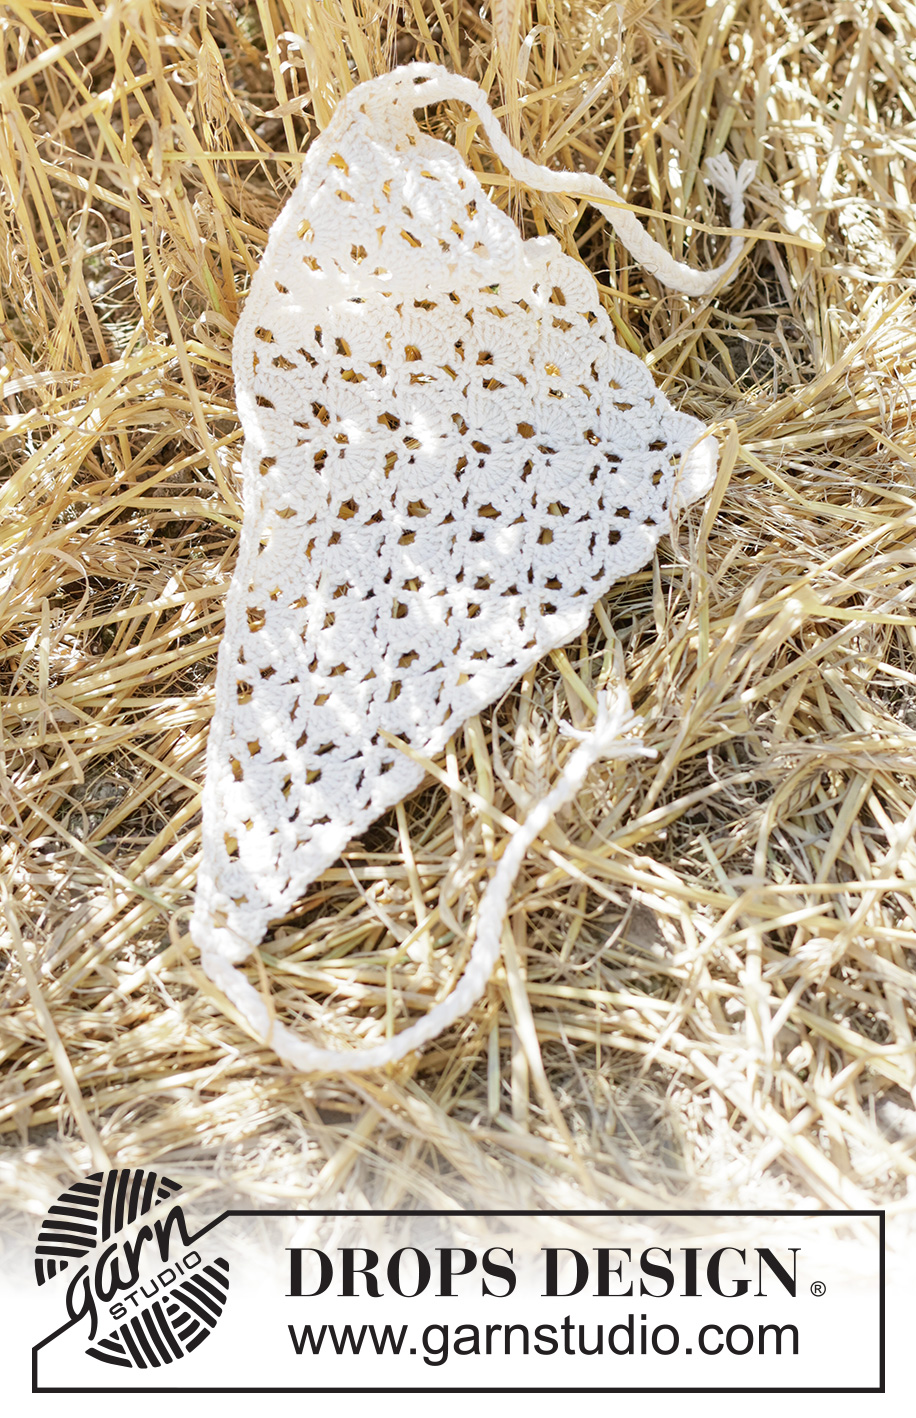
For each cord, cut 6 strands of DROPS Cotton Merino, each 80 cm long.
Thread the strands halfway through the piece, with the outermost position at one end of the long side. Once folded through the fabric, the six strands produce 12 strands of equal length.
Divide these 12 strands into 3 bunches of 4 strands.
Plait the three bunches until 3 cm are left.
Then tie a strand around the plait and fasten it well.
Make the second cord in the same way at the other end of the long side.
The key measurements in this step should be preserved carefully. Each cord begins with six strands measuring 80 cm each. The folded strands become 12 equal strands, which are divided into three groups of four. The plait stops when 3 cm remain.
A Second View for Checking the Finished Construction
Once the cords are attached, place the finished bandana flat and look at the complete silhouette.
The main fabric should form the triangular shape described in the pattern. The longest side should have the double crochet foundation row and A.7 edging. The two braided cords should sit at opposite ends of that long side.
The finished dimensions of the crochet piece are 44 cm in length without the cords and 18 cm in height.
A final visual inspection is useful for checking that the edging follows the long side evenly and that both cords have been fastened securely.
Practical Troubleshooting Guide
The Triangle Looks Uneven
First check your crochet tension and compare the two sides of the fan pattern. Then review the most recent A.2 to A.6 repeat. Pay special attention to the center and the chain-spaces.
The Chart Seems to Show Stitches I Have Already Worked
This is expected in the grey sections. In A.2 to A.6, the grey area represents A.1, which has already been worked. It is included to show how the diagrams continue.
I Am Unsure Where the Center Is
Use the instruction that identifies the 7 treble crochets before the chain-space in the middle of A.1. This is an important reference when transitioning from the first side to A.5 and then back into the repeated sections.
I Have Reached Approximately 18 cm
Check whether you have also completed a complete repeat in height. The pattern specifically instructs you to finish after a complete repeat.
I Cut the Strand After the Main Triangle
The original construction says not to cut the strand at this point. If you are following the pattern from the beginning, keep the strand attached so you can continue with the row of double crochets along the longest side.
The Braided Cord Does Not Look Even
Check the preparation of the six strands. Each should be 80 cm long before threading and folding. After folding, divide the resulting 12 strands into three groups of four before plaiting.
Photo-Based Project Checkpoints
The finished project photographs can also be useful as general visual references while you work. Compare the developing shape, not individual stitches, because the photographs show the completed accessory rather than every intermediate row.
The different views help illustrate how the triangle sits when worn, how the long side is positioned, and how the cords function at the ends.
Use the photographs as a supplement to the written instructions and diagrams. The chart and technical instructions remain the source for the actual stitch sequence.
Final Measurement and Construction Checklist
- Yarn: DROPS COTTON MERINO, colour 01, Off White.
- Quantity: 50 g.
- Hook: 3.5 mm.
- Gauge: 20 treble crochets in width and 10 rows in height = 10 x 10 cm.
- Starting chart: A.1.
- Main continuation: A.2 to A.6.
- Main shape: Triangle.
- Stopping measurement: 18 cm along the middle.
- Stopping condition: Finish after a complete repeat in height.
- Longest-side preparation: One row of double crochets.
- Long-side decoration: A.7.
- Finished length: 44 cm without cords.
- Each cord: 6 strands, each 80 cm long.
- After folding: 12 equal strands.
- Plait: 3 bunches of 4 strands.
- Leave before fastening: 3 cm.
- Cords: One at each end of the long side.
Frequently Asked Questions
What yarn is used for the Moon Dust Bandana?
The pattern uses DROPS COTTON MERINO from Garnstudio, yarn group B, in colour 01, Off White. The required amount is 50 g.
What crochet hook size is required?
The specified hook is a DROPS CROCHET HOOK SIZE 3.5 MM.
What is the gauge?
The gauge is 20 treble crochets in width and 10 rows in height with the 3.5 mm hook, equal to 10 x 10 cm.
How large is the finished bandana?
The finished piece measures 44 cm in length without cords and 18 cm in height.
What chart does the pattern start with?
The project begins with A.1 and then continues through A.2 to A.6 for the main fan-patterned body.
What does the grey area in the diagrams mean?
For A.2 to A.6, the grey section shows A.1, which is already worked. It helps demonstrate how the diagrams continue. The same principle applies to the grey section in A.7.
When should the main triangle be stopped?
Continue until the piece measures 18 cm measured along the middle, and finish after a complete repeat in height.
Should the yarn be cut after the triangle is complete?
No. The pattern instructs you not to cut the strand because the next step is the row of double crochets along the longest side.
How are the cords made?
For each cord, cut 6 strands of DROPS Cotton Merino, each 80 cm long. Thread them halfway through the piece to create 12 equal strands, divide them into 3 bunches of 4, and plait until 3 cm remain. Tie a strand around the plait and fasten it well.
The Finished Moon Dust Bandana
The Moon Dust Bandana is a satisfying project because each stage has a clear purpose. A.1 establishes the foundation, A.2 to A.6 develop the fan-patterned triangular body, and A.7 completes the longest side with a decorative finish. The braided cords then transform the finished crochet fabric into a wearable headscarf.
The most important strategy is to work patiently through the chart rather than trying to memorize the entire construction. Use the beginning, center, and ending sections as landmarks. Remember that the grey chart areas represent already-worked fabric, and use the stated 7-treble-crochet references to keep the central construction organized.
As the project grows, maintain consistent crochet tension and allow the repeated A.3 and A.4 sections to create the expanding triangle. When the middle measurement reaches 18 cm, complete the required repeat in height, keep the strand attached, and move into the long-side finishing section.
After the double crochet row and A.7 are complete, the final braided cords are made from six 80 cm strands for each side. The careful preparation of those strands, followed by the division into three groups of four, produces the characteristic plaited ties.
With the crochet, edging, and cords complete, the project reaches its intended finished form: a 44 cm long triangular bandana without cords and 18 cm high, made in Off White DROPS Cotton Merino and finished with simple braided ties. By keeping the technical details, measurements, chart sequence, and construction order exactly as specified, you can enjoy the decorative result while also practicing several useful crochet skills along the way.