
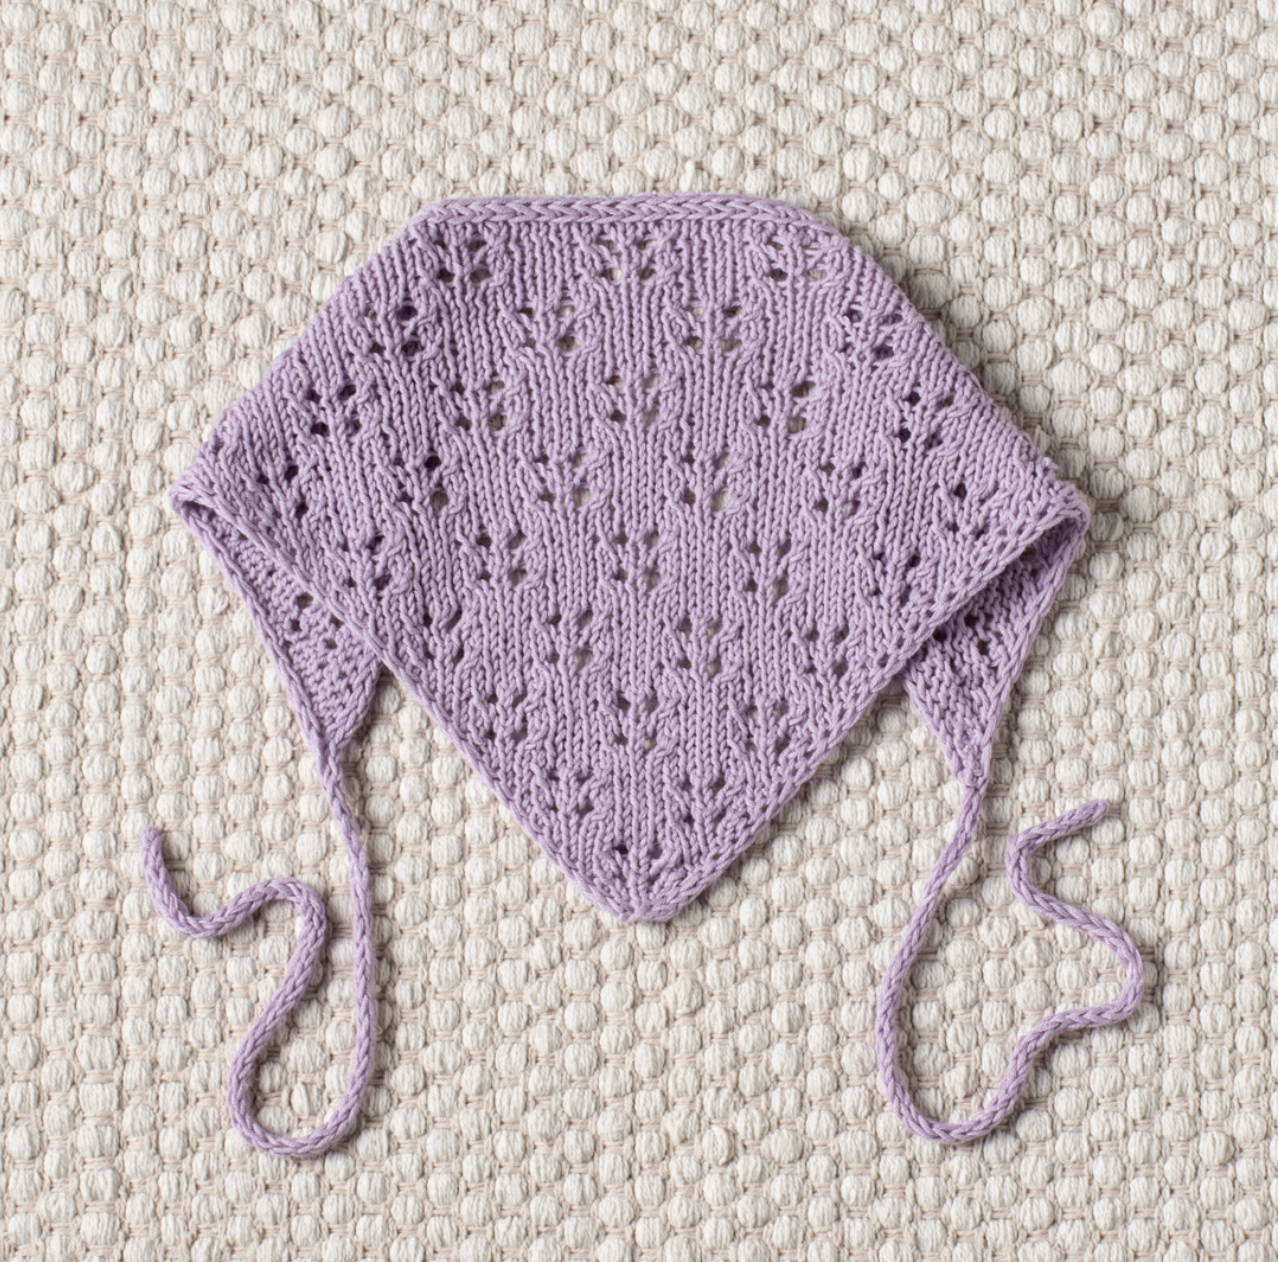
The Flower Bed Bandana is a beautifully structured knitted accessory that combines delicate eyelet details with a simple triangular shape and neat i-cord finishing. While the finished design looks intricate, its construction is based on a repeatable rhythm of increases, knit and purl rows, decorative eyelets, and a carefully integrated i-cord border.
This complete guide explains how to work the pattern from the first cast-on stitches through the final tie. The technical instructions remain faithful to the original pattern, including the stitch counts, row numbers, measurements, yarn requirements, needle sizes, eyelet sequence, and i-cord construction.
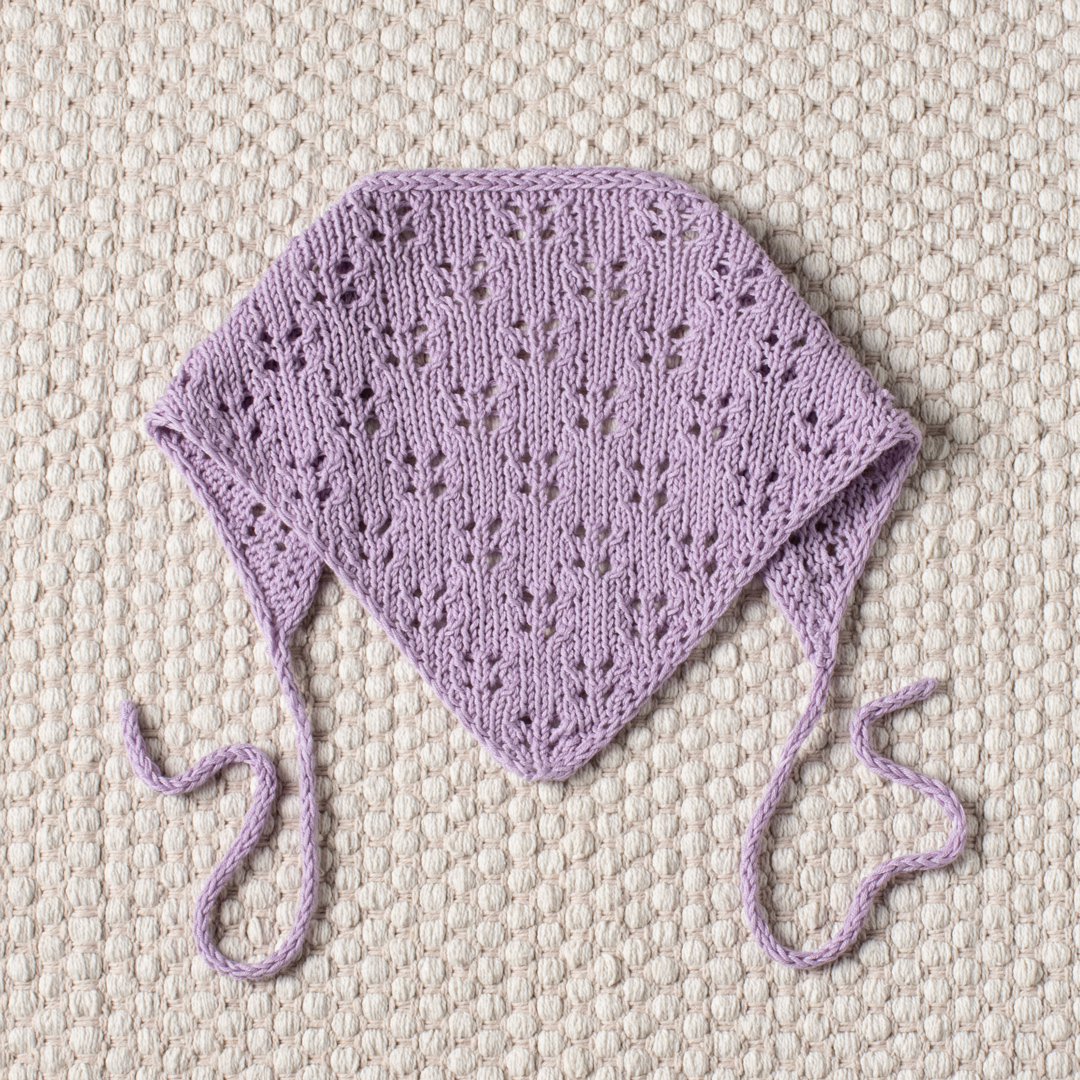
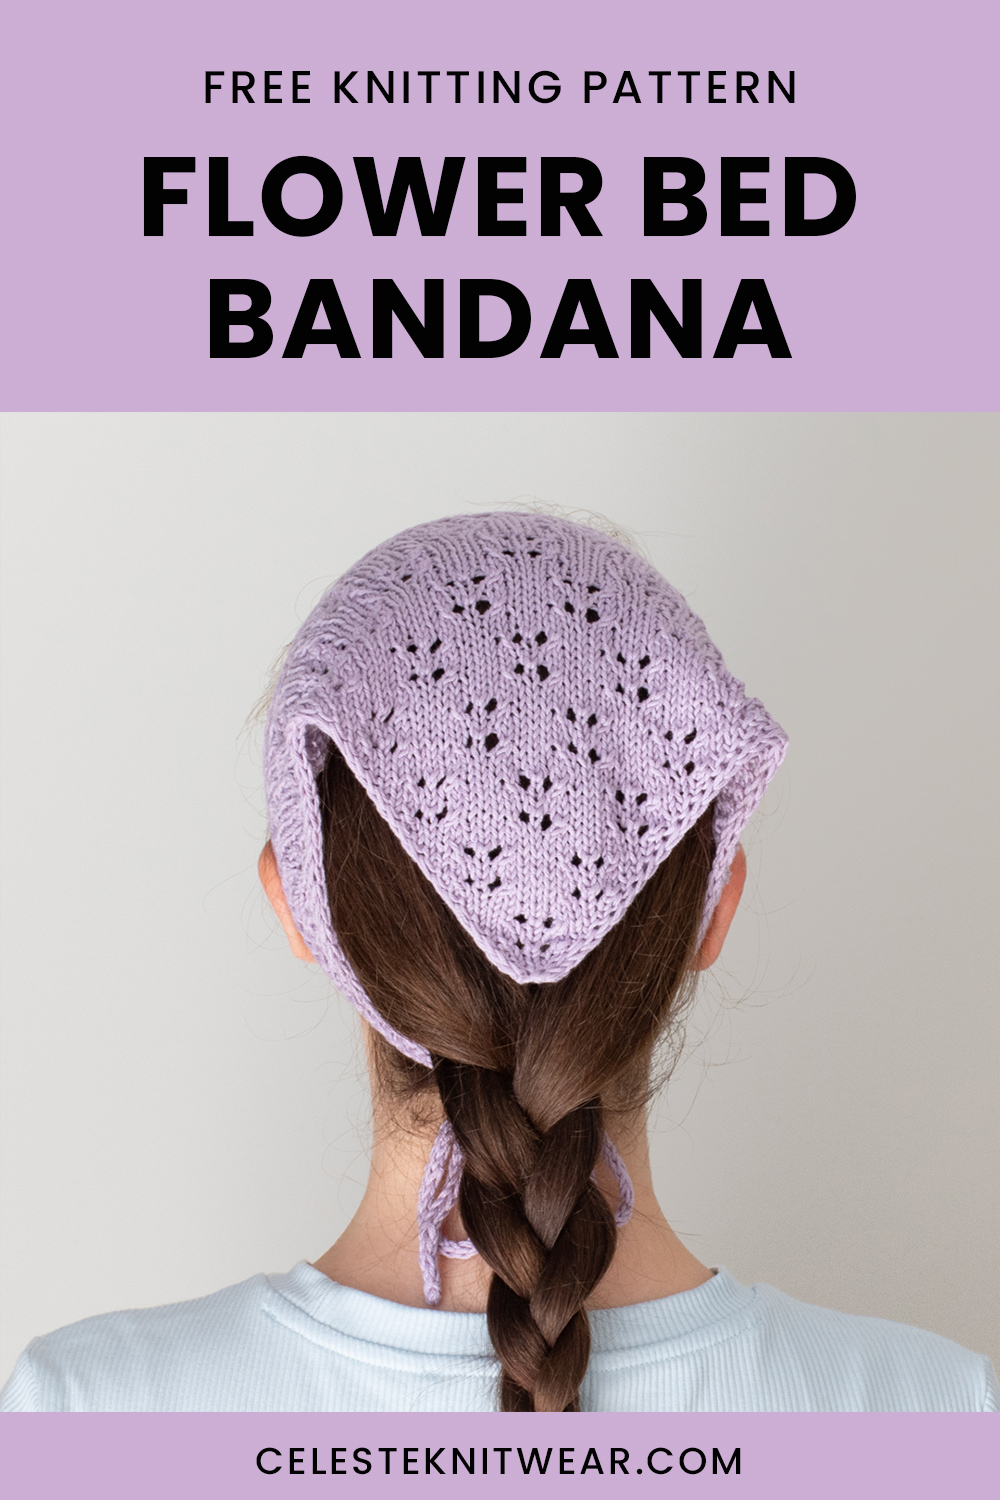
The project is written in one size. Once completed and blocked, the bandana measures 43cm/17in in length without ties and 22cm/8.75in in height. The ties are formed from three-stitch i-cords and are each worked until the tube measures approximately 30 cm.
Before You Pick Up the Needles
Although this is a relatively compact project, there are several details worth understanding before starting. The body begins with only 5 stitches, then expands through two increases on the specified right-side rows. At the same time, the first and last two stitches are treated consistently to create the i-cord edging.
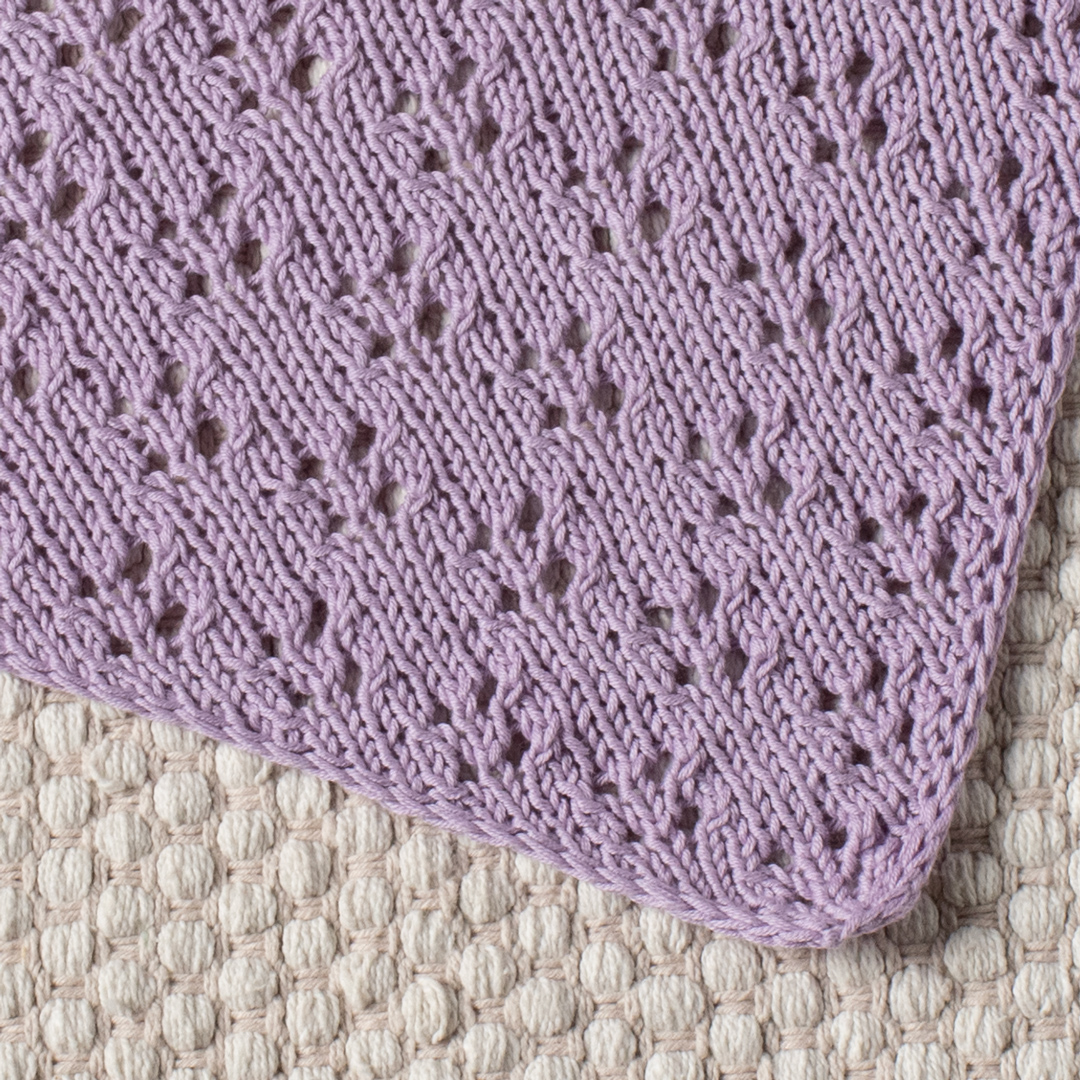
The decorative pattern is based on a five-action eyelet sequence: k2tog, yo, k1, yo, ssk. This motif appears in selected rows of the foundation and then becomes a recurring feature in the main eight-row pattern.
The final construction is also unusual compared with a conventional triangular accessory. The body is not simply bound off. Instead, the yarn is broken while the live stitches remain on the needle. A separate i-cord is then joined to those live stitches and becomes the edging before continuing into the second tie.
Project Information
| Size | One size |
| Finished length without ties | 43cm/17in |
| Finished height | 22cm/8.75in |
| Gauge | 24 sts x 32 rows in stockinette stitch over 10 x 10 cm (4 x 4in) after blocking |
| Yarn | Drops Safran, lavender, uni color 05, 1 ball |
| Main needles | 3mm (US 2.5) knitting needles |
| Tie needles | A pair of 3mm (US 2.5) DPNs |
| Notions | Tapestry needle, measuring tape, scissors |
Understanding the Edge Before the Lace
The bandana’s border is not added afterward. It is incorporated into the knitting from the beginning through two special edge stitches on each side.
The pattern notes explain that the i-cord edging is created by knitting the first 2 stitches of every row and slipping the last 2 stitches of every row with yarn in front.
One detail is especially important: do not tighten the edge stitches.
This instruction applies throughout the bandana. Keeping those stitches relaxed allows the edge to retain the flexibility needed for the growing triangular fabric.
The Increase Logic
The shape of the bandana is created by adding two stitches at the beginning and end of each right-side increase row. The increases use M1R or M1L before and after the 2 i-cord edge stitches.
The source pattern also says that M1L/M1R can be replaced with yo if you prefer this simplification.
Do not tighten the increased stitches. These increases are the mechanism that steadily expands the triangular fabric, so maintaining a consistent tension helps the shape develop evenly.
Abbreviation Reference
- k – knit.
- k2tog – knit 2 stitches together.
- M1L – make 1 left.
- M1R – make 1 right.
- p – purl.
- RS – right side.
- sl – slip stitch as if to purl with yarn in front.
- ssk – slip 1 stitch knitwise, slip the next stitch knitwise, return the 2 stitches back to the left needle, knit those 2 stitches together through the back loops.
- WS – wrong side.
- yo – yarn over.
- *-* – repeat the instructions in between the asterisks the number of times specified.
The Flower Bed Eyelet Motif
The decorative eyelet pattern is:
k2tog, yo, k1, yo, ssk.
This is the key lace motif used in the bandana. The k2tog and ssk decreases balance the two yarn overs, creating deliberate openings without changing the stitch count of the eyelet sequence itself.
Because this sequence appears inside larger row instructions, it is helpful to read the entire row before beginning rather than treating the eyelet as an isolated action.
Step One: Cast On and Establish the Foundation
Cast on 5 stitches.
Then work the set-up row:
Set-up row (WS): k2, p1, sl2.
This short row establishes the basic edge treatment and prepares the fabric for the first increase.
At this stage the bandana is tiny, so it is much more useful to focus on the stitch sequence than on the appearance of the finished shape. The triangular form will develop as stitches are added.
Step Two: Work the Twelve-Row Opening Sequence
The first twelve rows introduce the increase rhythm and the first eyelet motifs. Work them exactly as follows.
Rows 1 and 2
Row 1 (RS): k2, M1R, k1, M1L, sl2 (7sts).
Row 2: k2, p to last 2 sts, sl2.
Row 1 increases the initial 5 stitches to 7 stitches. Row 2 returns to the established wrong-side structure.
Rows 3 and 4
Row 3: k2, M1R, k3, M1L, sl2 (9sts).
Row 4: k2, p to last 2 sts, sl2.
The stitch count after Row 3 should be 9 stitches.
Rows 5 and 6
Row 5: k2, M1R, eyelet pattern, M1L, sl2 (11sts).
Row 6: k2, p to last 2 sts, sl2.
This is the first foundation row containing the eyelet pattern.
Rows 7 and 8
Row 7: k2, M1R, k to last 2 sts, M1L, sl2 (13sts).
Row 8: k2, p to last 2 sts, sl2.
After Row 7, the project has reached 13 stitches.
Rows 9 and 10
Row 9: k2, M1R, k2, eyelet pattern, k2, M1L, sl2 (15sts).
Row 10: k2, p to last 2 sts, sl2.
Row 9 combines the eyelet pattern with knit stitches on both sides of the decorative section.
Rows 11 and 12
Row 11: k2, M1R, k to last 2 sts, M1L, sl2 (17sts).
Row 12: k2, p to last 2 sts, sl2.
The opening section is now complete, with the final increase checkpoint at 17 stitches.
Foundation Checkpoint Card
If you want a compact reference while knitting the first section, use these stitch-count milestones:
- Row 1: 7sts.
- Row 3: 9sts.
- Row 5: 11sts.
- Row 7: 13sts.
- Row 9: 15sts.
- Row 11: 17sts.
These are not additional instructions; they are the stitch counts already specified by the pattern. They can be useful when checking whether the increases have been completed correctly.
Step Three: Enter the Main Pattern
After Row 12, move into the main eight-row pattern. This section is the heart of the bandana and is repeated seven more times or until the desired length is reached.
Main Pattern: Rows 1–4
Row 1 (RS): k2, M1R, *eyelet pattern, k3* until 5sts left, eyelet pattern, M1L, sl2 (2sts increased).
Row 2 (WS): k2, p to last 2 sts, sl2.
Row 3: k2, M1R, k to last 2 sts, M1L, sl2 (2sts increased).
Row 4: k2, p to last 2 sts, sl2.
The first row of the repeat is decorative and uses the eyelet pattern repeatedly between knit sections. The third row focuses on increasing across the growing fabric.
Main Pattern: Rows 5–8
Row 5: k2, M1R, k2, *eyelet pattern, k3* until 7sts left, eyelet pattern, k2, M1L, sl2 (2sts increased).
Row 6: k2, p to last 2 sts, sl2.
Row 7: k2, M1R, k to last 2 sts, M1L, sl2 (2sts increased).
Row 8: k2, p to last 2 sts, sl2.
The source pattern instructs you to repeat Rows 1–8 7 more times or until desired length.
A Better Way to Read the Repeat
Rather than viewing the eight rows as one large block, divide them mentally into two four-row halves. Rows 1–4 establish one decorative and increase sequence, while Rows 5–8 provide the second decorative and increase sequence.
The wrong-side rows are particularly consistent. Rows 2, 4, 6, and 8 all use:
k2, p to last 2 sts, sl2.
This repetition provides a useful orientation point. If you finish a right-side decorative row and are unsure where you are, the next wrong-side row returns to this familiar structure.
Keeping the Lace Symmetrical
The bandana’s visual balance depends on the placement of the increases and eyelets. The M1R and M1L increases sit around the central fabric while the two edge stitches remain part of the i-cord edging.
When reading rows containing asterisks, pay attention to the point where the pattern says “until 5sts left” or “until 7sts left.” Those remaining stitches are important because the row finishes with a specific sequence before the final edge stitches.
For a clean result, avoid improvising the number of repetitions. Follow the pattern’s stated repeat instructions and use the finished measurements as a reference after blocking.
When the Main Body Is Complete
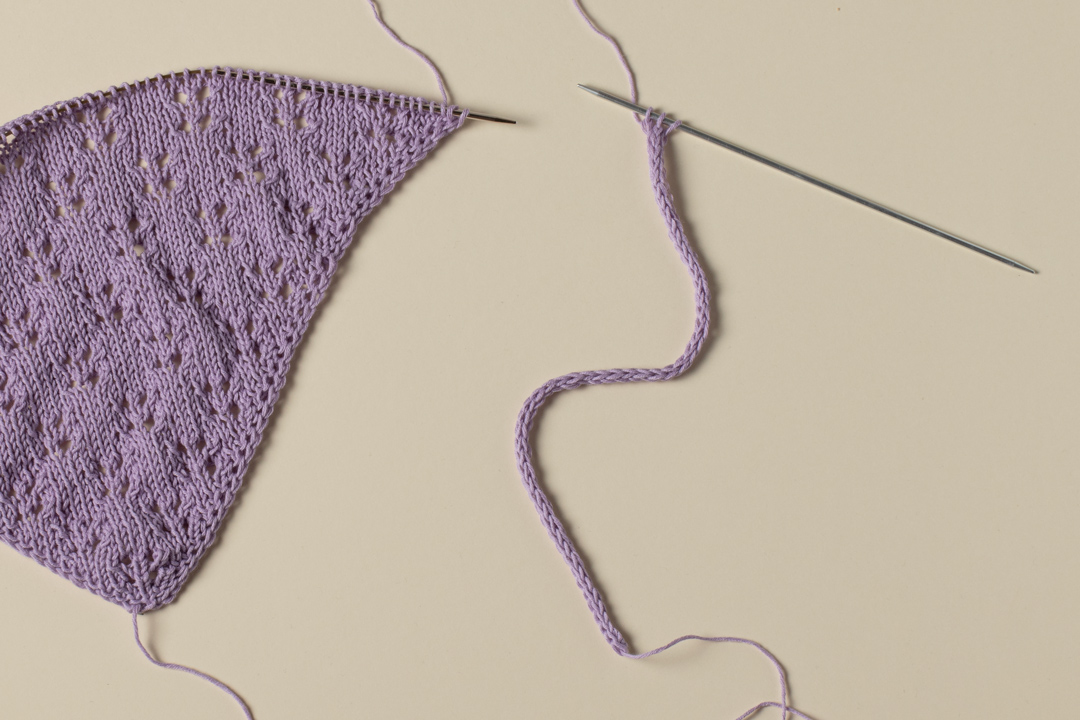
After completing the main pattern to the desired length, break the yarn while leaving a 10cm (4″) long tail.
Do not bind off the bandana stitches.
Instead, set the bandana aside while leaving the stitches on the needle as they are. These live stitches are essential to the next stage, where the first i-cord is joined directly to the bandana edge.
This is an important moment to pause and organize your work. Make sure the live stitches remain secure and that the yarn tail is long enough for the stated 10cm (4″) requirement.
The Tie Construction: Why the DPNs Matter
The pattern specifies a pair of 3mm (US 2.5) DPNs for the ties. The ties are worked as three-stitch i-cords, which create narrow tubes rather than flat knitted strips.
The first tie starts with 3 stitches. Cast them on and do not turn.
Then repeat:
*Slip the 3 stitches to the right side of the needle. Knit 3.*
Continue until the i-cord tube measures approximately 30 cm.
Do not cut the yarn at this point.
Joining the First Tie to the Bandana
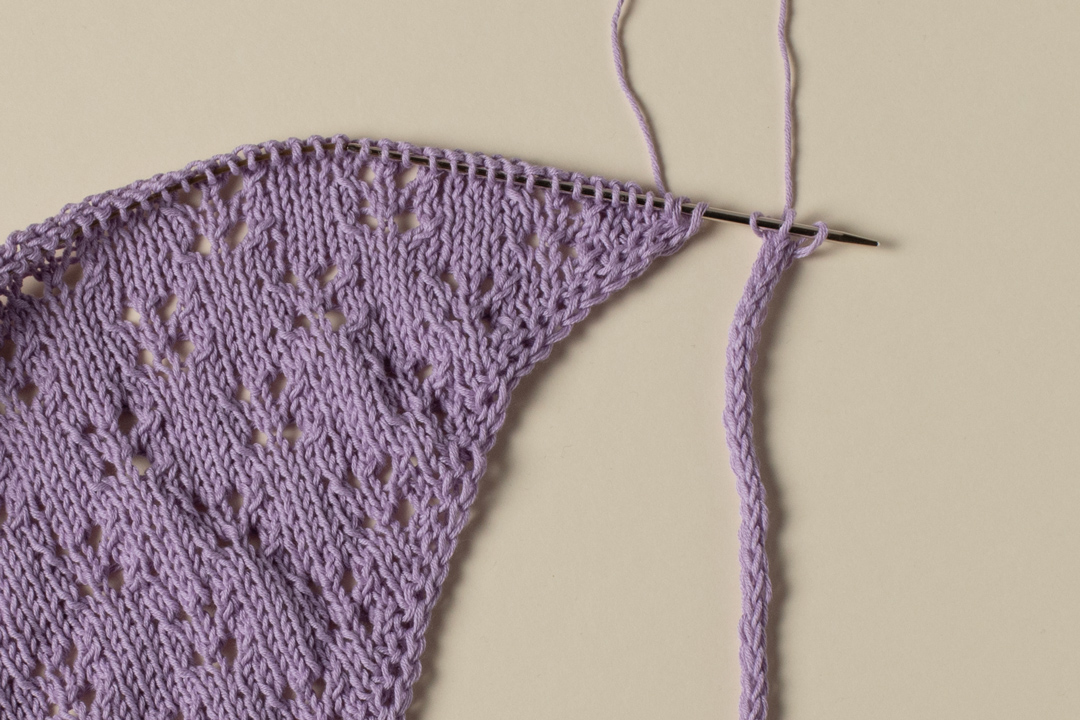
Now the separate i-cord becomes part of the bandana itself.
Transfer the 3 i-cord stitches to the needle while holding the live bandana stitches.
Work the following sequence:
Knit the first two i-cord stitches, ssk (knit last i-cord stitch together with first bandana stitch).
Then transfer the first 3 stitches to the needle while holding the live bandana stitches.
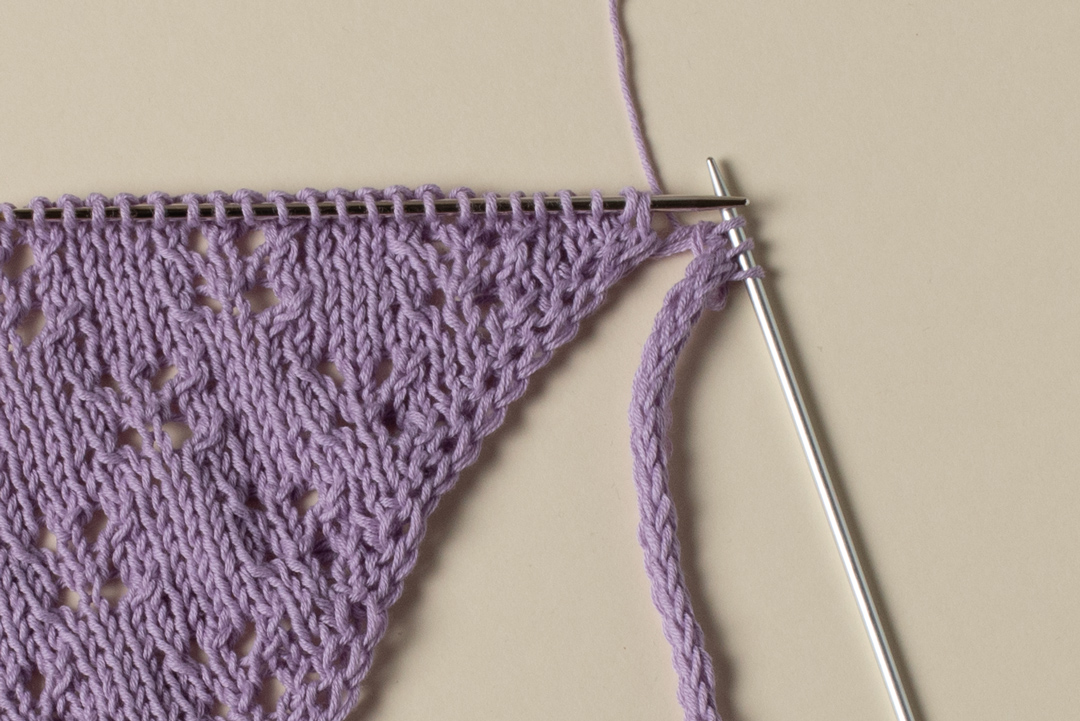
Continue repeating:
*k2, ssk, transfer 3 stitches to the needle, holding the live bandana stitches*
Work this sequence until 3 stitches remain.
The important concept is that the i-cord stitches and live bandana stitches are worked together through the ssk. This is what creates the integrated edging rather than requiring a separate sewn border.
Finishing the Opposite Tie
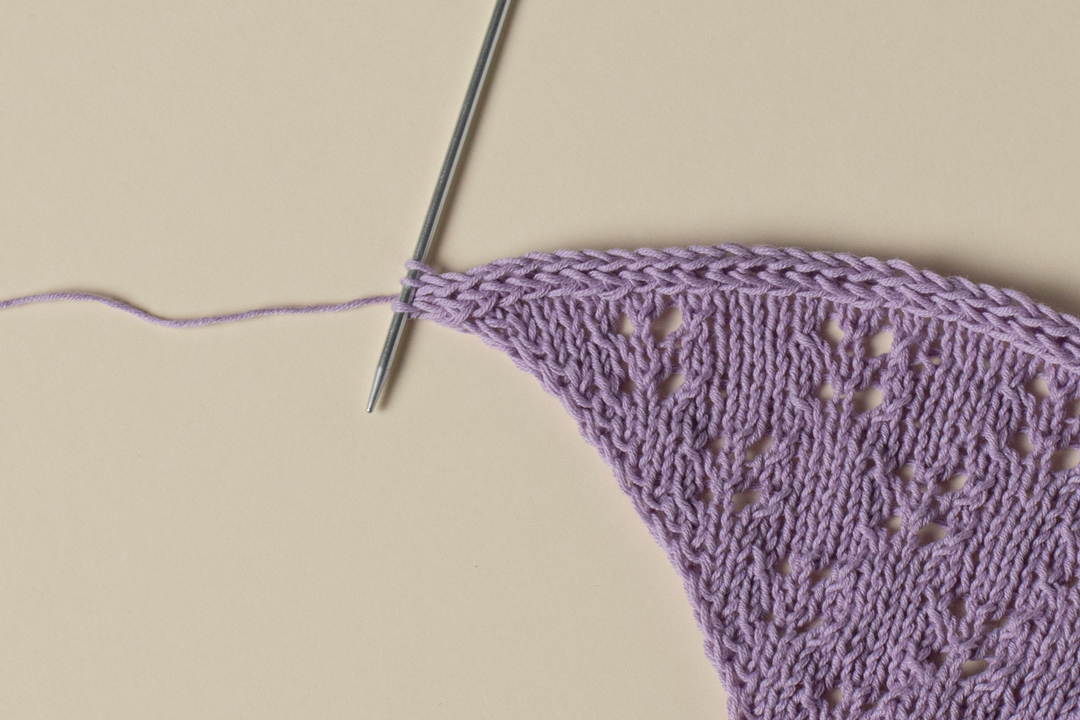
Once the edging has incorporated the bandana stitches and only 3 stitches remain, continue with the second tie.
Work the second tie in the same way as the first:
*Slip the 3 stitches to the right side of the needle. Knit 3.*
Continue until the tube measures approximately 30 cm.
Then bind off, cut the yarn, and weave in the tails.
Finishing the Yarn Ends
The pattern calls for the second tie to be bound off, cut, and finished by weaving in the tails. The tapestry needle from the materials list is useful for this final step.
Take care not to pull the woven-in ends so tightly that the surrounding fabric becomes distorted. The goal is to secure the yarn while preserving the natural shape of the bandana and its narrow i-cord ties.
Blocking and Finished Measurements
The stated gauge is measured after blocking, so blocking is an important part of evaluating the completed accessory.
The target measurements are:
- Length without ties: 43cm/17in.
- Height: 22cm/8.75in.
The gauge is 24 stitches x 32 rows in stockinette stitch over 10 x 10 cm (4 x 4in) after blocking.
Blocking can help the eyelet fabric relax and make the lace structure easier to see. Work gently and use the finished measurements as your guide rather than stretching the piece beyond its intended proportions.
Troubleshooting the Most Common Pattern Problems
The Triangle Is Not Growing Evenly
Start by checking the specified right-side increase rows. Two stitches are increased at the beginning and end of each applicable RS row. Also check that the first and last two stitches are being handled according to the i-cord edge instructions.
The Edge Looks Too Tight
The source pattern specifically says not to tighten the edge stitches. If the edge feels unusually restrictive, pay attention to the tension used when knitting the first two stitches and slipping the last two stitches with yarn in front.
The Eyelets Do Not Look Consistent
Check the exact eyelet sequence: k2tog, yo, k1, yo, ssk. Also verify that the eyelet-containing rows are being worked in the correct position within the pattern repeat.
You Reached the End of the Body and Want to Bind Off
Do not bind off at this stage. The pattern instructs you to break the yarn leaving a 10cm (4″) tail and leave the stitches on the needle. They are needed for the i-cord edging.
The I-Cord Does Not Look Like a Tube
Remember that the three stitches are not turned in the conventional way. The instructions say to slip the 3 stitches to the right side of the needle and knit 3. This repeated movement is what forms the i-cord.
Technique Checkpoints
- Checkpoint 1: Start with 5 stitches.
- Checkpoint 2: After Row 1, there are 7 stitches.
- Checkpoint 3: After Row 5, there are 11 stitches.
- Checkpoint 4: After Row 9, there are 15 stitches.
- Checkpoint 5: After Row 11, there are 17 stitches.
- Checkpoint 6: Complete the eight-row repeat seven more times or until desired length.
- Checkpoint 7: Leave live body stitches on the needle.
- Checkpoint 8: First i-cord reaches approximately 30 cm.
- Checkpoint 9: Work the integrated edging until 3 stitches remain.
- Checkpoint 10: Second i-cord reaches approximately 30 cm before binding off.
Quick Reference: Complete Construction
- Cast on 5 stitches.
- Work the WS set-up row: k2, p1, sl2.
- Complete foundation Rows 1–12.
- Confirm the early stitch-count checkpoints.
- Work the main eight-row pattern.
- Repeat Rows 1–8 seven more times or until desired length.
- Break yarn, leaving a 10cm (4″) tail.
- Leave the live bandana stitches on the needle.
- Cast on 3 stitches for the first i-cord tie.
- Work the i-cord until approximately 30 cm.
- Join the i-cord to the bandana using the specified ssk construction.
- Repeat the edging sequence until 3 stitches remain.
- Work the second 3-stitch i-cord until approximately 30 cm.
- Bind off.
- Cut yarn and weave in tails.
- Check the finished measurements after blocking.
Frequently Asked Questions
Is this a one-size knitting pattern?
Yes. The pattern is written for one size, with a finished length of 43cm/17in without ties and a finished height of 22cm/8.75in.
How much yarn does the project use?
The pattern specifies 1 ball of Drops Safran in lavender, uni color 05.
What needles are required?
The bandana uses 3mm (US 2.5) knitting needles. The ties use a pair of 3mm (US 2.5) DPNs.
What is the gauge?
The stated gauge is 24 stitches x 32 rows in stockinette stitch over 10 x 10 cm (4 x 4in) after blocking.
How many stitches are cast on at the beginning?
The bandana begins with 5 stitches.
What is the eyelet pattern?
The eyelet pattern is k2tog, yo, k1, yo, ssk.
How long should each tie be?
The first and second i-cord ties are each worked until the tube measures approximately 30 cm.
Do I bind off the main bandana body?
No. The body is finished by breaking the yarn and leaving a 10cm (4″) tail while the live stitches remain on the needle for the i-cord edging.
Why the Construction Works So Well
The strength of this design is its efficient construction. The bandana does not require a separately knitted border to be sewn on afterward. The edge is built into the fabric from the beginning, while the final i-cord is connected directly to the live stitches.
The decorative portion is also carefully balanced. Increases create the expanding triangle, while the eyelet sequence introduces openness and visual texture. The wrong-side rows remain straightforward, giving the knitter regular opportunities to re-establish the edge and row rhythm.
For someone learning lace knitting, this makes the project particularly useful as a focused exercise. The eyelets are repeated enough to become familiar, but the project remains small enough that the construction can be followed from beginning to end without managing a very large piece of fabric.
Final Project Review
Before considering the Flower Bed Bandana finished, make one final pass through the project:
- Confirm that the yarn is Drops Safran, lavender, uni color 05.
- Confirm that the project uses the specified 3mm (US 2.5) needles.
- Check that both i-cord ties measure approximately 30 cm.
- Verify that the bandana body measures approximately 43cm/17in in length without ties.
- Check the 22cm/8.75in height.
- Make sure all yarn tails have been woven in.
- Allow the blocked fabric to settle naturally.
Final Thoughts
The Flower Bed Bandana is a compact project with a carefully organized construction. Its beauty comes from the interaction between simple knitting techniques rather than from a complicated number of separate components. Starting from 5 stitches, the fabric expands through controlled increases, decorative eyelets appear at specific points, and the integrated i-cord creates a polished finish.
The most useful strategy is to work through the project in recognizable stages: establish the five-stitch foundation, complete the twelve-row opening sequence, move into the eight-row repeat, preserve the live stitches, construct the first i-cord, integrate the edging, and finish with the second approximately 30 cm tie.
With the stitch counts, row instructions, measurements, and construction sequence kept close at hand, the project becomes much easier to manage. The finished result is a lightweight lace bandana with a defined triangular silhouette, delicate eyelet texture, and clean knitted ties.