
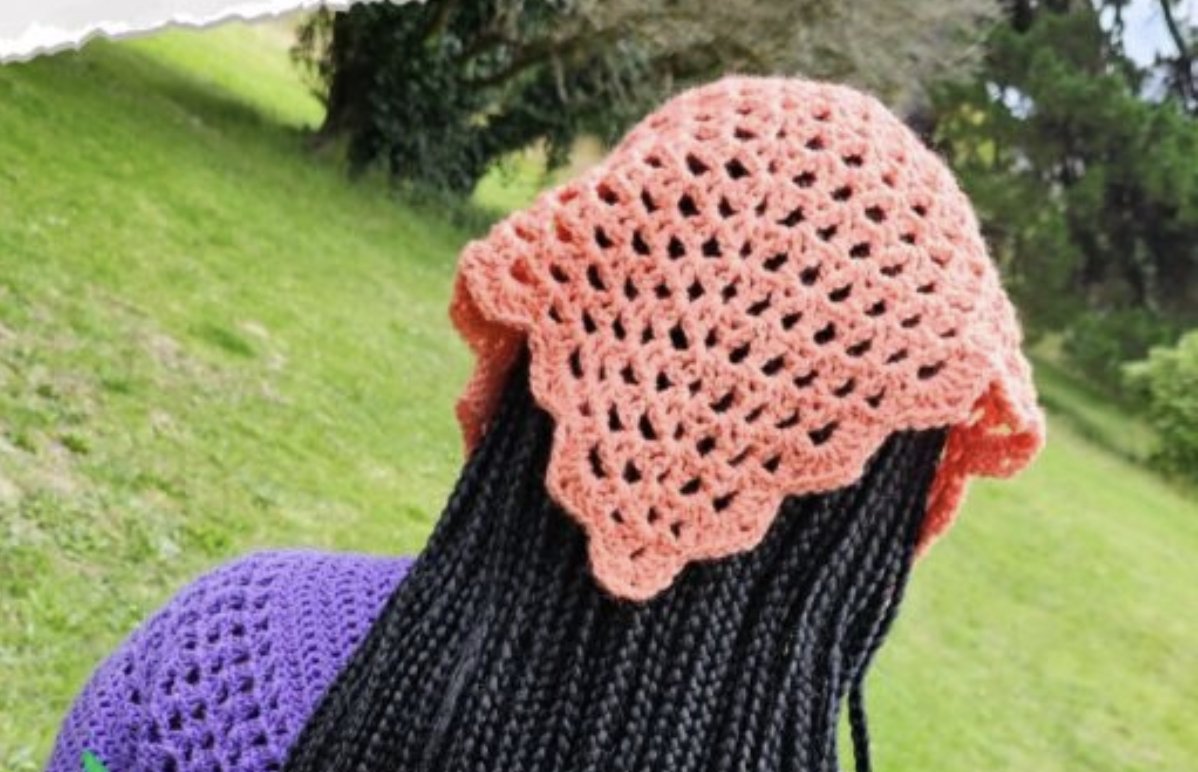
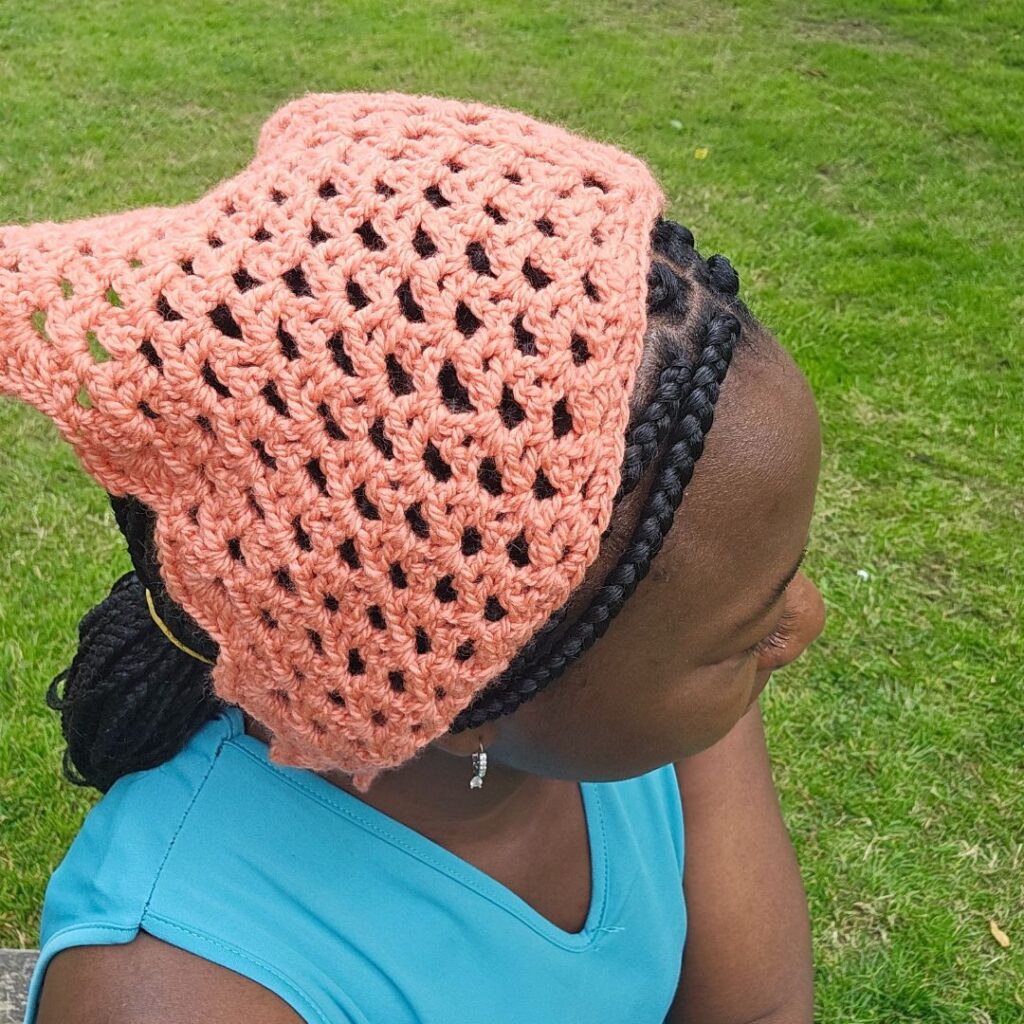
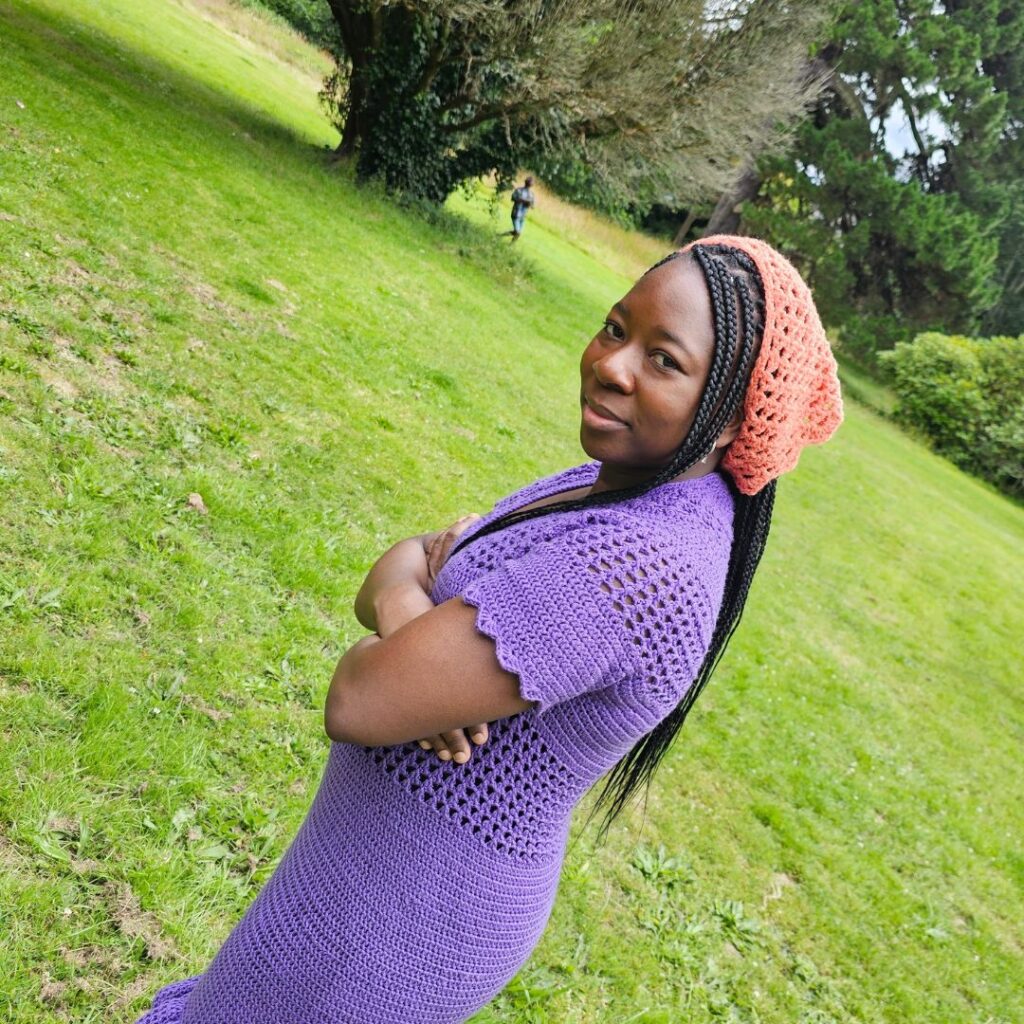
A handmade crochet bandana is one of those projects that can be both useful and enjoyable to make. The XoXo Crochet Bandana is a versatile kerchief designed with V stitches, open chain spaces, and a simple triangular construction. It is an attractive accessory for different seasons and can be worn with casual, boho-chic, or cottage-core outfits.
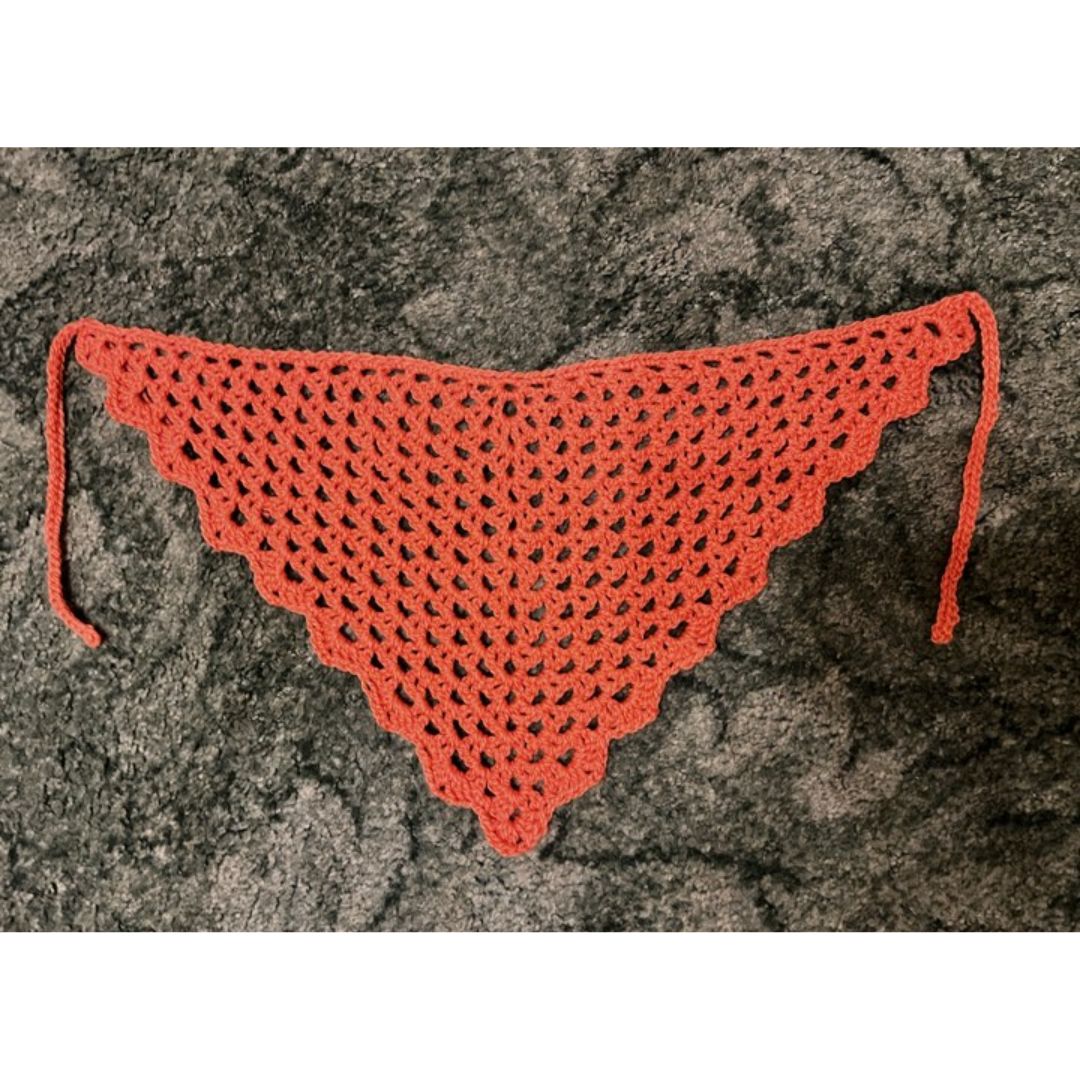
This project uses a relatively small amount of yarn and a 5.5 mm crochet hook. The estimated total yardage is only 70 yards, making it a convenient project when you want to use part of a ball of yarn for something practical and stylish.
The construction starts with a small circle and gradually grows through a sequence of V stitches and chain spaces. The central chain-2 space creates the important increase point, while the stitch marker helps you keep track of that location throughout the growing piece.
Why Try This Crochet Bandana Pattern?
If you enjoy crochet accessories that do not require a large amount of yarn or an extended list of supplies, this bandana is an excellent choice. The project is described as relatively quick, and the original pattern notes that it can be completed in a few hours. That makes it suitable for a weekend project, relaxing at home, or taking along on a road trip.
The pattern is also a useful opportunity to practice working with V stitches. Instead of using the popular granny stitch often seen in crochet bandanas, this design uses V stitches to create its distinctive open texture.
The shape develops gradually, so you can see the bandana becoming larger as you work through the rows. Once the initial rows are complete, Rows 4 and 5 become the repeating section that carries the project toward the 18-inch measurement.
Project Details at a Glance
- Project: XoXo Crochet Bandana
- Skill level: Intermediate
- Yarn: Stylecraft Aran, #4, 100% Acrylic
- Yarn quantity: 382 yards per 7.1 oz/200g ball
- Estimated total yardage: 70 yards
- Hook: 5.5 mm crochet hook
- Finishing tool: Tapestry needle
- Main stitch: V stitch
- Standard body measurement: 18 inches
- Standard tying rope: 39 chains on each side
Materials You Will Need
Gather your supplies before beginning so you can work continuously through the pattern. The original pattern specifies Stylecraft Aran #4 yarn made from 100% acrylic. Each 7.1 oz/200g ball contains 382 yards, while the project itself uses an estimated total of 70 yards.
You will also need a 5.5 mm crochet hook and a tapestry needle for weaving in the finished ends.
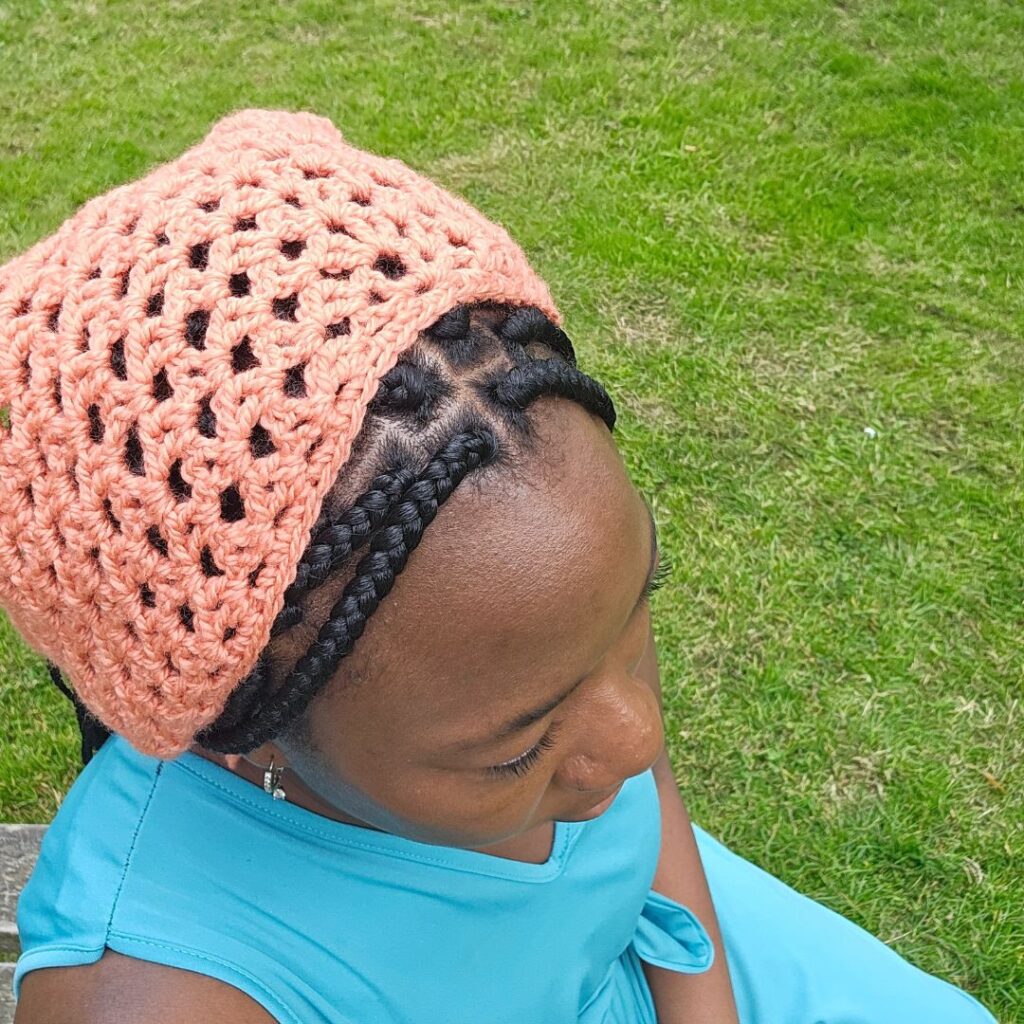
A similar #4 weight yarn can be substituted according to the pattern notes. If you substitute yarn, check the gauge. The source also notes that cotton yarn is recommended for a breathable and lightweight feel, particularly for summer outfits, while acrylic yarn works well for a cozy autumn-weather version.
Gauge Information
The stated gauge is 16 stitches over 8 rows = 4 inches by 4 inches, made in xhdc before blocking.
The pattern states that gauge is not crucial to this project. Even so, checking your tension can be helpful if you want your finished bandana to be close to the stated proportions. Gauge can become more important when changing yarn or when your natural crochet tension is significantly different from the original pattern.
If your gauge does not match the stated gauge, the original FAQ recommends trying a smaller or larger hook to adjust your tension and achieve the desired result.
Abbreviations to Know
The written pattern uses several standard crochet abbreviations. Keep this list available while following the instructions:
- ch – chain
- hdc – half double crochet
- st – stitch
- sl st – slip stitch
- dc – double crochet
The Special V Stitch
The main decorative stitch in this bandana is the V stitch. In this pattern, the V stitch is defined as dc, ch 1, dc in the indicated stitch.
This simple combination produces two double crochet stitches separated by a chain-1 space. Those spaces become especially important as the pattern progresses because later V stitches are worked into the chain spaces.
The pattern specifically instructs you to skip all V stitches from Row 3 onward. Therefore, do not treat the V stitch itself as the normal working location when following the later rows. Pay attention to the chain-1 spaces and the central chain-2 space.
Before You Begin
The pattern recommends reading through the instructions before starting. This is especially useful because the stitch marker and central increase area are important parts of the construction.
Have a stitch marker ready. In Row 1, you will place the marker and then move it after every row. Keeping this marker in the correct position helps you locate the central section as the bandana becomes wider.
It is also helpful to recognize that the first few rows have specific stitch and chain-space counts. These counts can act as checkpoints while you learn the structure of the pattern.
Starting the Bandana
Begin by chaining 4. Join the chain to make a circle.
This small circle forms the starting point for the bandana. Make sure the join is secure before beginning Row 1, since the first group of stitches will be worked into the circle.
Row 1: Creating the First V Stitches
Start Row 1 with ch 4. This counts as a double crochet plus a chain 1 here and throughout the pattern.
Work a V stitch, then chain 2. Place your stitch marker at the specified point and remember to move it after every row.
Continue with another V stitch, chain 1, and a double crochet in the circle. Turn your work.
The stated Row 1 checkpoint is:
- 2 V stitches
- 2 double crochets
- 3 chain spaces
Do not worry if the piece looks very small at this stage. The bandana is designed to grow outward through repeated rows.
Row 2: Establishing the Central Increase
For Row 2, begin with ch 4. Again, the chain 4 counts as a double crochet and chain 1.
Work a V stitch in the same stitch. Chain 1, then work a V stitch in the next V stitch. Chain 1.
Now reach the important center. In the next chain-2 space, work (V stitch, ch 2, V stitch). This central sequence is what helps the bandana expand.
Continue with chain 1, a V stitch in the next V stitch, chain 1, and a V stitch in the last stitch, which is the third chain from the ch-4 space. Chain 1 and work a double crochet in the same stitch. Turn.
The stated Row 2 checkpoint is:
- 6 V stitches
- 2 double crochets
- 7 chain spaces
Row 3: Adding More V Stitches
Begin Row 3 with ch 4. Work a V stitch in the first chain space and chain 1.
Work a V stitch in the next chain-1 space, chain 1, and repeat that sequence one more time.
At the central chain-2 space, work (V stitch, ch 2, V stitch).
Continue the V-stitch and chain-1 sequence on the opposite side according to the written pattern. Repeat the indicated section two more times, then finish with a V stitch, chain 1, and a double crochet in the last stitch. Turn.
The stated Row 3 checkpoint is:
- 8 V stitches
- 2 double crochets
- 9 chain spaces
From this point, remember the pattern instruction to skip all V stitches and work into the appropriate chain spaces.
Rows 4 and 5: The Repeating Pattern
Rows 4 and 5 are the main repeating section. These rows build the body of the bandana while maintaining the central increase.
How to Work Row 4
Start with ch 4. Work a V stitch in the first chain space, followed by chain 1.
Continue by working a V stitch in each indicated chain-1 space with chain 1 between the V stitches. Repeat the sequence until reaching the next stitch marker.
At the central chain-2 space, work (V stitch, ch 2, V stitch).
Continue the V-stitch and chain-1 sequence until reaching the last stitch. Finish with a V stitch, chain 1, and a double crochet in the last stitch. Turn.
The stated Row 4 count is 10 V stitches, 2 dc, and 11 chain spaces.
How to Work Row 5
Begin Row 5 with ch 4. Work a V stitch in the first chain space and chain 1.
Continue working V stitches into the chain-1 spaces with chain 1 between them until reaching the stitch marker.
In the central chain-2 space, work (V stitch, ch 2, V stitch).
Continue the same sequence toward the last stitch. Finish with a V stitch, chain 1, and a double crochet in the last stitch. Turn.
The stated Row 5 count is 12 V stitches, 2 dc, and 13 chain spaces.
Repeat Rows 4 and 5 Until You Reach 18 Inches
Once Rows 4 and 5 are established, continue repeating those two rows until the piece measures 18 inches.
Measuring the work as you go is a useful way to know when you have reached the specified size. Because the pattern gives a clear measurement rather than a fixed number of repetitions, the measurement itself is your main stopping point for the standard version.
If you want a smaller bandana, the original instructions say that you can stop at any point you would love. This allows the same basic design to be used for a smaller accessory without requiring you to continue to the full 18-inch measurement.
Useful Stitch Checkpoints
The first five rows provide clear checkpoints that can help you confirm that the structure is developing correctly:
- Row 1: 2 V stitches, 2 dc, 3 chain spaces.
- Row 2: 6 V stitches, 2 dc, 7 chain spaces.
- Row 3: 8 V stitches, 2 dc, 9 chain spaces.
- Row 4: 10 V stitches, 2 dc, 11 chain spaces.
- Row 5: 12 V stitches, 2 dc, 13 chain spaces.
These counts are especially helpful if you are still getting used to working V stitches into chain spaces. If your count differs, review the row before continuing rather than trying to compensate in a later row.
Why the Stitch Marker Matters
The stitch marker is more than an optional convenience in this design. The instructions specifically tell you to place the stitch marker and move it after every row.
As the bandana grows, the center can become harder to identify visually. The marker gives you a consistent reference point for the central chain-2 space where the increase is made. Keeping it correctly positioned can make the repeated rows much easier to follow.
Working the Decorative Last Row
After the main body reaches the desired measurement, it is time to work the final decorative row.
Begin with ch 3. Work 2 dc, ch 2, 3 dc in the next chain-1 space.
Then repeat the following sequence across the row:
- Single crochet in the next chain-1 space.
- 3 dc, ch 2, 3 dc in the next chain space.
- Repeat the sequence across.
This decorative edging adds a different visual rhythm to the final row and creates a more finished appearance around the outer edge.
Do Not Fasten Off After the Last Row
This is an important point in the finishing process. After completing the last row, do not fasten off.
The remaining working yarn is used to continue directly into the tying rope and edge-finishing instructions. Keeping the yarn attached makes it possible to proceed without creating an unnecessary additional join.
Making the First Tying Rope
After completing the last row, chain 39.
Slip stitch in the second chain from the hook and continue with a slip stitch in each chain across.
The pattern allows you to increase or decrease the number of chains if you want a different rope length. The standard instruction uses 39 chains, so use that number when following the original version exactly.
This construction gives the bandana a simple tie that can be adjusted according to how you prefer to wear it.
Single Crochet Across the Edge
Once the first rope has been completed, crochet across the edge of the bandana. Work single crochet stitches evenly across to the other edge.
The word evenly is important here. The finishing edge should follow the bandana without creating an unnecessarily tight or loose border. Work steadily and observe the edge as you move from one side toward the other.
Making the Second Tying Rope
When you reach the opposite edge, chain 39 again.
As with the first rope, slip stitch in the second chain from the hook and in each chain across.
The number of chains can again be increased or decreased if you want a different tying rope length. Once the second rope is complete, fasten off.
Finishing and Weaving in the Ends
After fastening off, use the tapestry needle to sew in all ends. Weaving the loose ends securely gives the project a clean finish and helps prevent the yarn from unraveling.
For a polished result, take your time during this final stage. The finishing work may be small compared with the main body, but it is an important part of completing a wearable crochet accessory.
How to Keep the Bandana Looking Even
One of the easiest ways to maintain a neat shape is to pay attention to the central increase throughout the project. The repeated (V stitch, ch 2, V stitch) sequence in the central chain-2 space is a defining part of the construction.
Keep your stitch marker updated after each row and make sure the central space remains easy to identify. Working the V stitches into the correct chain spaces will also help maintain the open structure of the design.
As the piece gets larger, occasionally lay it flat to observe its shape. This can help you notice whether the center and sides are developing consistently.
Choosing Yarn for Different Seasons
The original pattern uses Stylecraft Aran #4 100% Acrylic yarn. This yarn provides the specified foundation for the project and is the basis for the stated gauge and yardage information.
For a different feel, the pattern notes that similar #4 weight yarn can be substituted, with gauge checking recommended. The original FAQ also recommends cotton for a breathable and lightweight feel, especially when making a bandana for summer outfits.
Acrylic is another practical choice and can be suitable for a cozy bandana during cooler weather. Whichever yarn you choose, remember that changing the yarn can affect the final feel and dimensions of the project.
Adjusting the Size
The pattern provides a simple option for making a smaller bandana: stop the repeated section at any point you would love. The standard instructions continue until the piece measures 18 inches.
The FAQ also mentions changing hook size, yarn weight, or the number of stitches and rows as possible ways to adjust the finished size. When making substitutions or significant changes, remember that the stated gauge and stitch construction are part of the original pattern specifications.
The tying ropes provide another straightforward adjustment. The standard length is 39 chains on each side, but the pattern specifically allows you to increase or decrease the number of chains for the desirable rope length.
Common Troubleshooting Questions
What if I lose track of the center?
Check your stitch marker first. The instructions tell you to place the marker and move it after every row. Use it as your reference for the central section and the chain-2 increase.
What if my stitches look too tight?
Check your tension and gauge. If your gauge does not match the stated gauge, the original FAQ recommends trying a smaller or larger hook to adjust the tension.
What if my bandana is smaller than expected?
Measure the project as you work. The standard body measurement is 18 inches, and Rows 4–5 are repeated until that measurement is reached. Yarn weight, hook size, and crochet tension can all affect the finished dimensions.
Can I use a different #4 yarn?
Yes. The pattern notes that similar #4 weight yarn can be substituted. Check the gauge when making a substitution.
Can I change the tying rope length?
Yes. The standard instructions use 39 chains, but you can increase or decrease the number of chains for the tying rope you desire.
A Simple Workflow for the Whole Project
If you prefer to think of the pattern as a project sequence rather than a long list of instructions, use the following workflow:
- Gather Stylecraft Aran #4 yarn, a 5.5 mm hook, tapestry needle, and stitch marker.
- Read through the pattern before beginning.
- Chain 4 and join to make a circle.
- Work Row 1 and place the stitch marker as instructed.
- Complete Row 2 and establish the central increase.
- Work Row 3 while paying attention to the chain spaces.
- Work Rows 4 and 5 according to the written instructions.
- Repeat Rows 4–5 until the piece measures 18 inches, or stop earlier for a smaller version.
- Work the decorative last row.
- Do not fasten off.
- Chain 39 and slip stitch back across to form the first tying rope.
- Single crochet evenly across the edge.
- Chain 39 and slip stitch back across to form the second tying rope.
- Fasten off.
- Sew in all ends with the tapestry needle.
Quick Pattern Checkpoints
- Starting chain: 4, joined to make a circle.
- Row 1: 2 V stitches, 2 dc, 3 chain spaces.
- Row 2: 6 V stitches, 2 dc, 7 chain spaces.
- Row 3: 8 V stitches, 2 dc, 9 chain spaces.
- Row 4: 10 V stitches, 2 dc, 11 chain spaces.
- Row 5: 12 V stitches, 2 dc, 13 chain spaces.
- Main repeat: Rows 4–5.
- Standard measurement: 18 inches.
- Smaller version: Stop the repeated section earlier.
- First tying rope: 39 chains.
- Edge: Single crochet evenly across.
- Second tying rope: 39 chains.
- Finishing: Fasten off and sew in all ends.
Frequently Asked Questions About the XoXo Bandana
Is this a quick crochet project?
Yes. The original pattern describes it as a relatively quick project that can be completed in a few hours. It is also presented as a suitable weekend or road-trip project.
Can finished items made from this pattern be sold?
Yes. The original FAQ states that finished items made from this pattern may be sold. It also encourages makers to share their work on social media and tag the pattern source on TikTok and Facebook.
Is the pattern suitable for beginners?
The source lists the skill level as intermediate. However, the project uses familiar stitches including chains, double crochet, half double crochet, and slip stitches, with the V stitch as the main special stitch. Crocheters who are comfortable working into chain spaces may find the construction approachable.
What is the finished size?
The main instructions say to repeat Rows 4–5 until the piece measures 18 inches. A smaller version can be made by stopping earlier.
What is the V stitch used in this pattern?
The pattern defines a V stitch as dc, ch 1, dc in the indicated stitch.
Is gauge important?
The pattern states that gauge is not crucial. The stated gauge is 16 stitches over 8 rows = 4 inches by 4 inches made in xhdc before blocking. When substituting yarn, the pattern recommends checking gauge.
How many yards of yarn are needed?
The estimated total yardage is 70 yards. The specified yarn is Stylecraft Aran #4, 100% Acrylic, with 382 yards per 7.1 oz/200g ball.
Final Finishing Checklist
- Confirm the body has reached 18 inches for the standard version.
- Check that the final decorative row is complete.
- Make sure you did not fasten off before beginning the first rope.
- Complete the first 39-chain tying rope.
- Single crochet evenly across the edge.
- Complete the second 39-chain tying rope.
- Fasten off.
- Use the tapestry needle to sew in all ends.
- Check the finished bandana for loose ends before wearing it.
Enjoy Your Handmade XoXo Crochet Bandana
The XoXo Crochet Bandana combines a simple supply list with an attractive V-stitch construction, making it a useful project for crocheters who want to create a handmade accessory while practicing stitch placement and working into chain spaces.
The project begins with a small circle and gradually expands through the central increase. The stitch marker helps keep the center organized, while the V stitches and chain spaces create the characteristic open texture. Rows 4 and 5 provide the repeating rhythm that carries the project toward the 18-inch measurement.
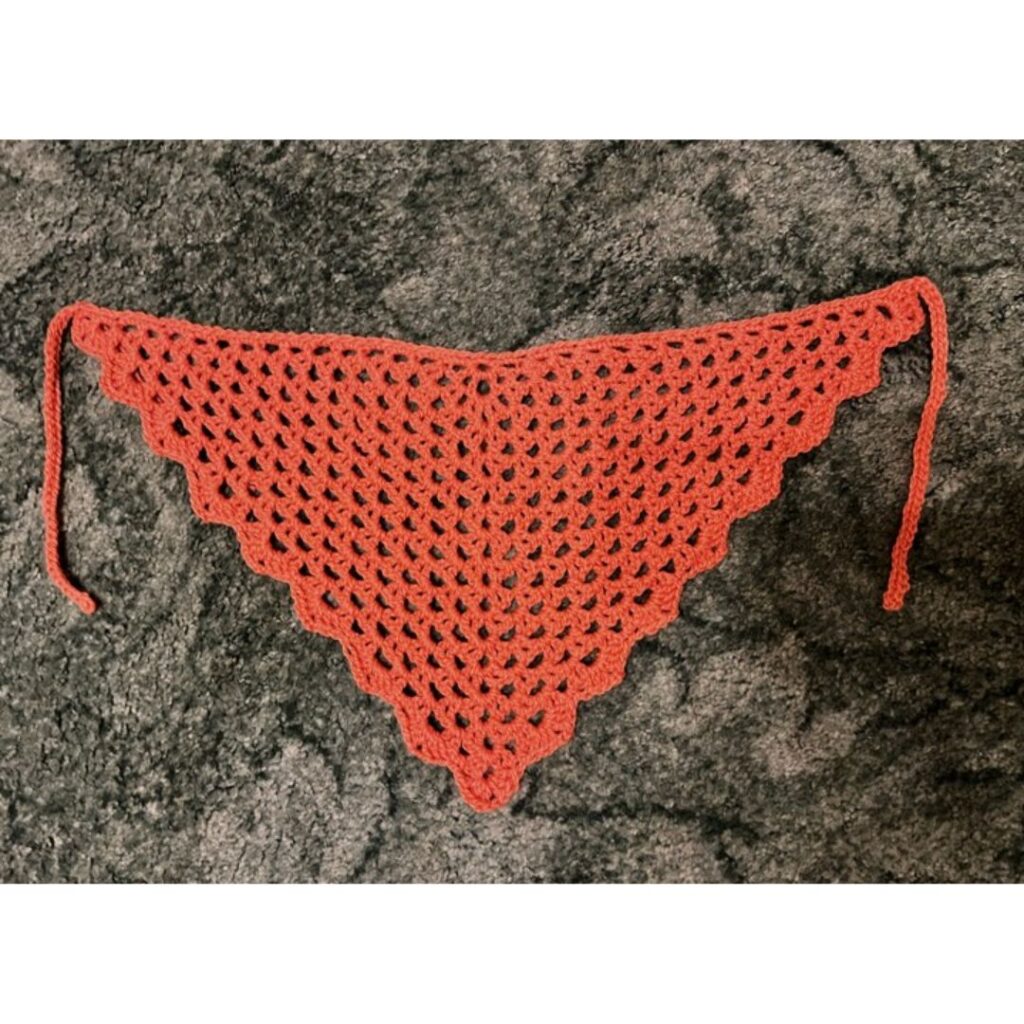
The finishing process adds the decorative final row, two tying ropes, and an evenly crocheted edge. The standard ropes use 39 chains each, although their length can be adjusted according to your preference.
Whether you follow the standard 18-inch version or stop earlier to create a smaller bandana, the result is a practical handmade accessory that can be enjoyed across different seasons. Choose your yarn, prepare your hook, keep your stitch marker close, and work through the rows carefully for a beautiful finished XoXo crochet bandana.