
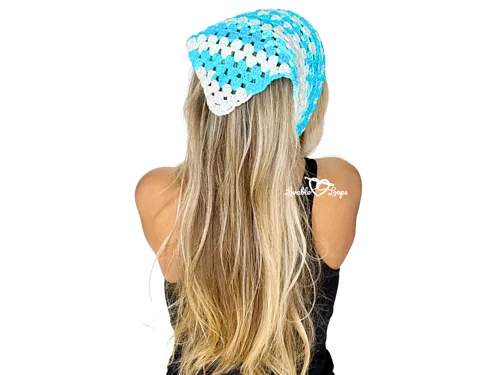
A crochet bandana is one of those projects that can be both useful and enjoyable to make. This granny stitch version combines a familiar crochet texture with a simple triangular construction, giving advanced beginners a manageable project that can be worn, gifted, or prepared for a craft fair. The design is intentionally straightforward: the bandana begins at the top point, grows downward through evenly increasing rows, and finishes with two simple chain straps.
The pattern includes both child and adult sizes, so the same basic technique can be used to create two different finished dimensions. The child version measures approximately 9 inches wide by 17 inches tall (23 cm × 43 cm), while the adult version measures approximately 10 inches wide by 20.5 inches tall (25 cm × 52 cm). Measurements are taken flat and may vary slightly depending on yarn choice and tension.
The project uses worsted weight yarn #4 and an H-8 (5 mm) crochet hook. You will also need a yarn needle, scissors, and stitch markers. The pattern is written in US crochet terms and relies heavily on chain spaces and granny stitch clusters, making those two elements the most important things to understand before beginning.
Project Overview
The bandana is worked using the corner-to-corner granny stitch technique. Instead of crocheting several separate sections and joining them afterward, the main piece is built continuously in rows. The first row establishes the top point, and every subsequent row increases the width of the triangular piece.
The central repeating element is a granny stitch cluster made with (3 dc, ch 1) in the indicated space. As the rows become wider, additional ch-1 spaces appear, giving you more locations in which to place the granny stitch clusters.
The pattern begins with a magic ring. After the triangular body reaches the required row, the final row becomes the strap row. The child version reaches this point at Row 20, while the adult version reaches it at Row 24. Both versions use chains of 35 for the two straps.
Materials for the Granny Stitch Bandana
Before beginning, gather all of the tools required for the project. Having everything within reach makes it easier to concentrate on the stitch placement and row progression.
- H-8 (5 mm) crochet hook
- Worsted weight yarn #4
- Yarn needle for weaving in ends
- Scissors for fastening off
- Stitch markers to help keep track of your work
The source pattern specifies worsted weight yarn #4 but does not give a particular brand, fiber, or color requirement. This means the important technical starting point is the specified yarn weight together with the H-8 (5 mm) hook.
Gauge and Finished Measurements
Gauge is an important reference when making a project that has stated finished dimensions. For this pattern, the gauge is 5 granny stitch clusters = 4 inches (10 cm) and 9 rows = 4 inches (10 cm).
The child size is approximately 9 inches wide × 17 inches tall (23 cm × 43 cm). The adult size is approximately 10 inches wide × 20.5 inches tall (25 cm × 52 cm).
The measurements are approximate because individual crochet tension can affect the finished fabric. The pattern specifically notes that the sizes are measured flat and may vary slightly according to yarn choice and tension.
Important Crochet Abbreviations
This pattern uses US crochet terminology. If you normally work from UK patterns, pay attention to the terminology before beginning so that the stitches are interpreted according to the system used by the source.
- dc: double crochet
- ch/chs: chain/chains
- ch sp: chain space
- st/sts: stitch/stitches
- sl st: slip stitch
The Main Stitch: C2C Granny Stitch Cluster

The most important special stitch in this project is the C2C granny stitch cluster. It consists of (3 dc, ch 1) worked in the indicated space.
Once you understand that combination, much of the pattern becomes a matter of repeating the same action in the available ch-1 spaces. The chain spaces are therefore more useful visual landmarks than individual double crochet stitches.
There is one important difference at the final space of the regular rows. Instead of simply working (3 dc, ch 1), the final space receives (3 dc, ch 1, dc). That additional double crochet is part of the shaping and should not be omitted.
Getting Started with the Magic Ring
The magic ring forms the starting point of the bandana. Begin with the magic ring, then chain 4. Work (3 dc, ch 1, dc) into the ring. Pull the yarn tail to close the ring. After completing this starting structure, chain 4 and turn your work.
The first row may feel slightly different from the following rows because you are working into the ring rather than an established chain space. Once Row 1 is complete, the subsequent construction becomes much more repetitive.
When tightening the magic ring, make sure the center closes securely without disturbing the stitches you have just created. The closed center establishes the point from which the triangular bandana grows.
Understanding the First Few Rows
The first four rows are particularly useful for learning the rhythm of the pattern. Each row adds another ch-1 space, which means another location for a granny stitch cluster.
Row 1
Make a magic ring. Chain 4. Work (3 dc, ch 1, dc) into the ring. Pull the yarn tail to close the ring. Chain 4 and turn.
Row 2
In the first ch-1 space, work (3 dc, ch 1). In the next ch-1 space, work (3 dc, ch 1, dc). Chain 4 and turn.
Row 3
In the first ch-1 space, work (3 dc, ch 1). In the next ch-1 space, work (3 dc, ch 1). In the last ch-1 space, work (3 dc, ch 1, dc). Chain 4 and turn.
Row 4
In the first ch-1 space, work (3 dc, ch 1). In the next 2 ch-1 spaces, work (3 dc, ch 1). In the last ch-1 space, work (3 dc, ch 1, dc). Chain 4 and turn.

These first rows demonstrate the basic growth pattern. The number of middle ch-1 spaces increases as the bandana gets wider, while the final space continues to receive the ending combination.
The Repeating Row Pattern
After Row 4, the instructions become much more repetitive. Row 5 establishes the main repeating sequence that is used for the remaining body rows.
Row 5
In the first ch-1 space, work (3 dc, ch 1). Repeat (3 dc, ch 1) in each ch-1 space across to the last space. In the last ch-1 space, work (3 dc, ch 1, dc). Chain 4 and turn.
The important phrase here is “across to the last space.” Every middle ch-1 space receives the standard granny stitch cluster, while the last space receives the special ending combination.
This repeated structure is what makes the project approachable. After you have established the pattern, you do not need to learn a new stitch sequence for every row. Instead, the same basic sequence is repeated while the triangular piece continues to grow.
Child Size Construction
For the child version, Row 5 is repeated through Rows 6–19. This gives the bandana its final triangular body before the straps are created on Row 20.
Rows 6–19
Repeat Row 5 for Rows 6–19.
As you work these rows, keep an eye on the ch-1 spaces. Each middle space should receive (3 dc, ch 1), while the last space receives (3 dc, ch 1, dc). Continue with Ch 4, turn at the end of each row.
The finished child size is approximately 9 inches wide by 17 inches tall (23 cm × 43 cm), measured flat.
Child Size Strap Row
Row 20 is the strap row for the child size. This row is different because the bandana body is now complete and the instructions move into the strap construction.
In the first ch-1 space, work (3 dc, ch 1). In the next 18 ch-1 spaces, work (3 dc, ch 1). In the last ch-1 space, work (3 dc, ch 1, dc).
Then chain 35 to form the first strap and fasten off.
To create the second strap, join yarn to the opposite corner and ch 35. Fasten off. Weave in all ends using a yarn needle.
Adult Size Construction
The adult version begins exactly like the child version. Work Rows 1–4 according to the instructions, then complete Row 5 and repeat it through the additional body rows.
The main difference is the number of rows. The adult size continues through Row 23 before the strap row is worked.
Rows 6–23
Repeat Row 5 for Rows 6–23.
Continue paying attention to the difference between the regular ch-1 spaces and the last ch-1 space. Consistent placement is essential for maintaining the intended triangular shape.
The completed adult size is approximately 10 inches wide by 20.5 inches tall (25 cm × 52 cm), measured flat.
Adult Size Strap Row
Row 24 is the strap row for the adult size.
In the first ch-1 space, work (3 dc, ch 1). In the next 22 ch-1 spaces, work (3 dc, ch 1). In the last ch-1 space, work (3 dc, ch 1, dc).
Chain 35 to form the first strap and fasten off. Join yarn to the opposite corner and chain 35 to form the second strap. Fasten off and weave in all ends using a yarn needle.
Keeping Track of Your Rows
Because the middle section contains many repeated rows, row tracking can be helpful. This is particularly important when working the child and adult versions because the strap rows occur at different points.
- Child size: repeat Row 5 through Rows 6–19, then work Row 20 as the strap row.
- Adult size: repeat Row 5 through Rows 6–23, then work Row 24 as the strap row.
A stitch marker can also be useful as a visual aid while you are becoming familiar with the pattern. The source lists stitch markers among the required materials for the project.
How to Avoid Losing the Triangular Shape
The triangular shape depends on the consistent increase pattern. Every row begins with granny stitch work in the first ch-1 space and finishes with the specific ending combination in the final ch-1 space.
If the edges begin to look uneven, check whether you accidentally skipped a ch-1 space or worked into a location that was not intended to receive a cluster. It is also helpful to inspect the final space because the final double crochet is part of the row’s shaping.
Another useful habit is to pause at the end of each row and visually inspect the edge before chaining 4 and turning. Catching an inconsistency immediately can save considerable time later.
Reading the Pattern Through Its Chain Spaces
One of the easiest ways to understand this project is to think of it in terms of spaces rather than individual stitches. The granny clusters are placed in the ch-1 spaces, and those spaces form a visible framework throughout the fabric.
For the middle of the row, the repeated unit is (3 dc, ch 1). At the final space, the unit changes to (3 dc, ch 1, dc). This distinction remains important throughout the repeated rows.
Once your eye becomes accustomed to the spaces, the pattern can become much easier to follow than a line-by-line count of individual double crochets.
Finishing the Bandana Neatly
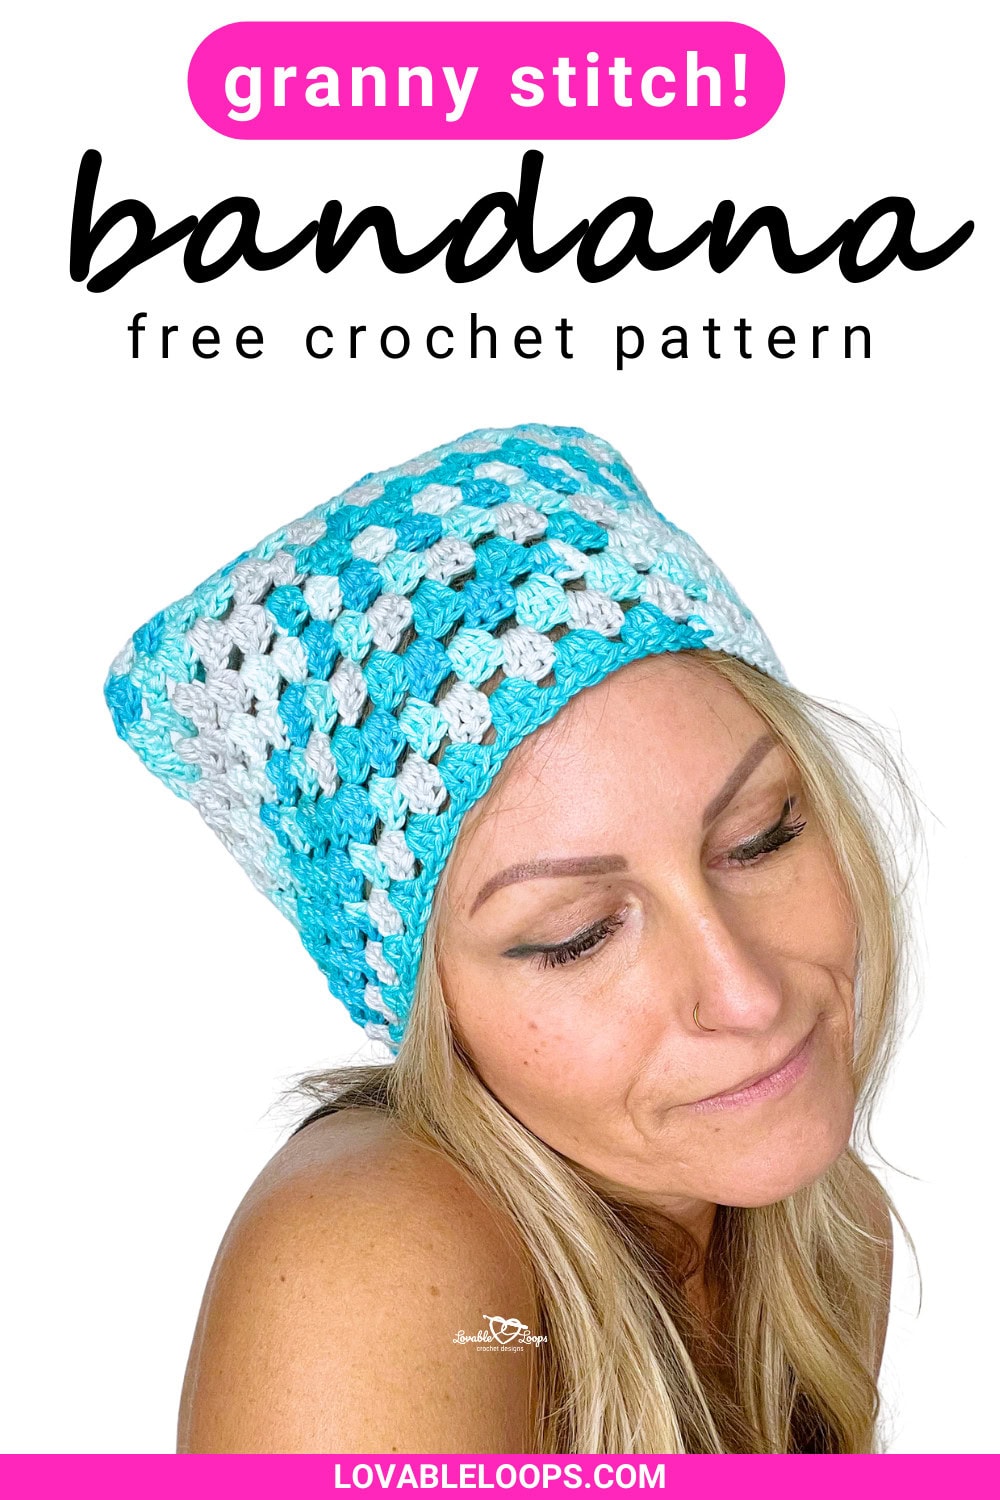
Finishing is simple but important. After creating the two straps, fasten off and use a yarn needle to weave in all loose ends securely along the edges and strap chains.
Lay the completed bandana flat. Check that the two straps are even and that neither strap has become twisted. This is a good time to inspect the entire piece for loose ends or areas that need additional attention.
The source pattern also gives the option of lightly steam blocking or wet blocking the finished bandana. Blocking can help the piece lay flat and highlight the granny stitch texture. If you choose to block it, allow the bandana to dry completely before wearing it.
Blocking: An Optional Finishing Step
Blocking is not required to complete the construction, but it can be useful when you want the triangular shape to present neatly. The pattern specifically mentions both light steam blocking and wet blocking as options.
When deciding whether to block, first lay the bandana flat and inspect its natural shape. If it already lies nicely and the texture looks as you want it to, you may simply finish the loose ends and wear it. If you want the fabric to lay flatter and the granny stitch texture to be more pronounced, blocking can be considered as an optional finishing step.
Beginner Troubleshooting Guide
The bandana is not growing evenly
Review the placement of the granny stitch clusters and make sure you are working into the ch-1 spaces. Also check that the final ch-1 space receives (3 dc, ch 1, dc).
I am unsure where the next cluster belongs
Look for the next ch-1 space. The granny stitch cluster is worked into the indicated space rather than into an individual double crochet from the previous cluster.
My finished measurements are slightly different
The source notes that finished measurements may vary slightly depending on yarn choice and tension. Compare your gauge with the stated gauge of 5 granny stitch clusters per 4 inches (10 cm) and 9 rows per 4 inches (10 cm).
The straps do not look even
Lay the bandana flat and compare the two straps before finishing. Both straps are made with ch 35, so consistent chain tension is important. Make sure the straps are also untwisted.
Child and Adult Versions at a Glance
- Child: approximately 9 inches wide × 17 inches tall (23 cm × 43 cm)
- Adult: approximately 10 inches wide × 20.5 inches tall (25 cm × 52 cm)
- Child strap row: Row 20
- Adult strap row: Row 24
- Child strap construction: ch 35 for each strap
- Adult strap construction: ch 35 for each strap
- Hook: H-8 (5 mm)
- Yarn: worsted weight #4
Practical Tips Before You Begin
Set up your work area with the hook, yarn, scissors, yarn needle, and stitch markers before making the magic ring. The project becomes much easier when you do not need to stop repeatedly to search for supplies.
Keep your row count visible. The repeated Row 5 structure can make it easy to lose your place, particularly when working several rows during one sitting. Marking your progress after each completed row can help you distinguish the child and adult stopping points.
Most importantly, do not rush the first few rows. Rows 1–4 establish the structure that all of the later rows build upon. Once you are confident that the first rows are correct, the repeated section should become much more comfortable.
A Simple Workflow for the Whole Project
- Gather the H-8 (5 mm) hook, worsted weight yarn #4, yarn needle, scissors, and stitch markers.
- Review the US crochet abbreviations used in the pattern.
- Make the magic ring.
- Complete Row 1 using the specified stitch sequence.
- Work Rows 2–4 while paying attention to the ch-1 spaces.
- Complete Row 5.
- Repeat Row 5 for the required size.
- Work the appropriate strap row.
- Chain 35 for the first strap.
- Fasten off.
- Join yarn at the opposite corner and chain 35 for the second strap.
- Fasten off and weave in all ends.
- Check that the straps are even and untwisted.
- Lightly steam block or wet block if desired.
- Allow the bandana to dry completely if blocking was used.
Why the Repetition Works So Well
One of the strengths of this pattern is the balance between repetition and visible progress. Every new row adds width to the triangle, so the bandana grows steadily while you repeat a familiar stitch combination.
This is particularly helpful for crocheters who want to build confidence with pattern reading. Instead of learning a new complicated sequence on every row, you learn the basic granny stitch cluster and the difference between the middle spaces and the final space.
The project also demonstrates how a simple increase structure can create a recognizable wearable shape. The result is an accessory that looks more elaborate than the basic stitch technique might suggest.
Finishing Checklist
- Confirm the correct final row for your chosen size.
- Check that both straps contain ch 35.
- Make sure both straps are attached at opposite corners.
- Fasten off securely.
- Weave in every loose end with the yarn needle.
- Lay the bandana flat.
- Check the triangular shape.
- Check that both straps are even.
- Make sure the straps are not twisted.
- Block lightly if desired.
- Allow the piece to dry completely after blocking.
Final Look at the Crochet Bandana
Once the finishing steps are complete, the simple granny stitch construction becomes a wearable triangular accessory. The repeating clusters provide the classic texture, while the chain straps allow the bandana to be tied into place.
The finished design works particularly well as a small handmade project because it does not require complicated assembly. The main fabric is crocheted as one triangular section, and the only additional construction comes from the two chain straps and the final weaving-in process.
For the child size, the body progresses through Row 19 before the strap row is completed at Row 20. For the adult size, the body continues through Row 23 before the strap row at Row 24. This clear distinction makes it easy to select the version you want before beginning.
Frequently Asked Questions
What skill level is this crochet bandana?
The pattern is classified as advanced beginner. It is best suited to someone who is comfortable with basic crochet stitches, working in rows, and reading simple pattern instructions.
What hook size is required?
The specified hook is an H-8 (5 mm) crochet hook.
What type of yarn is required?
The pattern calls for worsted weight yarn #4.
What is the gauge?
The gauge is 5 granny stitch clusters per 4 inches (10 cm) and 9 rows per 4 inches (10 cm).
How many rows are in the child size?
The child version reaches Row 20, which is the strap row. Rows 6–19 repeat Row 5 before the strap row is worked.
How many rows are in the adult size?
The adult version reaches Row 24, which is the strap row. Rows 6–23 repeat Row 5 before the straps are created.
How long is each strap?
Each strap is made by chaining 35.
Can I make the bandana larger or smaller?
The source notes that the bandana can be adjusted by adding or removing rows. Since the triangular body grows through repeated rows, changing the number of rows changes the finished dimensions.
Can this project be used as a handmade gift?
Yes. The source specifically describes the bandana as suitable for gifts and craft fairs. The inclusion of both child and adult sizes also makes the design useful for different recipients.
Conclusion
This granny stitch crochet bandana is a practical way to turn a classic stitch technique into a wearable accessory. Its construction is easy to understand once you recognize the role of the ch-1 spaces and the repeating (3 dc, ch 1) granny stitch cluster.
The project starts with a magic ring and grows downward through evenly increasing rows. The first four rows establish the triangular construction, Row 5 introduces the main repeat, and the appropriate number of repetitions determines whether you are making the child or adult version.
The child bandana finishes its body with Row 19 and uses Row 20 for the straps. The adult bandana continues through Row 23 and uses Row 24 for its straps. In both cases, the straps are made with ch 35. After fastening off, the final steps are simply to weave in the loose ends, check that the straps are even and untwisted, and optionally block the finished piece.
With an H-8 (5 mm) crochet hook, worsted weight yarn #4, and a little patience with the repeating granny stitch structure, an advanced beginner can create a classic triangular bandana that is ready to wear, gift, or add to a handmade collection.