
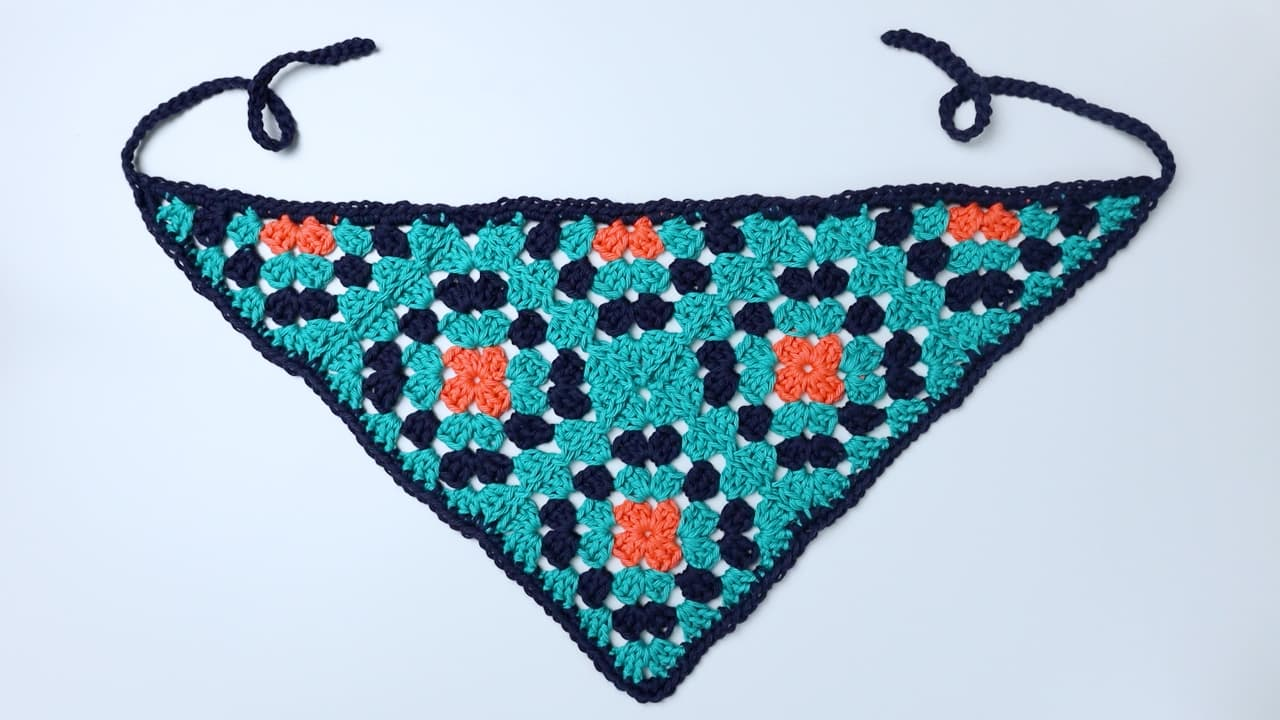
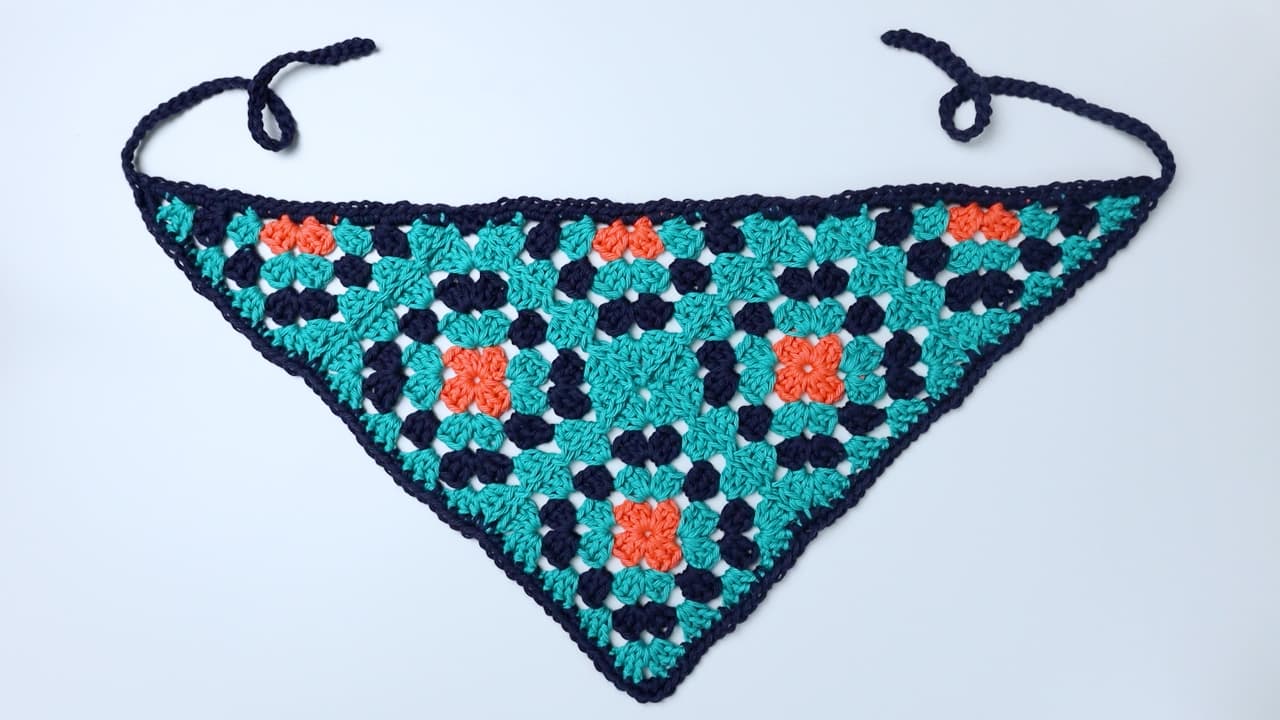
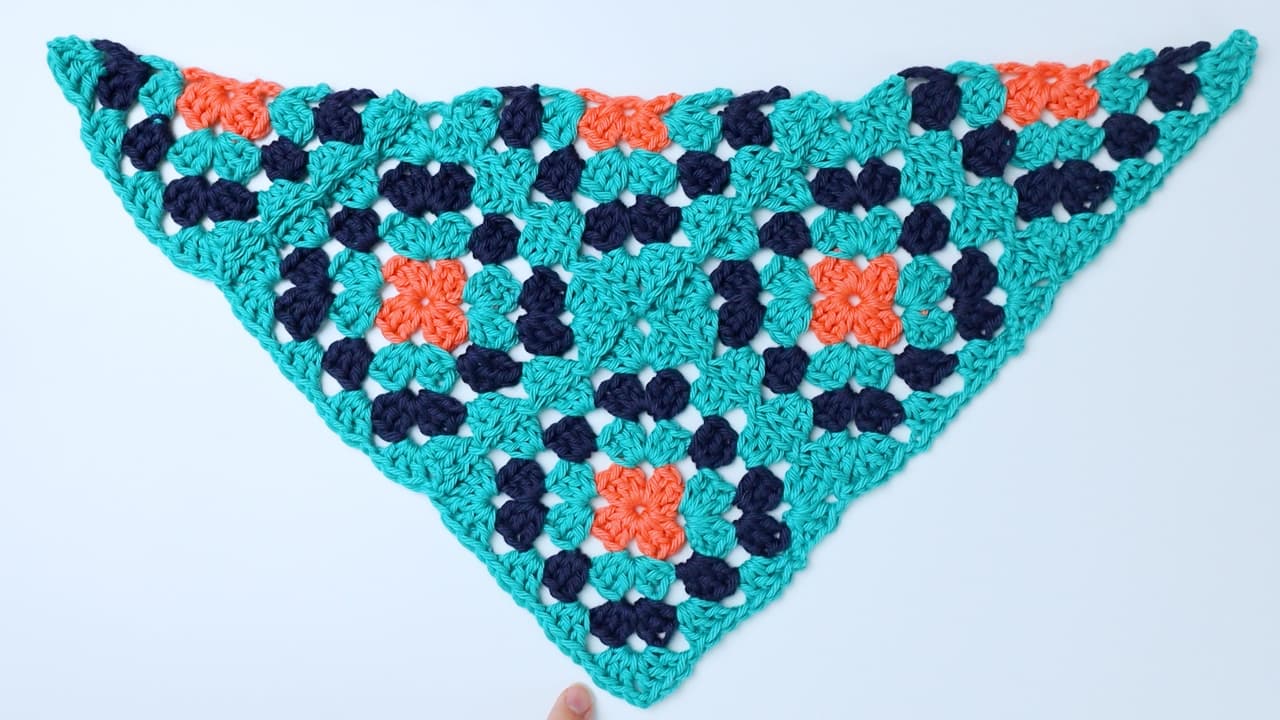
This granny square bandana is a wonderful crochet project for anyone who enjoys colorful motifs and wants to turn a few simple pieces into a wearable accessory. The finished design combines three granny squares with three granny triangles, then connects them into a pointed bandana shape with a neat single crochet border and two long ties.
The construction is especially useful for crocheters who want to understand how separate granny motifs can be joined while maintaining the look of the traditional granny stitch. Instead of making the entire accessory in one continuous piece, this pattern breaks the work into manageable sections: squares first, triangles next, joining afterward, and finally the border and straps.
The pattern is rated easy and uses US crochet terms. The designer used “I Love This Cotton” because it was available, although the source notes a preference for another cotton worsted yarn. The pattern uses three colors: Coral as Color A, Teal as Color B, and Navy as Color C. Each color requires 1 skein.
What You Will Make
The finished bandana measures approximately 22 inches across from corner to corner and 10 inches deep. The two straps are approximately 11 inches long. The individual granny squares are approximately 4.5 inches, while the triangles measure approximately 4.5 inches along their short sides and 6.5 inches along the long side, or hypotenuse.
Gauge is not considered important for this project. That makes the bandana approachable for beginners, because the emphasis is on following the motif construction and keeping the pieces consistent rather than matching a strict stitch-per-inch measurement.
Materials and Pattern Reference
Before beginning, organize the yarn colors so that Color A, Color B, and Color C are easy to identify. The pattern calls for 1 skein of each color. The designer used “I Love This Cotton,” and the source identifies the yarn as worsted cotton.
- Color A: Coral — 1 skein
- Color B: Teal — 1 skein
- Color C: Navy — 1 skein
- Crochet hook and the basic crochet supplies needed to work and finish the motifs
The project uses the following abbreviations:
- ch — chain
- sc — single crochet
- hdc — half double crochet
- dc — double crochet
- sl st — slip stitch
- sp — space
- ch sp — chain space
There are two beginning-chain details that are important throughout the pattern. A chain 3 at the beginning of a row counts as a double crochet. A chain 4 at the beginning of a row counts as a double crochet and chain 1. Keeping these conventions in mind makes the written instructions much easier to follow.
Before You Start: Think in Motifs
The easiest way to approach this project is not to think of it as one large bandana. Think of it as a small collection of individual motifs that will eventually become one shape.
You will make three granny squares and three granny triangles. One of the three squares receives an additional fourth round. That extra round is important because this particular square is positioned at the bottom of the finished bandana. Once the motifs are complete, they are joined with Color B. The final border and straps are worked in Color C.
This motif-first approach gives you several opportunities to check your work before the pieces are permanently connected. Compare the squares with one another, check the triangle proportions, and make sure your color sequence is consistent before beginning assembly.
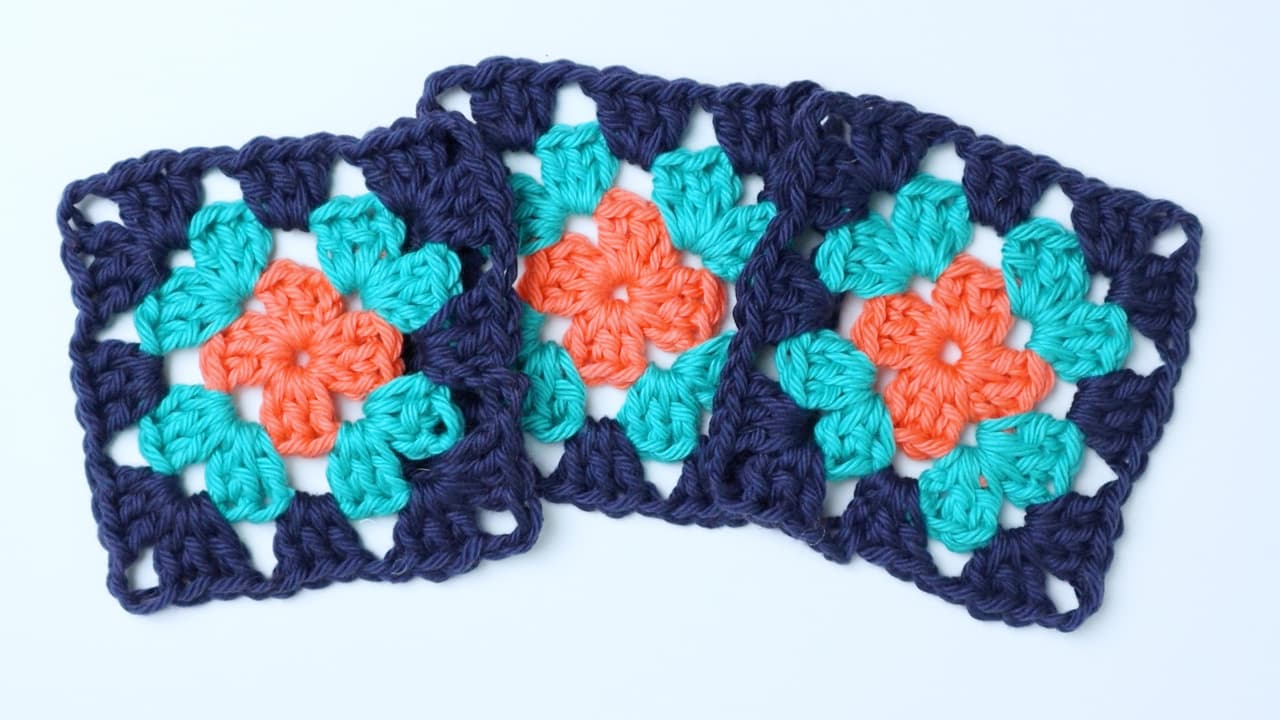
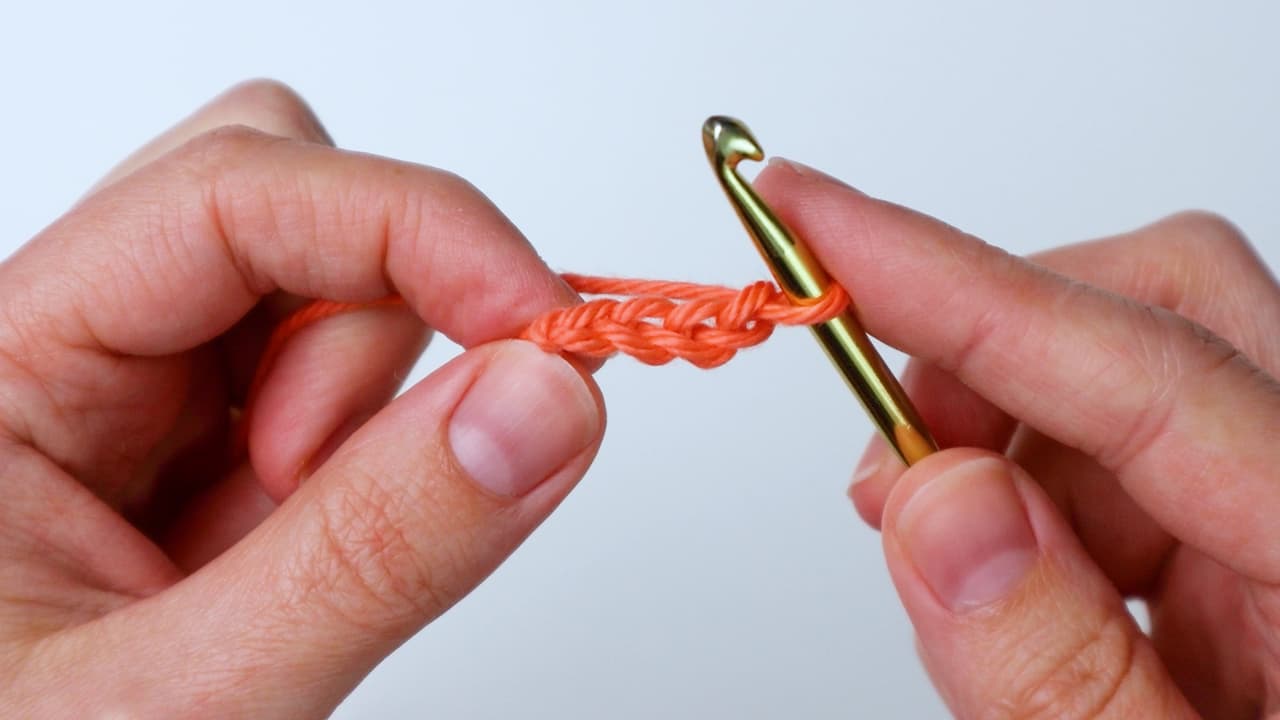
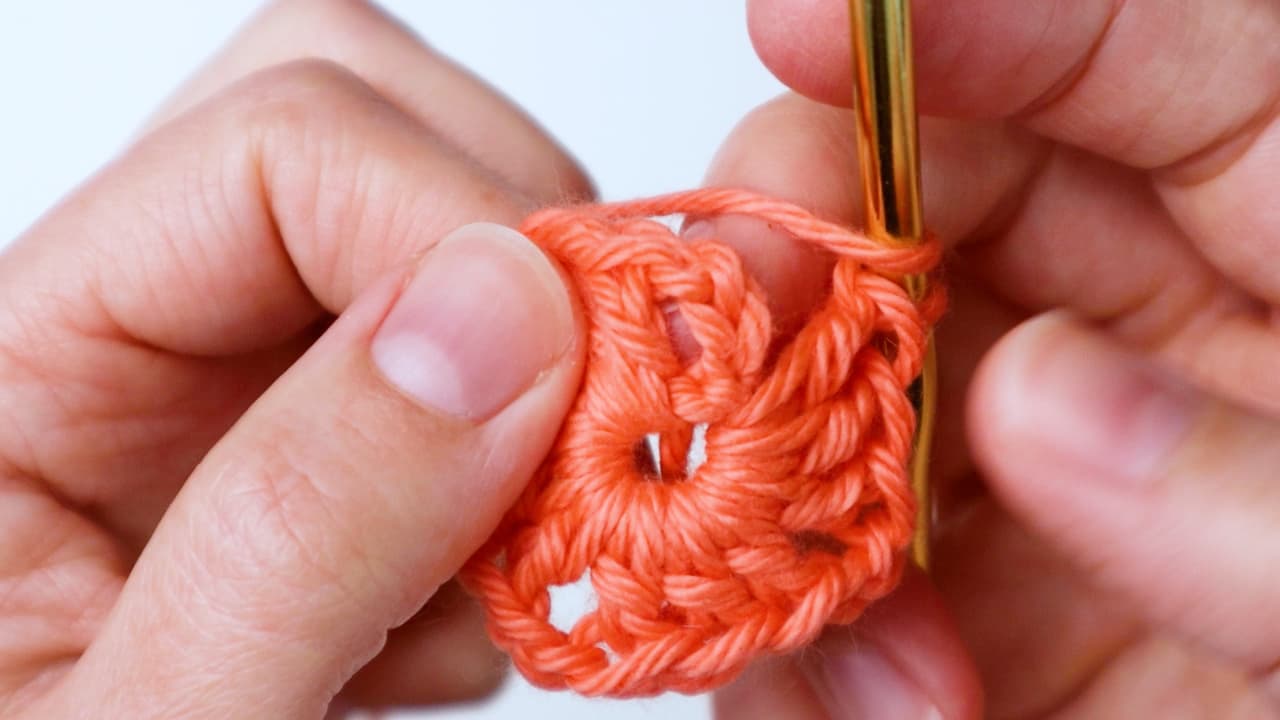
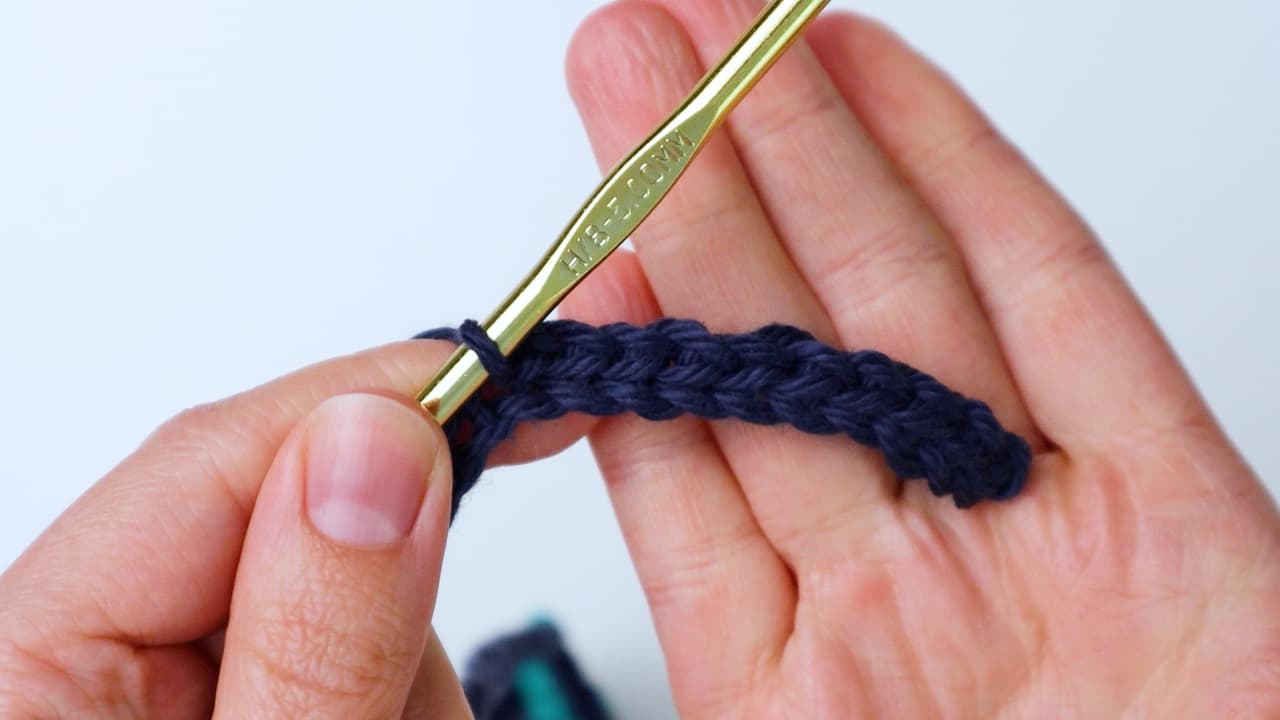
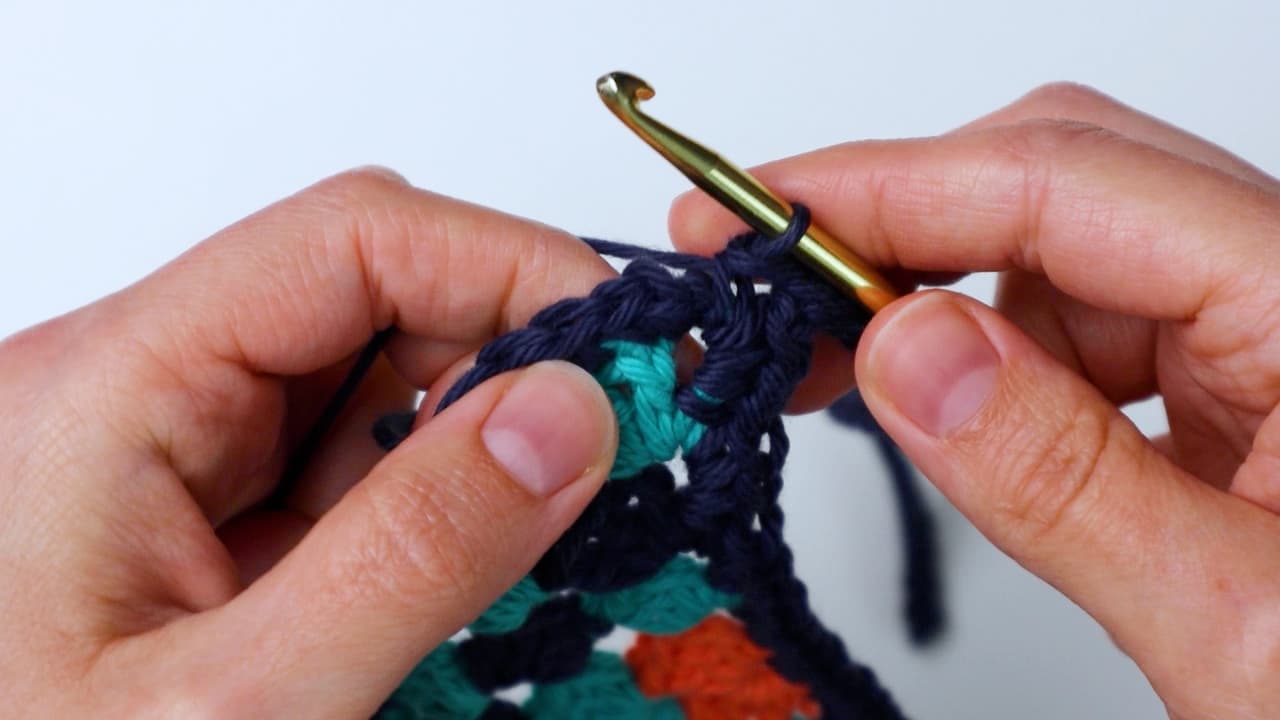
Visual Checkpoint: Starting the Granny Square
Building the Three Granny Squares
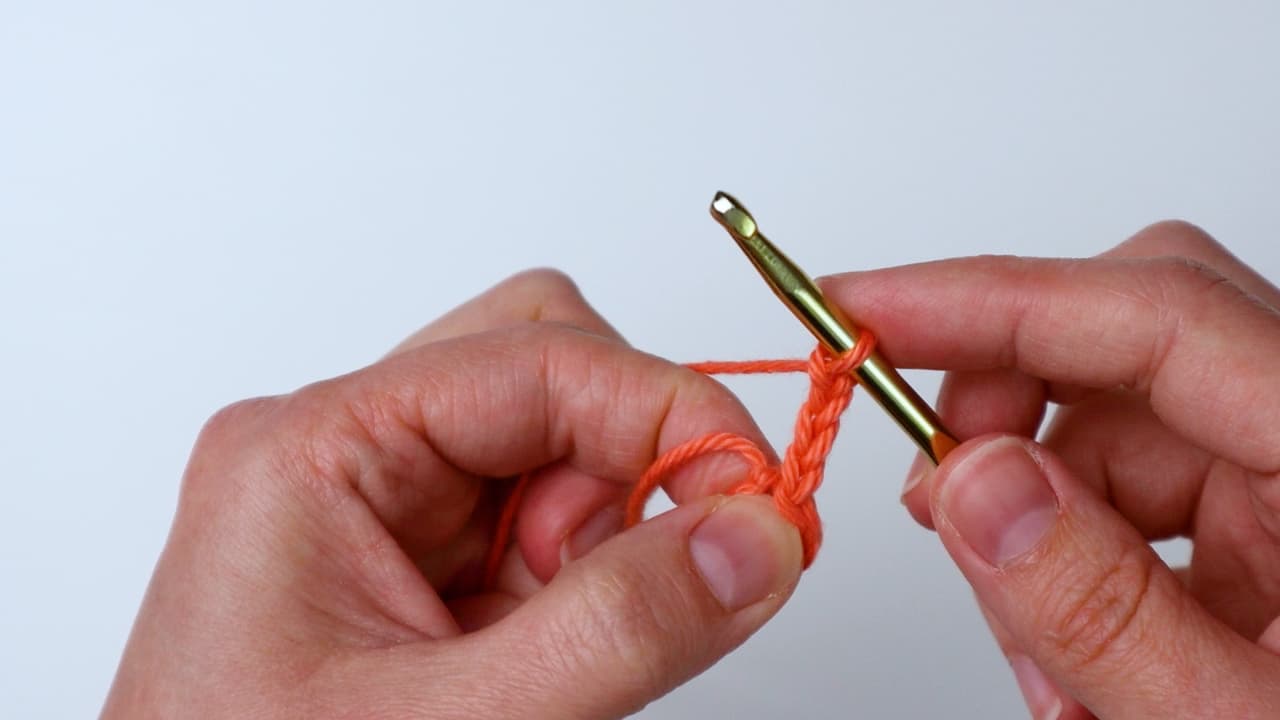
Begin each granny square with Color A. Chain 4 and slip stitch to the first chain to form a ring. If preferred, the source also allows a magic loop as an alternative starting method.
Round 1
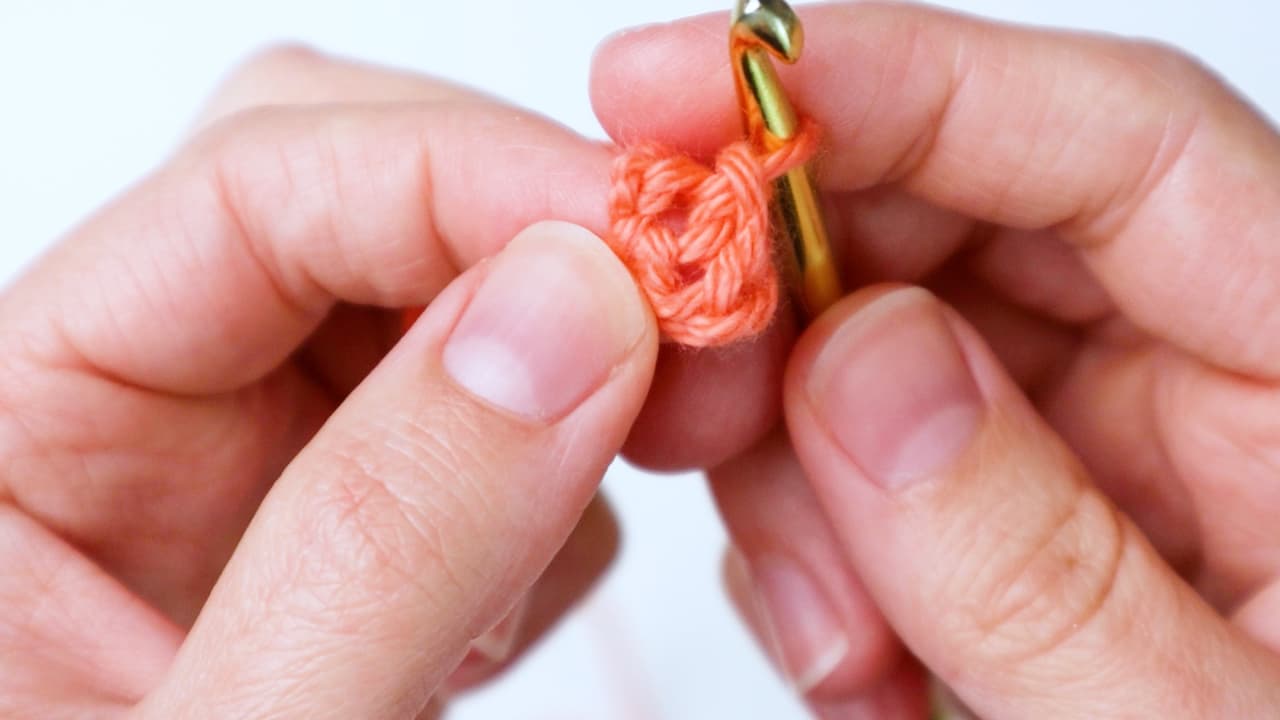
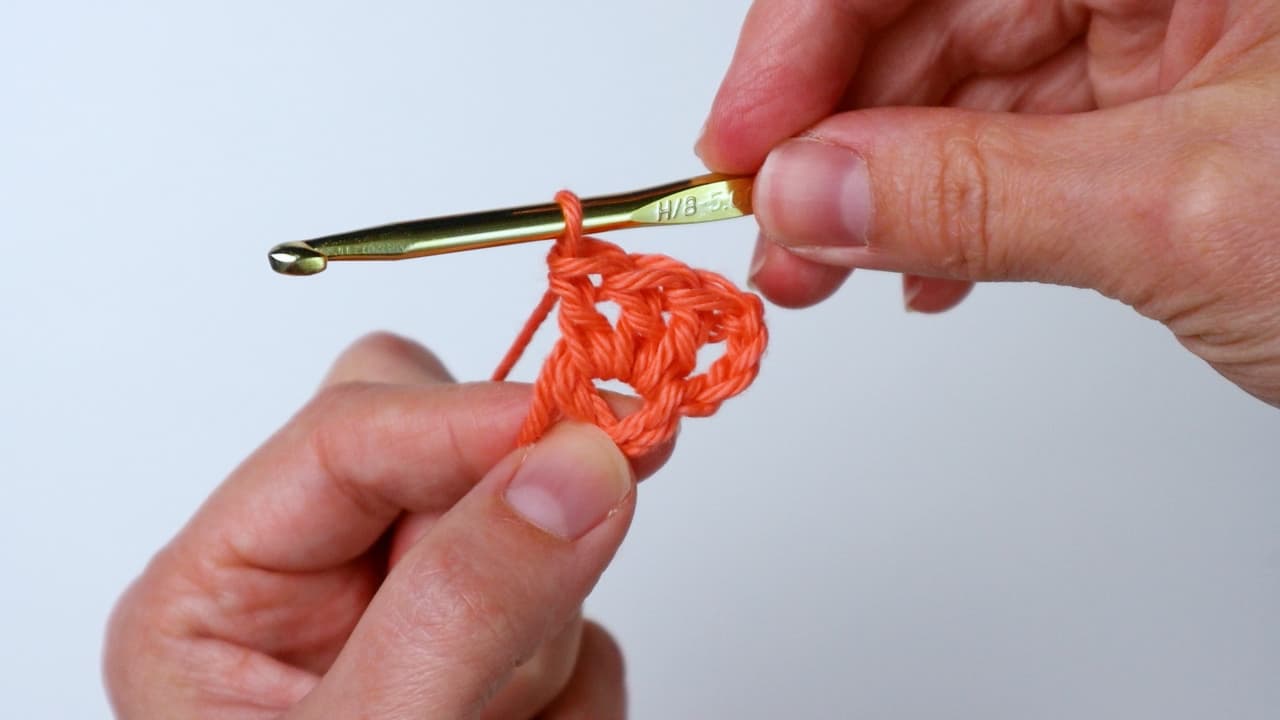
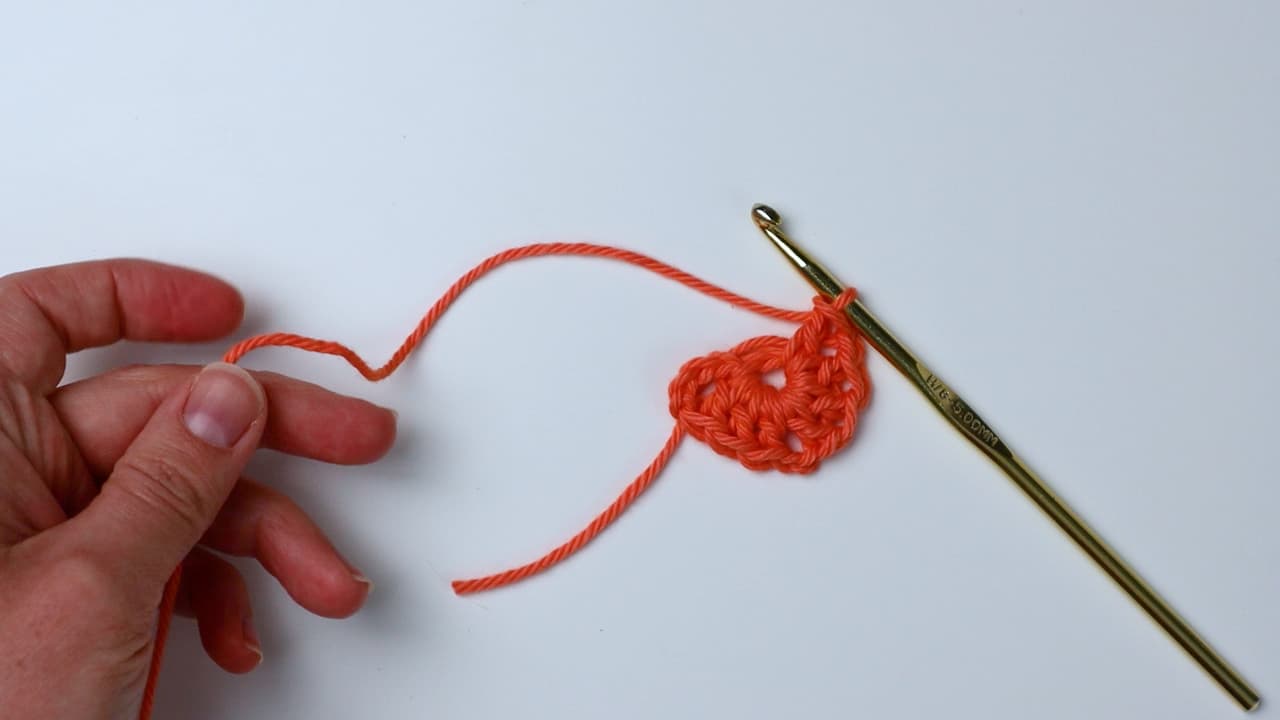
Chain 3, counting it as the first double crochet. Work 2 dc into the ring. Then repeat the following sequence 3 times: chain 2, followed by 3 dc in the ring. Join with a hdc in the third chain of the beginning chain. Fasten off.
This first round establishes the four corners of the granny square. At this stage, the shape is still small, so it is worth checking that the corner spaces are clearly visible. Those spaces become important attachment points in later rounds.
Round 2
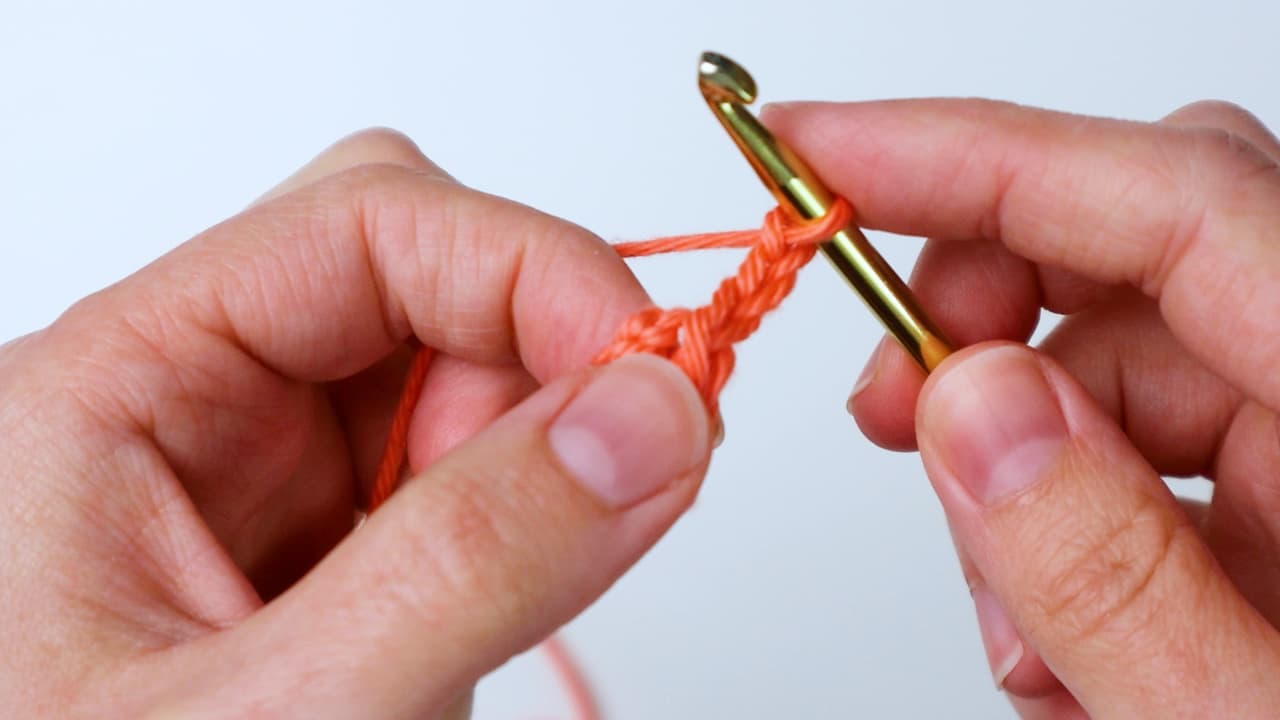
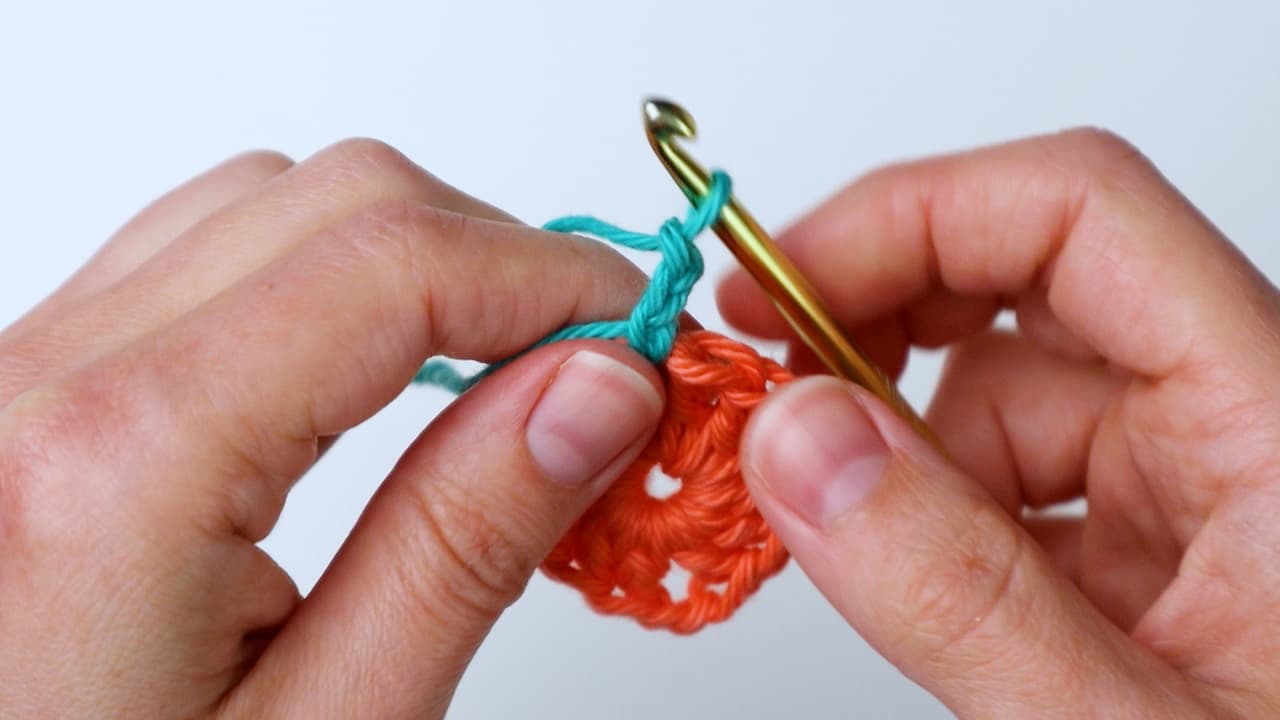
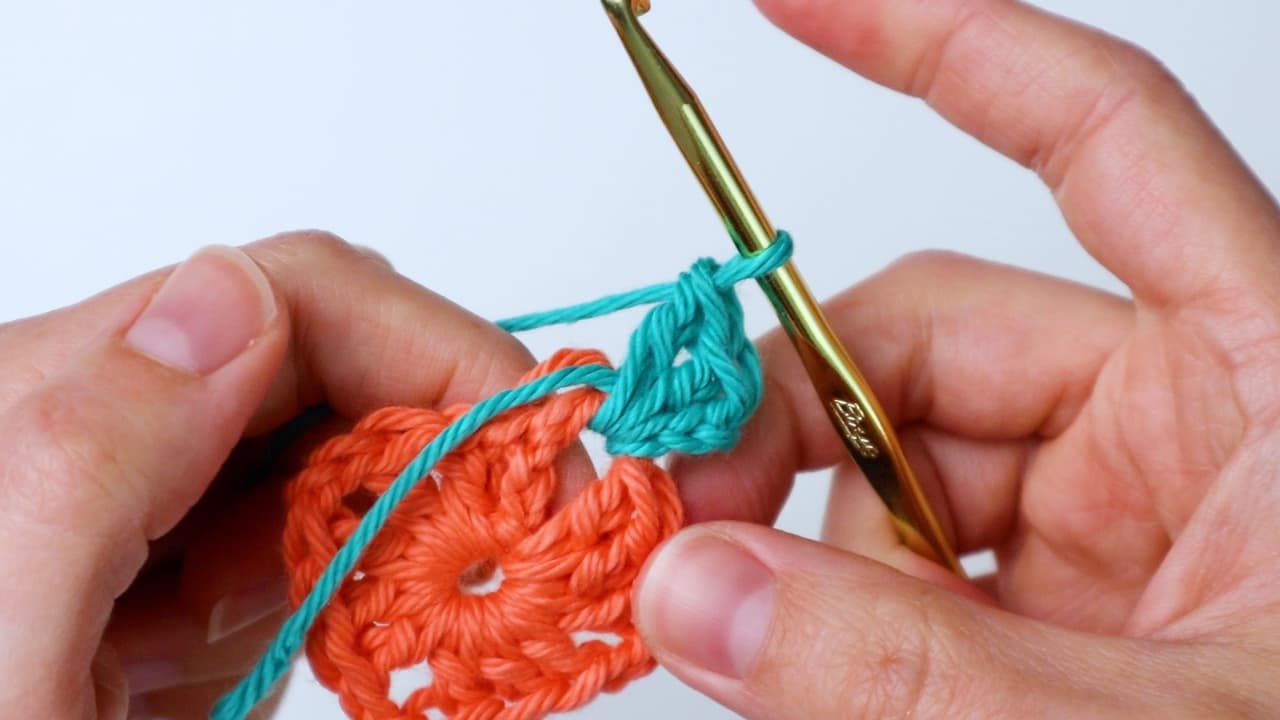
Join Color B in the same corner where the previous round ended. Chain 3, then work (2 dc, ch 2, 3 dc) in the same corner chain space.
Next, work ch 1, followed by (3 dc, ch 2, 3 dc) in the next chain space. Repeat that sequence 2 more times. Finish with sc in the third chain of the beginning chain and fasten off.
Round 3
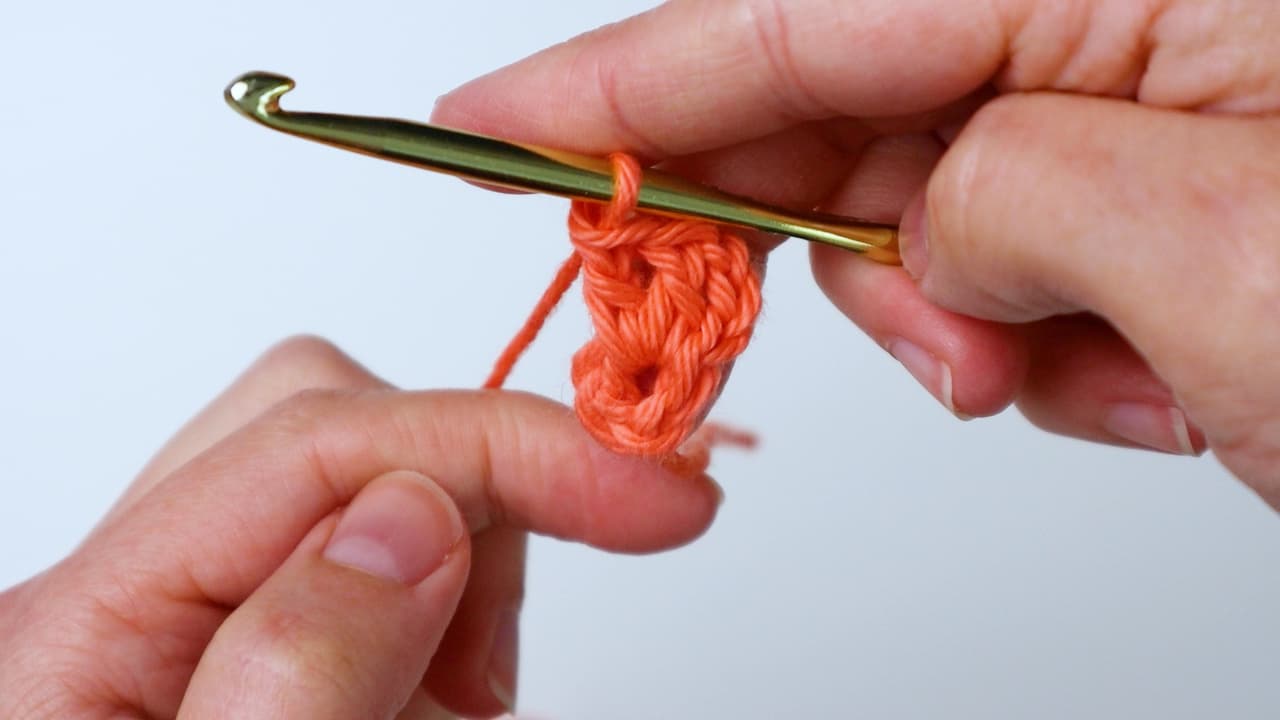
Join Color C in the same corner where the previous round ended. Chain 3 and work (2 dc, ch 2, 3 dc) in the same corner chain space.
Continue with the repeating sequence: ch 1, 3 dc in the next ch 1 space, ch 1, then (3 dc, ch 2, 3 dc) in the next corner chain space. Repeat this sequence 2 more times. Then work ch 1, 3 dc in the next ch sp. Finish with sc in the third chain of the starting chain. Fasten off and weave in the ends.
The One Square That Gets a Fourth Round
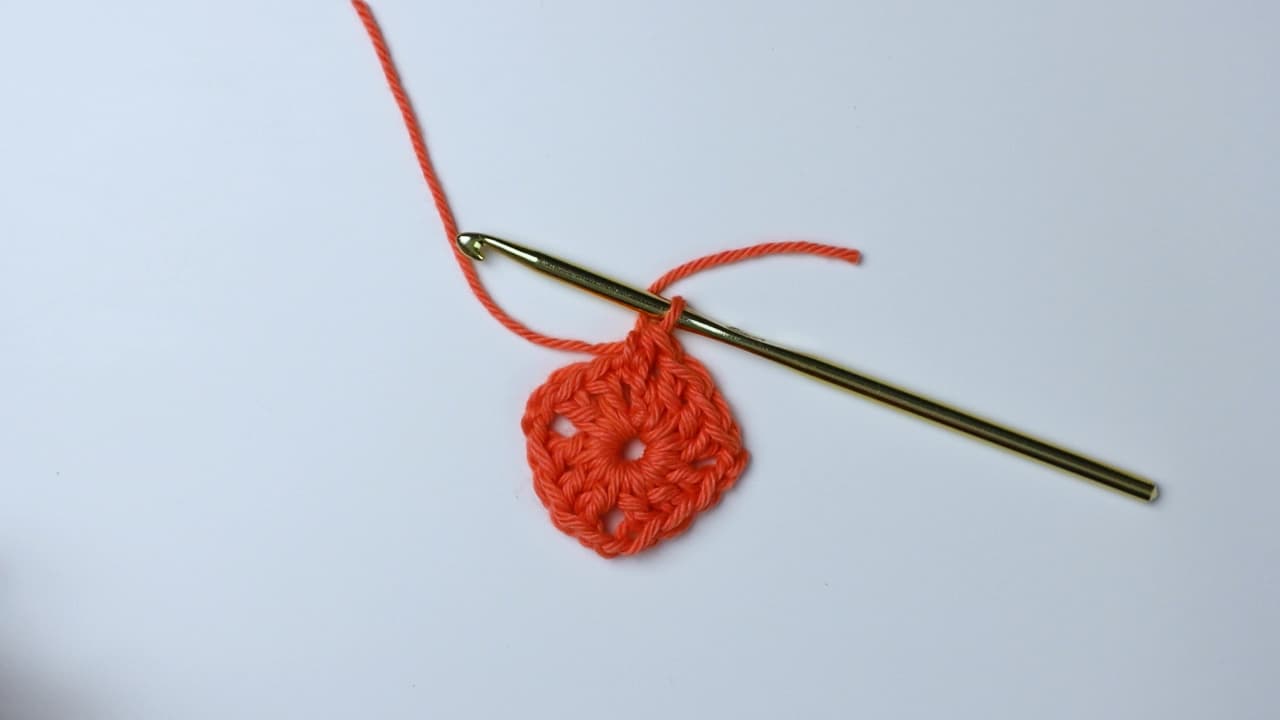
Only one square receives Round 4, and this distinction should not be overlooked. The extra round is worked in Color B.
Join Color B in the same corner where the previous round ended. Chain 3 and work (2 dc, ch 2, 3 dc) in the same corner chain space. Then repeat the following sequence 2 more times: ch 1, 3 dc in the next ch 1 space, ch 1, 3 dc in the next ch 1 space, ch 1, followed by (3 dc, ch 2, 3 dc) in the next corner chain space.
After the repeated portion, work ch 1, 3 dc in the next ch sp, ch 1, 3 dc in the next ch sp, then sc in the third chain of the starting chain. Fasten off and weave in the ends.
Creating the Three Granny Triangles
The three triangular motifs complete the upper portion of the bandana. Like the squares, they are worked through Color A, Color B and Color C. The construction is slightly different because the motif develops in rows rather than rounds.
Triangle Row 1
With Color A, chain 4 and slip stitch to the first chain to form a ring.
Chain 4, counting this as 1 dc and ch 1 from here on out. Work 3 dc in the ring, ch 2, 3 dc in the ring, ch 1, and 1 dc in the ring. Fasten off.
Triangle Row 2
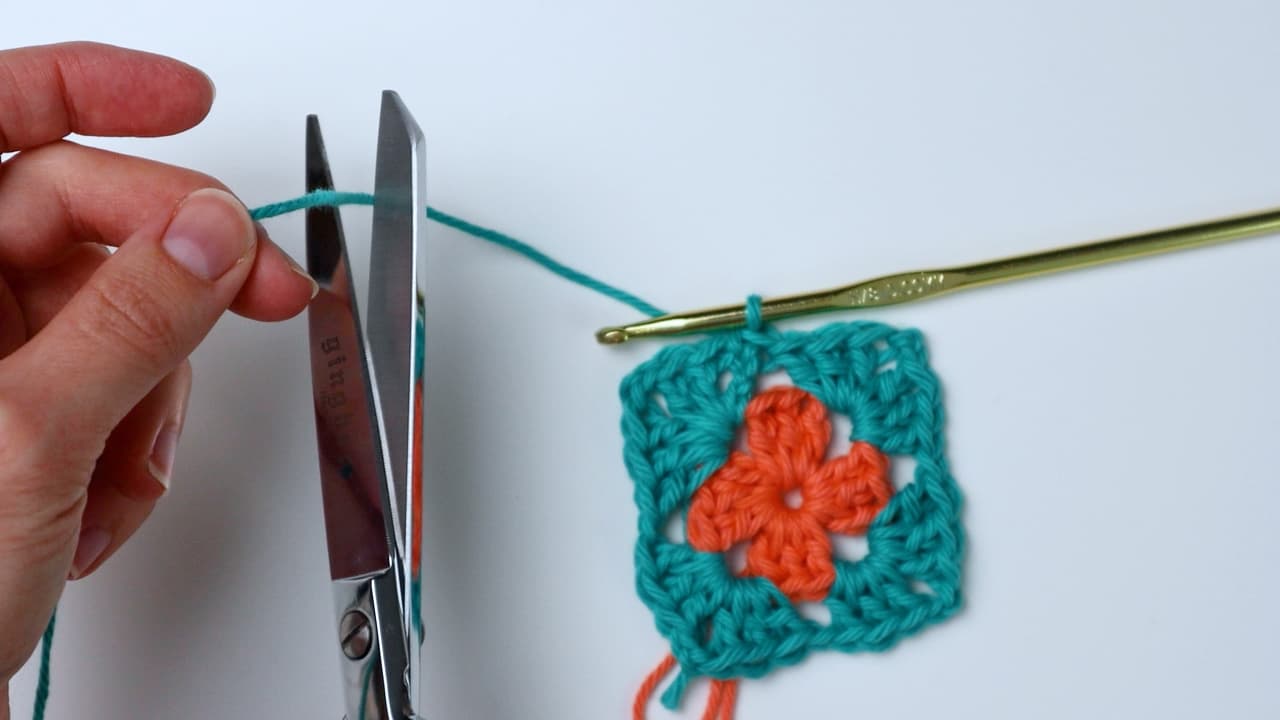
Join Color B in the corner chain space from Row 1. Chain 4, then work 3 dc in the same chain space. Chain 1, then work (3 dc, ch 2, 3 dc) in the corner space. Finish with ch 1, followed by (3 dc, ch 1, 1 dc) in the last chain space. Fasten off.
Triangle Row 3
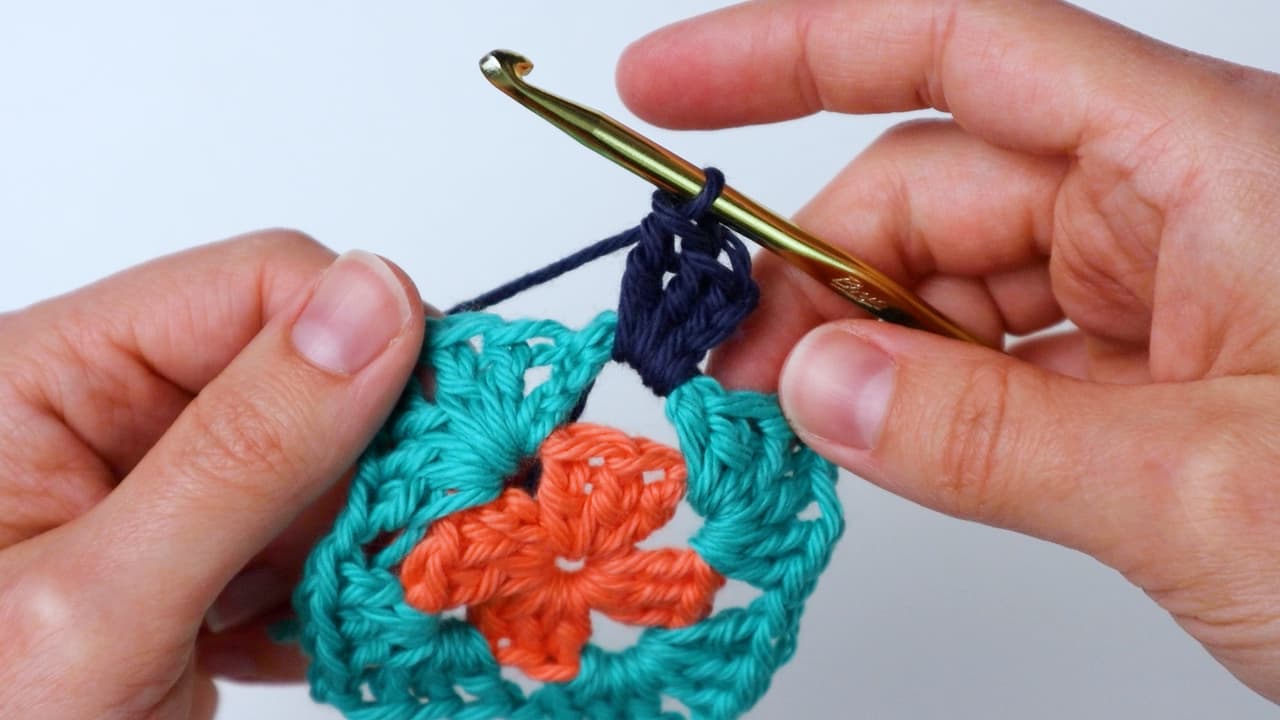
Join Color C in the corner chain space from Row 2. Chain 4 and work 3 dc in the same chain space. Chain 1, then work 3 dc in the next chain space, followed by ch 1.
In the corner space, work (3 dc, ch 2, 3 dc). Continue with ch 1, 3 dc in the next ch sp, ch 1, then (3 dc, ch 1, 1 dc) in the last ch sp. Fasten off and weave in the ends.
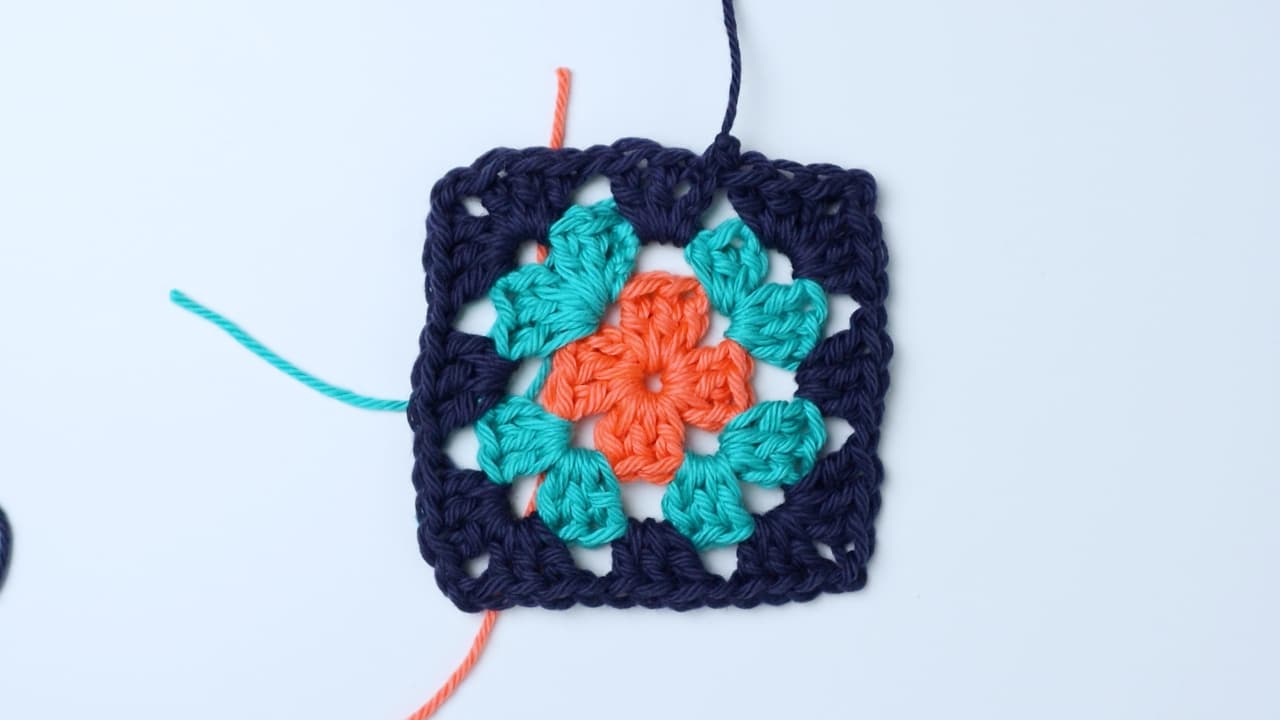
Make three triangles in total. Before assembling the bandana, compare the three triangles and make sure their shapes and color progression are consistent. This is a useful checkpoint because any differences are easier to notice before the motifs are attached.
A Useful Motif Check Before Assembly
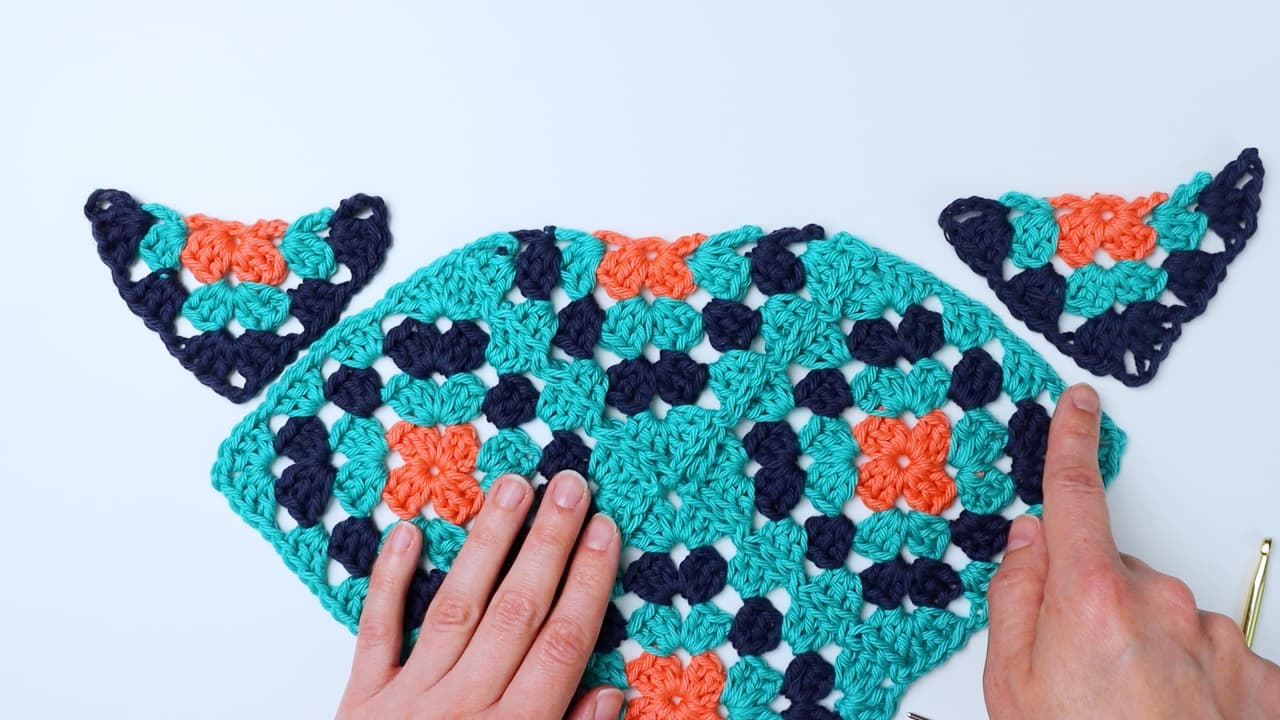
At this point you should have three granny squares, three granny triangles, and one larger square created with the fourth round. Take a few moments to arrange the pieces on a flat surface.
- Three squares should be available.
- One of the squares should have the additional fourth round.
- Three granny triangles should be completed.
- The colors should progress through Coral, Teal and Navy as specified by the pattern.
- The square size should be approximately 4.5 inches.
- The triangle short sides should be approximately 4.5 inches.
- The triangle long side should be approximately 6.5 inches.
These measurements are reference measurements rather than a strict gauge requirement. The source specifically notes that gauge is not important, so the most useful comparison is consistency among your own motifs.
Preparing the Layout
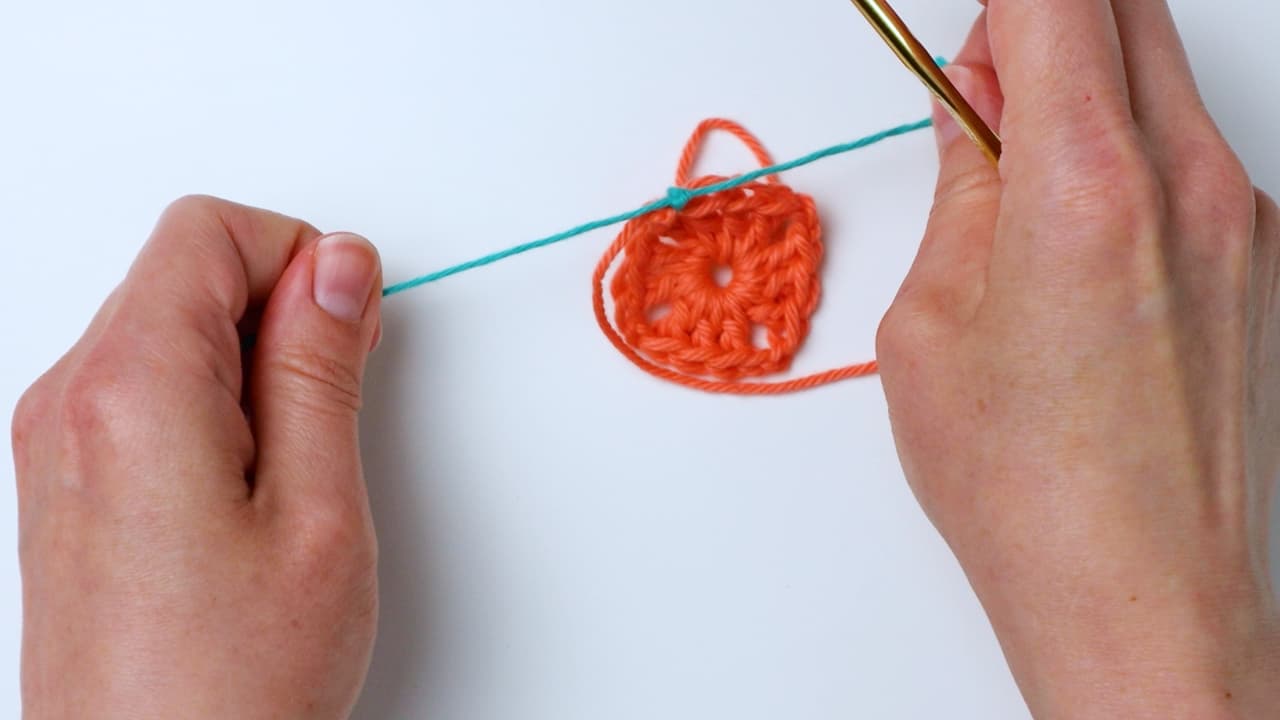
The joining stage is much easier when the motifs are arranged before the yarn is attached. Lay the squares and triangles in their intended order using Color B, with the right side facing up.
The square with the extra round belongs at the bottom. Tilt it so that one point faces downward. The remaining squares are positioned above it, with the triangles completing the upper sections of the bandana.
Joining the Granny Squares
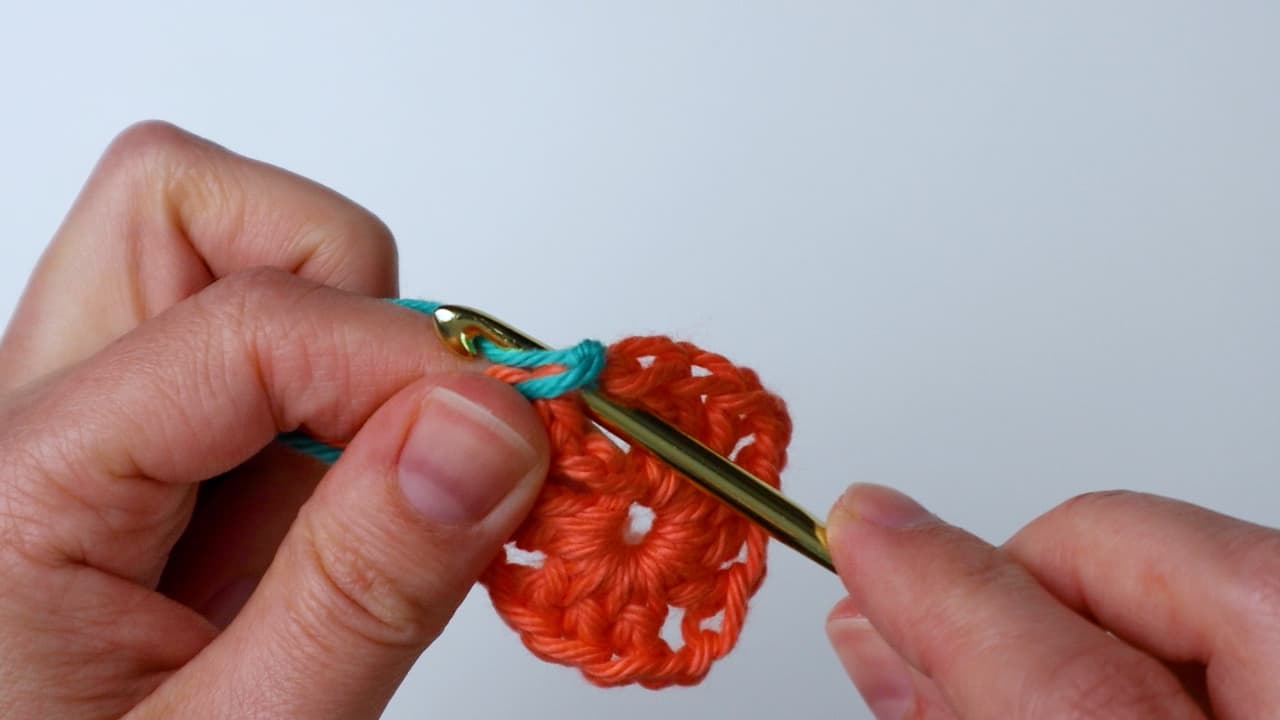
Use Color B for the joining process. Start with the bottom square and take the next square to its right. Attach the yarn at the rightmost corner of the square.
Work granny clusters as normal across the top and left side. When you reach the left corner, make 3 dc as the first half of the corner. This is where the corresponding spaces of the neighboring square become part of the joining process.
Take the next square and line it up above the current square. Insert the hook into the corner space of the top square and chain 1. Make the second chain to complete the chain-2 corner, then work 3 dc into the corner.
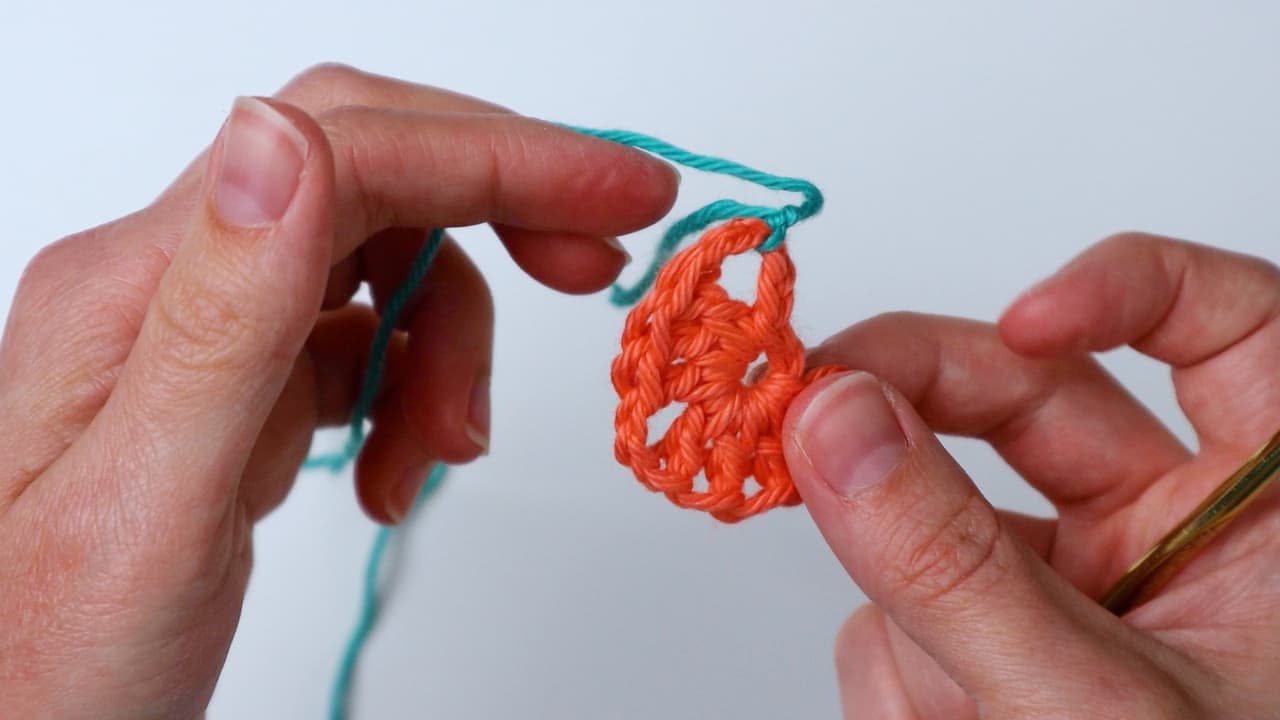
For the next connection, insert the hook into the next space of the top square, make ch 1, and then make the next granny 3-dc cluster in the corresponding space of the bottom square.
The key idea is simple: complete the granny square round normally, but insert the hook into the matching space of the neighboring square before making the chain that connects the two pieces. Continue this method from one space to the next and around the required corners.
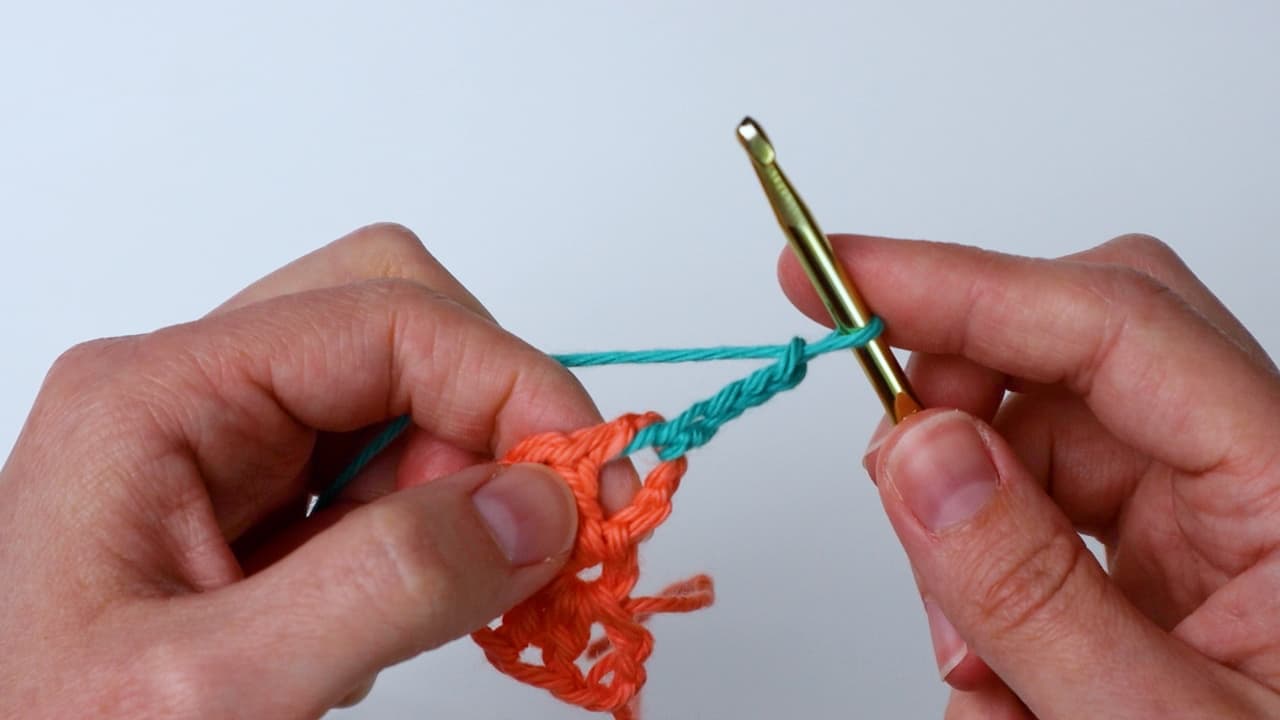
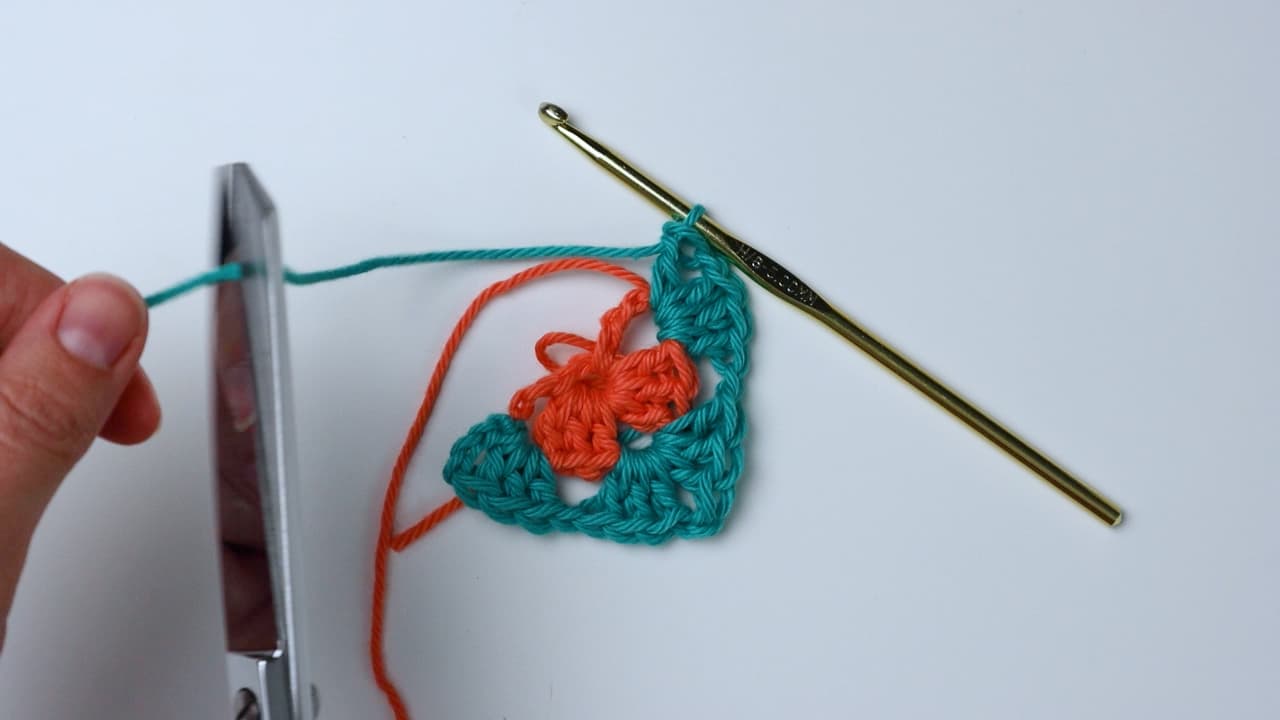
Continue to the other corner and then complete the round as usual. Repeat the same joining method for the top-left square. Work patiently around each joining edge, because keeping the spaces aligned is more important than rushing through the connection.
Joining the Triangles to the Squares
Once the squares are connected, the triangles are added at the center top of the square section. The first triangle is joined in the center at the top of the squares.
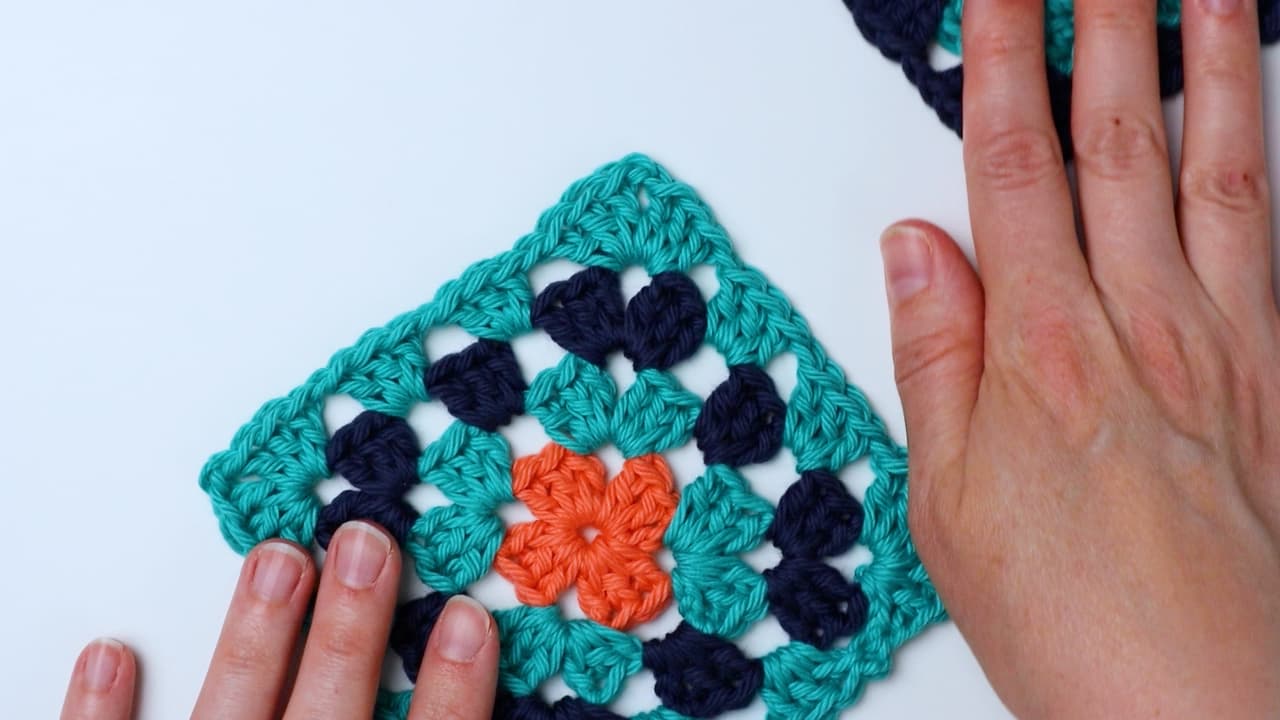
Attach Color B to the far right corner of the triangle. Chain 3, insert the hook into the corner space of the square, and chain 1. Make 3 dc in the same space. Continue along the triangle, inserting the hook into the corresponding spaces of the square before making the connecting chains.
At the corner, make the first 3 dc in the triangle corner space. Then insert the hook into the corner space of the square directly across from it, which is the top corner of the bottom square, and chain 1.
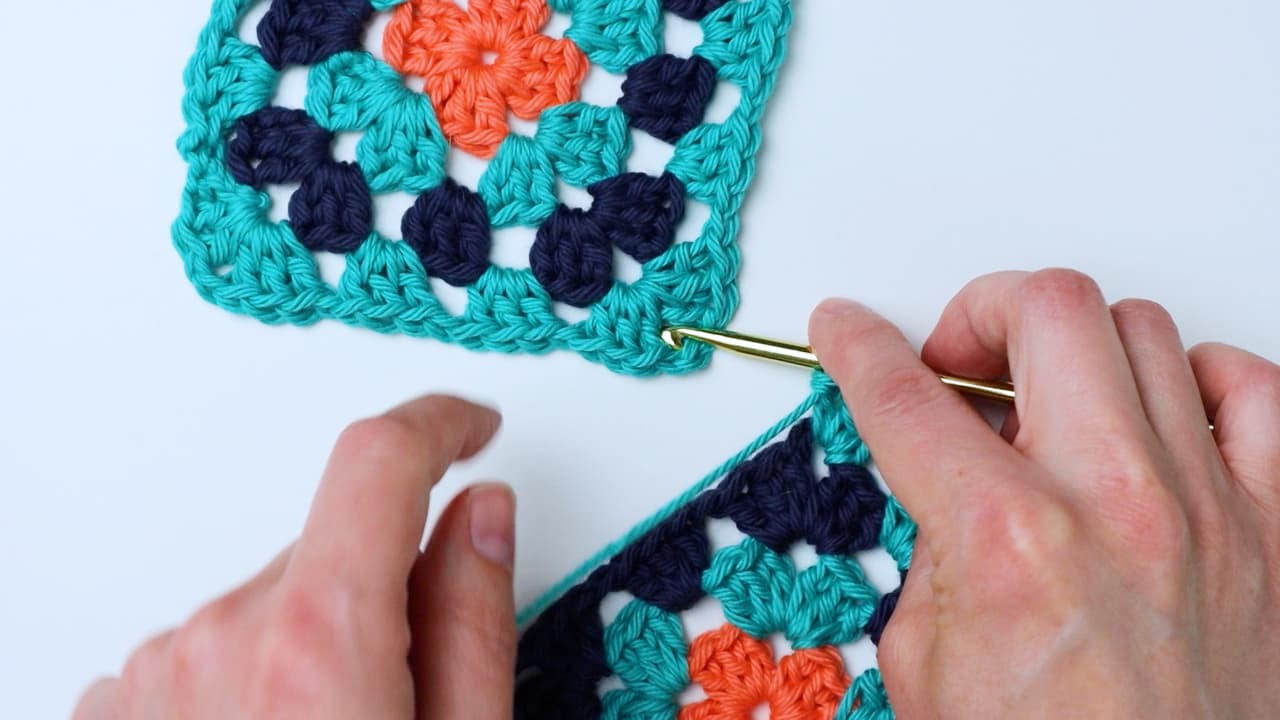
Chain again and continue normally up the other side of the triangle. At the final corner, make 3 dc, insert the hook into the last corner of the adjacent square, chain 1, and make the last dc in the triangle corner space.
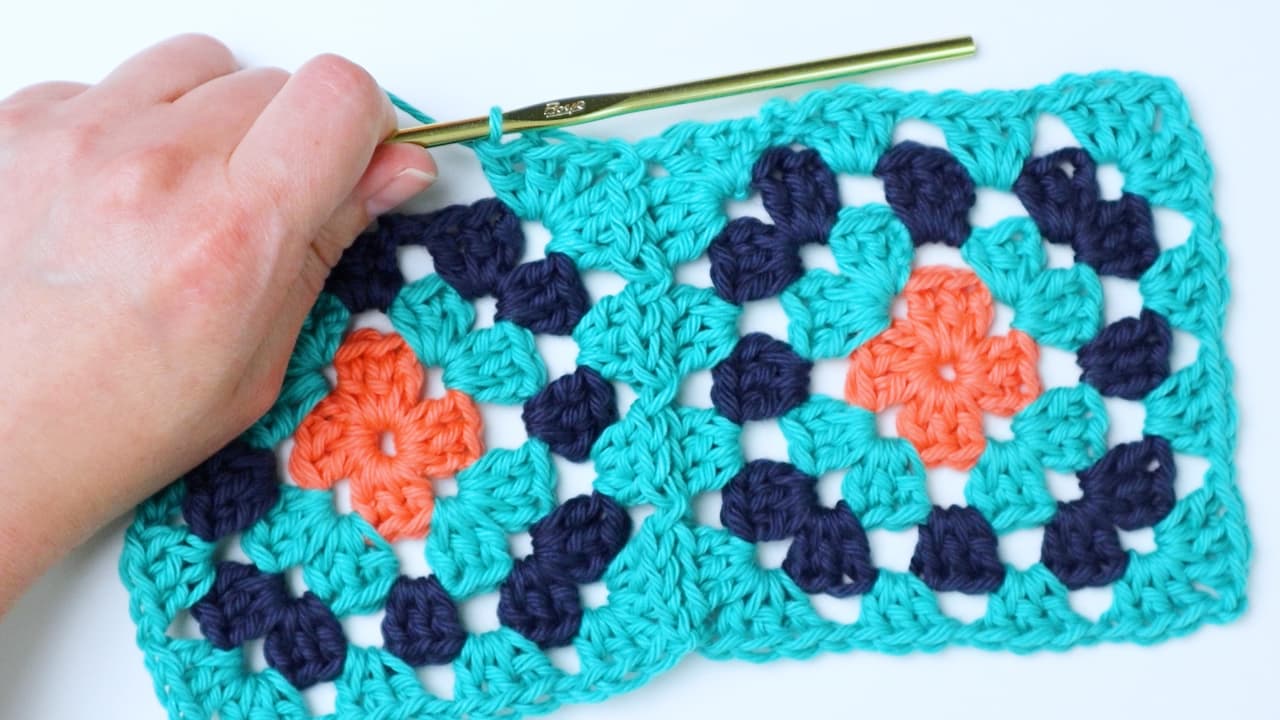
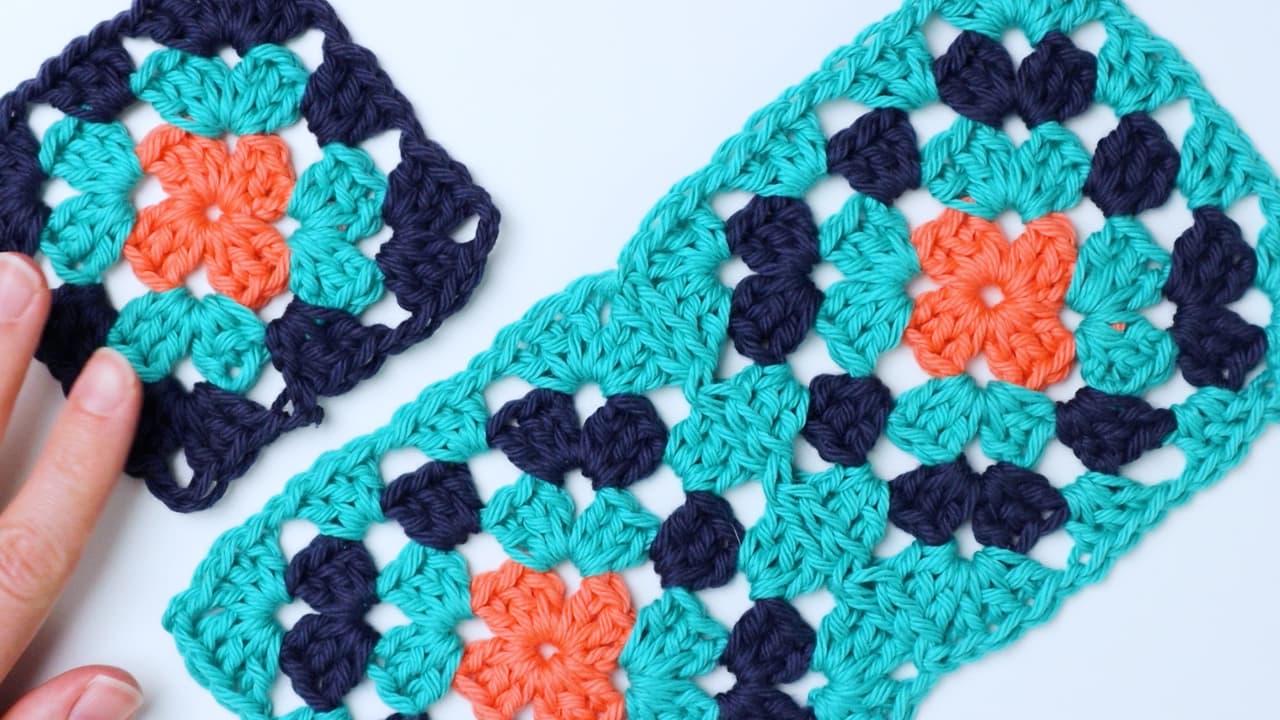
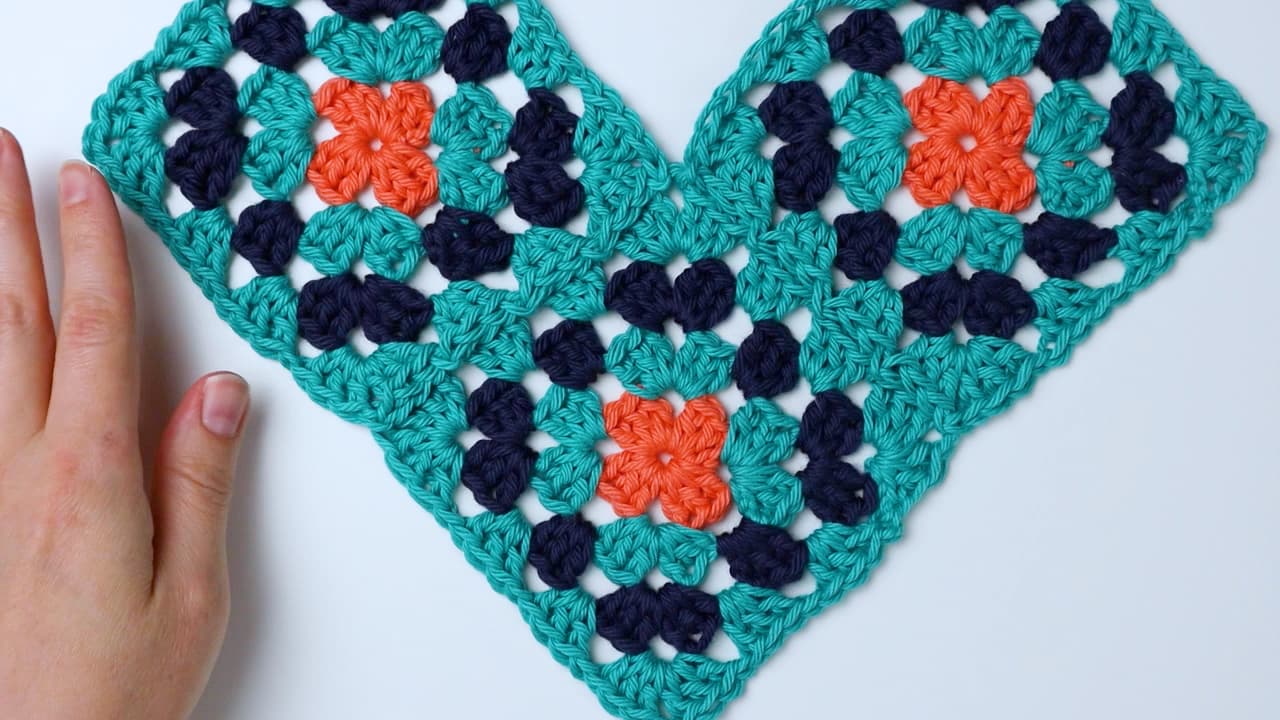
Repeat this process for the other two triangles. After the last triangle has been joined, finish off and weave in all the ends.
Finishing the Outer Border
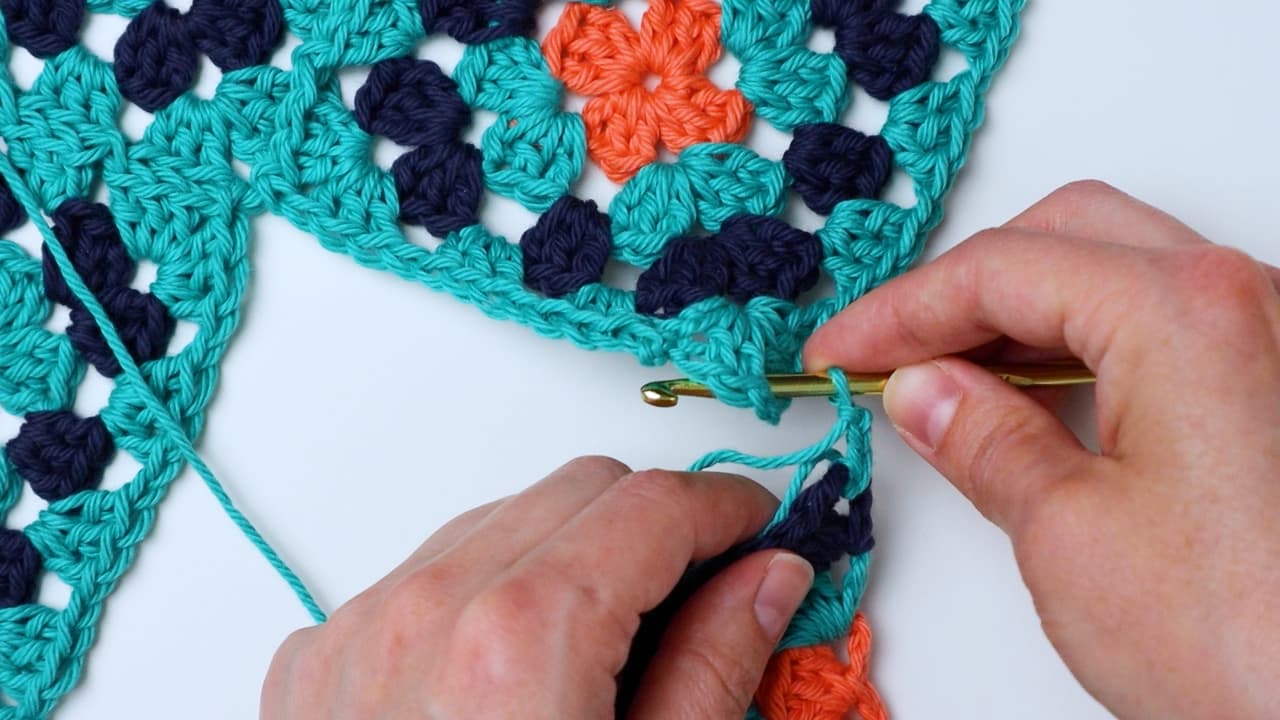
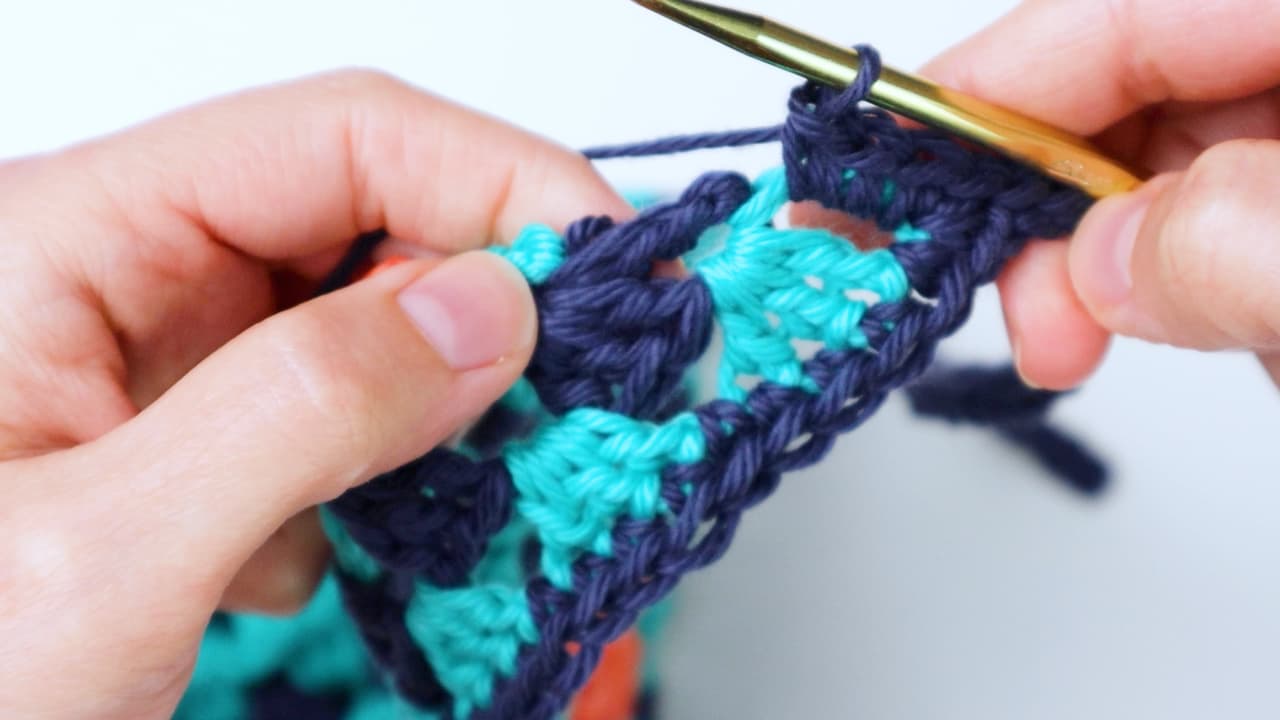
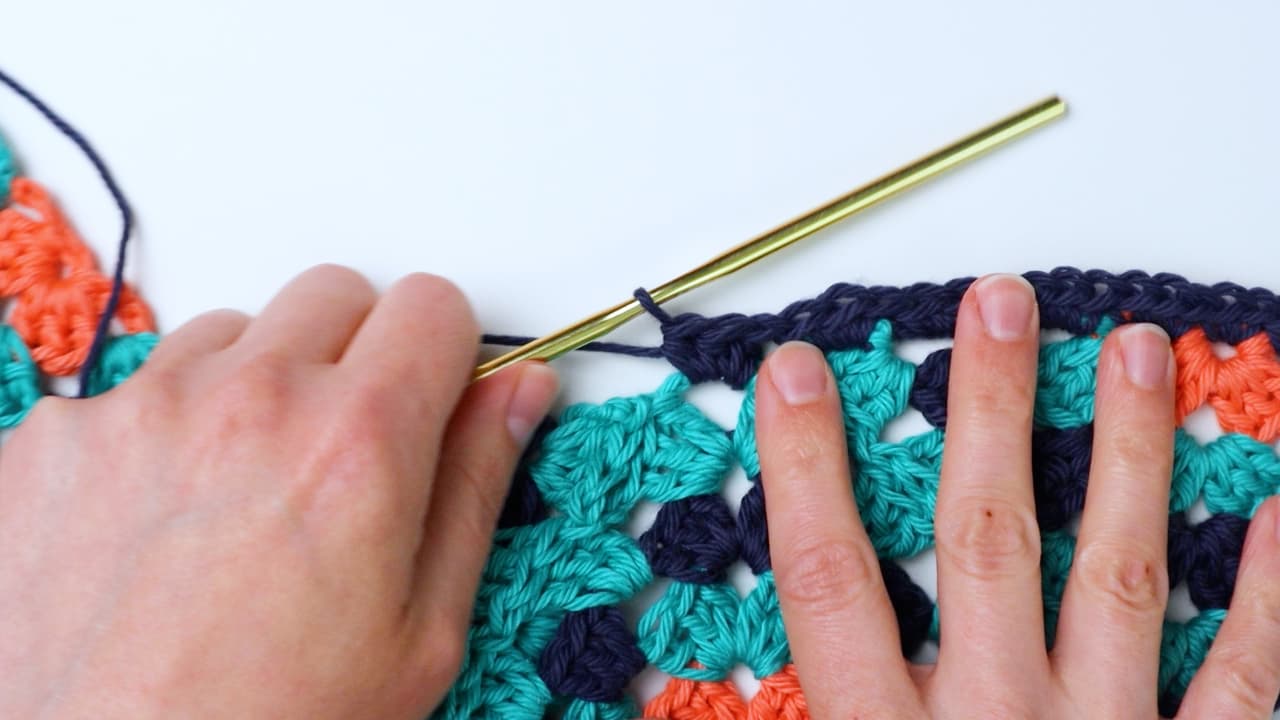
The border is worked in Color C. Join Color C to the far left corner. Chain 1 and make 1 sc in the same space.
Continue with 1 sc in the top of each dc and in each space. Also make 1 sc in each corner space and in the space where two squares are attached.
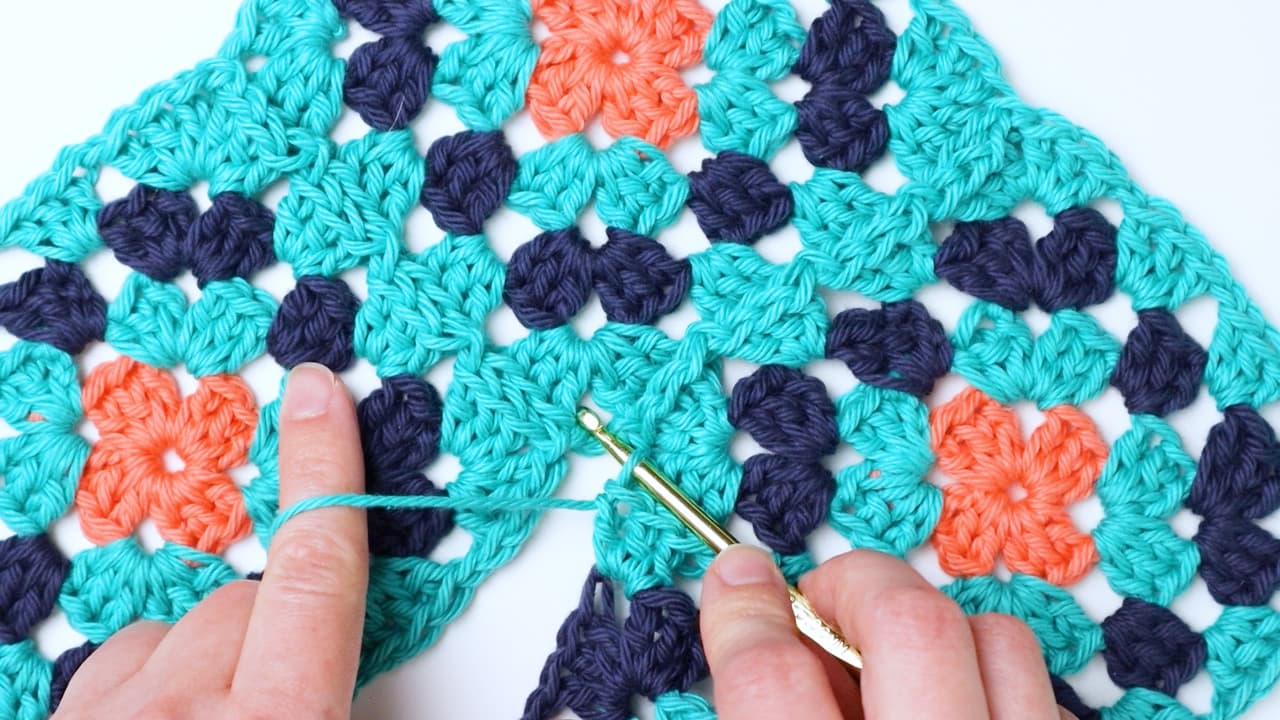
When you reach the bottom point, work 3 sc in the corner space. This gives the pointed bottom a clean turn. Continue back up the other side with 1 sc in each stitch and space.
Creating the First Strap
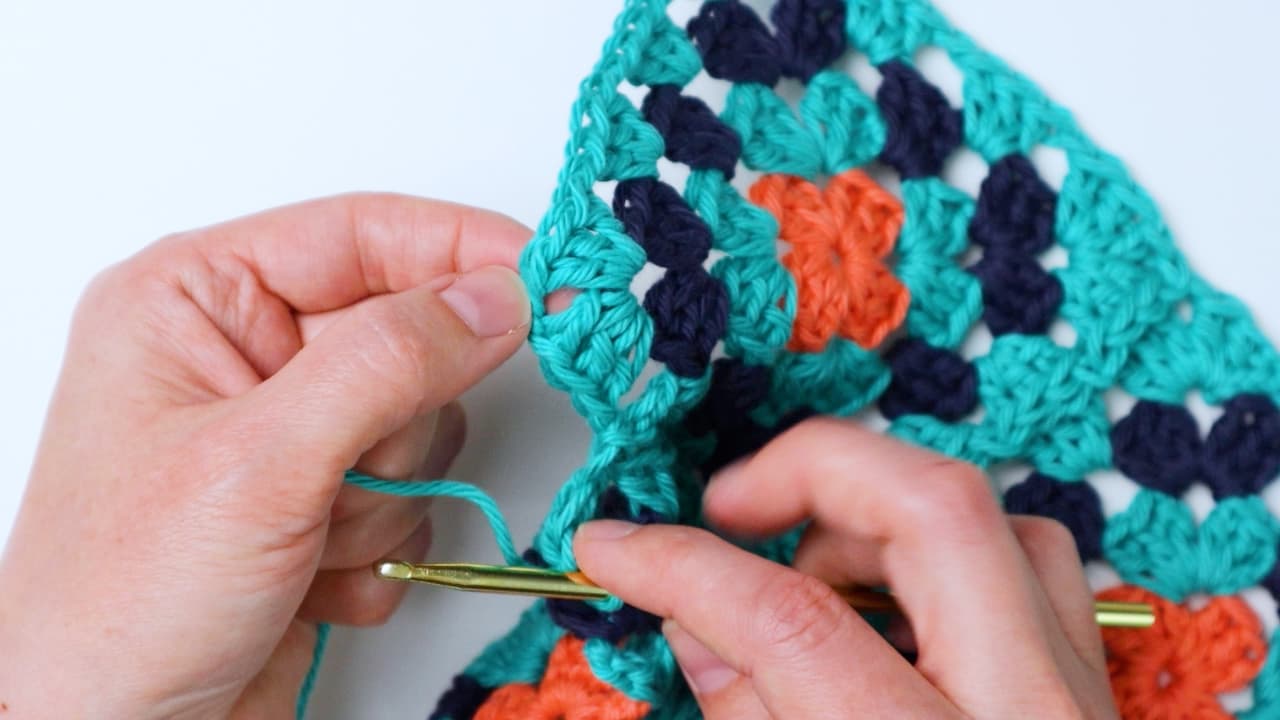
When you reach the right corner, make 1 sc in the top of the ch 3 of that corner. Then chain 41 to create the first strap.
Slip stitch into the second chain from the hook and continue slip stitching in each chain going down. Then make sc in the same spot as the last sc before the strap.
Shaping the Top Edge
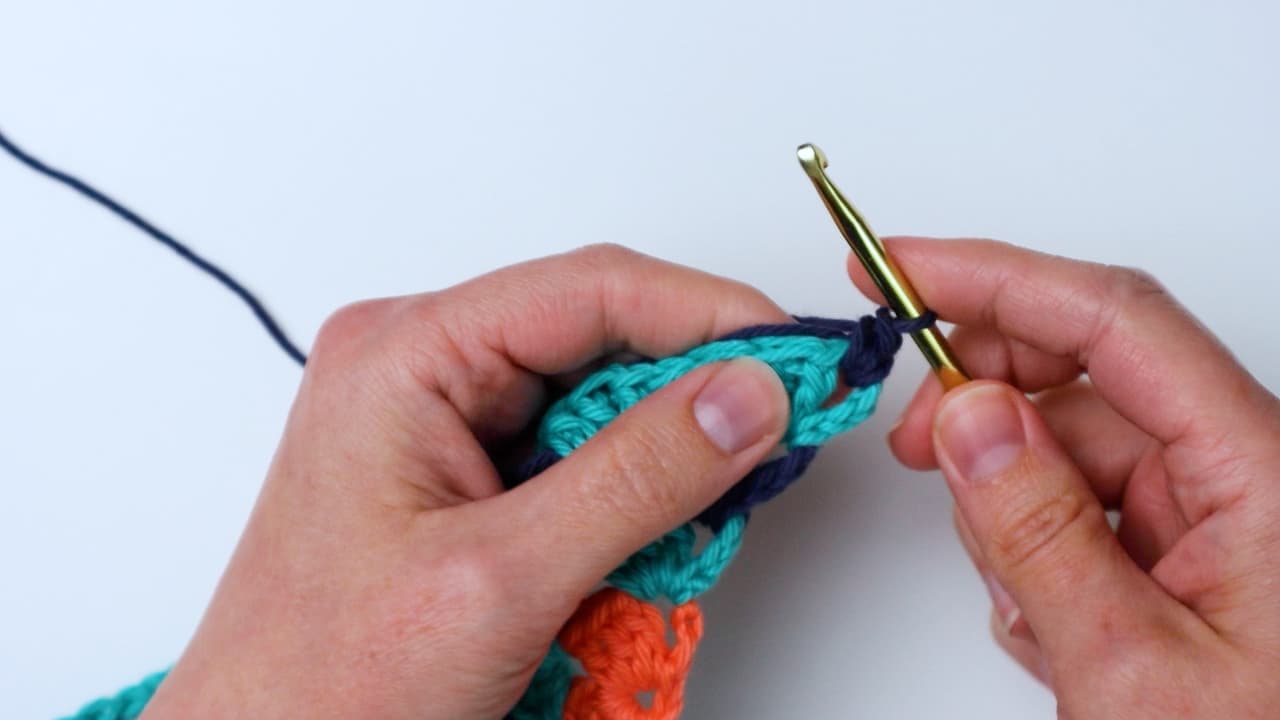
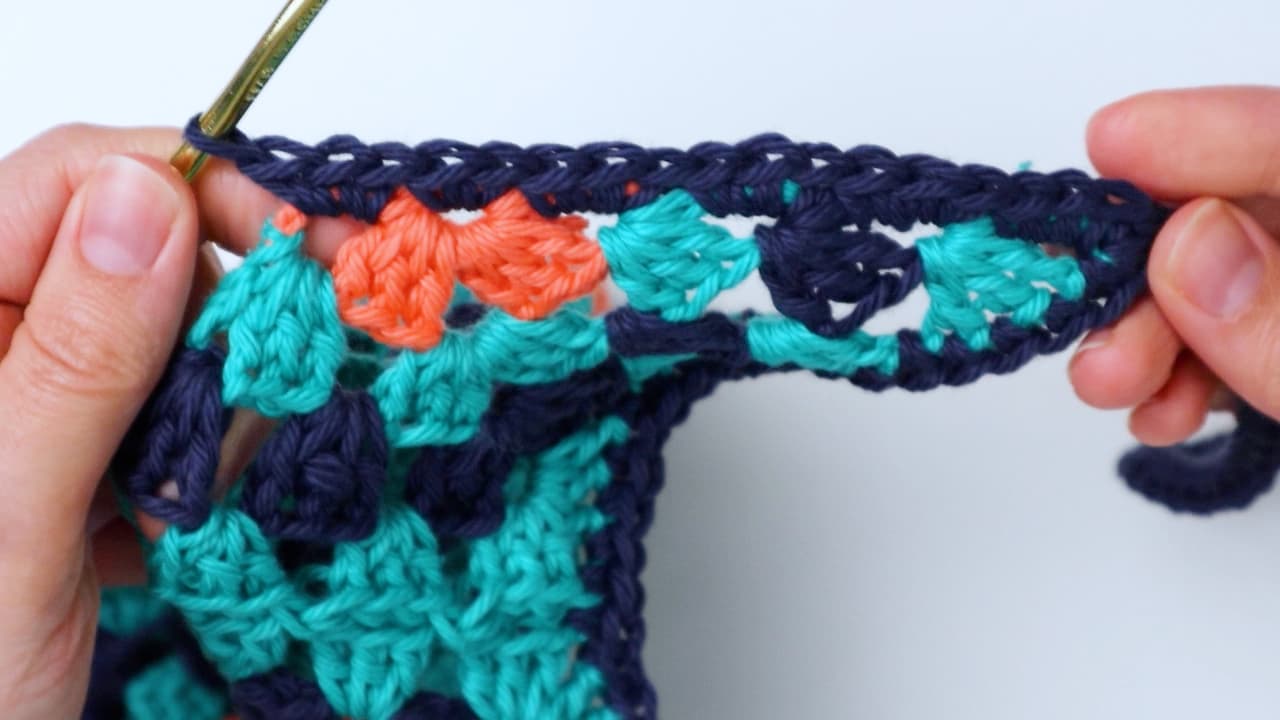
After completing the first strap, continue across the top edge. Make 3 sc in each of the next 4 spaces at the end of each triangle row.
At the center of the triangle, make 2 sc in the center loop. Then continue with 3 sc in each of the next 4 spaces.
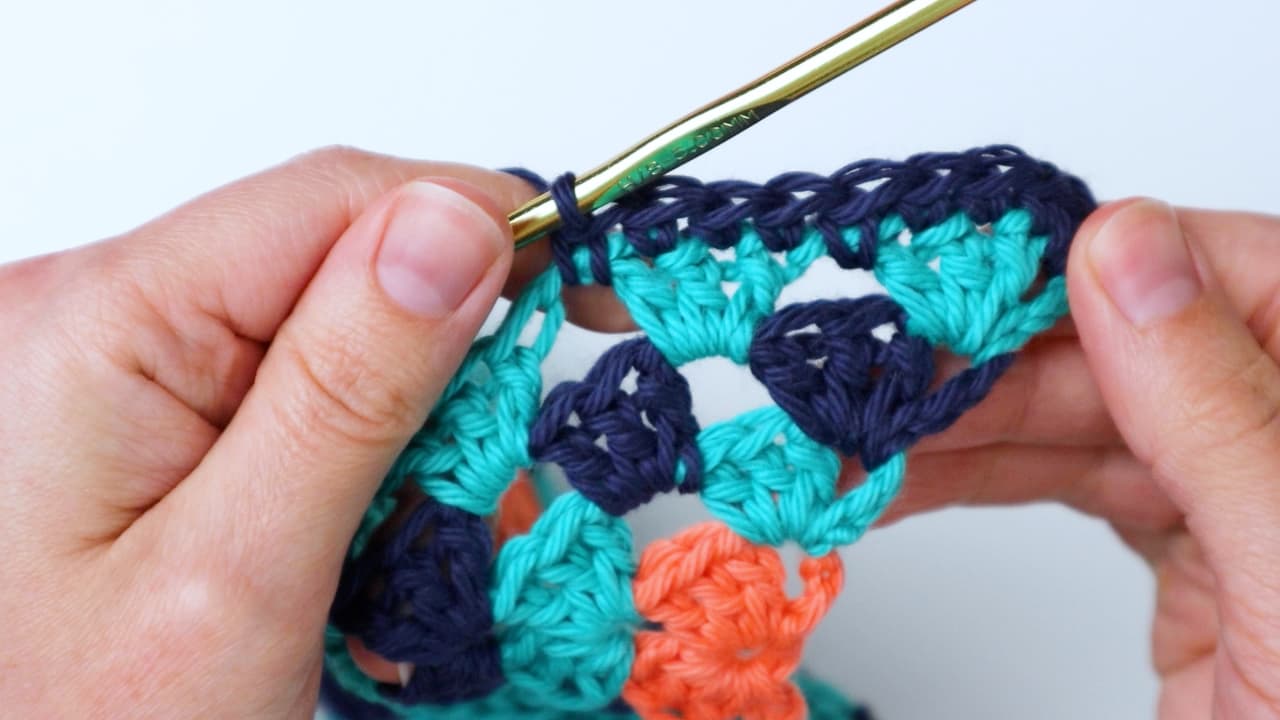
When you reach a granny square corner, make 3 hdc. The source specifically uses the longer hdc at this location to prevent an indent from forming across the front of the bandana.
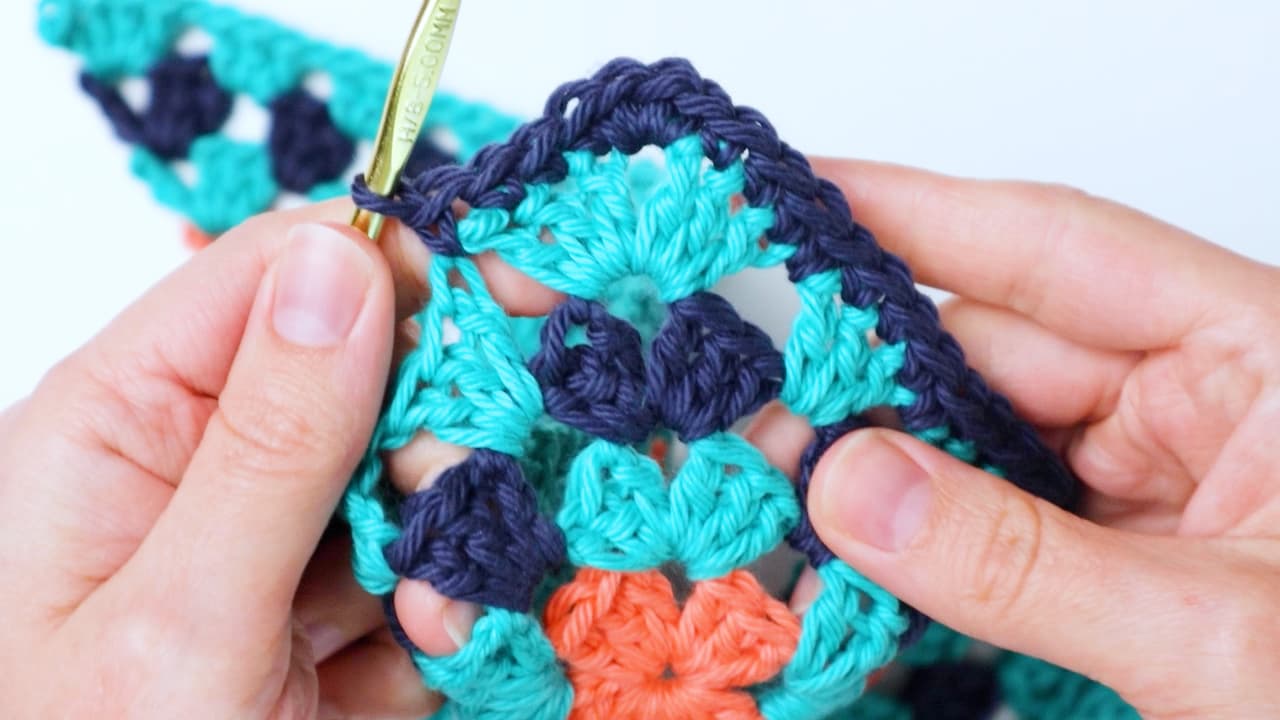
Continue across to the left corner. The transition between the square and triangle sections is a place where careful stitch placement makes a visible difference, so follow the specified combination rather than replacing the hdc with another stitch.
Adding the Second Strap
After making 3 sc in the far left corner, chain 41 for the second strap. Slip stitch into the second chain from the hook and continue all the way down the chain.
Make 1 sc in the same space as the last stitch before the chain. Then slip stitch into the first sc of the row. Finish off and weave in the ends.
Final Finishing and Shape Check
Once all stitches are complete, finish off and weave in the remaining ends. Before considering the bandana finished, lay it flat and look at the overall shape.
The completed piece should be approximately 22 inches across from corner to corner and approximately 10 inches deep, with straps approximately 11 inches long. Because gauge is not important in the source, small differences caused by individual tension are not the focus. Consistency within your own motifs and careful adherence to the written construction are the more useful checkpoints.
Beginner Checkpoints That Make the Pattern Easier
For beginners, the most helpful strategy is to divide the project into checkpoints rather than trying to remember every instruction at once.
Checkpoint One: Identify the Corners
In granny motifs, corner chain spaces are essential. They are where the next corner clusters are built and where the joining process takes place. If a corner space is difficult to identify, pause before continuing rather than guessing.
Checkpoint Two: Keep the Color Sequence Clear
The squares begin with Color A, continue with Color B, and then Color C. The special fourth round is Color B. The triangles also progress from Color A to Color B to Color C. The joining is done with Color B, while the border and straps use Color C.
Checkpoint Three: Remember Which Square Is Larger
Only one square receives Round 4. This is not an optional extra round for every square. It identifies the square that will sit at the bottom of the finished bandana.
Checkpoint Four: Match Spaces During Joining
The joining instructions repeatedly rely on inserting the hook into the corresponding space of the neighboring motif before making the connecting chain. Concentrate on matching the spaces rather than simply counting visible granny clusters.
Checkpoint Five: Follow the Border Stitch Changes
The border is primarily single crochet, but there are specific locations where the pattern changes the number or type of stitches. The bottom point receives 3 sc, the triangle center receives 2 sc in the center loop, and each granny square corner receives 3 hdc. These details should remain exactly as written.
Common Problems to Watch For
The Motifs Do Not Look Consistent
If your three squares or three triangles look noticeably different, compare them before joining. Since gauge is not important, the goal is not to force an outside measurement but to make the individual pieces reasonably consistent with one another.
The Bottom Square Is in the Wrong Position
Remember that the square with the extra fourth round belongs at the bottom and should be tilted so that one point faces downward. Positioning this piece incorrectly can change the final silhouette.
The Joining Edge Looks Uneven
Slow down around the corners. The joining method depends on corresponding corner and chain spaces being aligned. Make sure the hook is being inserted into the appropriate space of the neighboring motif before making the connecting chain.
The Front Edge Develops an Indent
The pattern specifically addresses this at granny square corners by using 3 hdc. Do not overlook this stitch change when working the border.
The Straps Are Unequal
Both straps begin with chain 41. Keeping that number identical for both sides provides a simple built-in checkpoint before finishing the ends.
Quick Construction Checklist
- Prepare Color A in Coral, Color B in Teal, and Color C in Navy.
- Make 3 granny squares.
- Add Round 4 in Color B to only one square.
- Make 3 granny triangles.
- Weave in the ends of the completed motifs as instructed.
- Arrange the pieces with right sides facing up.
- Place the fourth-round square at the bottom.
- Join the square section using Color B.
- Join the three triangles using the corresponding spaces.
- Finish off and weave in the joining ends.
- Work the outer border in Color C.
- Make 3 sc at the bottom point.
- Make the first chain-41 strap.
- Work the specified sc groups across the triangle sections.
- Make 3 hdc at the granny square corners.
- Make the second chain-41 strap.
- Slip stitch to close the border.
- Finish off and weave in all remaining ends.
A Closer Look at the Finished Construction
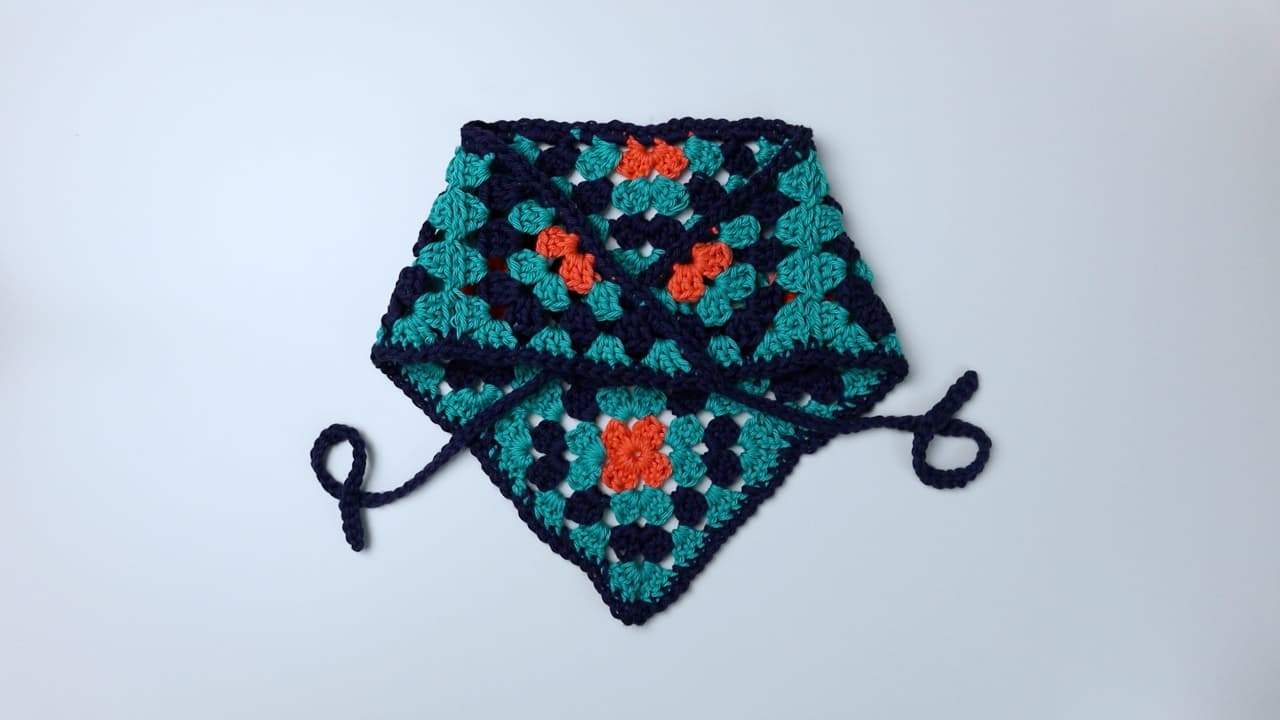
One of the appealing features of this design is the way the individual components remain recognizable after assembly. The granny squares provide the central visual structure, while the triangles extend the shape and help create the upper edge. The Color B joining stitches connect the pieces without removing the characteristic granny-stitch appearance.
The Color C border provides a final visual frame around the project. Its stitch placement also has practical importance: the extra stitches at corners and the controlled shaping at the triangle center help the finished edge follow the intended form.
Pattern Facts at a Glance
- Skill level: Easy
- Crochet terminology: US terms
- Squares: 3 total
- Triangles: 3 total
- Special square: One square receives a fourth round
- Square size: Approximately 4.5 inches
- Triangle short sides: Approximately 4.5 inches
- Triangle long side: Approximately 6.5 inches
- Finished width: Approximately 22 inches corner to corner
- Finished depth: Approximately 10 inches
- Straps: Approximately 11 inches long
- Color A: Coral — 1 skein
- Color B: Teal — 1 skein
- Color C: Navy — 1 skein
- Gauge: Not important
Why the Construction Works So Well for Beginners
Although the finished bandana looks more elaborate than a simple granny square, the project is based on familiar building blocks. A beginner can work on one square at a time, then learn the triangle construction separately. This breaks the project into smaller tasks and provides natural opportunities to stop and compare the work.
The joining stage introduces an additional crochet skill: connecting motifs while continuing the granny pattern. This is useful practice for future projects involving blankets, bags, garments and other motif-based designs.
The final border then brings the separate components together visually. Rather than requiring a complicated edging, the source uses mostly single crochet with carefully specified stitch placements. The straps are also straightforward chains followed by slip stitches, making the finishing stage accessible after the more detailed motif assembly.
Final Finishing Advice
Take your time with the last inspection. Make sure all ends have been woven in, the two straps are complete, and the border has been worked around the entire required edge. Look particularly at the bottom point, the triangle center and the granny square corners, since these areas contain special stitch instructions.
The finished measurements provide useful reference points: approximately 22 inches from corner to corner, 10 inches deep and approximately 11-inch straps. The source does not require an exact gauge, so focus on preserving the pattern’s stitch counts, rounds, rows, color sequence and construction rather than altering the instructions to force a particular gauge.
Frequently Asked Questions
How many granny squares are needed?
The pattern calls for 3 granny squares. Only one of those squares receives the additional fourth round.
How many granny triangles are needed?
You will make 3 granny triangles, each worked through three rows.
Which color is used for joining?
Color B, Teal, is used to join the squares and triangles together.
Which color is used for the border?
The outer border and straps are worked with Color C, Navy.
How long are the straps?
Each strap begins with a chain of 41, and the finished straps are approximately 11 inches long.
Is gauge important for this pattern?
No. The source states that gauge is not important. The reference motif measurements are approximately 4.5 inches for the squares, 4.5 inches along the short sides of the triangles and 6.5 inches along the triangle hypotenuse.
What are the finished dimensions?
The completed bandana is approximately 22 inches across corner to corner and 10 inches deep, with straps approximately 11 inches long.
What happens at the bottom point?
The border works 3 sc in the bottom corner space before continuing up the opposite side. This provides the stitch placement specified for the pointed section.
Why are 3 hdc used at the granny square corners?
The source explains that the longer stitches help prevent an indent from forming across the front of the bandana.
Enjoy the Motif-to-Accessory Transformation
This granny square bandana is a good example of how a small collection of simple crochet motifs can become a complete accessory through thoughtful arrangement and joining. The project begins with individual granny squares and triangles, develops through a controlled color sequence, and finishes with a structured border and two straps.
The most important approach is to treat each stage as its own checkpoint. Complete the squares, identify the one that needs the fourth round, make the three triangles, arrange everything carefully, and then move through the joining process one corresponding space at a time. Finally, follow the Color C border and strap instructions exactly as written.
With its approximately 22-inch corner-to-corner width, 10-inch depth and approximately 11-inch straps, the finished piece has a defined bandana silhouette while retaining the classic handmade character of granny crochet. The Coral, Teal and Navy color sequence gives the motifs a strong visual rhythm, while the Color B joins and Color C border bring the separate pieces together into one cohesive project.
Once the final ends are woven in, the transformation is complete: three squares, three triangles and their carefully worked connections become one distinctive granny square bandana.