
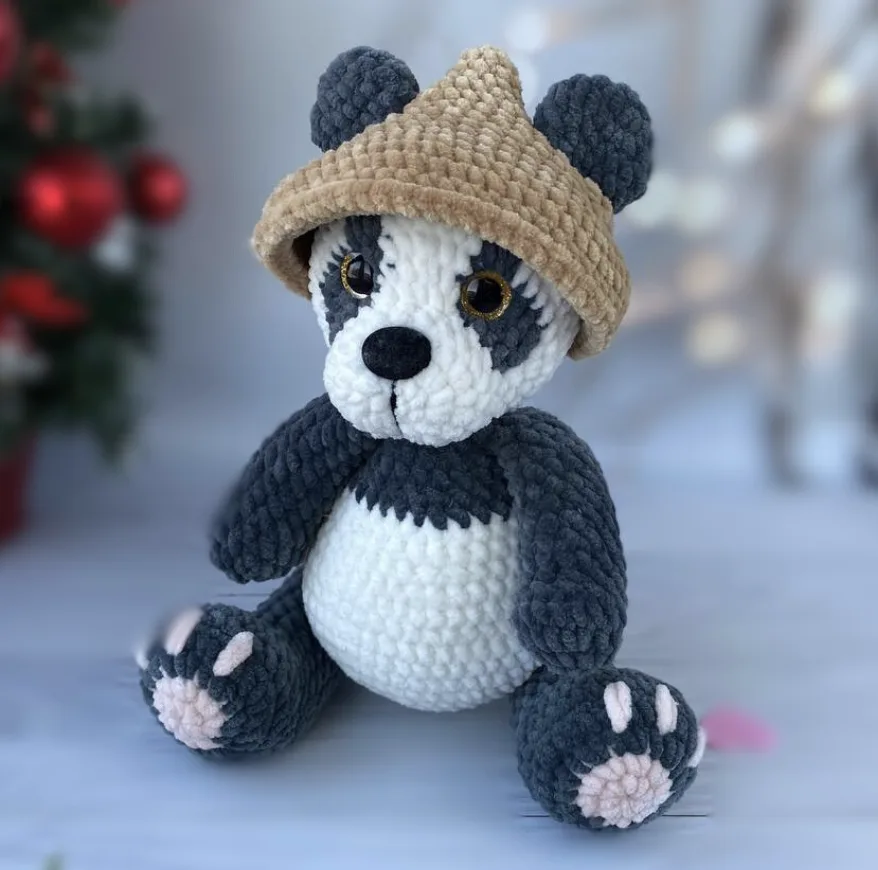
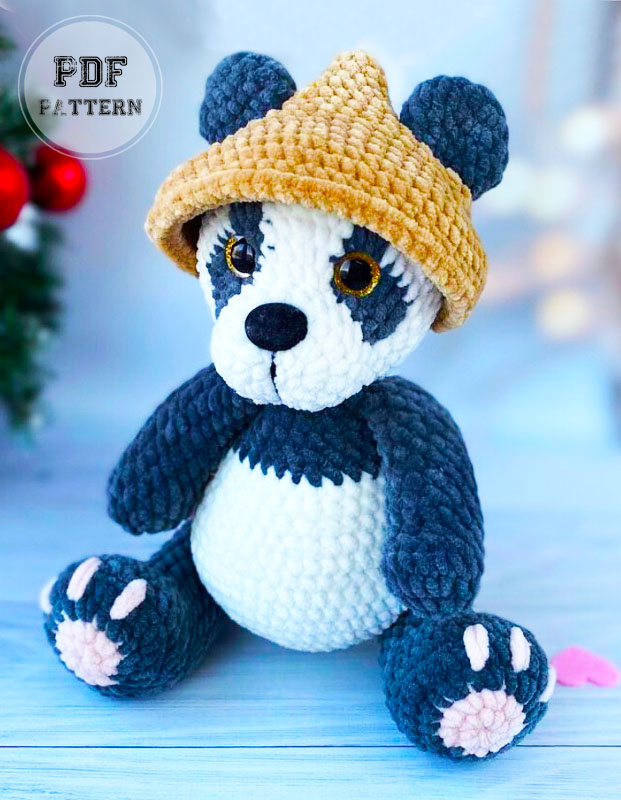
If you love soft amigurumi projects with plenty of personality, this crochet panda with a little brown hat is a wonderful project to add to your handmade collection. The finished character combines a simple black-and-white panda body with a contrasting hat, making the project especially charming as a gift, nursery decoration, or handmade collectible.
This guide presents the panda pattern as a complete construction and finishing tutorial. Instead of focusing only on the individual crochet pieces, it helps you understand how the ears, tail, arms, legs, body, head, facial features, and hat come together into one finished character.
About This Crochet Panda Project
The panda is crocheted with a 4 mm crochet hook and soft Himalaya Dolphin Baby yarn. The main body color is white, while black is used for the panda’s ears, arms, tail, and black sections of the body and face. Pink is used at the beginning of the legs, and brown is used for the hat.
The pattern also calls for 16 mm safety eyes and a 15/22 mm safety nose. Optional 30 mm joints can be used for the legs, although the supplied PDF presents a no-joint construction while the accompanying video demonstrates a jointed variation.
One of the most important construction details is that the pieces are not all sewn onto the finished body. According to the pattern instructions, only the head and tail are sewn on. The other pieces are attached while crocheting progresses. This makes the construction process quite different from an amigurumi design where every limb is completed separately and sewn together afterward.
Materials You Will Need
- Crochet hook: 4 mm
- Main yarn: Himalaya Dolphin Baby white
- Black yarn: Himalaya Dolphin Baby black
- Pink yarn: Himalaya Dolphin Baby pink
- Brown yarn: for the hat
- Safety eyes: 16 mm
- Safety nose: 15/22 mm
- Optional joints: 30 mm
- Yarn needle
- Scissors
- Hollowfiber
- Stitch marker
The source does not specify a finished size, gauge, or total yarn yardage. These details should therefore not be substituted with estimates. The important measurements supplied by the pattern are the hook size, safety-eye size, safety-nose size, and optional joint size listed above.
Crochet Abbreviations
The pattern uses the following abbreviations. Keeping these terms consistent is important because the construction depends on accurate increases, decreases, and attached stitches.
- MR: magic ring
- ch: chain
- sl st: slip stitch
- sc: single crochet
- dec: decrease
- inc: increase, meaning 2 sc in one stitch
- BLO: back loop only
- cc: color change
- FO: fasten off
- (…): repeat the instructions inside the parentheses
- *…: repeat the indicated section the shown number of times
Before You Begin: Understand the Construction
Before starting the first round, it helps to understand the order in which the panda is assembled. The small parts are crocheted first, followed by the legs and body, and then the head and hat. The arms and legs are incorporated into the body rather than being attached afterward in the usual sewing-heavy method.
There is also an important yarn-tail instruction. Do not automatically leave long yarn tails on every piece for sewing. The pattern specifically explains that yarn tails should not be left for sewing unless the instructions call for them. The tail and head are the pieces that are sewn on.
This distinction can save time and prevent unnecessary loose ends from accumulating throughout the project.
Step 1: Crochet the Ears
Make two ears using black yarn. The ears are worked in the round and are intentionally left unstuffed. Their final shape is created by folding each piece in half and crocheting through both sides.
- Round 1: Make 8 sc in a MR.
- Round 2: Make 8 inc (16).
- Round 3: 3 sc, inc, 7 sc, inc, 4 sc (18).
- Round 4: 18 sc around.
- Round 5: 4 sc, dec, 6 sc, dec, 4 sc (16).
- Round 6: 2 sc, 2 dec, 4 sc, 2 dec, 2 sc (12).
After Round 6, work 2 sc. Fold the ear in half and crochet 6 sc through both sides. Cut the yarn and fasten off. The ears are not stuffed.
Because the ears are attached to the head during the head construction, keep their shape neat and symmetrical. Avoid over-stretching the folded edge while working the final 6 sc through both sides.
Step 2: Make the Tail
The tail is worked entirely in black yarn and is lightly stuffed. Unlike the ears, the tail requires a yarn tail for sewing because it will later be attached to the body.
- Round 1: 6 sc in a MR.
- Round 2: 6 inc (12).
- Round 3: 12 sc.
- Round 4: (sc, dec) repeated 4 times (8).
Stuff the tail lightly. Cut the yarn and fasten off, leaving a tail for sewing. The tail is placed between R7 and R9 of the body.
Light stuffing is particularly useful here because the tail should remain compact rather than becoming a large, heavily filled sphere.
Step 3: Crochet the Two Arms
Both arms are crocheted in black yarn. The pattern instructs you to stuff the arms as you work from R1 through R12. This allows the stuffing to reach the lower part of the arm before the opening becomes too narrow.
- Round 1: 6 sc in a MR.
- Round 2: 6 inc (12).
- Round 3: 4 sc, 3 inc, 5 sc (15).
- Round 4: 15 sc.
- Round 5: 5 sc, 3 dec, 4 sc (12).
- Round 6: 12 sc.
- Round 7: 5 sc, inc, 6 sc (13).
- Rounds 8–13: 13 sc around for 6 rows.
- Round 14: 5 sc, dec, 6 sc (12).
- Round 15: 12 sc.
After Round 15, work 2 sc. Fold the arm in half and crochet 6 sc through both sides. Cut the yarn and fasten off.
Step 4: Build the Legs
The legs are especially important because their direction determines how the finished panda stands. Begin each leg in pink yarn and change to black after Round 2.
- Round 1: 8 sc in a MR.
- Round 2: 8 inc (16), then change color to black.
- Round 3: (sc, inc) repeated 8 times (24).
- Round 4: (3 sc, inc) repeated 6 times (30).
- Round 5: 30 sc in BLO.
- Round 6: 30 sc around.
- Round 7: 9 sc, 6 dec, 9 sc (24).
- Round 8: 6 sc, 6 dec, 6 sc (18).
- Round 9: 7 sc, 2 dec, 7 sc (16).
- Rounds 10–12: 16 sc around for 3 rows.
- Round 13: dec, 14 sc (15).
- Rounds 14–16: 15 sc around for 3 rows.
- Round 17: (sc, dec) repeated 5 times (10).
Stuff the legs from R1 through R15. After Round 17, work 2 sc and fold the leg in half. Make sure the feet face forward rather than pointing to the side. Adjust the stitches if necessary, then crochet 5 sc through both sides. Cut the yarn and fasten off.
The PDF provides the no-joint version. The accompanying video demonstrates a jointed option. If using the no-joint construction from the PDF, follow the leg and body instructions exactly as given for attaching the legs.
Step 5: Construct the Body
The body is worked in the main white color. This is where the completed legs become part of the panda’s structure.
- Round 1: 6 sc in a MR.
- Round 2: 6 inc (12).
- Round 3: (sc, inc) repeated 6 times (18).
- Round 4: (2 sc, inc) repeated 6 times (24).
- Round 5: (3 sc, inc) repeated 6 times (30).
- Round 6: (4 sc, inc) repeated 6 times (36).
- Round 7: (5 sc, inc) repeated 6 times (42).
- Round 8: (6 sc, inc) repeated 2 times, 2 sc, inc, 6 sc, inc, 3 sc, inc, 6 sc, inc, 7 sc (48).
For the no-joint version, Round 9 incorporates the legs:
Round 9: 9 sc, 5 sc together with leg, 18 sc, 5 sc together with leg, 11 sc (48).
Make sure the legs face forward and remain symmetrical. Adjust the stitches if necessary.
For the jointed version, work 48 sc around on Round 9 and attach the jointed legs after R12, as demonstrated in the video.
- Rounds 10–12: 48 sc around for 3 rows.
- Round 13: (6 sc, dec) repeated 6 times (42).
- Round 14: (5 sc, dec) repeated 6 times (36).
- Round 15: 36 sc around.
- Round 16: (4 sc, dec) repeated 6 times (30).
- Round 17: 30 sc around, then change color to black.
- Round 18: (3 sc, dec) repeated 6 times (24).
- Rounds 19–20: 24 sc around for 2 rows.
- Round 21: (2 sc, dec) repeated 6 times (18).
- Round 22: 2 sc, 6 sc together with arm, 3 sc, 6 sc together with arm, sc (18), then change color to white.
- Round 23: dec, 7 sc, dec, 7 sc (16).
Adjust the arm attachment if necessary. Cut the yarn and fasten off, leaving a tail for sewing.
Body Checkpoint
At this point, take a moment to check the overall symmetry before continuing. The feet should point forward, the legs should sit evenly, and the arms should be positioned naturally on opposite sides of the body.
This is also a useful stage for checking stuffing distribution. The pattern does not specify a separate stuffing quantity, so do not attempt to calculate one. Instead, use the supplied construction instructions and avoid changing the shape by overstuffing.
Step 6: Crochet the Head and Create the Face
The head begins in the main color. The color-changing rounds create the panda’s distinctive facial area. The source indicates that the black text represents white yarn while the red text represents black yarn in the original pattern presentation, and the video demonstrates these color changes.
- Round 1: 6 sc in a MR.
- Round 2: 6 inc (12).
- Round 3: 2 sc, (3 sc in one stitch) twice, 4 sc, (3 sc in one stitch) twice, 2 sc (20).
- Round 4: 5 sc, inc, 8 sc, inc, 5 sc (22).
- Rounds 5–6: 22 sc around for 2 rows.
The color-changing section begins with R7.
Round 7: 6 sc, 3 inc, 3 inc, 3 inc, 7 sc (31).
Round 8: 6 sc, inc, 3 sc, inc, 2 sc, sc, inc, 2 sc, 2 sc, inc, 3 sc, inc, 7 sc (36).
Round 9: 7 sc, inc, sc, 3 sc, inc, 2 sc, 2 sc, inc, 2 sc, 2 sc, inc, 3 sc, sc, inc, 8 sc (41).
Round 10: 9 sc, inc, 5 sc, inc, sc, 3 sc, inc, 2 sc, sc, inc, 6 sc, inc, 9 sc (46).
Round 11: 13 sc, inc, 19 sc, inc, 12 sc (48).
Face Placement
The placement of the safety eyes and nose is one of the most important visual stages of the project. The pattern specifies that the eyes should be placed between rows 8 and 9, with approximately 7 visible stitches between them. The nose is positioned between rows 3 and 4.
After placing the facial pieces, continue the head.
- Rounds 12–14: 48 sc around for 3 rows.
- Round 15: (6 sc, dec) repeated 6 times (42).
- Round 16: 12 sc, 6 sc together with ear, 7 sc, 6 sc together with ear, 11 sc (42). Adjust if necessary and refer to the photo for placement.
- Round 17: (5 sc, dec) repeated 6 times (36).
- Round 18: (4 sc, dec) repeated 6 times (30). Start stuffing.
- Round 19: (3 sc, dec) repeated 6 times (24).
- Round 20: (2 sc, dec) repeated 6 times (18).
- Round 21: (sc, dec) repeated 6 times (12).
- Round 22: 6 dec.
Cut the yarn and close the hole. The finished head is then sewn to the body.
The creator’s video also demonstrates the face shaping and embroidery process. Since those visual details are demonstrated rather than represented as additional numbered rounds in the supplied pattern, they should be followed through the creator’s visual instructions rather than replaced with invented stitch counts.
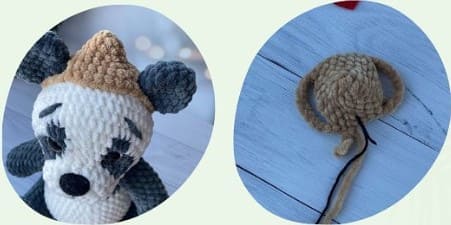
Step 7: Make the Brown Hat
The hat gives the panda its recognizable finishing touch. It is crocheted separately in brown yarn and shaped with increases to fit over the head.
- Round 1: 5 sc in a MR.
- Round 2: 5 inc (10).
- Round 3: 10 sc around.
- Round 4: (sc, inc) repeated 5 times (15).
- Round 5: (2 sc, inc) repeated 5 times (20).
- Round 6: (3 sc, inc) repeated 5 times (25).
Round 7 creates the distinctive openings that help form the hat’s shape:
Round 7: 3 sc, ch 9, skip 6 stitches, 8 sc, ch 9, skip 6 stitches, 3 sc (32).
Try the hat on the head at this stage and adjust the stitch if necessary.
- Round 8: 3 sc, 9 sc on chain, 8 sc, 9 sc on chain, 3 sc (32).
- Round 9: (6 sc, inc) repeated 3 times, 5 sc, inc, 5 sc (36).
- Round 10: (5 sc, inc) repeated 6 times (42).
- Round 11: (6 sc, inc) repeated 6 times (48).
- Round 12: (7 sc, inc) repeated 6 times (54).
- Round 13: (8 sc, inc) repeated 6 times (60).
- Rounds 14–15: 60 sc around for 2 rows.
- Round 16: 60 sl st.
Cut the yarn and fasten off.
How to Keep the Panda Symmetrical
Symmetry is one of the biggest factors in making an amigurumi panda look polished. The pattern itself gives several opportunities to adjust positioning if needed, particularly around the legs, arms, and ears.
- Check that both feet face forward before closing the legs.
- Keep the two legs at corresponding positions when joining them to the body.
- Check the arm positions while working the body rather than waiting until the end.
- Place the eyes between rows 8 and 9 as specified.
- Keep approximately 7 visible stitches between the eyes.
- Place the nose between rows 3 and 4.
- Compare the ear positions before closing the final head rounds.
Small positional adjustments can be made where the source explicitly permits them. However, avoid changing the stitch counts or rewriting the construction sequence simply to make the piece look different.
Stuffing Tips for a Soft Amigurumi
The pattern specifically tells you when stuffing should take place. The arms are stuffed as you crochet through R1–R12, while the legs are stuffed from R1–R15. The tail is lightly stuffed. The head begins stuffing at R18.
Following these stages is more useful than adding a large amount of stuffing at the end. Early stuffing helps the pieces maintain their intended shape while the remaining rounds are crocheted.
Do not assume that more stuffing automatically produces a better result. Excessive stuffing can stretch the stitches and change the appearance of the finished piece. The pattern does not provide a specific quantity of Hollowfiber, so use the construction and resulting shape as your guide without inventing a measurement.
Common Construction Mistakes to Watch For
Forgetting the Color Change on the Legs
The legs begin with pink yarn. After R2, the yarn changes to black. Missing this change will alter the appearance of the feet.
Missing the BLO Instruction
Round 5 of the legs is specifically worked as 30 sc in BLO. This is a technical instruction and should not be treated as an ordinary round.
Turning the Feet Sideways
The pattern explicitly emphasizes that the feet must face forward. Before closing the folded portion of each leg, check their orientation.
Attaching the Legs Incorrectly
In the no-joint body version, the legs are incorporated into R9 using the specified 5 sc together with each leg. The position should be checked for symmetry while this round is being worked.
Using the Wrong Construction for the Joints
The PDF provides a no-joint version, while the video demonstrates a jointed alternative. These should not be mixed accidentally. If using the PDF construction, follow the no-joint attachment on R9. The jointed variation attaches the jointed legs after R12.
Leaving Sewing Tails Everywhere
The source specifically says not to leave yarn tails for sewing on pieces unless instructed. The head and tail are sewn on; the other parts are incorporated during crocheting.
Quick Project Checklist
- 4 mm crochet hook ready
- White, black, pink, and brown yarn prepared
- 16 mm safety eyes prepared
- 15/22 mm safety nose prepared
- Optional 30 mm joints prepared if using the jointed variation
- Hollowfiber ready for stuffing
- Stitch marker available
- Two ears completed
- Tail completed and lightly stuffed
- Two arms completed
- Two legs completed with feet facing forward
- Body completed with correct leg and arm attachments
- Head completed with correct eye and nose placement
- Hat completed in brown yarn
- Head sewn to body
- Tail sewn between R7 and R9 of the body
- Final face shaping and embroidery completed according to the creator’s instructions
Frequently Asked Questions
What crochet hook size is used for the panda?
The pattern uses a 4 mm crochet hook.
What yarn is recommended?
The source specifies Himalaya Dolphin Baby in white for the main color, black and pink for the other panda sections, and brown for the hat.
What size safety eyes are required?
The pattern specifies 16 mm safety eyes.
What size safety nose is used?
The source lists a 15/22 mm safety nose.
Does the panda require joints?
Not necessarily. The PDF provides a no-joint version. The source also notes that the video demonstrates a jointed version using 30 mm joints.
Which pieces are sewn onto the panda?
The head and tail are sewn on. The other pieces are attached as crocheting progresses according to the pattern instructions.
Where is the tail placed?
The tail is placed between R7 and R9 of the body.
Where should the eyes be placed?
The eyes are placed between rows 8 and 9, with approximately 7 visible stitches between them.
Where is the nose placed?
The nose is placed between rows 3 and 4.
When should the head be stuffed?
Stuffing begins at R18 of the head.
When are the legs stuffed?
The legs are stuffed from R1 through R15.
When are the arms stuffed?
The arms are stuffed as you work through R1–R12.
Is the tail heavily stuffed?
No. The pattern specifically instructs you to stuff the tail lightly.
Finishing the Panda
Once the body, head, arms, legs, ears, and tail are complete, take time to inspect the overall character before considering the project finished. The head should be securely sewn to the body, and the tail should be positioned between R7 and R9 as specified.
Check the face from the front and make sure the eyes remain balanced around the center of the head. The feet should continue to face forward, and the arms should sit at corresponding positions on both sides of the body.
Finally, place the brown hat on the finished head. Because the pattern specifically instructs you to try the hat on the head during R7 and adjust the stitch if necessary, the fitting process is an intentional part of the construction rather than an afterthought.
A Final Beginner-Friendly Workflow
If this is your first time making a crochet amigurumi with attached limbs, work slowly and use the stitch marker consistently. The most important part is not speed but maintaining the exact round sequence.
A useful workflow is to complete the ears and tail first, then make both arms and both legs. Once the matching pieces are finished, move on to the body and carefully incorporate the legs and arms at their specified rounds. After the body is complete, work the head, place the facial pieces at the specified rows, attach the ears during R16, and sew the head to the body.
The hat can then be crocheted separately in brown yarn and fitted to the head. This approach keeps the project organized and makes it easier to compare matching pieces before they become part of the final assembly.
Pattern Credit and Use
This crochet panda design is by Rosalie_Toys. Please credit @Rosalie_Toys as the creator when sharing the finished project or discussing the design. The original pattern should not be copied or redistributed as your own pattern.
The source also states that finished handmade items made from the pattern may be sold. When publishing or sharing your finished panda, keep the designer credit intact and distinguish your handmade finished item from the original pattern itself.
Conclusion
This crochet panda with a brown hat is a rewarding amigurumi project because its character comes from a combination of straightforward crochet shaping and careful assembly. The ears remain compact and unstuffed, the tail is lightly filled and sewn to the body, the legs begin in pink before changing to black, and the body and arms are constructed together rather than relying on extensive sewing.
The head is especially important because the eye and nose placement, black-and-white color changes, ear attachment, and final stuffing all contribute to the panda’s expression. The brown hat then adds the final distinctive detail.
For the best results, keep the original round numbers and stitch counts unchanged, pay close attention to every color change, and use the adjustment points specifically provided by the pattern when checking symmetry or fitting the hat. With careful attention to those details, the project can be worked systematically from the first magic ring through the final finishing touches.
The accompanying creator video can also be used for the visual portions of the construction, particularly the color changes, face shaping, embroidery, and jointed-leg variation. The written pattern remains the reference for the exact numbered rounds and stitch counts presented in this guide.