
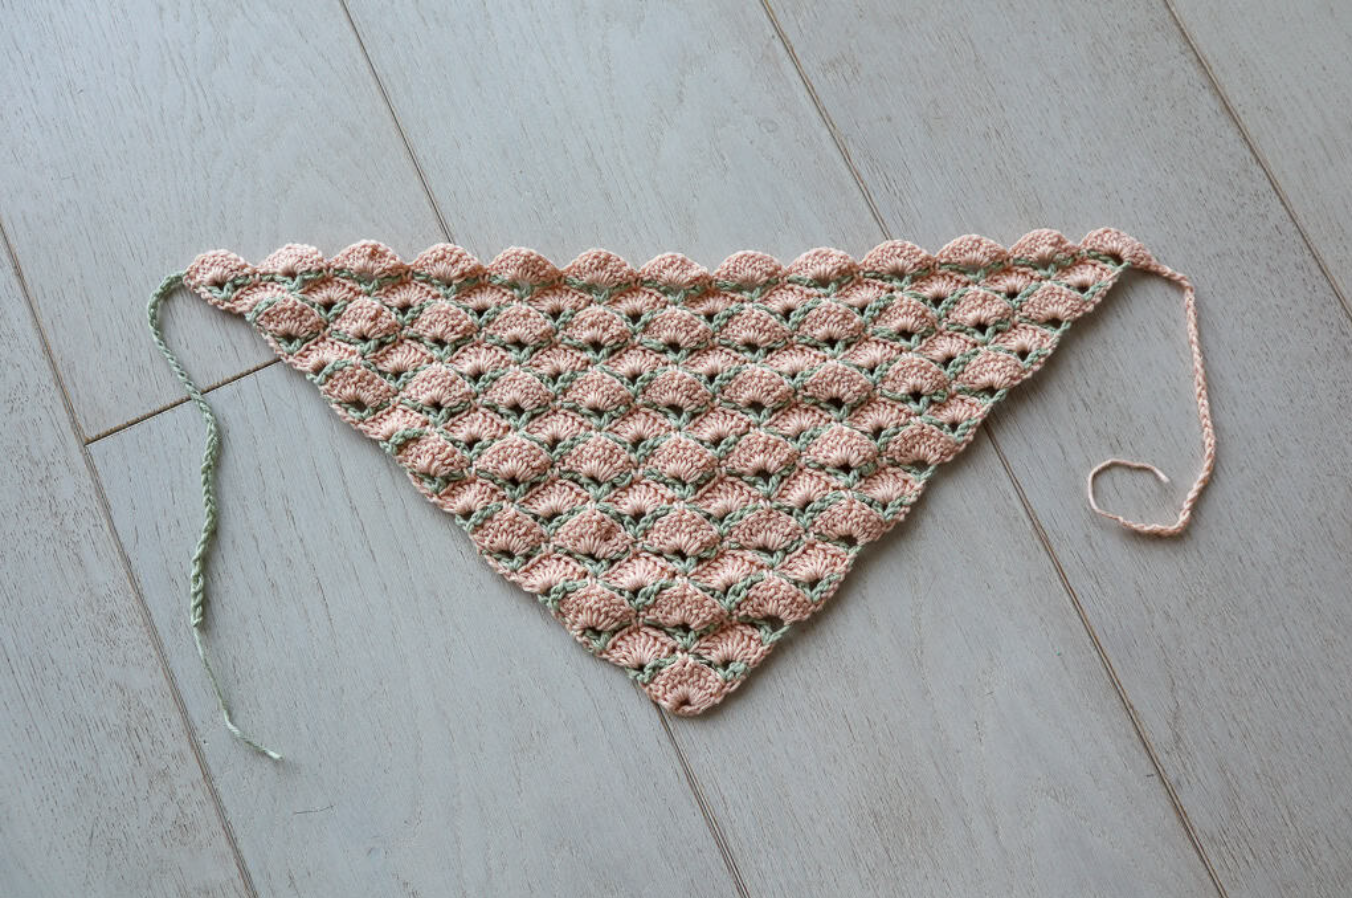
How to Crochet the Beautiful Shells Bandana: A Complete Shell Stitch Tutorial
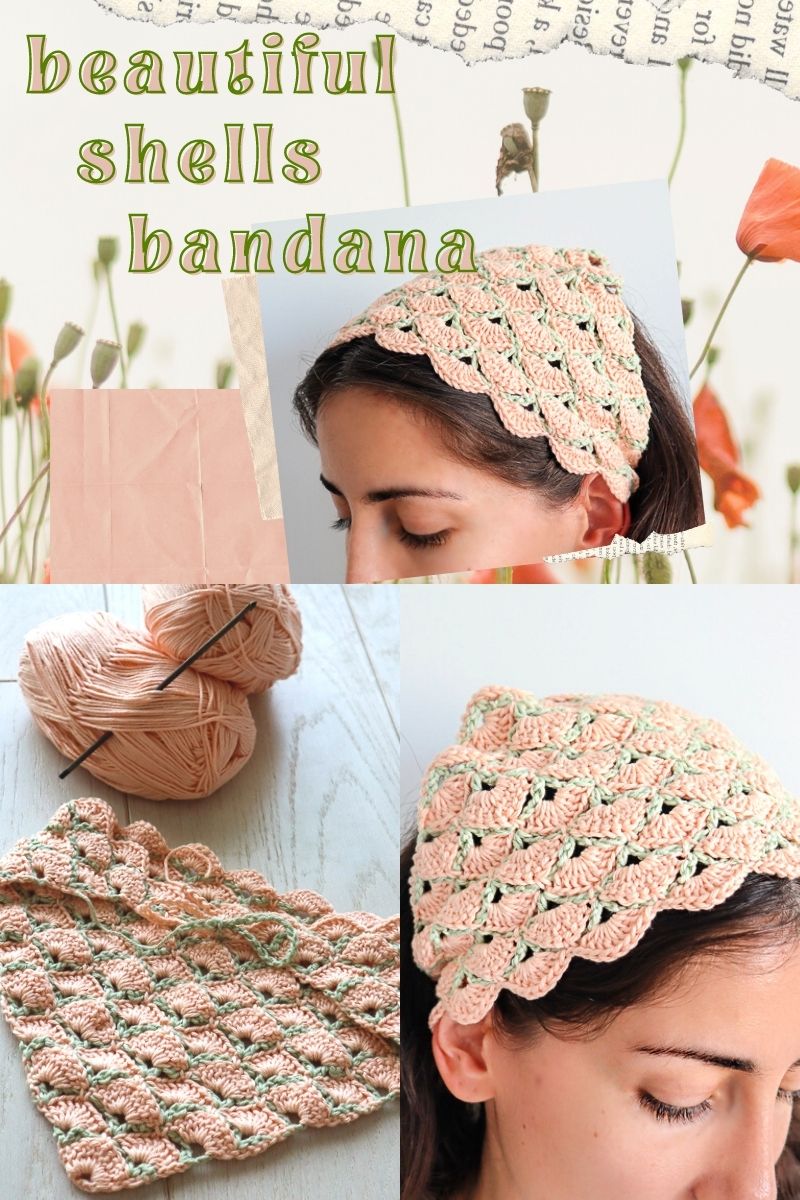
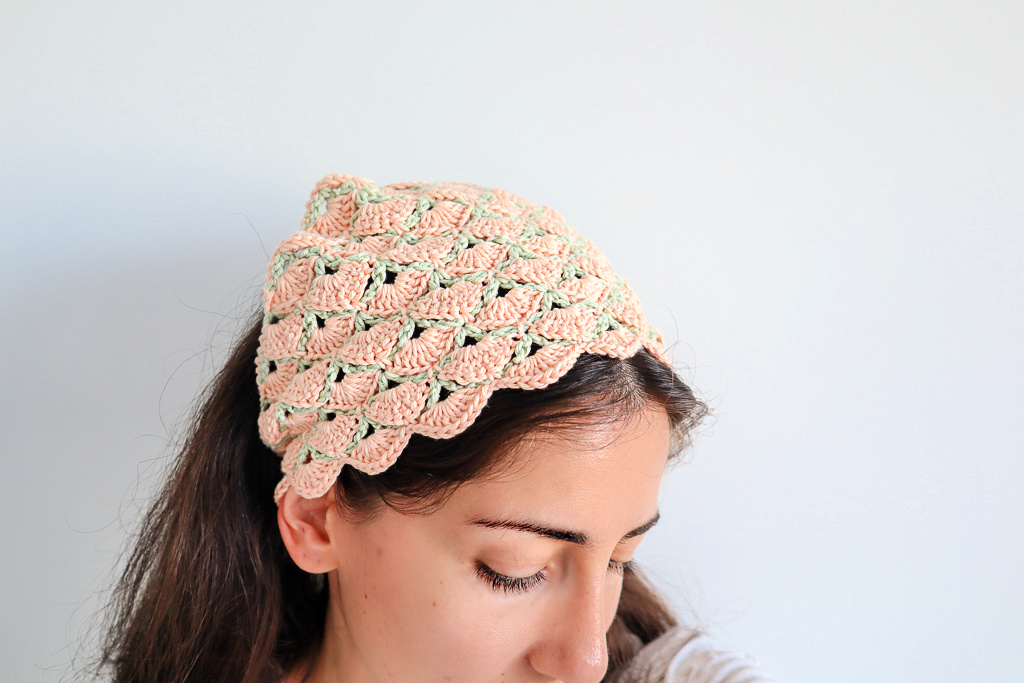
If you are looking for a crochet project that teaches something new without requiring a huge time commitment, the Beautiful Shells Bandana is an excellent place to begin. This small accessory introduces a distinctive way of constructing crochet fabric in which chain spaces form a framework first, followed by fuller shell stitches that are built onto that framework.
At first glance, the stitch can look considerably more complicated than ordinary rows of crochet. In reality, the pattern is based on a repeating relationship between two types of rows. One row creates V stitches and chain spaces, while the next row uses those V stitches to create substantial shells. Once that relationship becomes familiar, the structure is much easier to understand.
The project also has an especially attractive colorwork feature. The original design uses two colors of DK weight cotton yarn, alternating colors from row to row. Instead of cutting the yarn every time the color changes, the pattern uses a slightly tricky live-loop technique that keeps both yarns available. The yarn is not carried across the entire row, either, which keeps the colorwork relatively neat.
This tutorial walks through the construction from the first chain ring to the final ties while keeping the original technical instructions, stitch counts, measurements, materials, and color-change method intact.
A Small Project with a Bigger Crochet Lesson
The bandana is intentionally small. That is one of its greatest strengths when learning the stitch. Large projects can make an unfamiliar technique feel overwhelming because there are so many rows to complete before the structure becomes obvious. With this bandana, the stitch develops quickly enough that you can see the relationship between the framework and the shells after only a few rows.
The technique is related in concept to other intricate-looking crochet stitches that use chains as a kind of scaffold. The Virus Stitch is one well-known example of this general strategy. The Beautiful Shells stitch is a simpler cousin that gives you an opportunity to become comfortable with the idea before taking on something much larger.
Another benefit is that the bandana grows from the very bottom corner upward. This means there is no complicated shaping system based around a predetermined starting width. The piece begins very small and expands as the rows are repeated.
If you enjoy the construction, the same growing concept can be continued beyond the bandana size. The original design notes that because the project is worked bottom-up, continuing the stitch can eventually produce a much larger piece such as a shawl.
At-a-Glance Pattern Information
- Project type: Crochet bandana
- Stitch technique: Beautiful Shells stitch using a V-stitch framework
- Construction: Bottom-up from the smallest corner
- Original yarn weight: DK weight cotton
- Number of colors: Two
- Yarn quantity: Less than 50 yards of each color
- Original crochet hook: 3.5mm
- Original finished measurement: 18 inches (46cm) along the long side
- Original number of rows: 25 rows
- Finishing method: Chains a few inches long made from the available working yarn on either end for ties
Choosing the Yarn and Hook
The original bandana uses just a few yards of two colors of DK weight cotton yarn. Less than 50 yards of each color is required. The green yarn used in the original project was Paintbox Yarns Cotton DK, while the peach color was Baby Cotton from Ice Yarns.
A 3.5mm crochet hook is used with the original yarn. This combination provides the reference point for the original finished size and appearance.
One useful feature of this design is that the pattern does not lock you into a single yarn weight or hook size. Because the bandana grows from its bottom corner upward, you can experiment with different yarn weights and hook sizes. However, if you change the yarn or hook, you should expect the resulting fabric and dimensions to differ from the original version.
For a faithful reproduction of the original project, use DK weight cotton yarn and the 3.5mm hook.
Understanding the Two Main Row Types
Before beginning, it is useful to separate the pattern into two visual jobs.
The first job belongs to the framework row. This row uses V stitches and chain-5 spaces to create open areas. Think of these spaces as a temporary support structure.
The second job belongs to the shell row. Here, the V stitches created in the previous row are filled with groups of double crochet stitches. Those groups create the thick, fan-like shells that give the stitch its name.
The two row types alternate. Once you recognize which type of row you are working, the pattern becomes much easier to navigate.
Basic Crochet Abbreviations
The pattern relies on familiar basic stitches, but the V stitch is particularly important to understand because it serves as the foundation for the shells.
- ch: chain
- sl st: slip stitch
- sc: single crochet
- dc: double crochet
- V stitch: 1dc, ch1, 1dc worked into the same stitch or space
The starting chain-3 at the beginning of a double crochet row counts as 1dc. This affects the stitch count, especially in the first row and the shell rows.
Getting Started with the First Corner
The entire bandana begins with a very small foundation. In Color A, chain 6.
Join the chain into a ring by making a slip stitch into the first chain. This creates the central opening into which the first group of double crochet stitches will be worked.
Take care not to twist the chain before making the slip stitch. A clean ring makes the first row easier to work and gives the starting point a neat appearance.
Row 1: Establishing the First 9 Double Crochets
Begin Row 1 with Color A.
Chain 3. The chain-3 counts as 1dc. Then work 8dc into the center of the chain-6 ring.
The completed row contains 9dc total.
This count is worth checking before moving forward. The first chain-3 is included in the total, so you are not looking for nine additional double crochet stitches after the chain-3. The combination of the starting chain-3 plus the 8dc worked into the ring produces the required 9dc.
When you reach the end of the row, pull the last loop up long. Remove your hook without pulling the loop out. This live loop is needed for the special color-change process.
Why the Live Loop Matters
Ordinary crochet color changes often involve fastening off one color and attaching another. This pattern takes a different approach. The completed row is left with a long live loop, and the next color is connected through that loop.
This may feel unusual if you are accustomed to cutting the yarn at every color change. The important thing is not to accidentally tighten or lose the long loop after removing your hook.
Keeping the loop available is what makes the later color transition possible.
Row 2: Building the First V-Stitch Scaffold
For Row 2, insert your hook into the top of the starting ch3 from the previous row.
Switch to Color B. Chain 4. This chain-4 counts as 1dc and ch1.
Make 1dc into the same stitch. Together, the ch4 and the additional dc create the first V stitch:
1dc, ch1, 1dc.
Next, chain 5.
Then make another V stitch, again consisting of 1dc, ch1, 1dc, all into the last stitch of the row.
This is the beginning of the scaffold. The spaces created here will later support the shells.
The No-Cut Color Change
After completing the framework row, the colors need to be switched. The pattern provides a specific method that avoids cutting the yarn after every row.
With the live Color B loop on your hook, insert the hook into the live Color A loop.
Chain 3 in Color A only. Pull the Color A loop through the Color B loop.
Then chain 3 again in Color A while carrying Color B up the chain.
Turn your work.
This technique allows the project to alternate colors every row while the yarn remains connected. The inactive color is not carried across the full row. Instead, the color is moved through the chain during the transition.
The method may require some concentration the first few times. It helps to stop after each part of the movement and make sure you can clearly identify the live loop of each color.
Row 3: Filling the First V Stitches
Row 3 is worked in Color A.
Make 8dc into the first V stitch. The starting ch3 from the color-change instructions counts toward the shell, so the total is 9dc.
Next, make 1sc in the 5th dc from the previous shell stitch, working on top of the ch5 from the previous row.
Then make 9dc in the next V stitch.
When the row is complete, pull the final loop long and remove your hook.
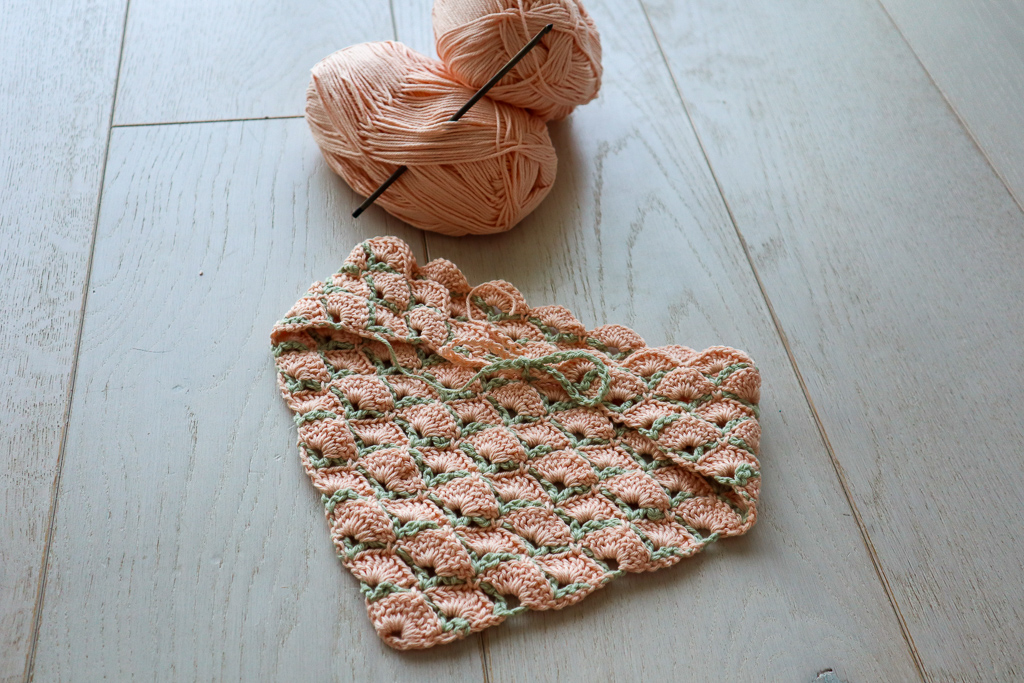
This is where the scaffold begins to transform into the recognizable Beautiful Shells texture. The V stitches that looked open and skeletal in Row 2 are now filled with dense groups of double crochet stitches.
What Happens to the Chain-5 Space?
The chain-5 space from the previous framework row plays an important role in Row 3. Rather than filling it with another large group of stitches, the pattern uses a single crochet in the specified position.
For Row 3, make 1sc in the 5th dc from the previous shell stitch, working on top of the ch5 from the previous row.
This creates the separation between the two large shell groups. It also demonstrates why the framework row should not be judged by its appearance alone. The open chain spaces are deliberately designed to become part of the next row’s structure.
Row 4: Adding Another Layer of Framework
Row 4 returns to Color B.
Insert your hook into the top of the starting ch3 from the previous row.
Chain 4. As in Row 2, this ch4 counts as 1dc, ch1. Make 1dc into the same stitch to complete the first V stitch.
Chain 5.
Next, make a V stitch into the single crochet from the previous row.
Chain 5 again.
Finally, make another V stitch consisting of 1dc, ch1, 1dc, all into the last stitch of the row.
After this framework row, repeat the color-change instructions so the work can continue in the same direction every two rows without cutting the yarn.
Reading the Pattern Visually
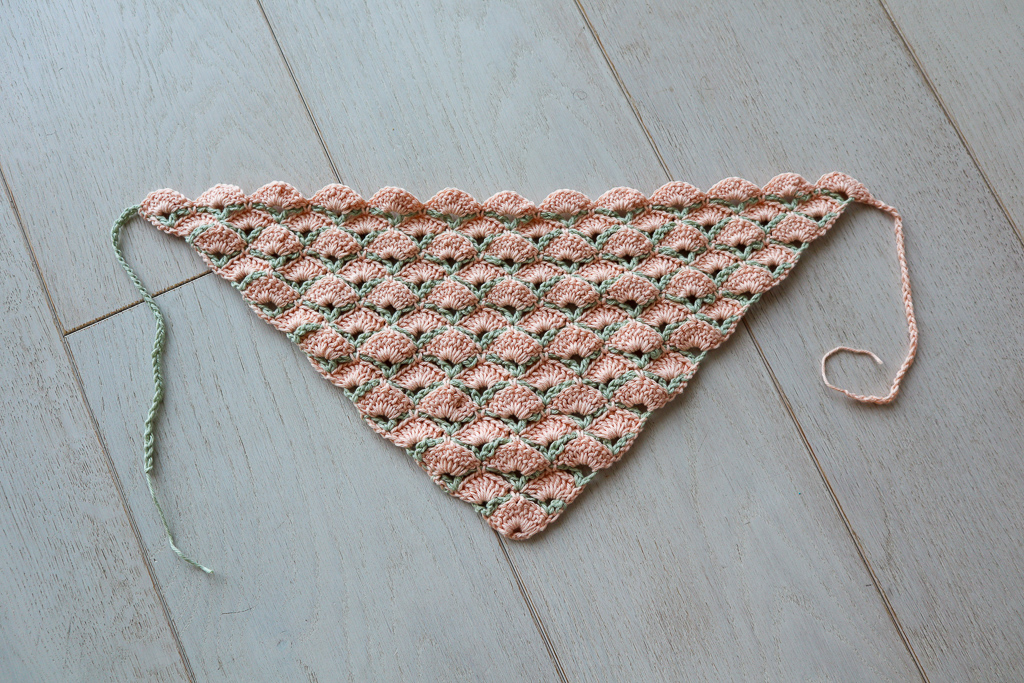
Once several rows are complete, you can use the fabric itself as a visual map. The dense fan-shaped groups are the shells. The open areas between them belong to the framework. Each framework row establishes the spaces where the following shell row will be worked.
This makes the project especially satisfying because the stitch pattern becomes increasingly recognizable as it grows.
Rather than trying to memorize every stitch, identify three things as you work:
- The V stitches that will receive shells.
- The chain-5 areas that are part of the framework.
- The single crochet positions that connect the shell sections.
These visual landmarks can make it much easier to identify where you are in the repeat.
Continuing the Pattern
After Row 4, continue making shells into each V stitch and V-stitch scaffold rows after the shell rows.
The original pattern continues until the piece measures 18 inches (46cm) along the long side. In the original project, this was achieved in 25 rows.
Keep in mind that the 25-row reference belongs to the original version. Different yarn weights, hook sizes, and personal tension can change the dimensions of the finished fabric.
If you are recreating the original bandana, the 3.5mm hook and DK weight cotton yarn provide the intended reference. Measure along the long side as you approach the final rows so you can compare your work with the stated 18-inch (46cm) measurement.
A Practical Way to Check Your Progress
When working a repeating stitch, it is easy to continue for several rows before noticing a misplaced stitch. A few simple checkpoints can prevent that.
First, confirm the early stitch counts. Row 1 should have 9dc total. Row 3 should have 9dc in each of its shell groups when the starting ch3 is included.
Next, check the framework. The V stitches should remain visually identifiable and should be positioned so that the following shell row has a clear foundation.
Finally, look at the overall triangular growth. Because the project is worked from the bottom-up, the fabric should gradually expand from the original small corner.
Colorwork Tips for a Cleaner Result
The alternating colors are one of the visual highlights of this pattern. Since only one color is used for each row, the finished fabric can look much more complicated than the actual colorwork technique.
Try to maintain consistent tension during the color-change sequence. The chains used to move the colors need enough flexibility to avoid pulling the edge too tightly.
At the same time, avoid making those chains excessively loose. The purpose is to connect the live loops cleanly while maintaining the shape of the fabric.
When learning the technique, pause after changing colors and inspect the transition before starting the next row. This is much easier than discovering several rows later that one of the loops was connected incorrectly.
Beginner-Friendly Advice Before You Continue
Do not be concerned if the framework rows initially seem less attractive than the shell rows. They are doing a structural job. Their purpose is to create the foundation for the fuller row that follows.
If you are new to this style of crochet, it may also help to avoid working too quickly. The color transition requires attention, and the stitch placement depends on recognizing V stitches and chain spaces.
Another useful approach is to examine the fabric after every completed pair of rows. Since the design works with alternating shell and framework rows, a two-row checkpoint gives you a clear opportunity to verify that the color sequence and stitch structure are behaving as expected.
Troubleshooting the Most Unusual Parts
My first row does not seem to contain enough stitches.
Remember that the starting ch3 counts as 1dc. Row 1 consists of the starting ch3 plus 8dc worked into the chain-6 ring, for 9dc total.
The V stitch looks strange.
A V stitch in this pattern consists of 1dc, ch1, 1dc in the same stitch or space. The two double crochet stitches create the sides of the V, while the chain-1 forms the opening in the center.
My shell row looks very dense.
That is expected. The shell rows are intentionally much fuller than the framework rows. The contrast between dense shells and open scaffold sections is what creates the stitch’s characteristic texture.
I accidentally cut one of the yarn colors.
The original technique is designed to avoid cutting the yarn at every color change. If you are following the pattern exactly, keep both colors connected and use the described live-loop transition.
The bandana is not exactly 18 inches at 25 rows.
Yarn weight, hook size, and individual crochet tension can affect the final dimensions. The original version reached 18 inches (46cm) along the long side at 25 rows. The source also allows experimentation with different yarn weights and hook sizes.
How to Decide When the Bandana Is Finished
The original finishing point is based on measurement rather than simply stopping after a predetermined number of rows. Continue the shell and framework sequence until the piece measures 18 inches (46cm) along the long side.
For the original project, this was 25 rows. If you are using the original materials and your tension is reasonably close to the reference, this gives you a useful target.
If you are experimenting with a different yarn weight or hook, measure the piece directly rather than assuming that 25 rows will produce the same measurement.
Adding the Ties
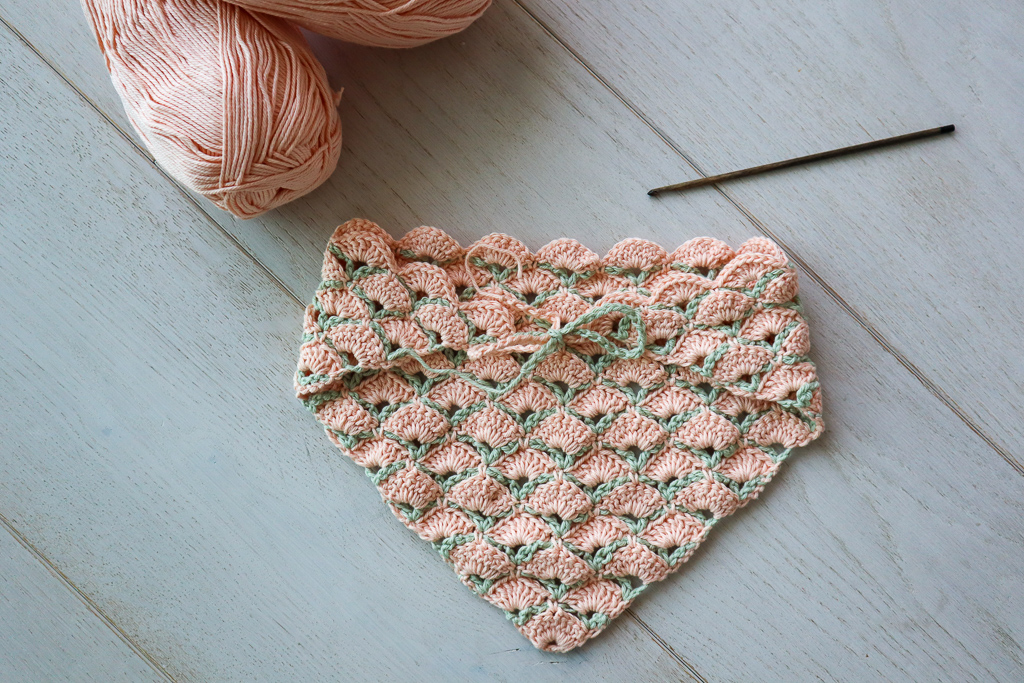
When the main bandana reaches the desired finishing point, use the available working yarn on either end to make chains a few inches long. These chains serve as the ties for the headband.
The finishing step does not require a complicated additional border. The chain ties provide the practical function needed to secure the bandana while keeping the focus on the shell fabric.
Could This Stitch Become a Shawl?
Yes. One of the interesting characteristics of this pattern is its bottom-up construction. The bandana is simply a small version of a shape that can continue growing.
If you enjoy the stitch, the same basic idea can be extended to create a larger fabric. The original source specifically notes that continuing the pattern can result in a whole shawl.
The bandana therefore works as a practical introduction to a broader crochet technique. You can learn the structure on a small project and then decide whether you want to explore a much larger version.
Quick Construction Checklist
- Prepare two colors of DK weight cotton yarn if reproducing the original version.
- Use a 3.5mm crochet hook for the original materials.
- In Color A, chain 6 and join into a ring.
- Complete Row 1 with 9dc total, including the starting ch3.
- Leave the final loop long and remove the hook.
- Use Color B to create the first V-stitch framework.
- Use the special live-loop color-change method instead of cutting the yarn.
- Build the first shells into the V stitches on the following row.
- Continue alternating shell and framework rows.
- Keep checking the placement of the V stitches and the chain-5 framework.
- Continue until the long side measures 18 inches (46cm).
- The original version reached that measurement in 25 rows.
- Use the available yarn at both ends to make chains a few inches long for ties.
Frequently Asked Questions About the Pattern
How much yarn does the bandana require?
The original project uses less than 50 yards of each of two colors of DK weight cotton yarn.
What are the original yarn colors?
The original project uses a green Paintbox Yarns Cotton DK and a peach Baby Cotton from Ice Yarns.
Does the pattern use one color per row?
Yes. The alternating framework and shell rows create an opportunity for two-color work while using one color per row.
Is the color change difficult?
It is somewhat tricky because it uses live loops rather than the more familiar method of fastening off and joining a new strand. Once understood, however, it allows the yarn to remain connected and avoids carrying the yarn across the entire row.
What is the finished size?
The original bandana measures 18 inches (46cm) along the long side. The original project reached this measurement after 25 rows.
Can I make the project in one color?
The construction itself can be understood independently of the colorwork, and the pattern notes that you can experiment with yarn weight and hook size. However, the original design is specifically presented using two colors and a color change on every row, so a one-color version would no longer reproduce the original visual effect.
Why is the stitch called Beautiful Shells?
The large groups of double crochet stitches form shell-like shapes across the fabric. The alternating open framework and fuller shells produce the distinctive decorative texture.
Final Project Review
The Beautiful Shells Bandana is a compact project with an unusually useful lesson built into it. Instead of treating each crochet row as an isolated line of stitches, the pattern demonstrates how one row can create a framework specifically designed for the next row.
The V-stitch scaffold creates open spaces, and the following shell row transforms those spaces into fuller groups of double crochet stitches. This alternating process gives the fabric both texture and visual depth.
The two-color design adds another layer of interest. With one color used per row, the stitch structure becomes easy to see, while the special live-loop transition eliminates the need to cut the yarn after every row. The method takes some practice, but it is an important part of what makes the original design especially clever.
For the original version, the essential specifications are straightforward: DK weight cotton yarn in two colors, less than 50 yards of each color, and a 3.5mm crochet hook. The pattern begins with a chain-6 ring, establishes 9dc in the first row, and then develops the V-stitch scaffold and shell sequence. Continue the repeating construction until the long side reaches 18 inches (46cm), which took 25 rows in the original project.
Once the main fabric is complete, chains a few inches long can be made from the available working yarn on either end to create the ties. The result is a lightweight accessory that also serves as a practical introduction to a stitch technique that can be expanded into much larger projects.
If you have wanted to try a crochet stitch that looks intricate without committing to a full-size shawl, this bandana provides a manageable starting point. The project is small enough to finish quickly, but the technique offers plenty of opportunity to improve your understanding of crochet structure, V stitches, shell construction, color changes, and bottom-up growth.