
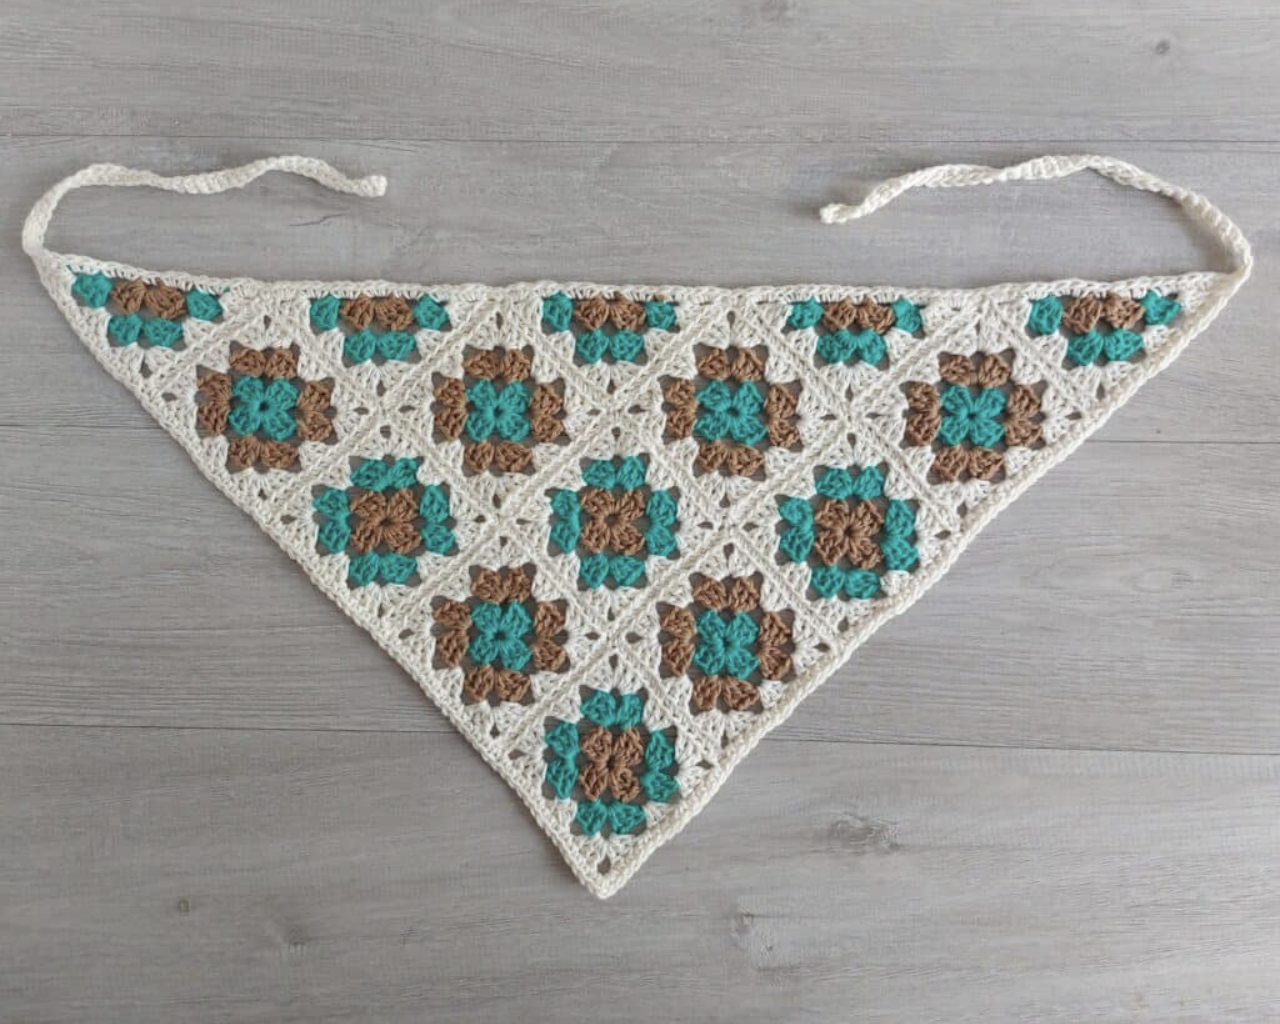
How to Crochet a Granny Square Bandana: Complete Construction and Finishing Guide
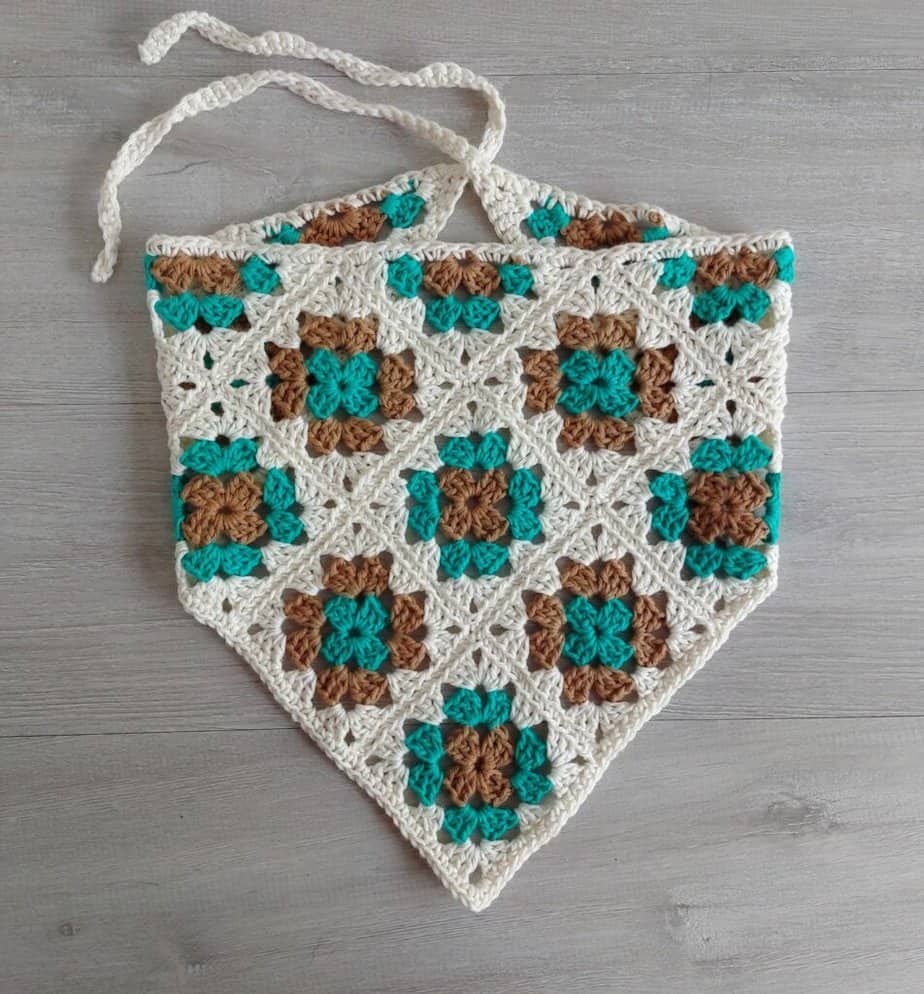
A handmade crochet head scarf can be both simple to make and surprisingly stylish, and this granny square bandana is a great example. Instead of crocheting one large fabric from beginning to end, the project is built from individual granny motifs that are later assembled into a wearable triangular accessory. The result is a colorful crochet bandana that combines traditional granny stitch construction with a practical summer shape.
This project is rated Easy and is written using US crochet terms. It is particularly suitable for crocheters who already know how to make a basic granny square and want to turn that familiar technique into something they can wear. The construction is divided into small, repeatable stages: make the squares, make the triangles, block the motifs, sew them together, and finish the outside edge with single crochet and two ties.
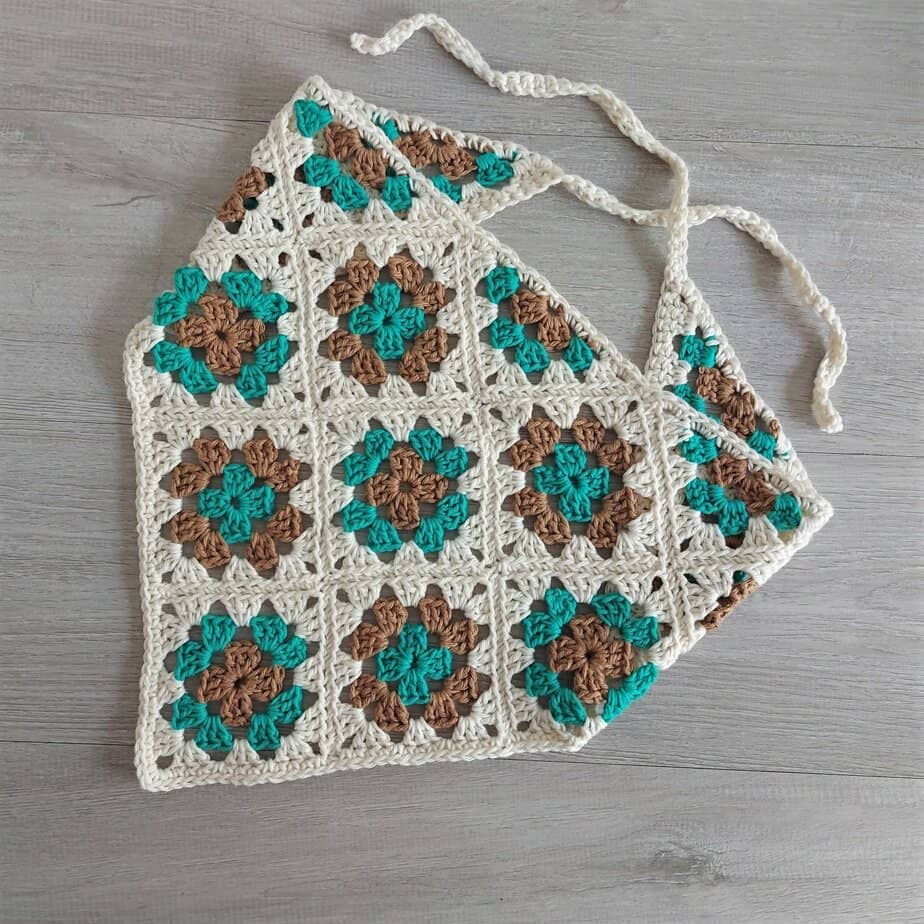
The pictured scarf measures 24in [61cm] wide and 12in [30cm] deep after light blocking. The ties are 12in [30cm] long. The pattern also allows the ties to be made longer by adding more chains, while the main construction remains based on 10 granny squares and 5 granny triangles.
The Construction Behind the Finished Bandana
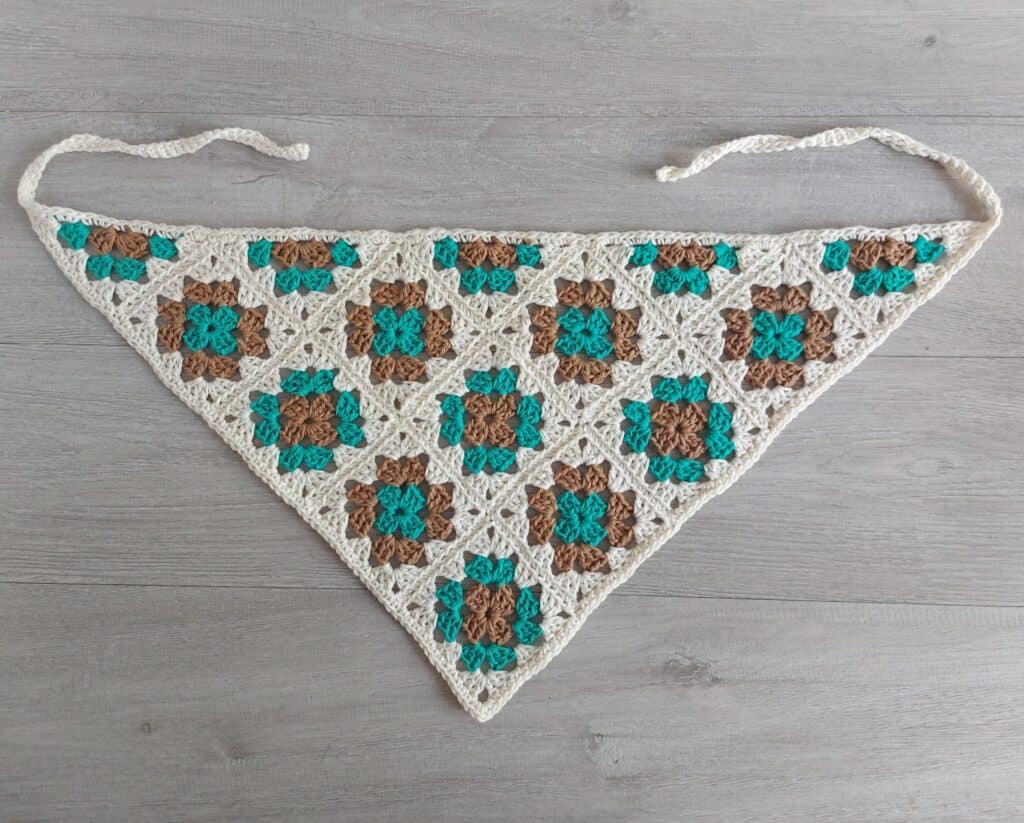
The easiest way to understand this project is to think of it as a collection of small crochet components rather than one complicated accessory. The main body consists of ten granny squares and five triangular motifs. These pieces are arranged according to the assembly layout and sewn together through the back loops only.
Once the motifs have been joined, the outside edge is finished with Yarn A. The border begins at the top left corner, continues down one side and around the bottom point, travels up the opposite side, and finishes across the upper edge. Two chain ties are incorporated at the upper corners.
This construction is useful because each individual motif can be completed and checked before you move on to assembly. If a square needs blocking or a color sequence needs checking, you can correct that before it becomes part of the larger scarf.
Project Specifications
| Detail | Pattern Information |
|---|---|
| Skill level | Easy |
| Terminology | US crochet terms |
| Granny squares | 10 |
| Granny triangles | 5 |
| Finished width | 24in [61cm] |
| Finished depth | 12in [30cm] |
| Tie length | 12in [30cm] |
| Square size | Approximately 3.5in [9cm] |
| Triangle size | Approximately 3.5in x 4.8in [9cm x 12cm] |
| Hook | 4mm [G/6] |
| Gauge | Not important |
Yarn Selection and Color Planning
The recommended yarn for this crochet bandana is DK weight or light worsted weight yarn. Cotton is particularly well suited to the project because it holds its shape, is breathable, and is easy to wash. A cotton/acrylic yarn is another suitable option.
The sample uses Cotlin from Knitpicks. The listed specification is 123yds [112m], 70% Cotton and 30% Linen, with 50gr per ball.
- Yarn A: 1 ball in Swan
- Yarn B: approximately 50m in Marina
- Yarn C: approximately 50m in Cashew
- Alternative yarn quantity: approximately 200m of any DK weight yarn
The color arrangement is an important part of the visual design. Six squares are made in yarn B, C and A. Four squares are made in yarn C, B and A. Five triangles are made in yarn C, B and A. The layout picture should be used as the reference when placing these motifs before sewing.
Tools to Keep Beside You
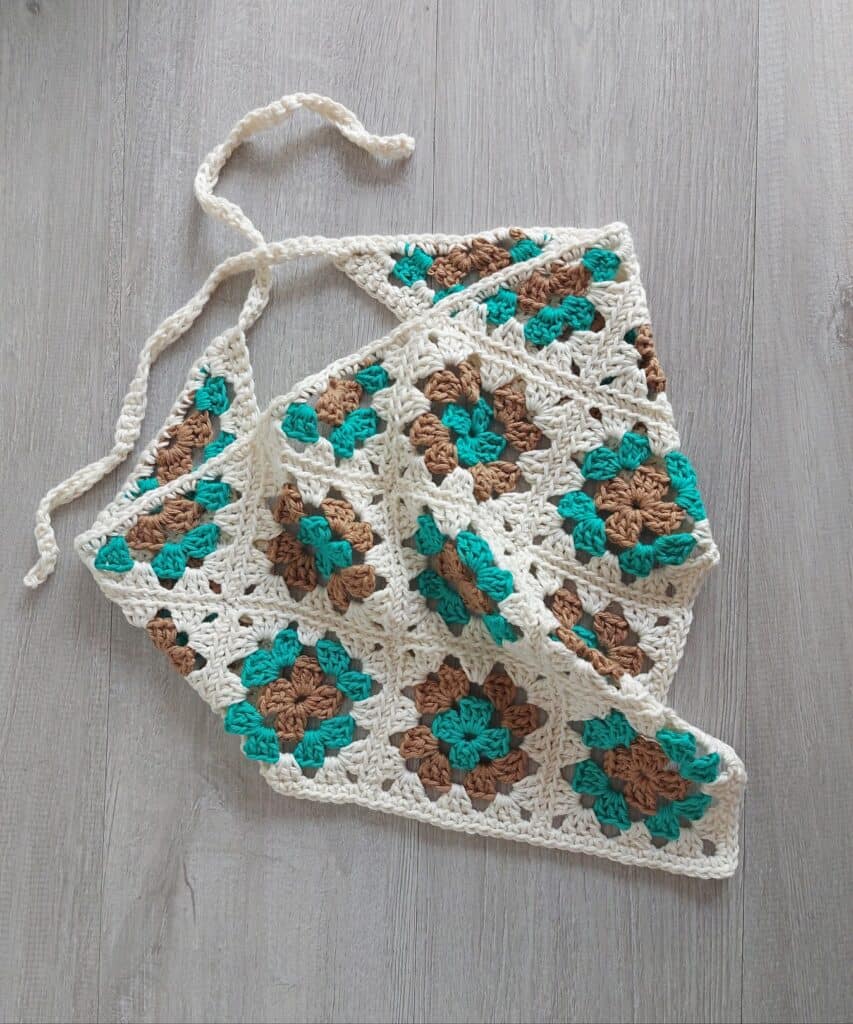
- DK weight/light worsted weight yarn
- Cotlin from Knitpicks or approximately 200m of another DK weight yarn
- 4mm [G/6] crochet hook
- Scissors
- Yarn needle
It is useful to have the yarn needle available from the beginning because the pattern requires fastening off and weaving in threads after completing the motifs. The needle will also be needed when sewing the squares and triangles together during assembly.
Reading the Pattern Correctly
Before beginning the first motif, take note of two chain-count conventions used throughout the instructions. Ch 3 at the beginning of a round counts as 1 dc. Ch 4 at the beginning of a row counts as 1 dc and ch-1.
These conventions are important because the beginning chains form part of the stitch structure. Keeping them in mind will make it easier to follow the written instructions and understand where the round or row begins and ends.
Abbreviations
- Beg — beginning
- Ch — chain
- St — stitch
- Sl st — slip stitch
- Dc — double crochet
- Yo — yarn over
- Sp — space
- RS — right side
Part One: Build the Granny Square Collection
The first major task is to make ten granny squares. Every square uses three rounds. Each round is worked in a different color, and Yarn A is used for Round 3 in all motifs.
Begin the Square
With the first color, chain 5 and slip stitch to the first chain to form a ring.
Round 1
Chain 3, counting as 1 dc. Work 2 dc in the ring. Then repeat the following sequence three times: ch 3, 3 dc in the ring. Finish with ch 3 and join with a slip stitch in the third chain of the beginning chain. Fasten off the yarn.
At this point, the foundation of the square has been established. The chain-3 spaces create the corners that will be expanded during the following rounds.
Round 2
Join the second color in any corner ch-3 space. Chain 3, then work (2 dc, ch 3, 3 dc) in the same ch-space.
Continue with [ch 1, (3 dc, ch 3, 3 dc) in next ch-3 space] three times. Finish with ch 1 and join with a slip stitch in the third chain of the beginning chain. Fasten off the yarn.
Round 3
Join the third color in any corner ch-3 space. Chain 3, then work (2 dc, ch 3, 3 dc) in the same ch-space.
Work the following sequence three times: ch 1, 3 dc in the next ch-1 space, ch 1, (3 dc, ch 3, 3 dc) in the next ch-3 space.
After the three repeats, work ch 1, 3 dc in the next ch-1 space, ch 1, then join with a slip stitch in the third chain of the beginning chain. Fasten off the yarn and weave in the threads.
Repeat the complete three-round process until you have made all ten squares.
Part Two: Shape the Five Triangles
The second group of motifs consists of five triangles. These pieces are worked in rows, and unlike the granny squares, they do not have a right side because both sides are the same.
Triangle Foundation
With the first color, chain 5 and slip stitch to the first chain to form a ring.
Row 1
Chain 4, counting as 1 dc and ch-1 space at the beginning of the row. Work 3 dc, ch 3, 3 dc, ch 1, and 1 dc in the ring. Turn and fasten off the yarn.
Row 2
Join the second color in the last dc made in Row 1. Chain 4, then work 3 dc in the first ch-1 space. Chain 1 and work (3 dc, ch 3, 3 dc) in the corner ch-3 space.
Continue with ch 1, then (3 dc, ch 1, 1 dc) in the last ch-1 space. Turn and fasten off the yarn.
Row 3
Join the third color in the last dc made in Row 2. Chain 4, then work 3 dc in the first ch-1 space. Chain 1, 3 dc in the next ch-1 space, ch 1, and work (3 dc, ch 3, 3 dc) in the corner ch-3 space.
Continue with ch 1, 3 dc in the next ch-1 space, ch 1, and (3 dc, ch 1, 1 dc) in the last ch-1 space. Fasten off the yarn and weave in the threads.
Make a total of five triangles.
Why Blocking Matters Before You Sew
Once all ten squares and five triangles are complete, the next step is blocking. The pattern recommends blocking each motif before attachment.
To do this, pin each motif to an even shape and spray it with water, or hover a steam iron over each piece. Leave the motif to dry.
This preparation is particularly useful for a project made from multiple pieces. Even if individual motifs look slightly uneven while they are in your hand, blocking can help them settle into more consistent shapes before you begin sewing.
Assembly: Turning the Motifs Into a Bandana
After blocking, arrange the squares and triangles according to the assembly layout. Do not begin sewing until the placement has been checked, particularly if you are following the sample color arrangement.
Hold the RS of the motifs together and sew them through the back loops only using whip stitching.
The quality of the seams depends on maintaining an even tension. The pattern recommends making the stitches loosely to avoid puckering. At the same time, the motifs should be joined as evenly as possible.
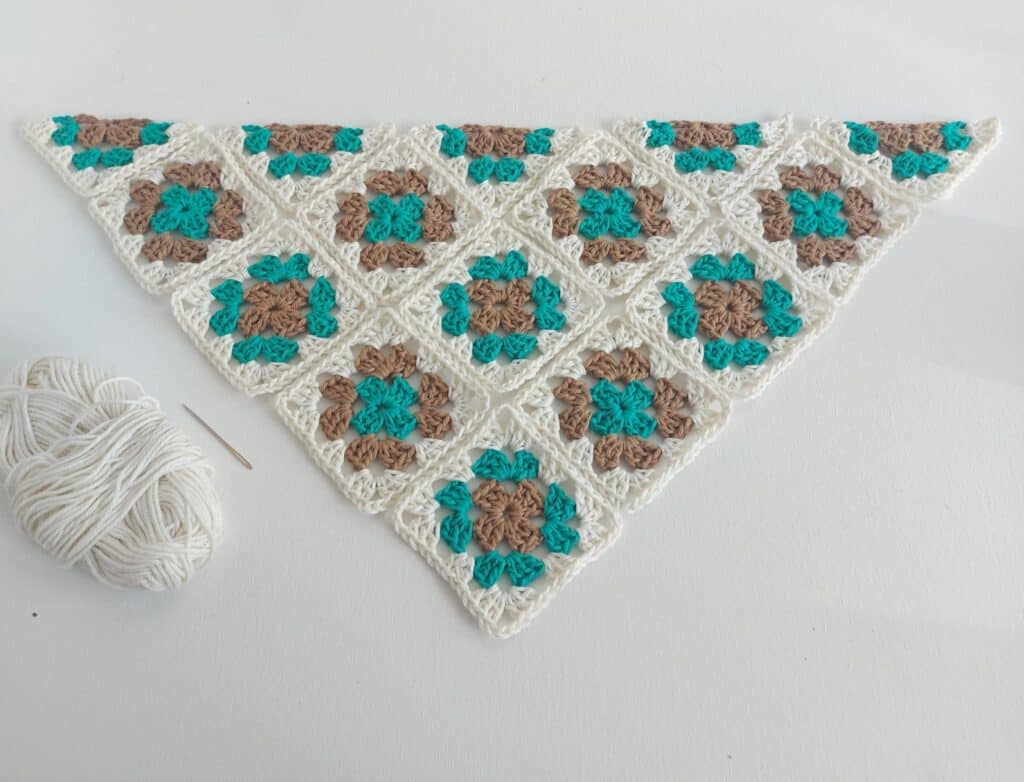
Once the complete piece has been sewn together, pin it out and steam block it lightly. This final shaping step comes before the border and ties.
The Border: Follow the Outer Shape Carefully
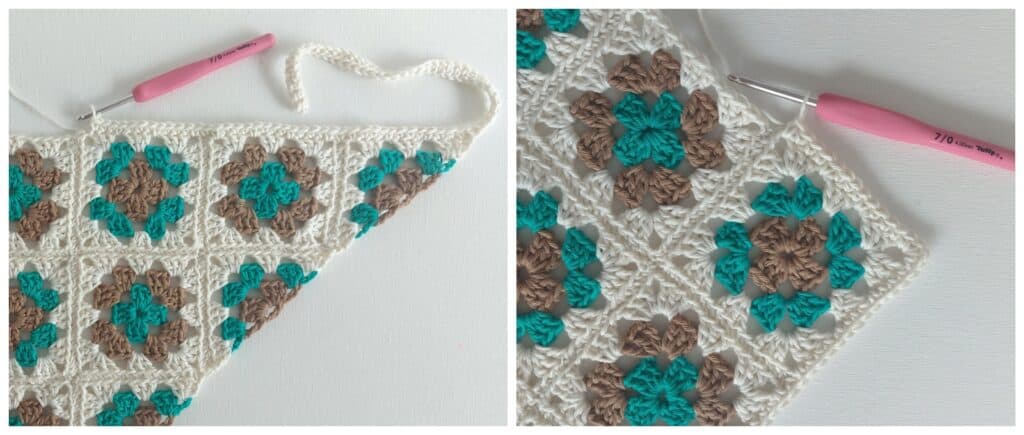
The finishing border is worked with Yarn A and follows the complete outer edge of the assembled scarf. The border is not simply a separate decorative strip; it also incorporates the two ties and shapes the pointed lower edge.
Begin at the Top Left Corner
Join Yarn A in the top left corner of the finished triangle. Chain 40. Make 1 sc in the second chain from the hook and in each chain across, creating 39 sc. Slip stitch back to the main piece.
This is the first tie.
Continue Down the Side
Make a sc in each dc and ch-1 space down the side of the piece. Make 1 sc in the space between each motif.
At the bottom peak of the triangle, work (2 sc, ch 1, 2 sc) in the ch-3 space.
This specific shaping at the point is important because the bandana has a triangular lower section. Keeping the stitches positioned in the specified space preserves the intended edge construction.
Return Up the Opposite Side
Work up the other side toward the top right corner. Make a sc in each dc and ch-1 space, again placing 1 sc in the space between each motif.
Make the Second Tie
At the right corner, chain 40. Make 1 sc in the second chain from the hook and in each chain across, giving 39 sc. Slip stitch back to the main piece.
The second tie mirrors the first one.
Finish Across the Top
Work across the top of the head scarf by making 3 sc in each row end of each triangle, 1 sc in each beginning ch 5, and 1 sc in the space between each motif.
Join with a slip stitch to the beginning chain and weave in all ends.
Understanding the Finished Measurements
The finished scarf pictured in the pattern measures 24in [61cm] wide and 12in [30cm] deep after light blocking. The ties are 12in [30cm] long.
The motif dimensions provide useful checkpoints during construction. A square should be approximately 3.5in [9cm], while a triangle should be approximately 3.5in x 4.8in [9cm x 12cm]. The pattern specifically states that gauge is not important, so these measurements should be treated as the approximate motif specifications given by the pattern rather than as a separate formal stitch gauge.
If you choose to substitute another granny square design, the original instructions recommend making a quick gauge swatch and adjusting your hook size so that the squares measure 3.5in [9cm].
Keeping the Motifs Organized
Since there are fifteen individual pieces, organization becomes useful before assembly. Keep the six squares made with the B, C, A sequence separate from the four squares made with the C, B, A sequence. The five triangles also follow the C, B, A color sequence.
When all motifs are complete, use the layout image to position them. This is especially important if you want the finished color arrangement to resemble the sample.
Organization also helps prevent a common assembly problem: sewing a correctly crocheted motif into the wrong position. The motif itself may be perfect, but the overall color distribution can change if the pieces are placed differently.
Practical Checkpoints During Construction
After the Squares
- You should have exactly 10 squares.
- Each square should have 3 rounds.
- Round 3 should use Yarn A in all motifs.
- Each square should be approximately 3.5in [9cm].
- Threads should be fastened off and woven in after Round 3.
After the Triangles
- You should have exactly 5 triangles.
- Each triangle has 3 rows.
- Each triangle should be approximately 3.5in x 4.8in [9cm x 12cm].
- There is no RS for the triangles because both sides are the same.
- Threads should be fastened off and woven in after Row 3.
Before Sewing
- All motifs should be blocked.
- The squares and triangles should be arranged according to the layout.
- The RS of the motifs should be held together when joining.
- Joining is done through the back loops only using whip stitching.
Before Wearing
- The outer border should be complete.
- Both ties should be attached securely.
- All ends should be woven in.
- The finished piece can be lightly steam blocked.
Troubleshooting the Most Important Stages
Your Squares Are Different Sizes
First compare them with the approximate 3.5in [9cm] square measurement. If you are using the recommended construction and your motifs vary noticeably, blocking can help even out the shape before assembly. If you are substituting a different granny square design, the pattern recommends a gauge swatch and adjusting hook size to make the squares 3.5in [9cm].
Your Triangles Look Uneven
Block the triangles before assembly. The recommended approximate size is 3.5in x 4.8in [9cm x 12cm]. Pinning each triangle into an even shape and allowing it to dry can make the subsequent joining stage easier.
The Joined Fabric Has Puckered Seams
Check the tension of your whip stitching. The instructions specifically recommend keeping the stitches loose to avoid puckering. Sewing too tightly can pull neighboring motifs together.
You Are Unsure Where a Triangle Goes
Use the assembly layout before beginning any sewing. The triangles are part of the structural shape of the bandana, so their placement should be confirmed rather than guessed.
The Ties Are Not Long Enough for Your Preference
The listed tie length is 12in [30cm], but the pattern explicitly allows you to add more chains if you want longer ties. The specified construction uses chain 40 followed by 39 sc for each tie.
Why Cotton Works Well for This Accessory
A head scarf benefits from a yarn that is comfortable and practical. The source recommends cotton because it holds its shape well, is breathable, and is easy to wash. These properties make cotton a natural choice for a summer accessory that may be worn outdoors.
The recommended yarn is not limited to one brand. The pattern states that any DK weight or light worsted weight yarn can work. A cotton/acrylic yarn is also suitable. If you are choosing from your existing yarn collection, the important starting point is to remain within the suggested yarn weight and keep the motif dimensions in mind.
Creative Color Planning Without Changing the Construction
One of the enjoyable aspects of granny square projects is the opportunity to work with multiple colors. This bandana uses three yarn colors, but the motif structure remains simple because each round or row has a defined color position.
Yarn A has a particularly consistent role: it is used for Round 3 in all granny squares. The sample also uses Yarn A for the finishing border and ties. This creates a visual connection between the individual motifs and the final edge.
The sample arrangement is based on six squares in B, C and A; four squares in C, B and A; and five triangles in C, B and A. The layout image provides the reference for how these pieces are positioned.
What Makes the Project Beginner-Friendly?
The project does not require complicated stitch combinations. The main stitch is double crochet, supported by chains and slip stitches, while the border uses single crochet. The repeated granny construction means that after the first square or triangle, the sequence becomes familiar.
The modular construction is another advantage. Instead of handling a large piece from the start, you work with small motifs. This can make it easier to concentrate on stitch placement and color changes.
The main skill to pay attention to is consistency. Keeping the motifs approximately the same size and blocking them before assembly will help the finished accessory look more balanced.
Frequently Asked Questions
How many granny squares are used in this bandana?
The pattern uses 10 granny squares.
How many triangle motifs are required?
You need 5 granny triangles.
What size crochet hook is used?
The materials list specifies a 4mm [G/6] crochet hook.
What is the finished size?
After light blocking, the pictured scarf measures 24in [61cm] wide and 12in [30cm] deep. The ties are 12in [30cm] long.
Is this pattern written in UK or US crochet terms?
It is written in US crochet terms.
Does the pattern require an exact gauge?
No. The pattern states that gauge is not important. The approximate motif dimensions are 3.5in [9cm] for each square and 3.5in x 4.8in [9cm x 12cm] for each triangle.
Can another granny square design be used?
The construction can be used as a template for experimenting with other granny square designs. The source recommends making a quick gauge swatch and adjusting the hook size so the replacement squares are 3.5in [9cm].
Can the ties be longer?
Yes. The pattern notes that you may add more chains to make the ties longer.
What is the best yarn type?
Cotton is recommended because it holds its shape, is breathable, and is easy to wash. DK weight or light worsted weight yarn is suitable, and cotton/acrylic yarn can also work.
Full Project Checklist
- Choose DK weight/light worsted weight yarn.
- Prepare Yarn A, Yarn B, and Yarn C.
- Use a 4mm [G/6] crochet hook.
- Make 10 granny squares.
- Use Yarn A for Round 3 of every square.
- Make 5 granny triangles.
- Remember that triangles do not have an RS.
- Check the approximate dimensions of the motifs.
- Block every square and triangle.
- Arrange the motifs according to the assembly layout.
- Hold the RS together when joining the motifs.
- Whip stitch through the back loops only.
- Keep the joining stitches loose enough to avoid puckering.
- Lightly steam block the assembled piece.
- Join Yarn A at the top left corner.
- Make the first chain-40 tie and 39 sc.
- Work the single crochet border down the side.
- Shape the bottom peak with (2 sc, ch 1, 2 sc) in the ch-3 space.
- Continue up the opposite side.
- Make the second chain-40 tie and 39 sc.
- Complete the top edge.
- Join with a slip stitch.
- Weave in all ends.
- Lightly block the finished accessory if needed.
Final Look and Finishing Details
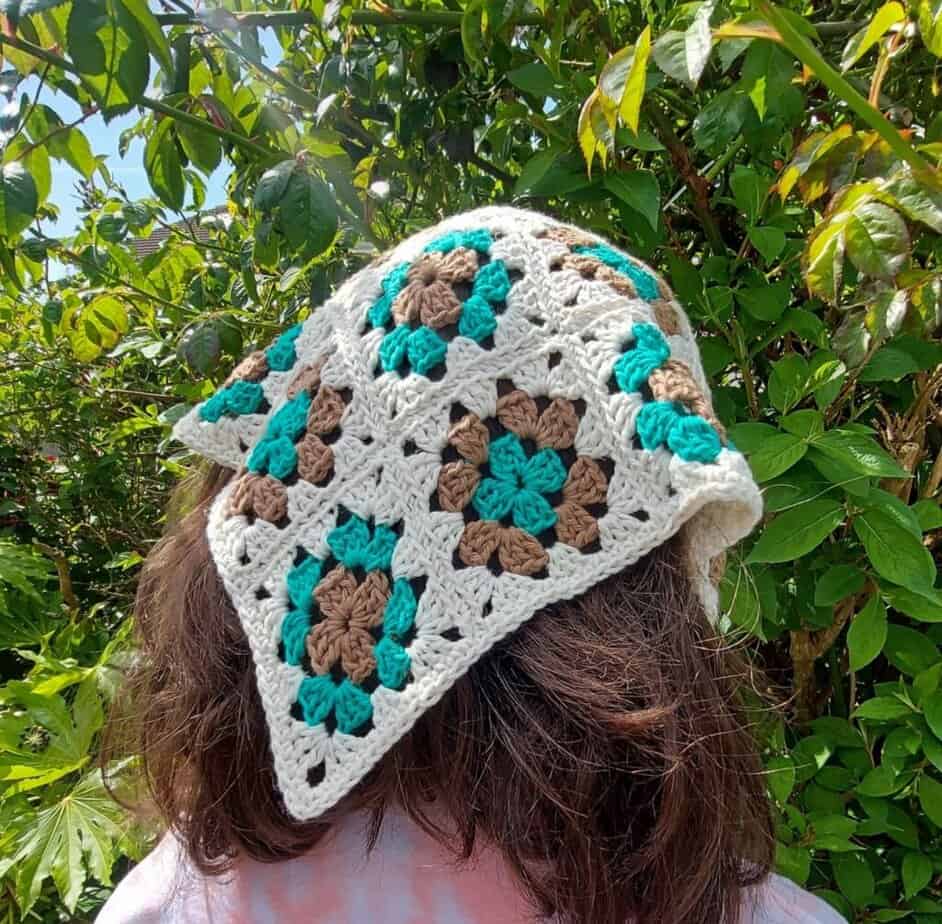
The completed crochet bandana is the result of a straightforward sequence of small, manageable tasks. The ten granny squares provide the repeating foundation, while the five triangles create the characteristic pointed shape. Once these motifs are blocked and sewn together, the single crochet border and ties turn the assembled fabric into a finished head scarf.
The project is especially useful for practicing consistency. The individual motifs are small enough to check as you work, and the approximate measurements provide useful checkpoints without requiring a strict gauge. Blocking then helps prepare the pieces for an even assembly.
For the cleanest result, give particular attention to the layout, the looseness of the whip stitching, and the placement of the border stitches. The construction should remain in the specified order: make the motifs, block them, assemble them, lightly steam block the joined piece, and then complete the border and ties.
The finished dimensions are approximately 24in [61cm] wide by 12in [30cm] deep after light blocking, with 12in [30cm] ties. If longer ties are desired, additional chains can be added while making them.
Whether you follow the sample colors or use your own DK-weight yarn palette, the structure remains the same. The combination of familiar granny stitches, small motifs, and simple finishing makes this a practical project for crocheters who want to transform a classic technique into a wearable accessory.