
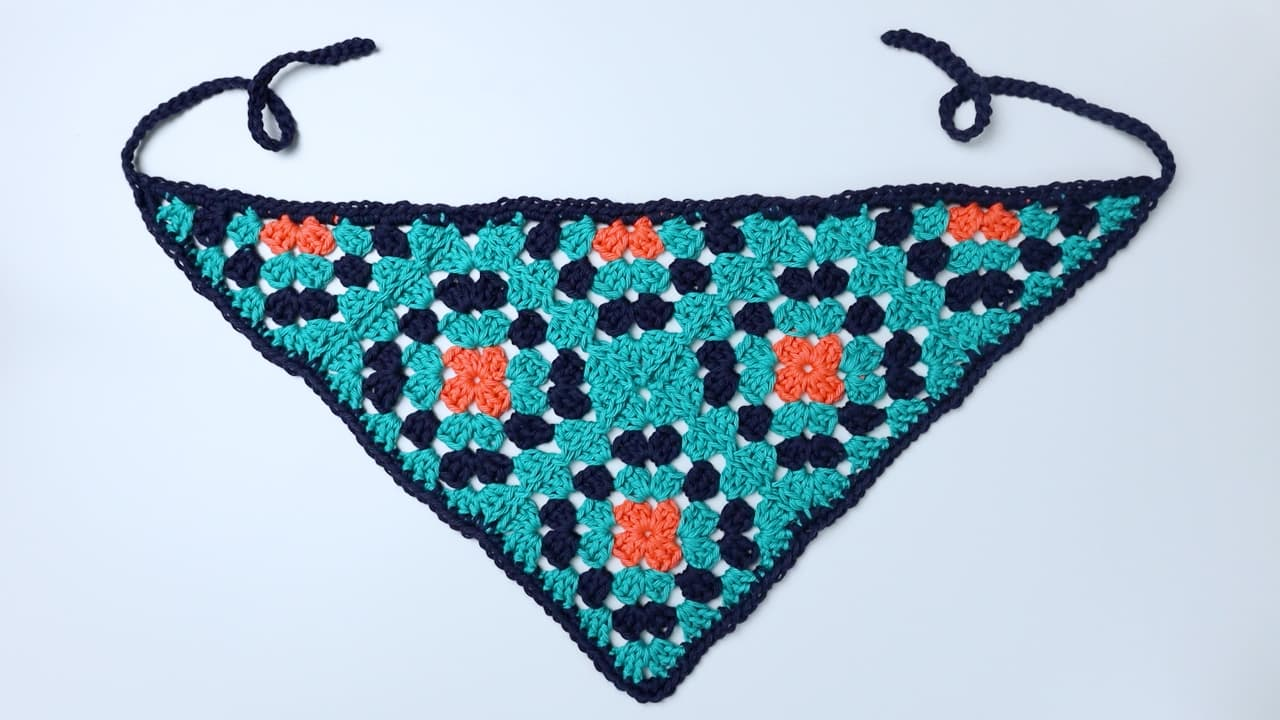
If you love classic granny crochet but want to turn those familiar motifs into something wearable, this Granny Square Bandana is a beautiful project to add to your handmade collection. Rather than making a traditional square blanket or a simple triangular scarf, this design combines granny squares, granny triangles, a contrasting border, and crocheted straps to create a lightweight accessory for warm-weather days.
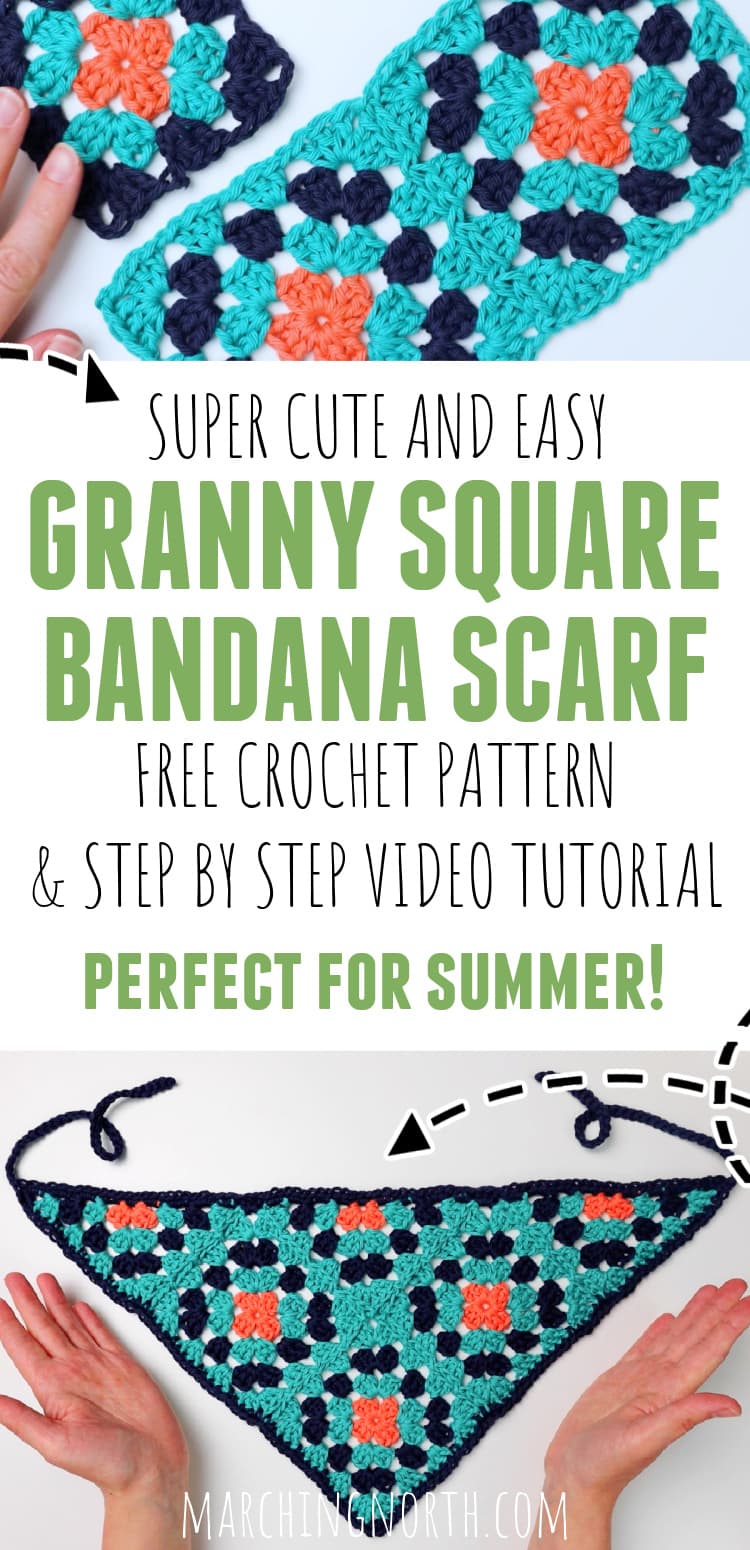
The original pattern is rated Easy and uses US crochet terms. Its construction is divided into manageable stages, making it possible to focus on one small motif at a time before moving into the joining and finishing work.
For the complete project, you will make three granny squares and three granny triangles. The three squares form the main lower section, while the triangles are attached across the upper portion. One of the squares has an additional round, which is an important part of the finished arrangement. Once the motifs are joined, Color C is used to crochet the outer border and the two straps.
This version of the tutorial focuses on the complete construction process. It walks through the motifs, color changes, joining technique, border, straps, and finishing details while keeping the original technical information intact.
What Makes This Bandana Different?
The charm of this crochet bandana comes from its construction. You are not simply crocheting a large triangle from the bottom upward. Instead, the design is assembled from individual granny motifs.
There are three granny squares in the project. All three begin with Color A, continue with Color B, and then use Color C. However, only one square receives a fourth round in Color B. That larger square is deliberately positioned at the bottom during assembly.
The three triangles follow a similar three-color progression. Color A is used for Row 1, Color B for Row 2, and Color C for Row 3.
Color B then becomes the joining color. The squares are connected first, followed by the triangles. Finally, Color C creates the border and straps, giving the entire project a coordinated finished edge.
Project Specifications at a Glance
- Skill level: Easy
- Crochet terminology: US crochet terms
- Granny squares: Make 3
- Granny triangles: Make 3
- Square size: Approximately 4.5 inches
- Triangle short sides: Approximately 4.5 inches
- Triangle hypotenuse: Approximately 6.5 inches
- Finished bandana: Approximately 22 inches across from corner to corner
- Finished depth: Approximately 10 inches
- Straps: Approximately 11 inches long
- Gauge: Not important for this pattern
The approximate motif measurements are useful checkpoints, even though the pattern does not require a specific gauge.
Yarn and Supplies
The original pattern uses cotton worsted yarn. The designer used “I Love This Cotton” because it was available, while also noting a preferred cotton worsted yarn choice in the original supply information.
- Color A – Coral – 1 skein
- Color B – Teal – 1 skein
- Color C – Navy – 1 skein
Have the basic crochet tools required for working and finishing the project available as well. A yarn needle and scissors are particularly useful because the motifs are fastened off individually and the completed assembly has multiple yarn ends to weave in.
Abbreviations Used in the Pattern
- ch – chain
- sc – single crochet
- hdc – half double crochet
- dc – double crochet
- sl st – slip stitch
- sp – space
- ch sp – chain space
Two starting-chain conventions are especially important. A chain 3 at the beginning of a row counts as a double crochet. A chain 4 at the beginning of a row counts as a double crochet and chain 1.
Stage One: Building the Granny Square Foundation
The granny squares are the foundation of the main body. You will make three of them, beginning each one with Color A.
Start by chaining 4 and slip stitching to the first chain to form a ring. If you prefer, the original pattern also gives the option of starting with a magic loop.
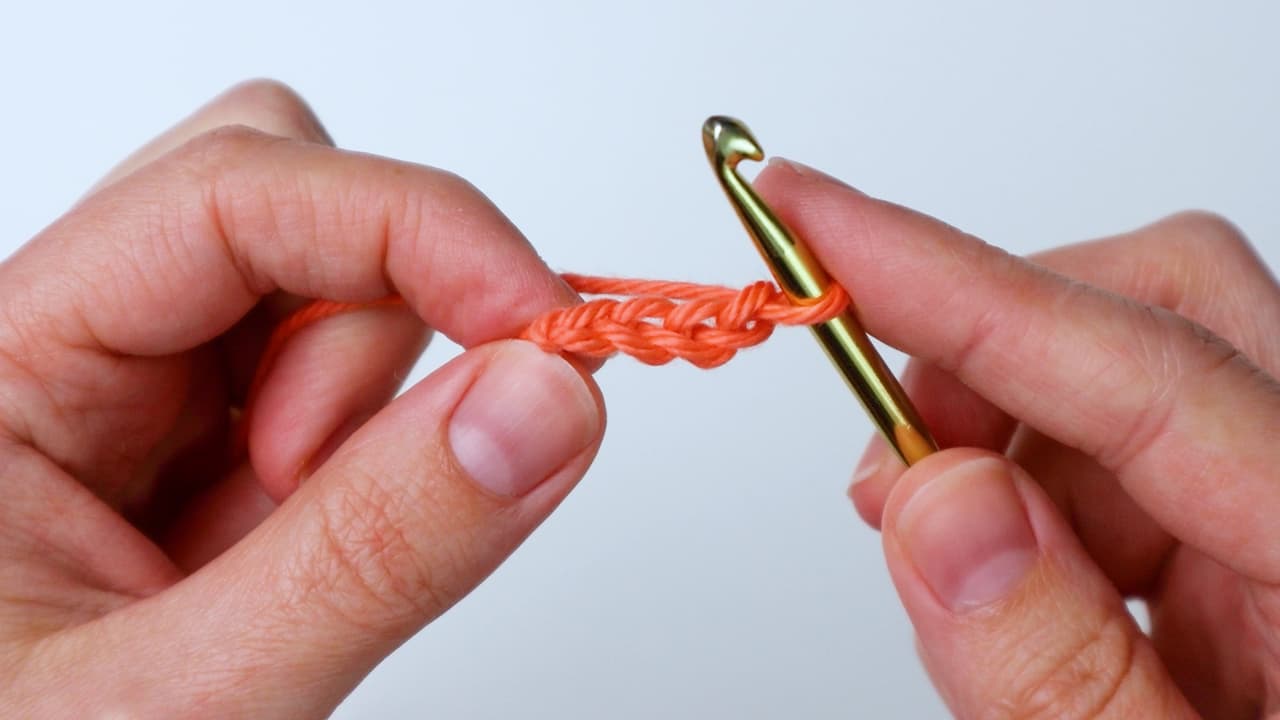
Slip stitch into the first chain to close the chain into a center ring.
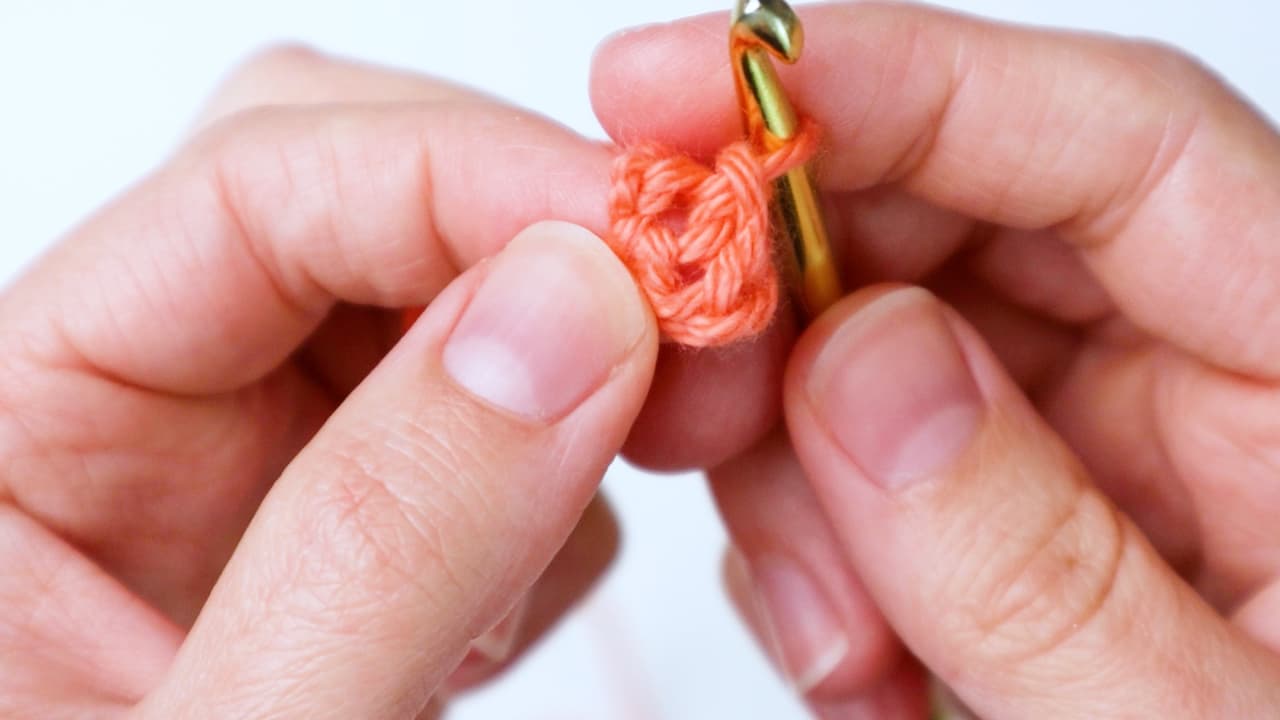
Granny Square Round 1
With the ring ready, chain 3. This counts as 1 dc from here on out. Make 2 dc in the ring.
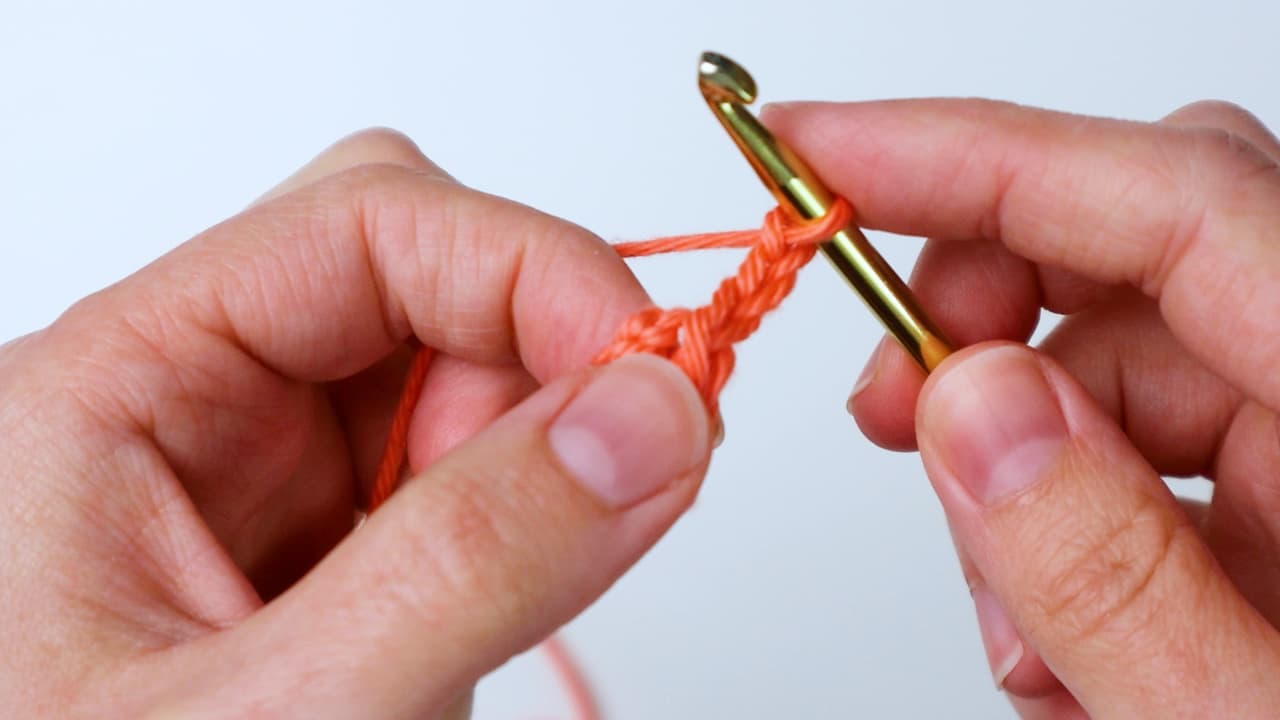
Next, repeat this sequence three times: chain 2, then make 3 dc in the ring.
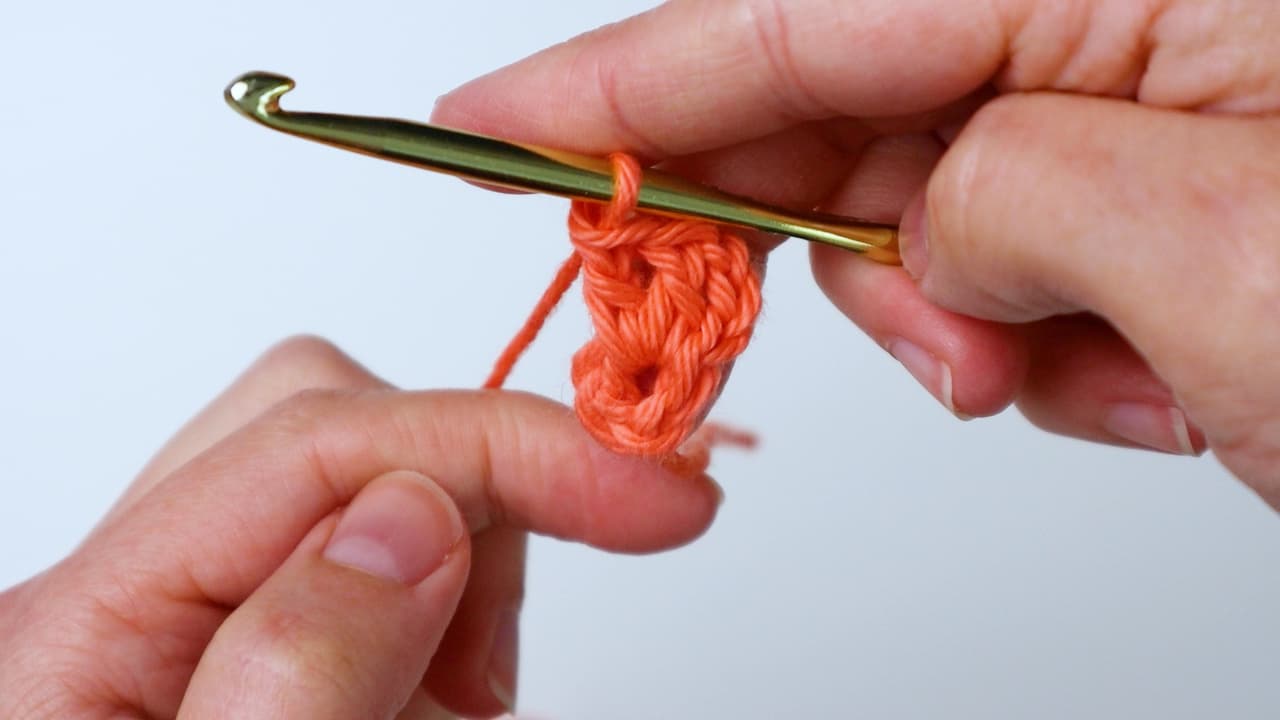
Finish the round by joining with hdc in the third chain of the starting chain.
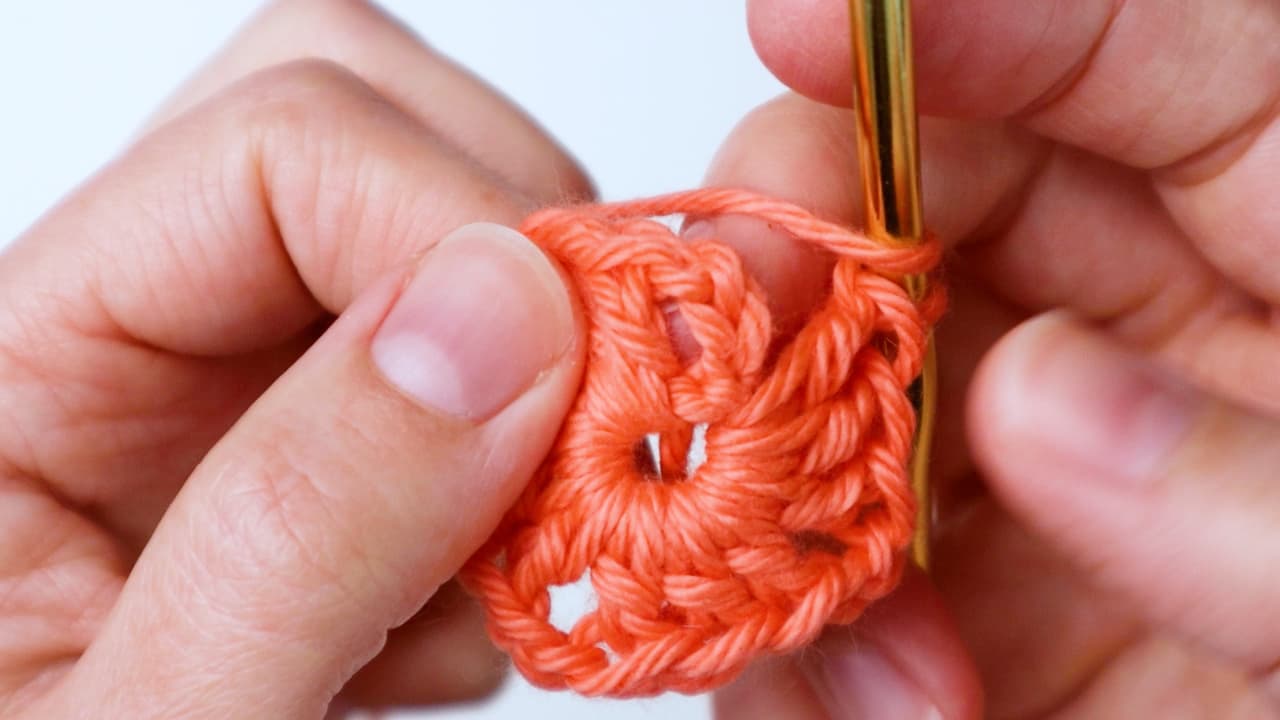
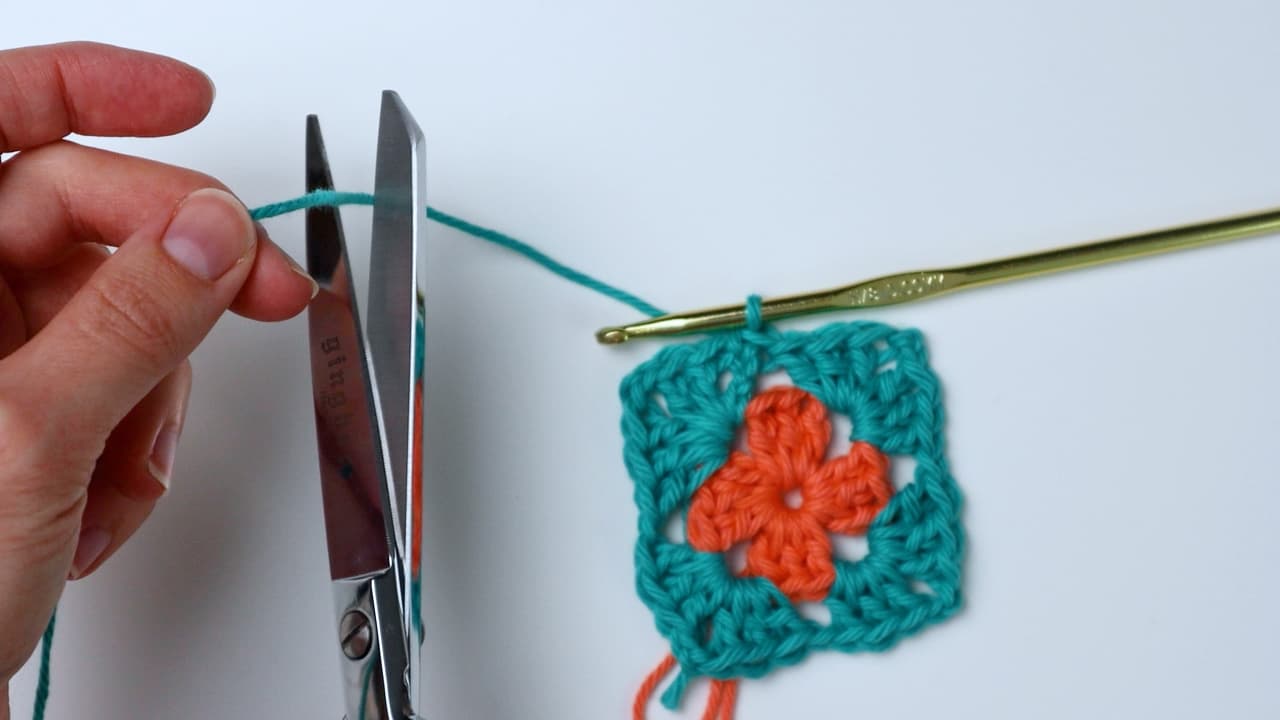
Fasten off and cut the yarn.
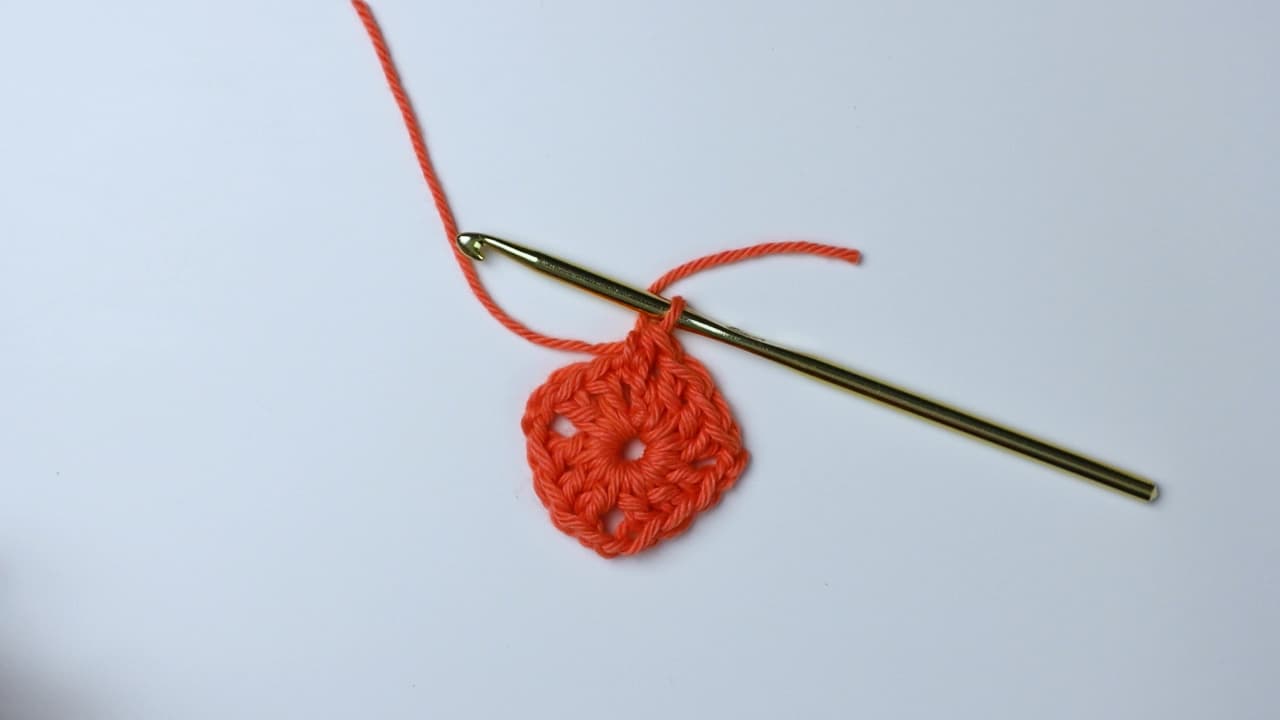
Granny Square Round 2
Join Color B in the same corner where you ended the previous row. Chain 3, then work (2 dc, ch 2, 3 dc) in the same corner chain space.
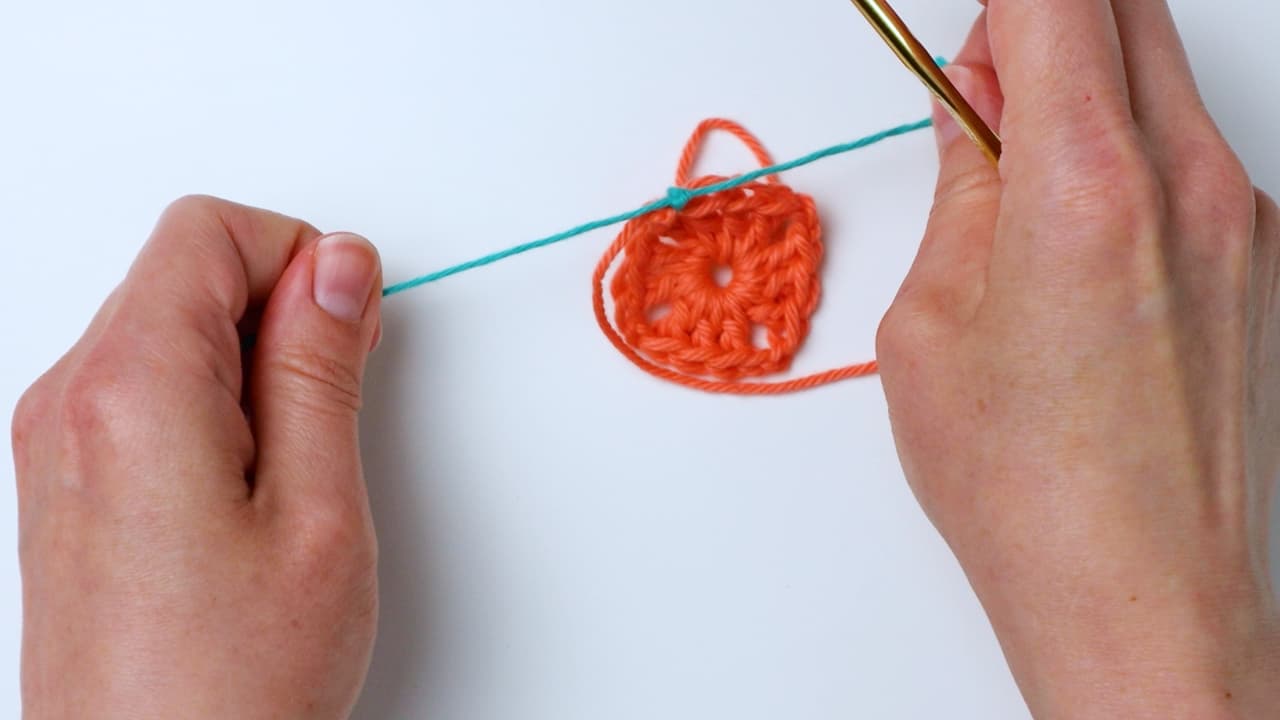
After attaching the new color, pull up a loop and begin the round.
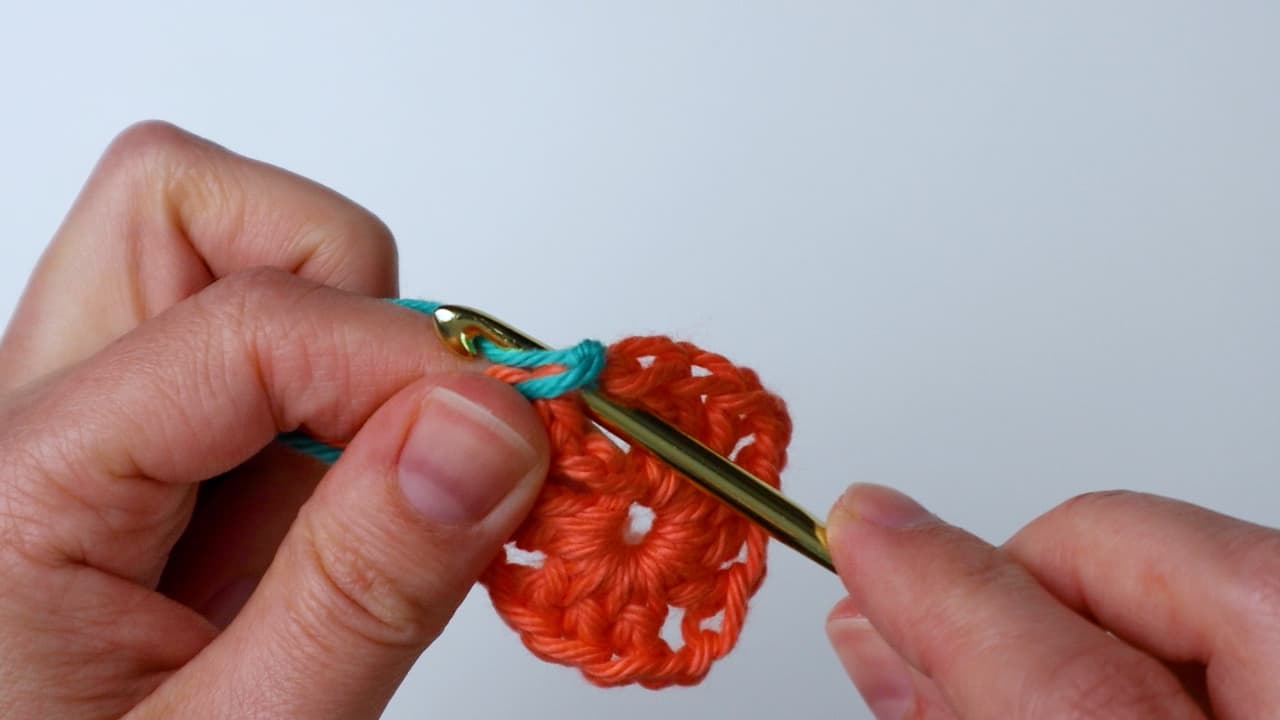
Chain 3 and continue the corner construction.
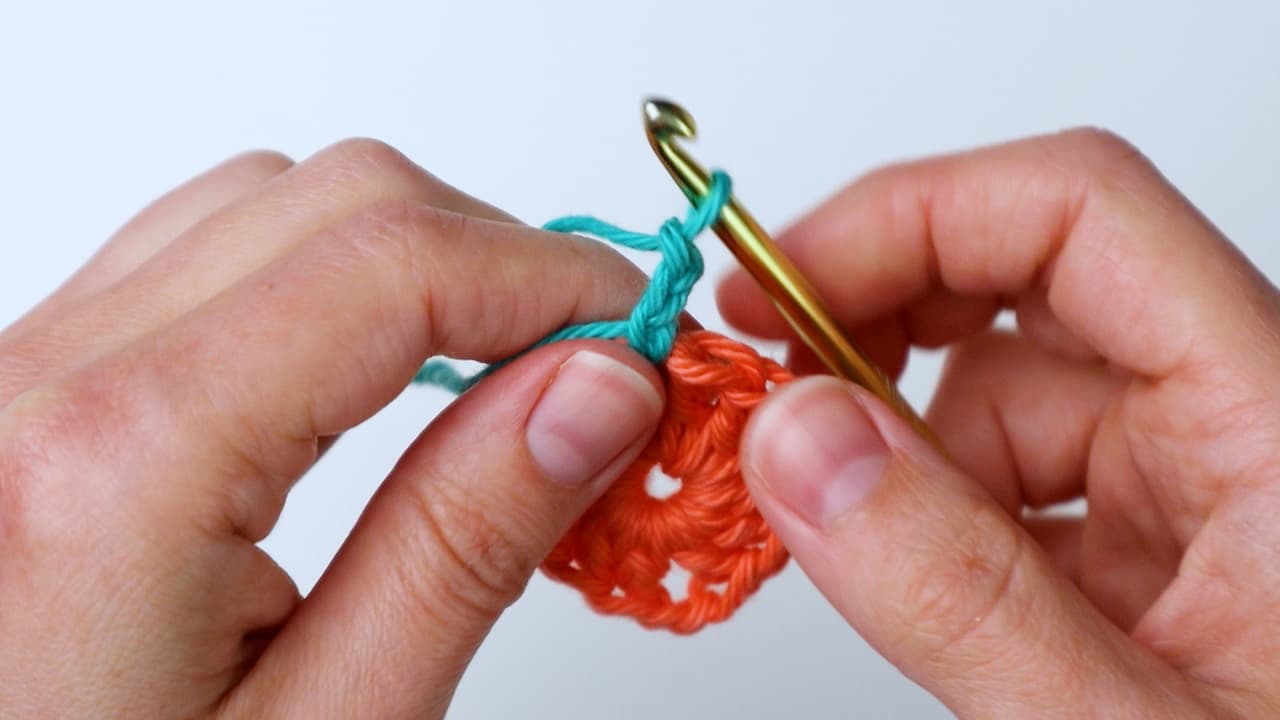
Continue by repeating the following sequence two more times: chain 1, then (3 dc, ch 2, 3 dc) in the next chain space. Finish with sc in the third chain of the starting chain and fasten off.
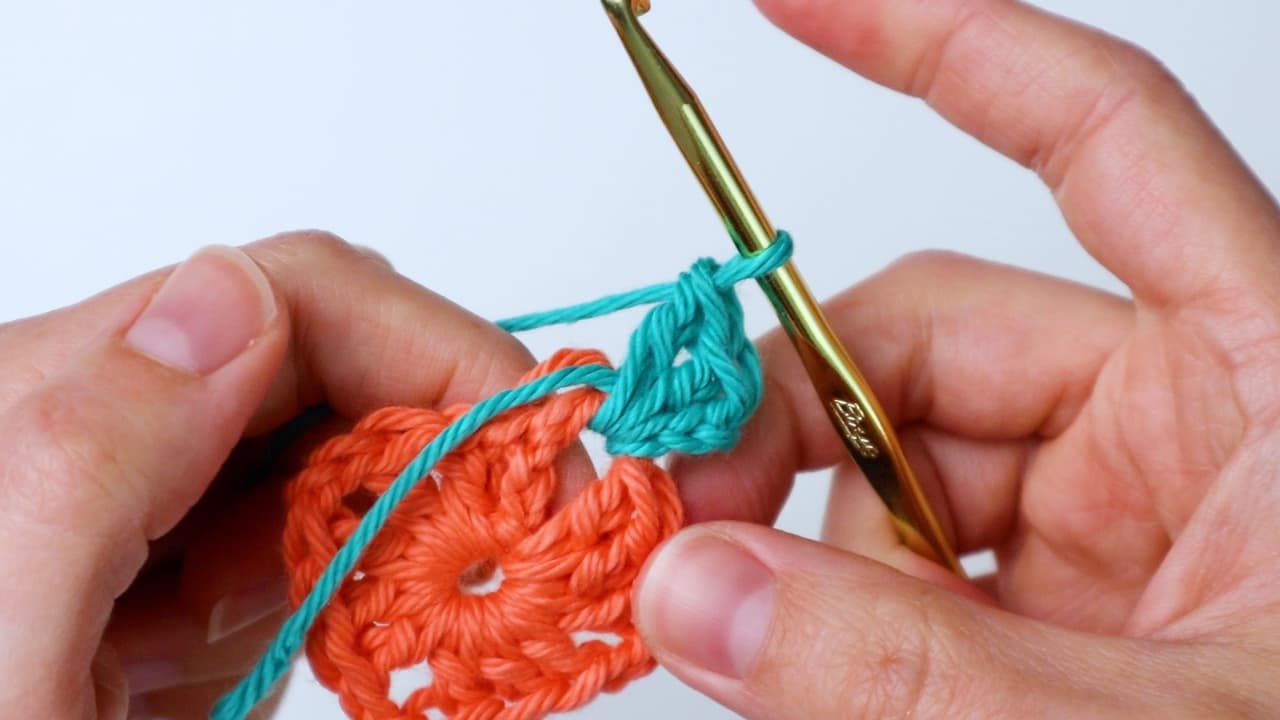
Granny Square Round 3
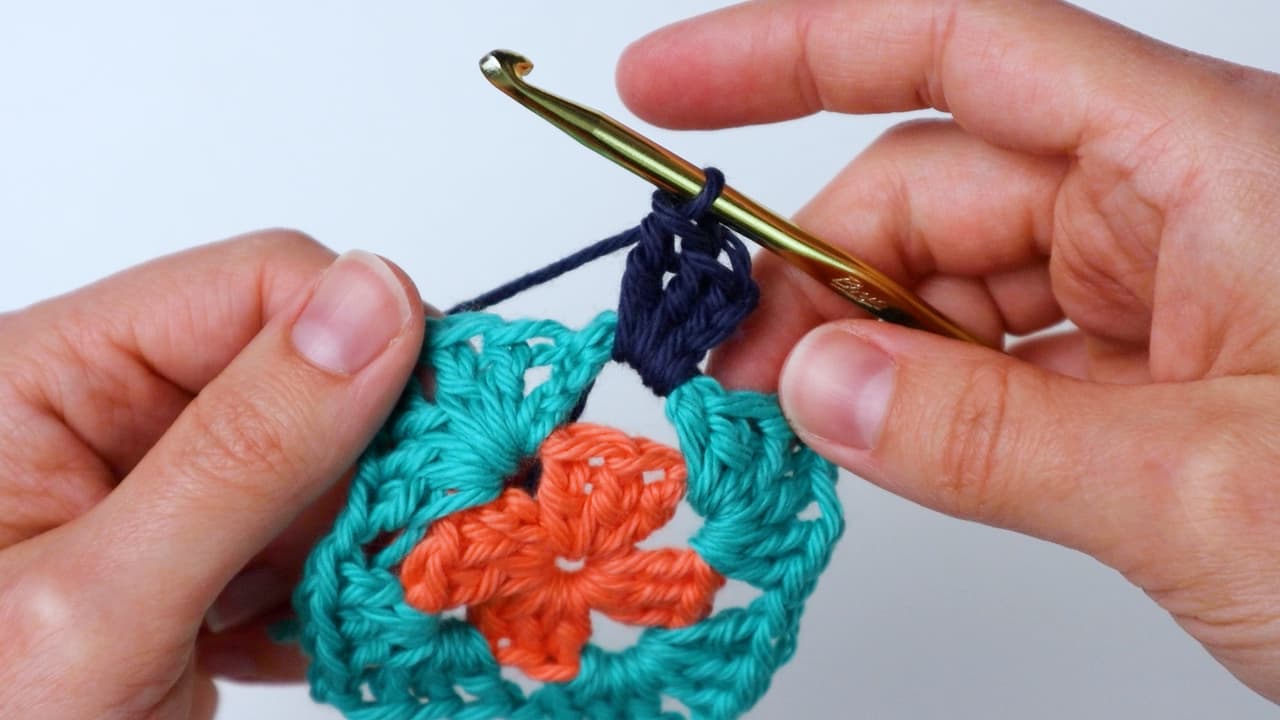
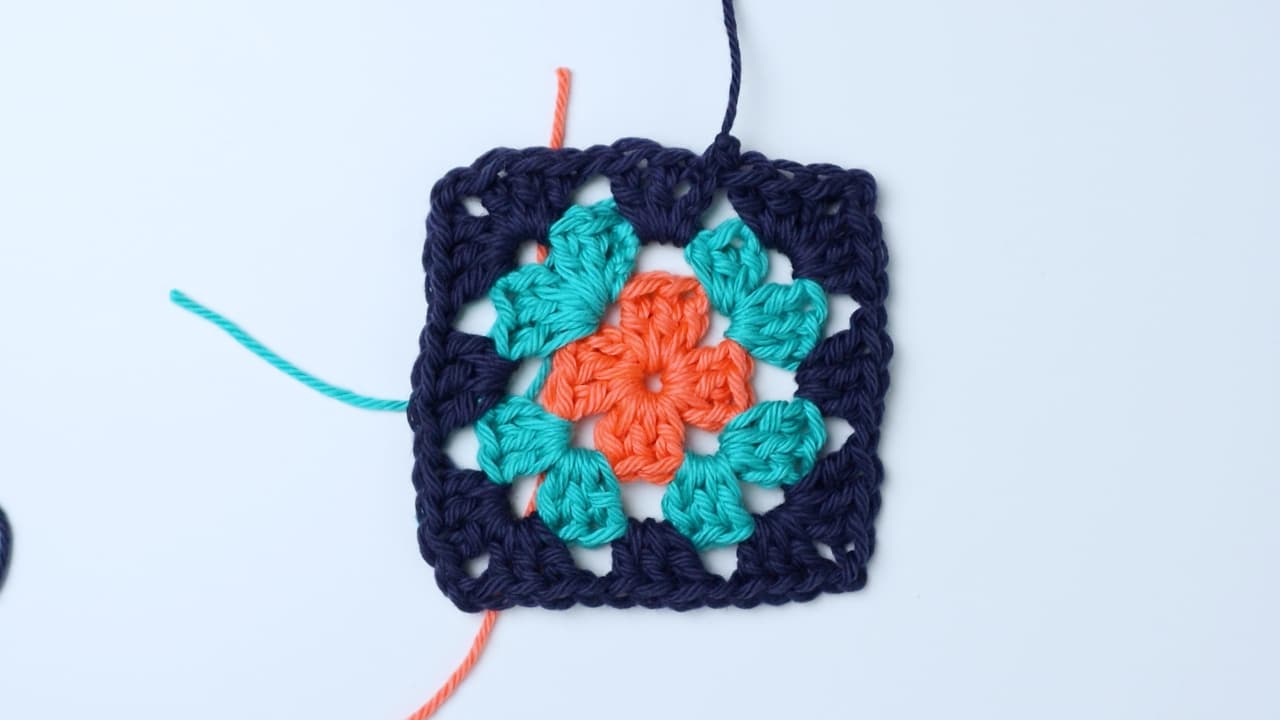
Join Color C in the same corner where you ended the previous row. Chain 3, then make (2 dc, ch 2, 3 dc) in the same corner chain space.
Continue with chain 1, 3 dc in the next chain 1 space, chain 1, and (3 dc, ch 2, 3 dc) in the next corner chain space. Repeat that sequence two more times. Finish with chain 1, 3 dc in the next chain space, then sc in the third chain of the starting chain.
Fasten off and weave in the ends.
The Special Fourth Round
At this point, two granny squares are finished. However, the third square needs one additional round. This is one of the most important details in the entire pattern because the three squares are not meant to be identical in size.
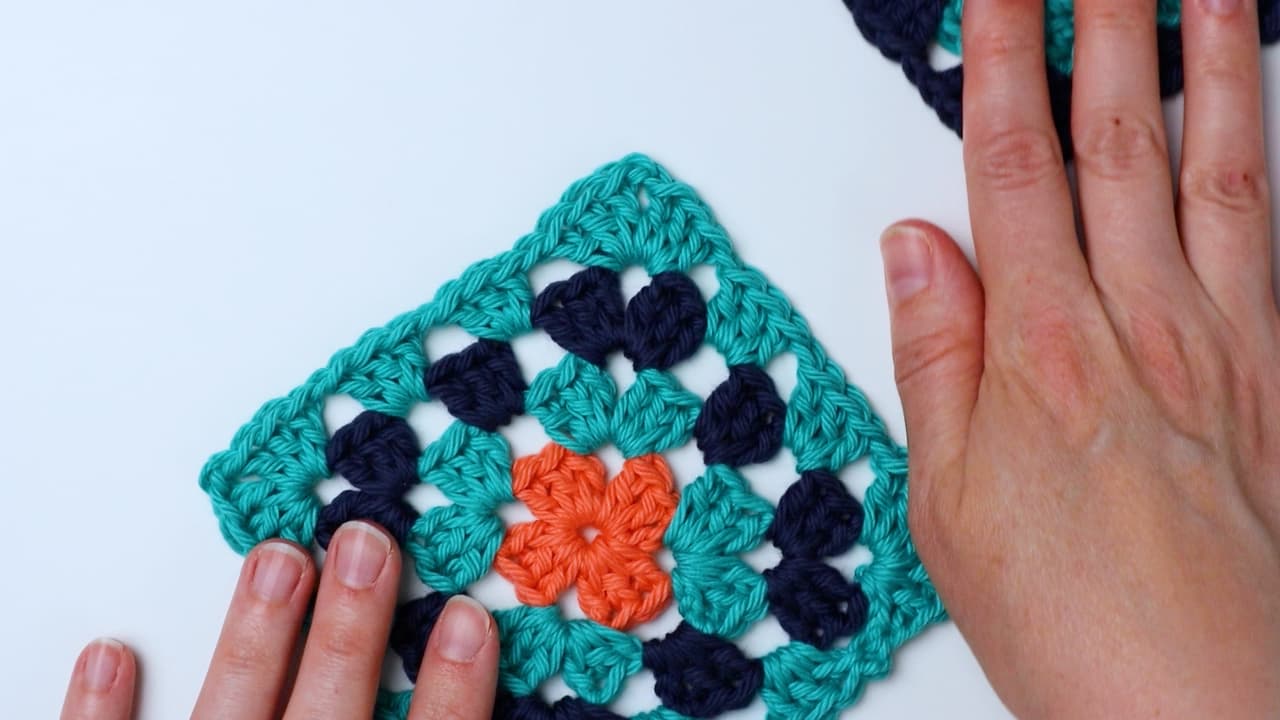
Only one granny square receives Round 4, and it is worked in Color B.
Join Color B in the same corner where you ended the previous row. Chain 3, then make (2 dc, ch 2, 3 dc) in the same corner chain space.
Continue around with chain 1, 3 dc in the next chain 1 space, chain 1, 3 dc in the next chain 1 space, chain 1, and (3 dc, ch 2, 3 dc) in the next corner chain space. Repeat that sequence two more times.
Finish with chain 1, 3 dc in the next chain space, chain 1, 3 dc in the next chain space, and sc in the third chain of the starting chain. Fasten off and weave in the ends.
Stage Two: Creating the Granny Triangles
The triangles provide the upper portion of the finished bandana. Three triangles are made in total. Their construction is shorter than the square construction, with three rows for each motif.
With Color A, chain 4 and slip stitch to the first chain to form a ring.
Triangle Row 1
Chain 4. This counts as 1 dc and chain 1 from here on out. Make 3 dc in the ring, chain 2, 3 dc in the ring, chain 1, and 1 dc in the ring. Fasten off.
The same chain-and-ring foundation technique used for the square motifs establishes the starting point of each triangle.
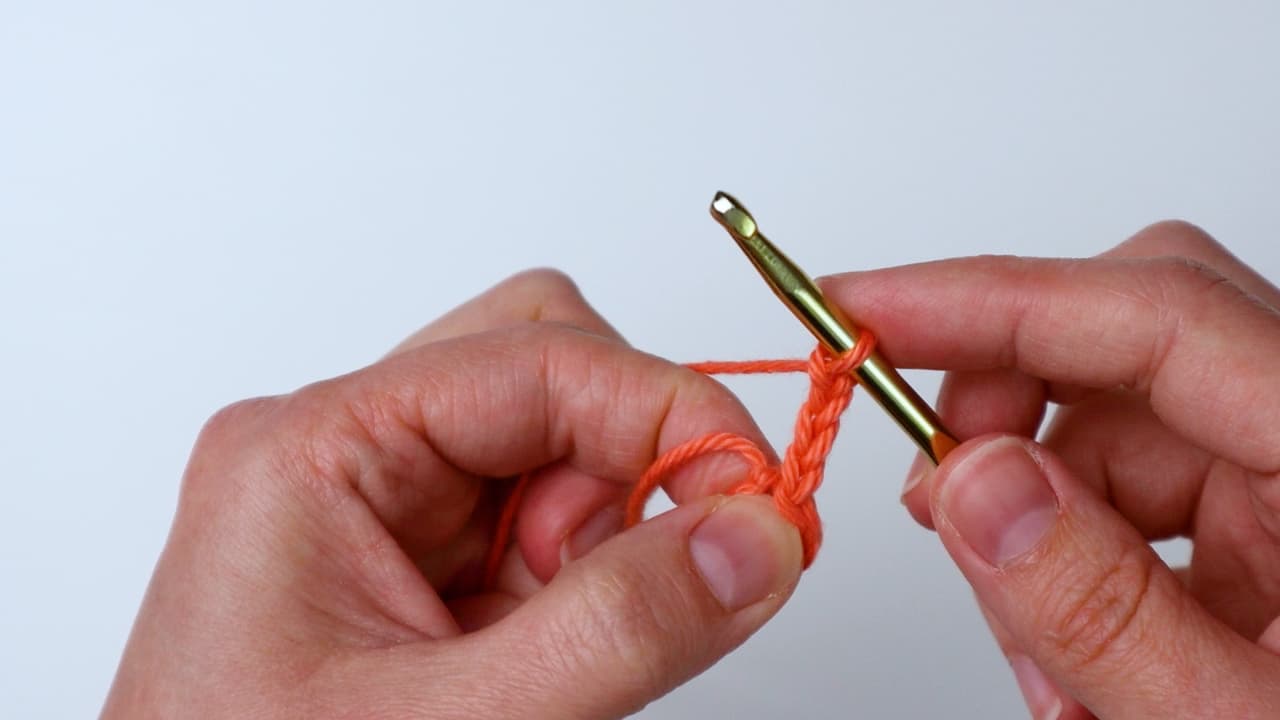
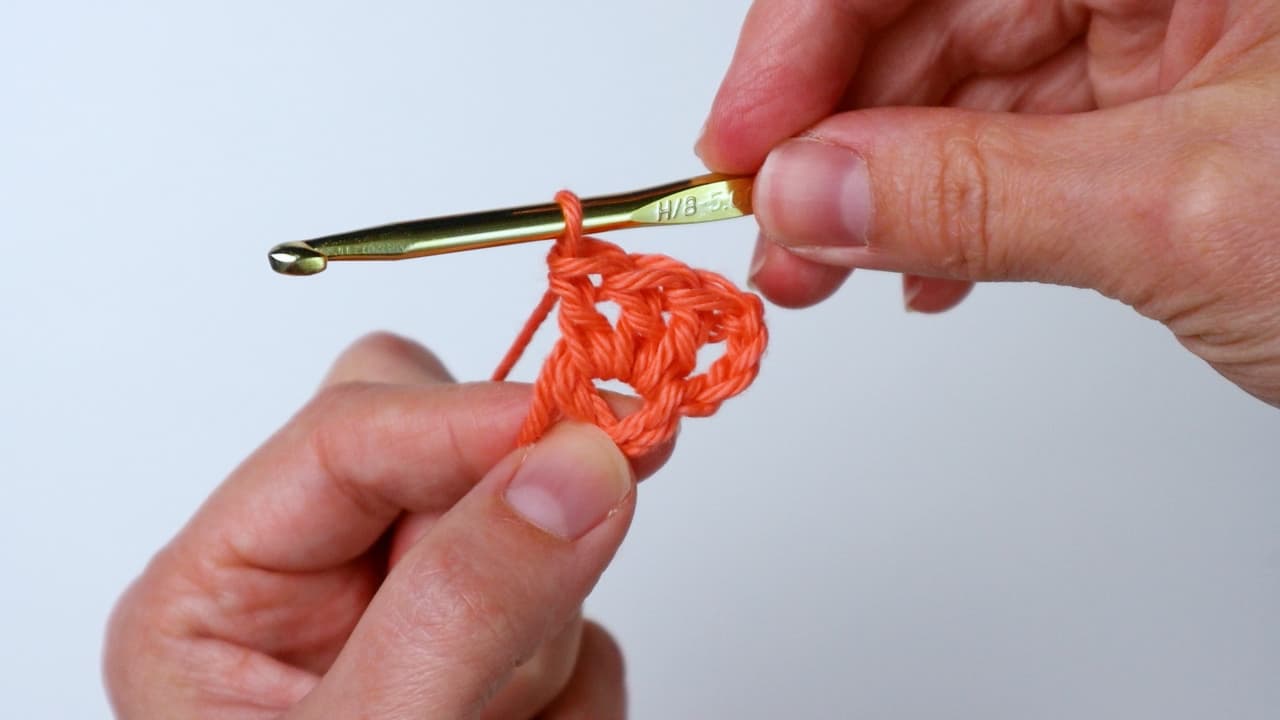
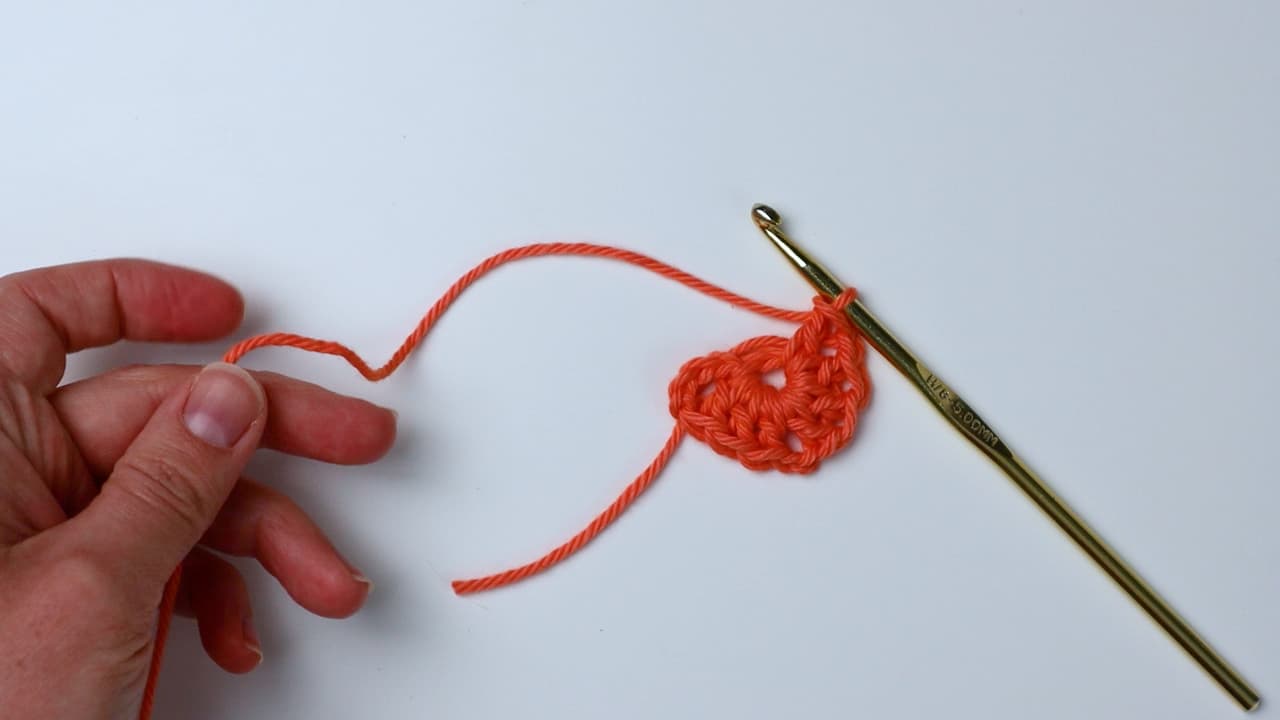
Triangle Row 2
Join Color B in the corner chain space from Row 1. Chain 4, then make 3 dc in the same chain space. Chain 1, then make (3 dc, ch 2, 3 dc) in the corner space. Chain 1, then work (3 dc, ch 1, 1 dc) in the last chain space. Fasten off.
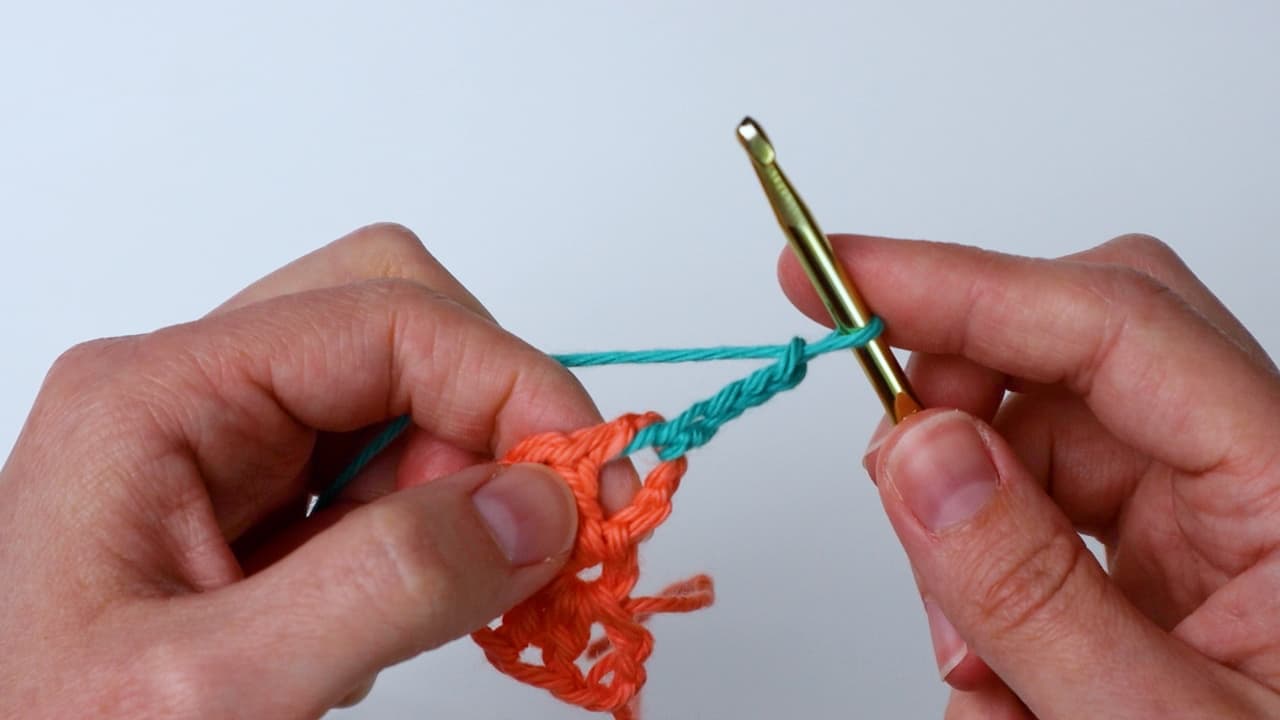
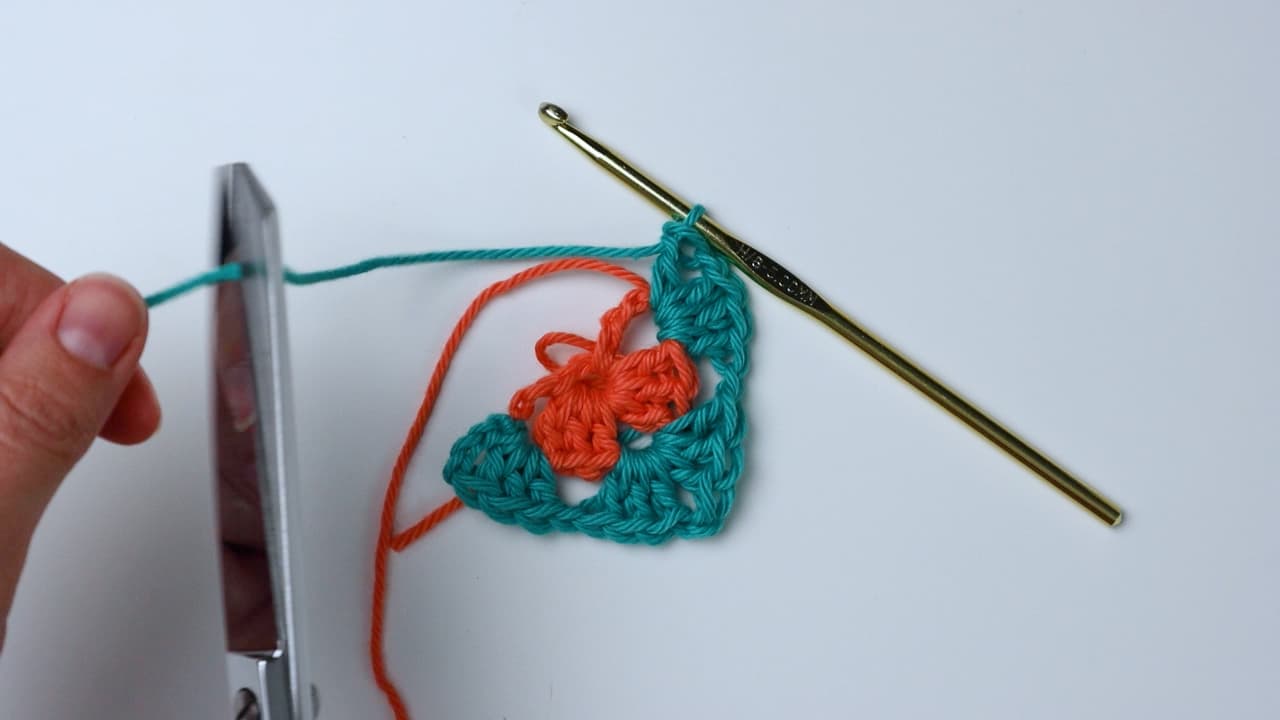
Triangle Row 3
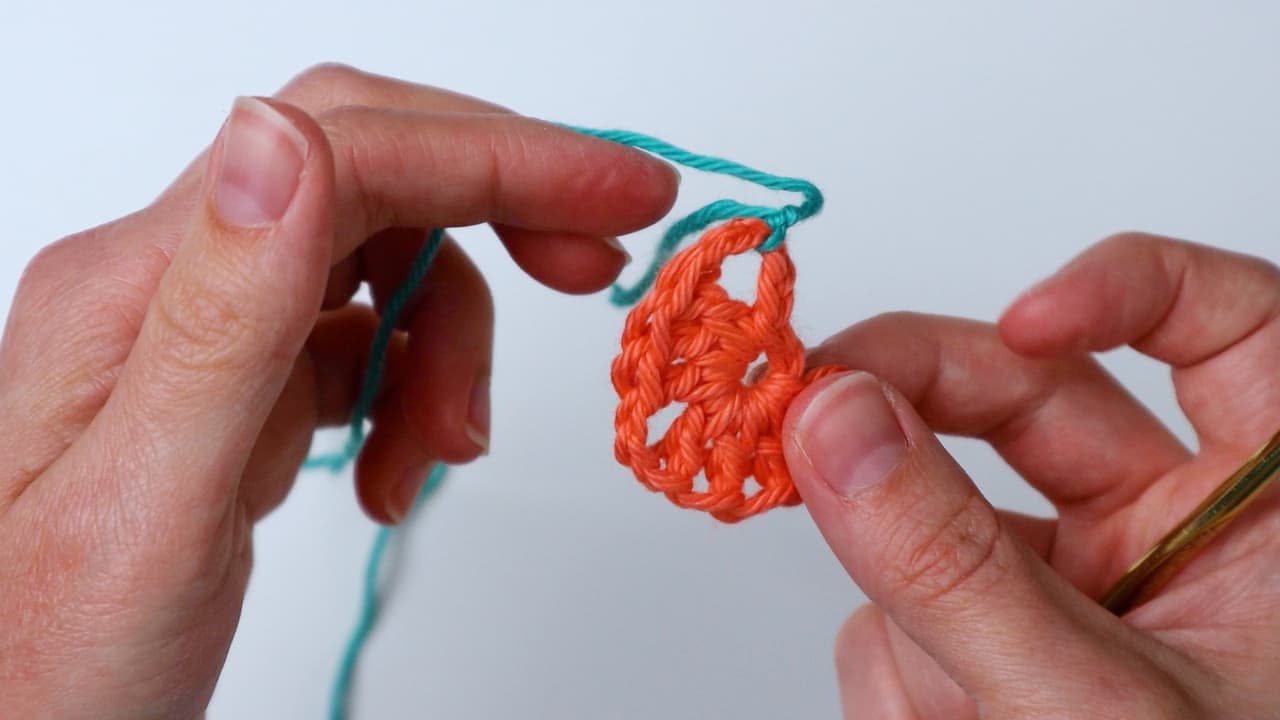
Join Color C in the corner chain space from Row 2. Chain 4, then make 3 dc in the same chain space, chain 1, 3 dc in the next chain space, chain 1, and (3 dc, ch 2, 3 dc) in the corner space.
Continue with chain 1, 3 dc in the next chain space, chain 1, and (3 dc, ch 1, 1 dc) in the last chain space. Fasten off and weave in the ends.
Repeat the triangle instructions until three granny triangles have been completed.
Stage Three: Arrange the Pieces Before Joining
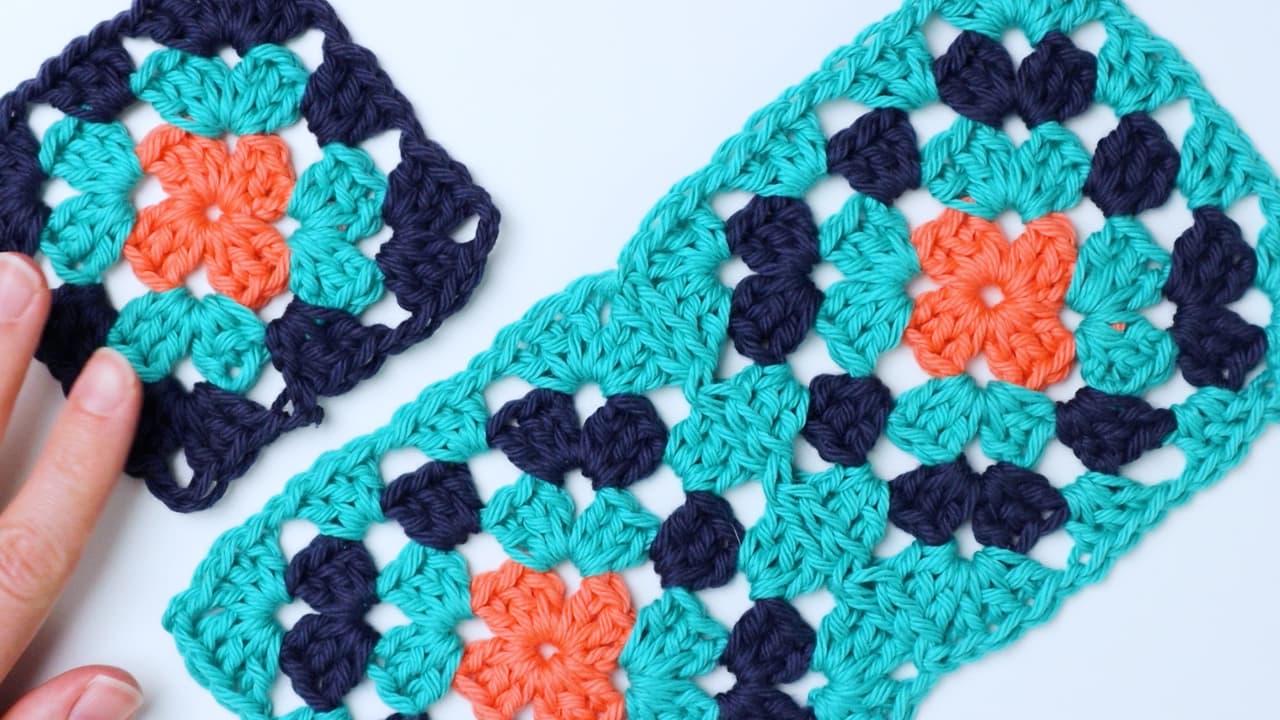
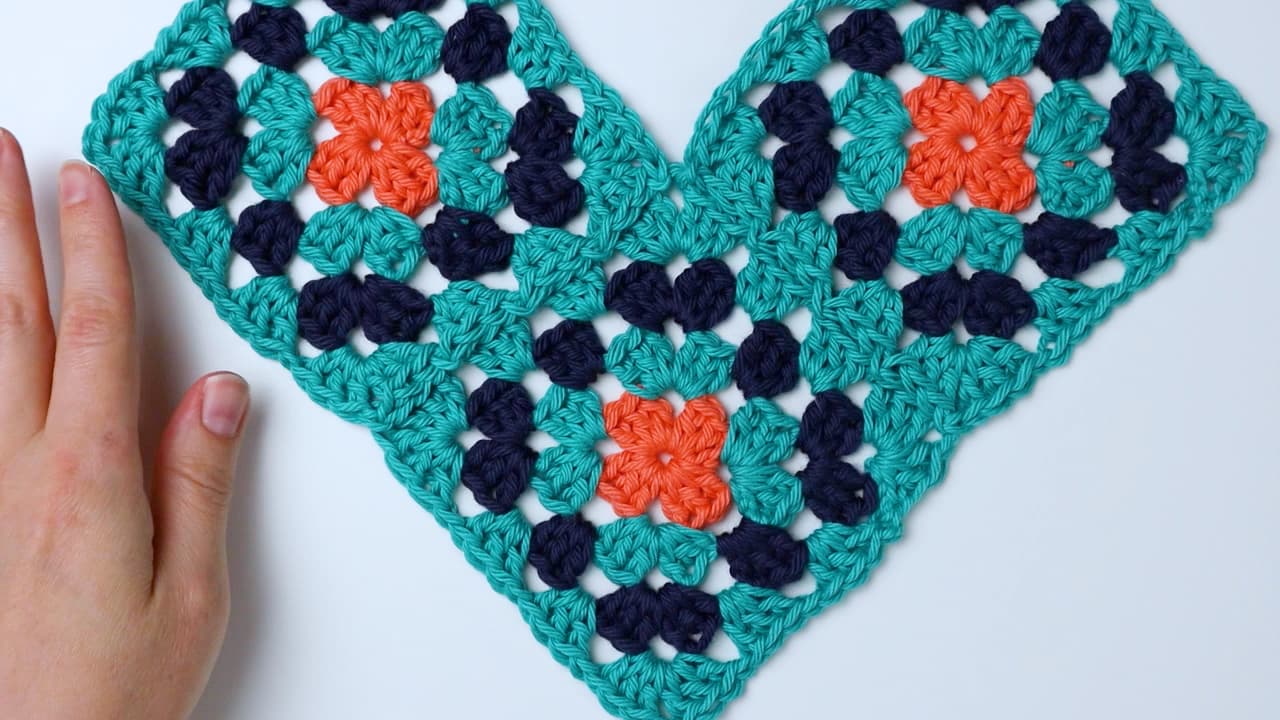
The assembly stage is where the separate motifs finally become the recognizable bandana shape. Before crocheting the joins, lay out all three squares and all three triangles in the order in which they will be attached.
Use Color B for the joining work, and make sure the right side is facing up.
The granny square with the extra round should be placed at the bottom. Tilt it so one point is facing downward. This larger square establishes the bottom portion of the triangular design.
Joining the Granny Squares
Take the next square to the right and attach Color B at the rightmost corner. Crochet granny clusters as normal across the top and along the left side.
When you reach the left corner, make 3 dc in the corner. This creates half of the corner and prepares the work for attaching the neighboring square.
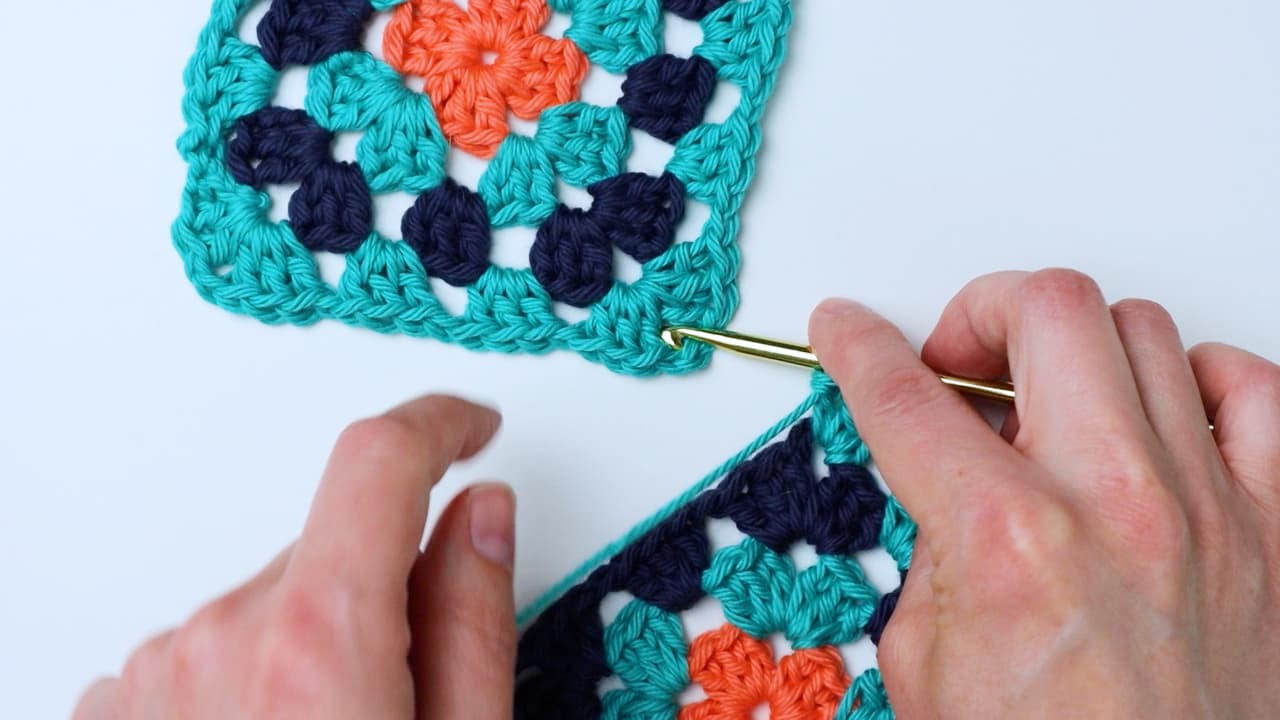
Take another square and line it up above the square you are currently working on. Insert your hook into the corner space of the top square and chain 1.
Make the second chain to complete the chain 2 for the corner, then work the other three double crochets into that corner space.
Move to the next space of the top square. Insert your hook into that space, chain 1, and make the next granny cluster of 3 dc in the corresponding space of the bottom square.
The joining process essentially follows the normal granny-square round, but the neighboring square is incorporated into the chain sections. The hook is inserted into the corresponding space of the other square before the chain is made. This connects the two pieces while the round is being crocheted.
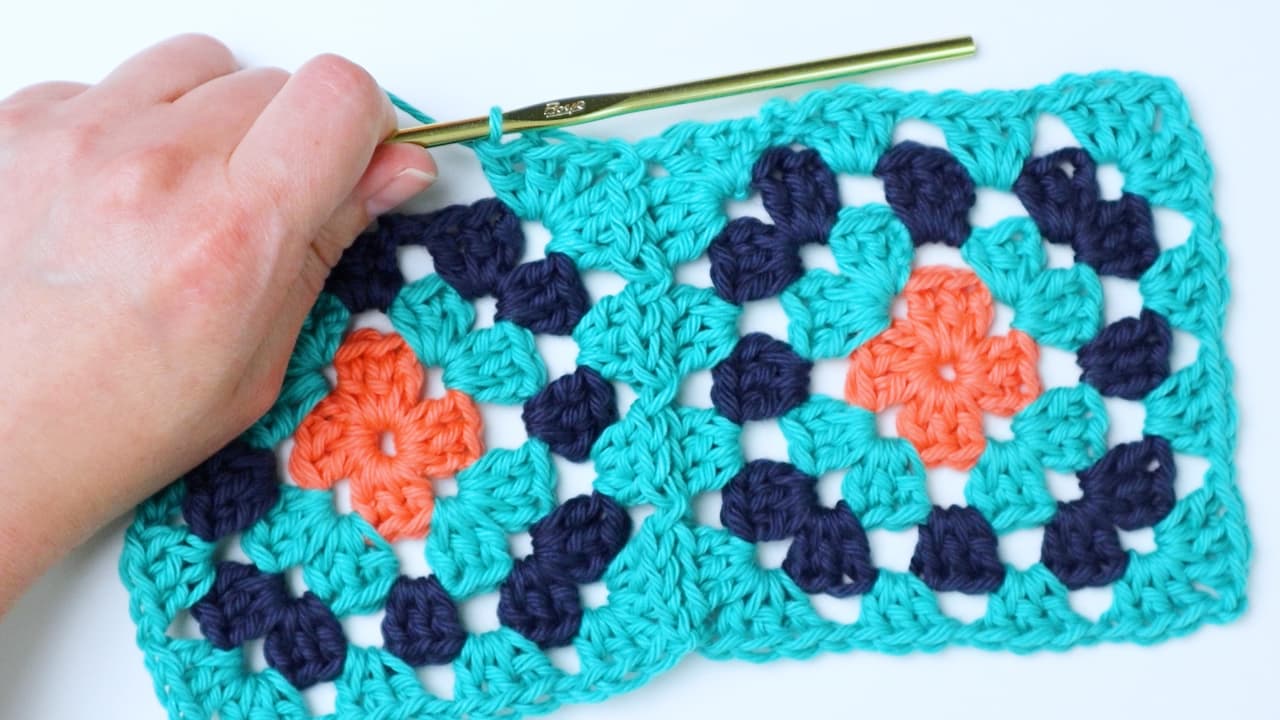
Once you reach the opposite corner and complete the attachment, continue the round normally. Then repeat the same joining method for the top-left square.
Stage Four: Attaching the Granny Triangles
With the square section assembled, begin adding the three granny triangles. The first triangle is joined in the center at the top of the squares.
Attach the yarn to the far-right corner of the triangle. Chain 3, then insert your hook into the corner space of the square and chain 1. Make 3 dc in the same space.
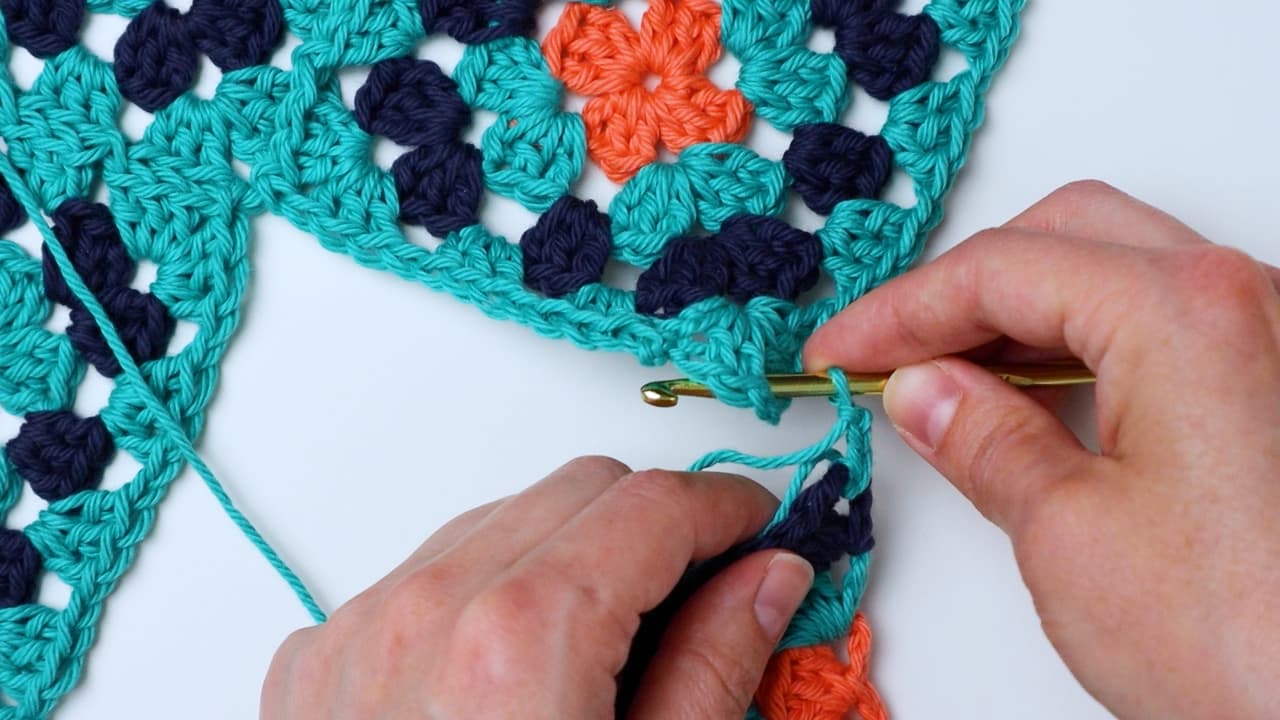
Continue along the triangle by inserting your hook into the spaces of the square before making the chains. When you reach the corner, make your first 3 double crochets into the corner space.
Then insert your hook into the corner space of the square directly across from the corner you are working in. This is the top corner of the bottom square. Chain 1.
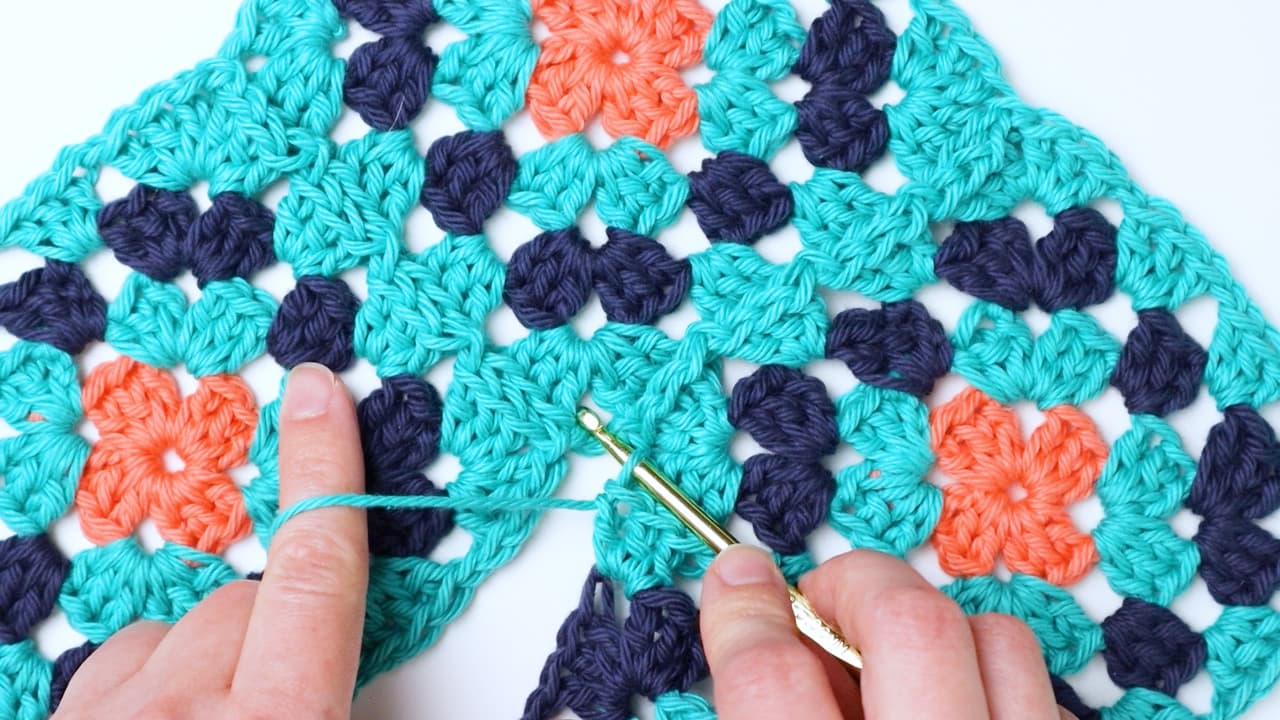
Chain again and continue normally up the other side of the triangle.
In the last corner, make the 3 double crochets. Then insert your hook into the last corner of the adjacent square, chain 1, and make the last double crochet in the corner space of the triangle.
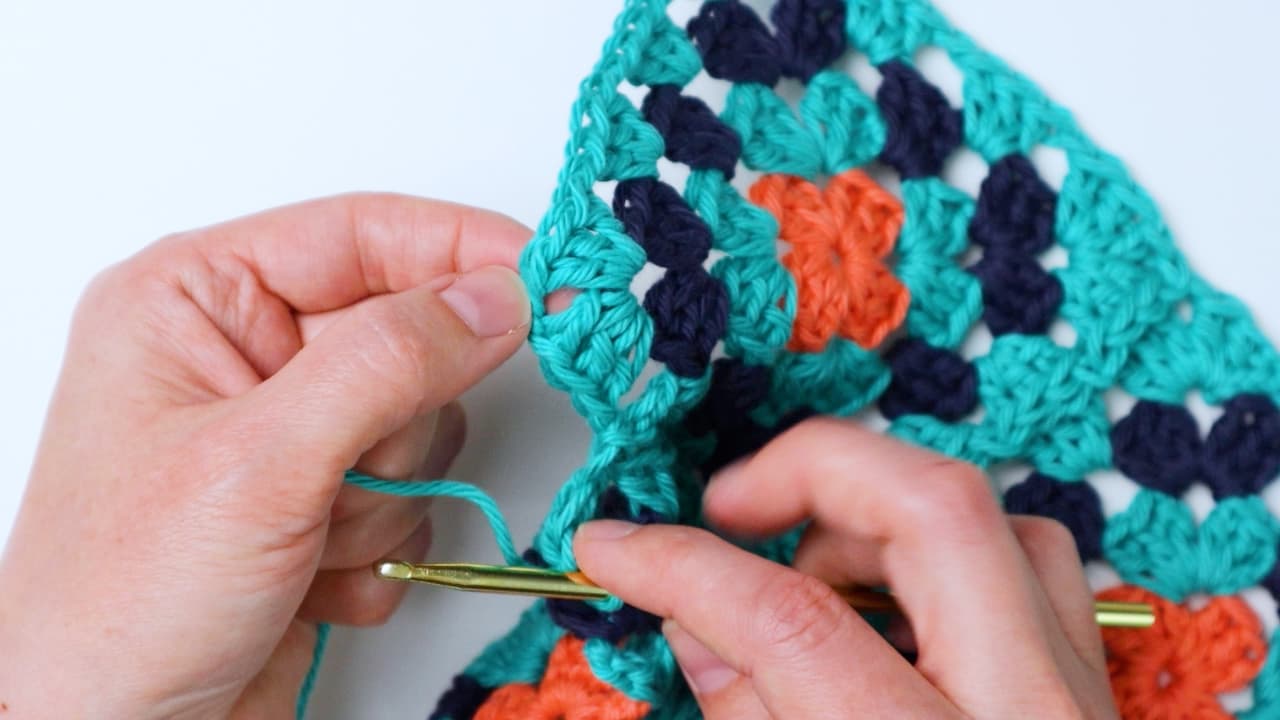
Repeat the same process for the other two triangles.
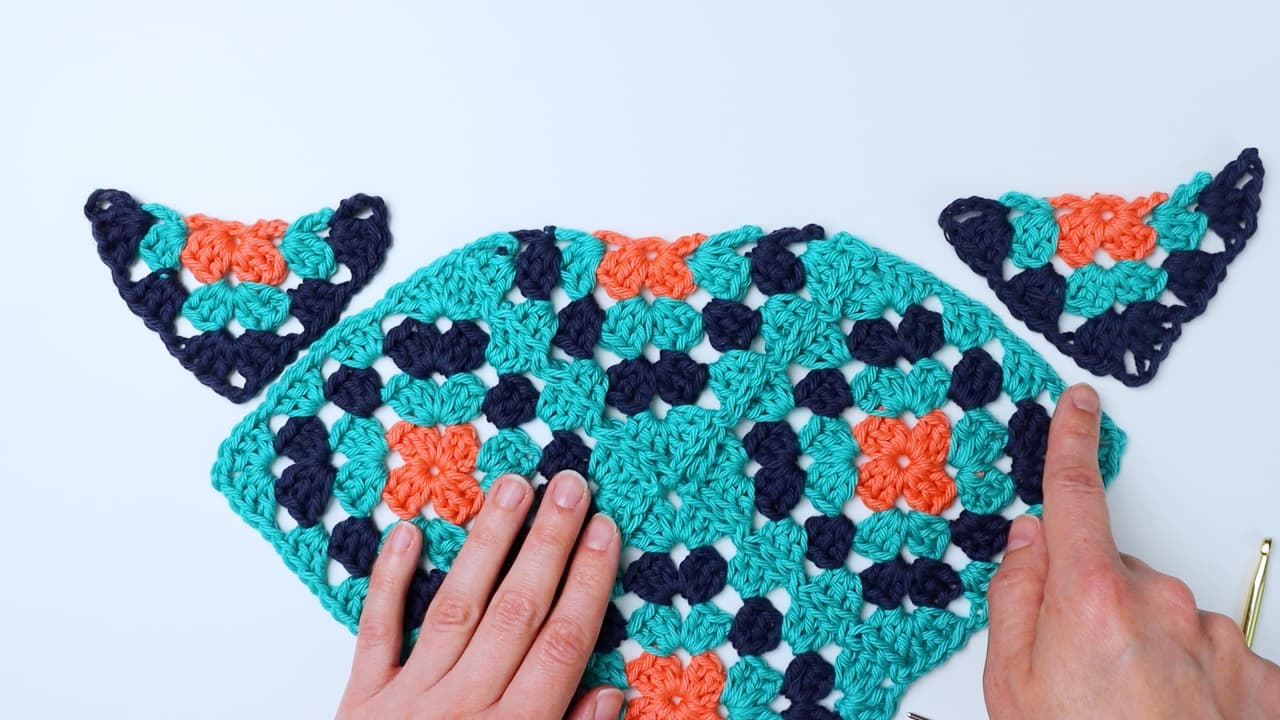
When the final triangle has been completed, finish off and weave in all the ends.
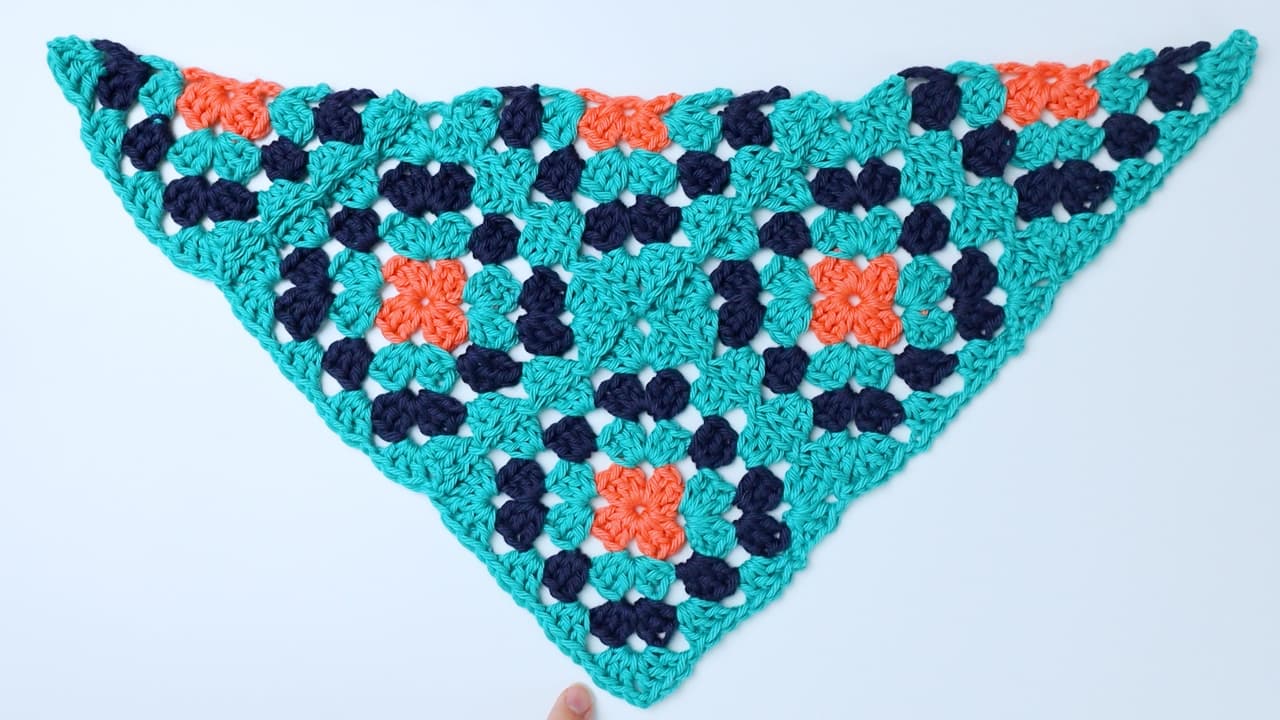
Stage Five: Work the Color C Border
The border is the finishing framework around the assembled bandana. Join Color C to the far-left corner. Chain 1 and make a single crochet in the same space.
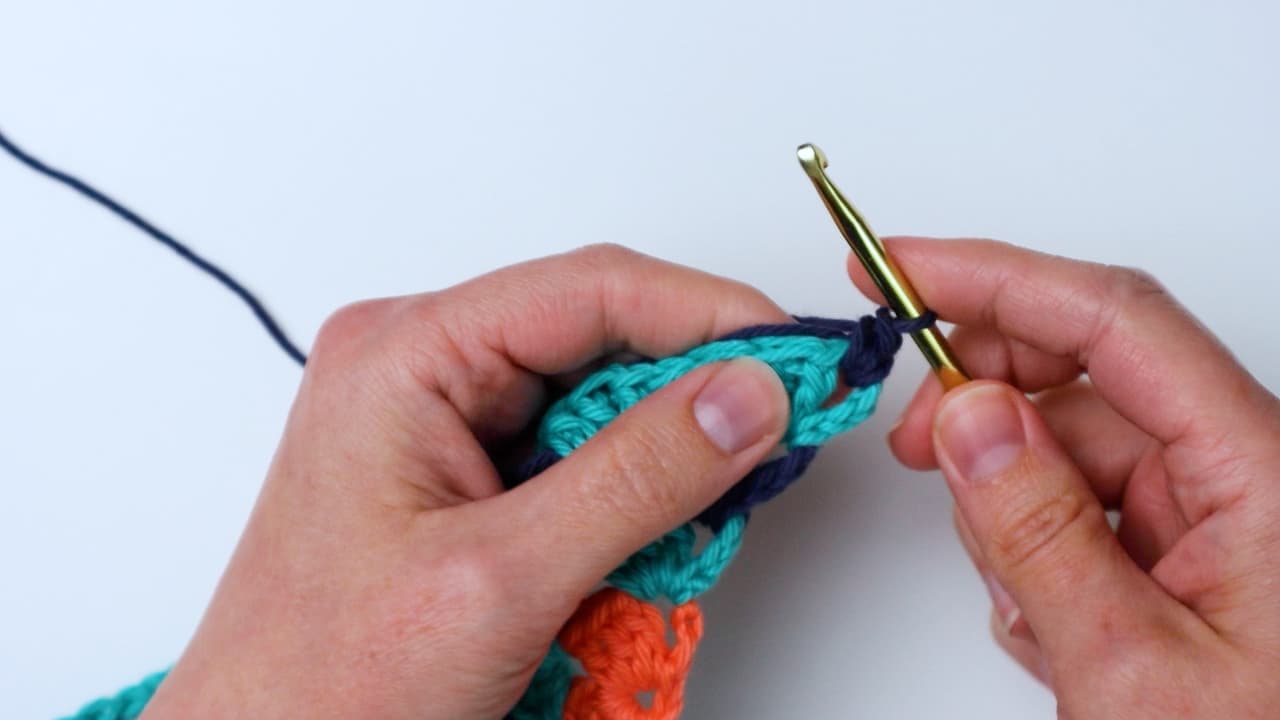
Work one sc in the top of each dc and each space. Also make one sc in each corner space and in the space where two squares are attached.
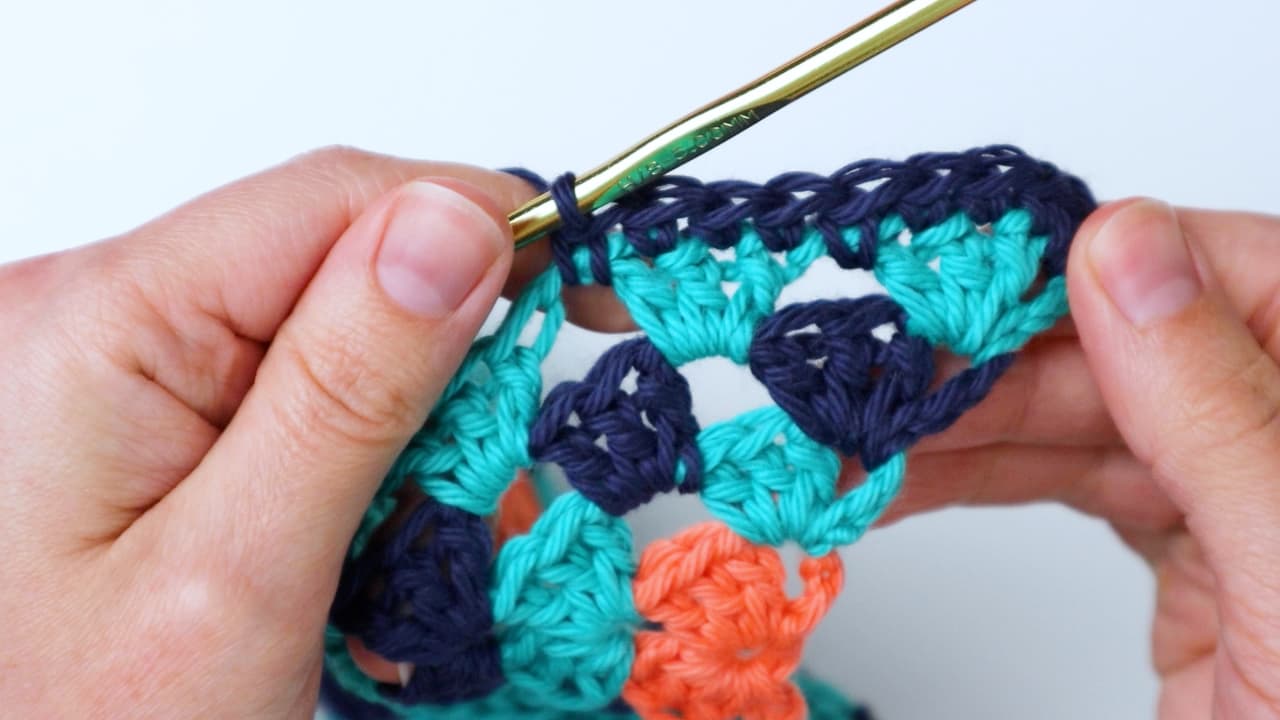
When you reach the bottom point, make 3 sc in the corner space. Then continue up the opposite side, making one sc in each stitch or space until you reach the right corner.
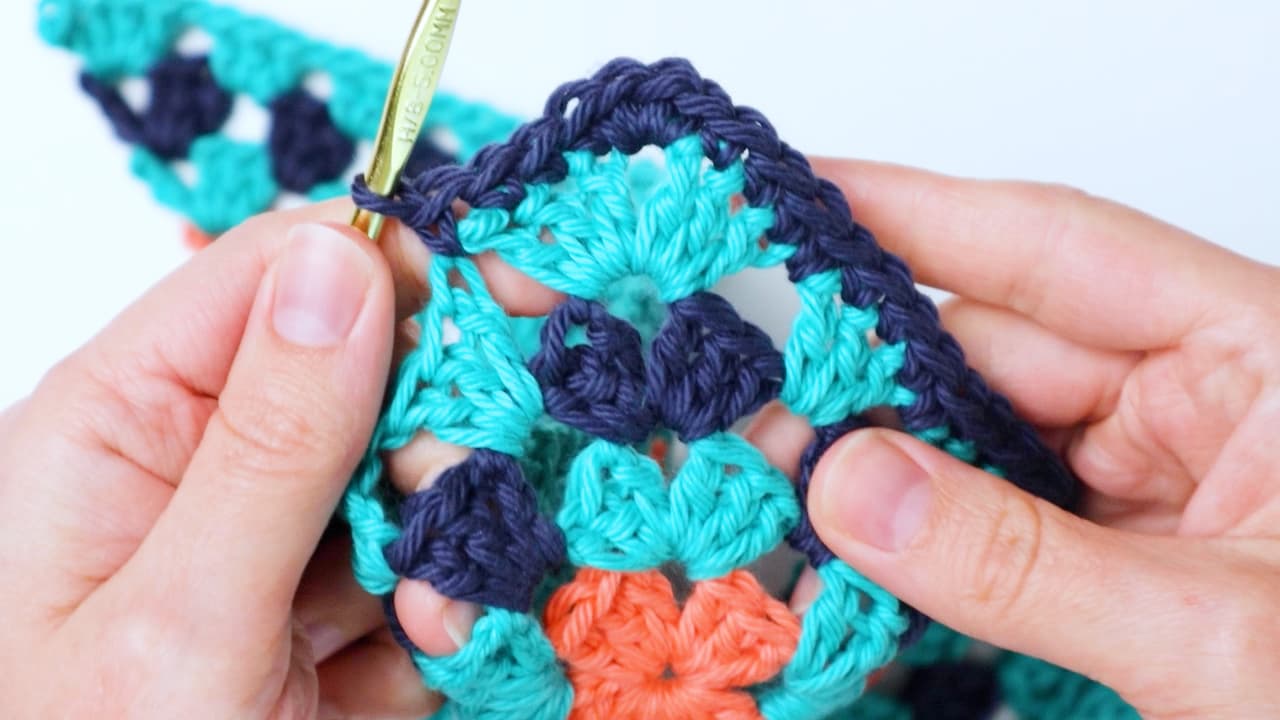
Stage Six: Make the First Strap
At the right corner, make one sc in the top of the chain 3 of this corner. Then chain 41 times to form the first strap.
Slip stitch into the second chain from the hook and continue slip stitching into each chain going down.
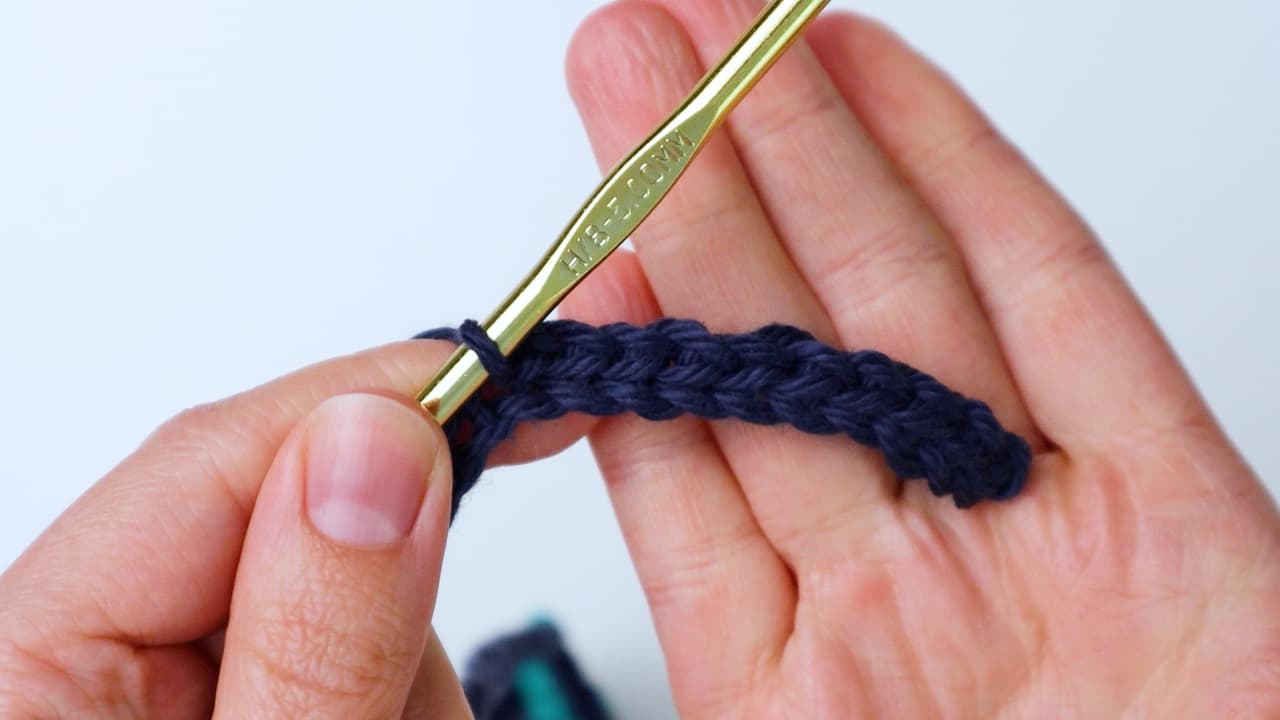
Make a sc in the same spot where you made the last sc before the strap.
Shaping the Front Border
Now work across the top of the bandana. Make 3 sc in each of the next 4 spaces at the end of each triangle row.
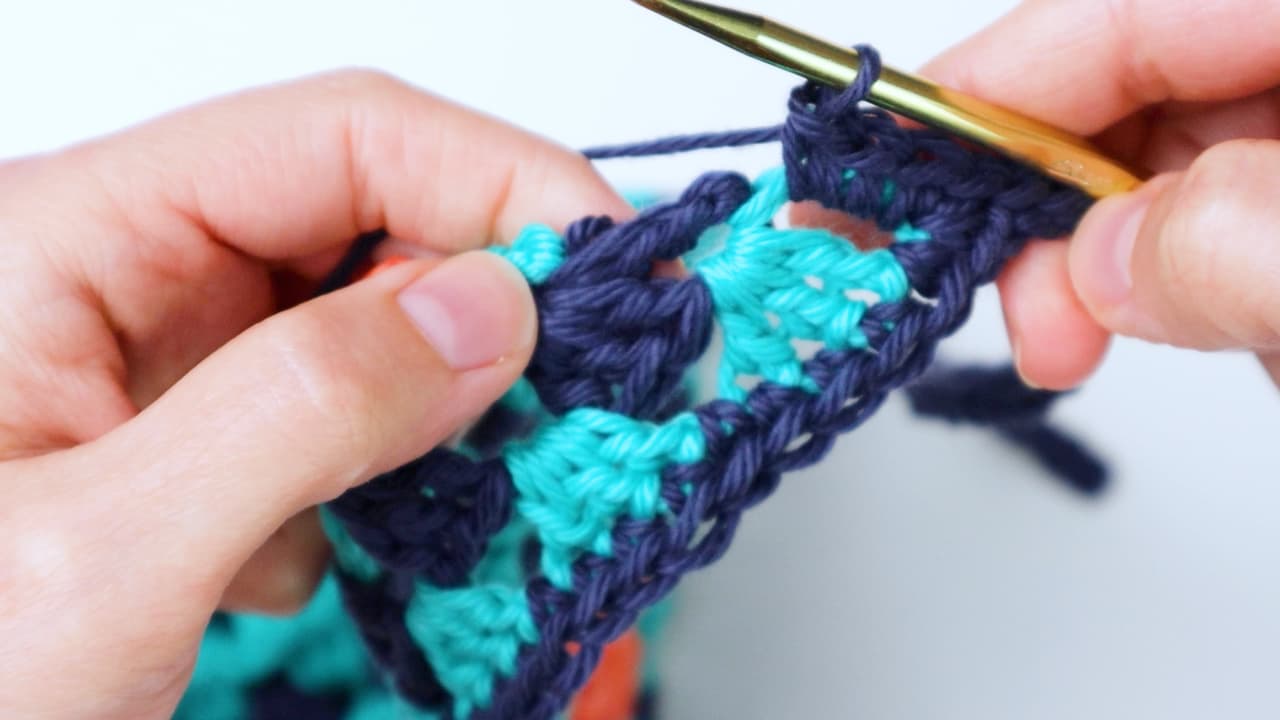
When you reach the center of the triangle, make 2 sc in the center loop. Then continue with 3 sc in each of the next 4 spaces.
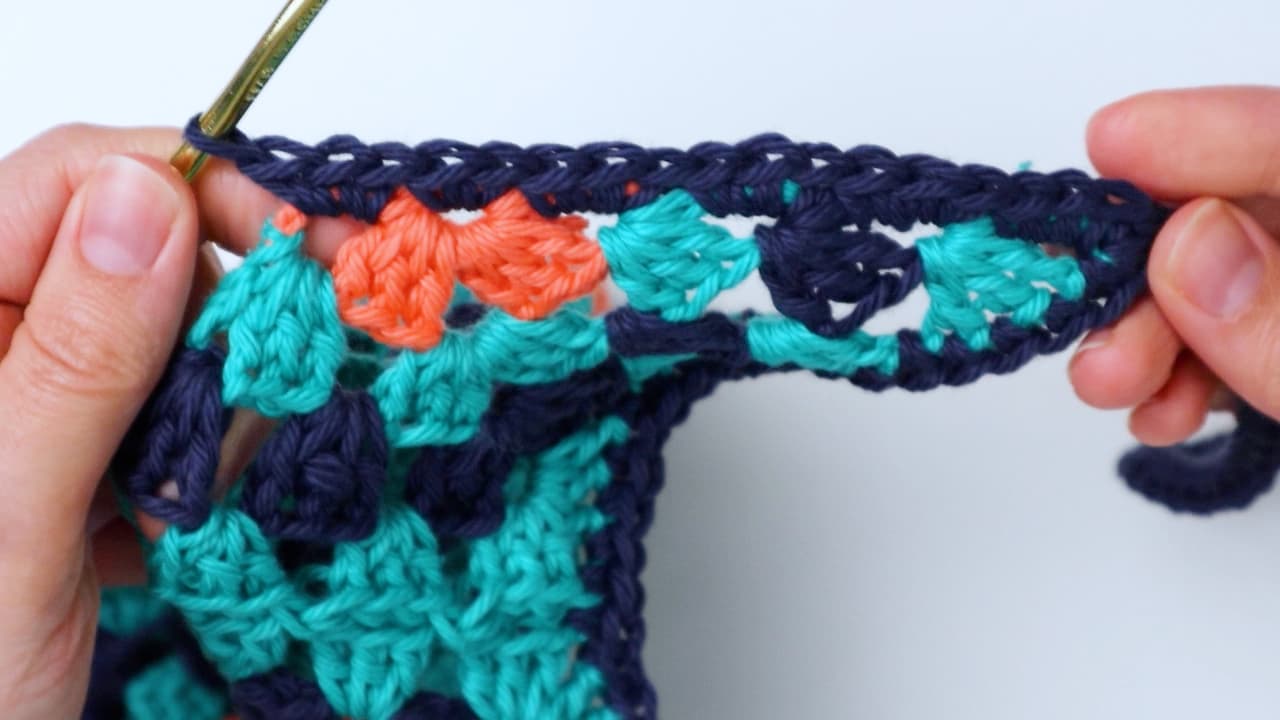
When you reach the corner space of a granny square, make 3 hdc. This longer stitch helps prevent an indentation from forming across the front.
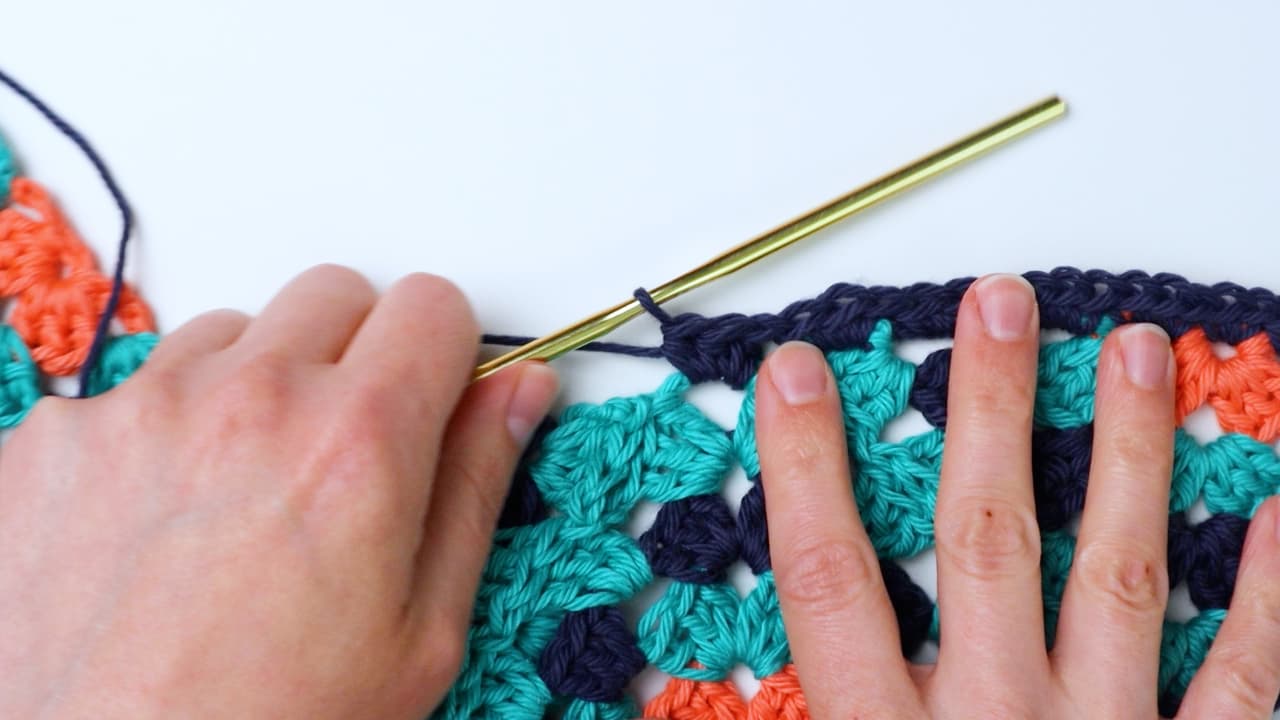
Continue across the front until you reach the left corner.
Stage Seven: Add the Second Strap
After making 3 sc in the far-left corner, chain 41. Slip stitch into the second chain from the hook and continue all the way down the chain.
Make one single crochet in the same space as the last stitch before you made the chain. Then slip stitch into the first sc of the row.
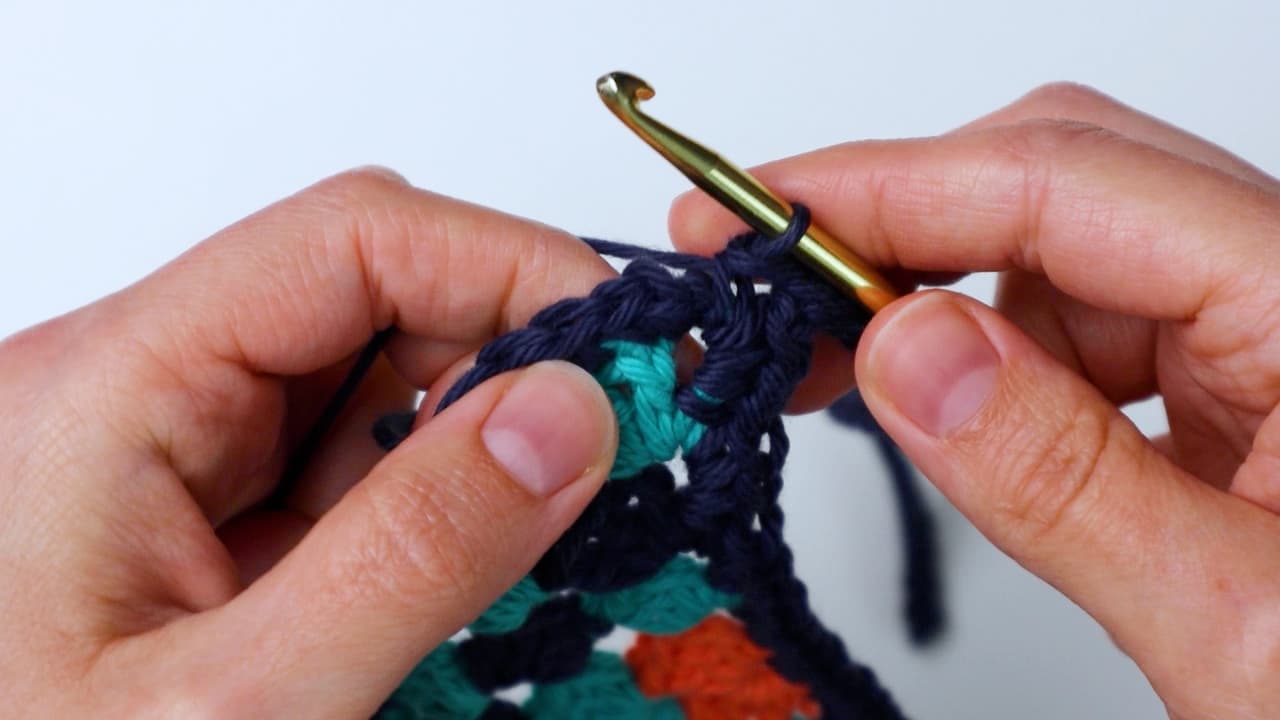
Finish off and weave in the ends. The bandana is now complete.
Understanding the Border Details
The border has several small construction details that are worth keeping together in your notes. Along the main outer edge, one sc is worked in the top of each double crochet and in each space. Corner spaces and spaces where squares are attached also receive a single crochet.
The bottom point receives 3 sc in the corner space. This gives the border enough room to turn around the point while preserving the shape.
The upper front edge has a different treatment. At the center of a triangle, 2 sc are worked in the center loop. At the granny-square corners, 3 hdc are used instead of three single crochets. According to the original instructions, this longer stitch helps prevent an indentation across the front.
Assembly Tips for a Neat Result
Lay Everything Out First
Do not begin joining immediately after completing the final motif. First arrange the three squares and three triangles. The square with the extra round must be placed at the bottom with one point facing down.
Keep the Right Side Facing Up
The assembly instructions specifically call for the right side to face up. Checking this before joining can save time and helps keep the finished color arrangement consistent.
Pay Attention to Matching Spaces
The joining method depends on corresponding spaces in the neighboring motif. When joining the squares or triangles, take care to insert the hook into the correct neighboring space before making the connecting chain.
Do Not Treat the Three Squares as Identical
Two squares end after Round 3. The third square receives Round 4 in Color B. This difference is intentional and determines where the larger square sits in the finished bandana.
Motif and Assembly Checklist
- Make 3 granny squares.
- Use Color A for Round 1.
- Use Color B for Round 2.
- Use Color C for Round 3.
- Add Round 4 in Color B to only 1 square.
- Make 3 granny triangles.
- Use Color A for triangle Row 1.
- Use Color B for triangle Row 2.
- Use Color C for triangle Row 3.
- Arrange the pieces with the right side facing up.
- Place the larger square at the bottom.
- Join the squares using Color B.
- Join the triangles using Color B.
- Use Color C for the border.
- Make 3 sc at the bottom point.
- Use 3 hdc at granny-square corners across the front edge.
- Make a chain of 41 for the first strap.
- Make a chain of 41 for the second strap.
- Slip stitch back down each strap.
- Finish off and weave in all ends.
Common Points to Double-Check
There are several places where it is easy to lose track of the construction sequence. The first is the difference between the squares and triangles. The squares use rounds, while the triangles use rows. Keeping those terms in mind makes it easier to follow the original pattern.
The second important point is the special fourth round. It belongs to only one square. If all three squares are given the extra round, their dimensions and arrangement will no longer match the intended construction.
The third point is the joining process. The motifs are joined while crocheting rather than simply being placed together and left for a separate sewing step. The hook moves through corresponding spaces of the adjacent motif during the chain sections.
The final point is the border. Although most of the edge uses single crochet, the pattern deliberately uses 3 hdc at the granny-square corners along the front edge. These taller stitches are part of the shaping method described in the original instructions.
Finished Project Review
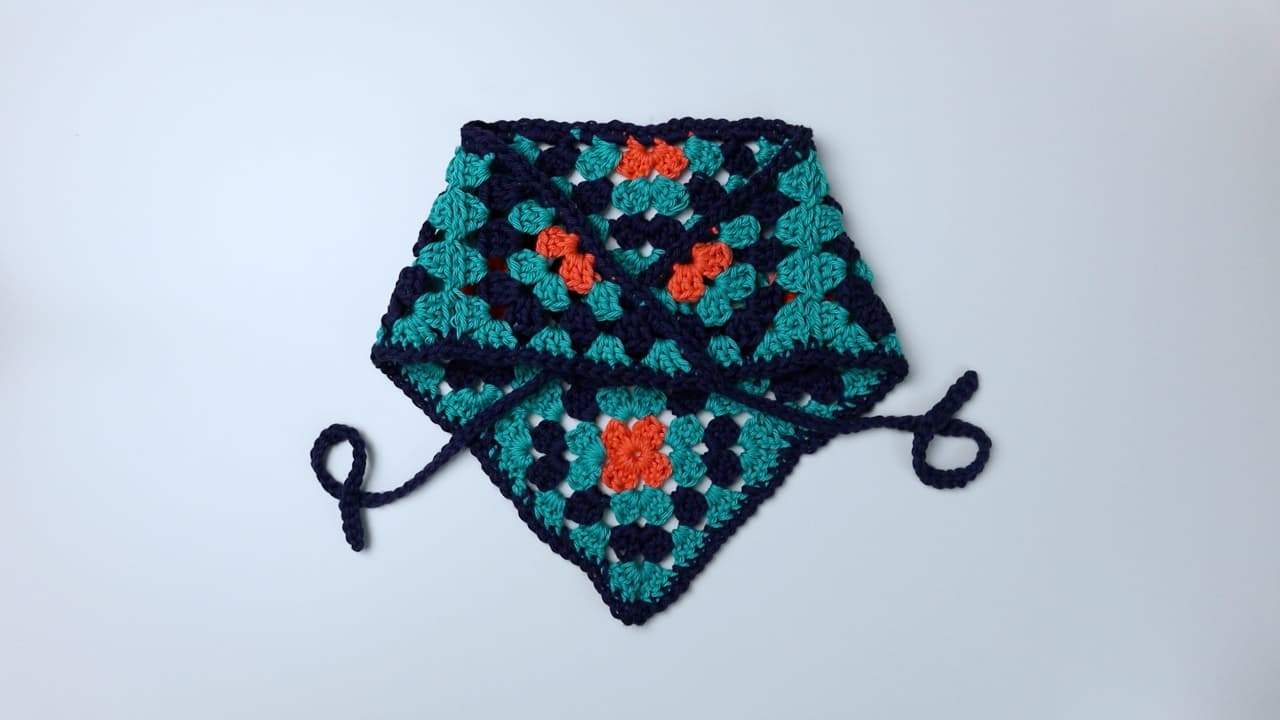
After all six motifs have been joined and the Color C border has been completed, the project takes on its final bandana silhouette. The three granny squares create the main body, while the triangles complete the upper section. The straps extend from the two corners and provide the finished accessory with its tie closure.
The finished bandana measures approximately 22 inches across from corner to corner and approximately 10 inches deep. The straps are approximately 11 inches long.
The motif measurements provide additional checkpoints: each granny square is approximately 4.5 inches, while each granny triangle measures approximately 4.5 inches on the short sides and approximately 6.5 inches along the hypotenuse.
Why This Is a Useful Beginner Crochet Project
Although the finished piece looks more elaborate than a basic granny square, its construction is based on familiar crochet techniques. The project gives a beginner an opportunity to practice chain stitches, double crochet clusters, corner spaces, color changes, fastening off, joining motifs, single crochet edging, half double crochet shaping, and crocheted straps.
The individual pieces are also small enough to make the project feel manageable. Instead of worrying about the full bandana from the first stitch, you can focus on completing one motif and then move on to the next stage.
The joining stage introduces another useful skill: crocheting motifs together as you work. This technique is particularly valuable for anyone interested in future crochet projects involving modular construction.
Final Finishing Routine
Once the second strap has been completed, make one single crochet in the same space as the last stitch before the chain. Slip stitch into the first single crochet of the round. Finish off and weave in the ends.
Take a moment to inspect the completed piece. Check the joins, the bottom point, the front border, and both straps. The final bandana should retain its intended triangular shape and colorful granny-motif appearance.
Frequently Asked Questions
How many granny squares are required?
The pattern requires three granny squares. Two stop after Round 3, while one receives an additional Round 4 in Color B.
How many granny triangles are required?
You need three granny triangles, each worked through Row 3.
What color is used for joining?
Color B is used to join both the granny squares and granny triangles.
What color is used for the border?
Color C is used for the outer border and the straps.
How many chains are used for each strap?
Each strap begins with chain 41. Slip stitches are then worked into the second chain from the hook and each chain going down.
Is gauge important?
No. The original pattern states that gauge is not important. The approximate dimensions of the motifs are provided as useful references.
What are the finished measurements?
The bandana is approximately 22 inches across from corner to corner and approximately 10 inches deep. The straps are approximately 11 inches long.
What terminology does this pattern use?
The pattern is written in US crochet terms.
Why is one granny square larger?
Only one square receives the additional Round 4. That larger square is placed at the bottom of the bandana with one point facing downward.
Final Thoughts
This Granny Square Bandana demonstrates how a handful of simple crochet motifs can be transformed into a practical and colorful accessory. The project starts with small rings and granny clusters, develops into three squares and three triangles, and then comes together through a crocheted joining method.
The most important thing to remember is that every component has a specific role. The three granny squares create the central structure, but only one receives the fourth round. The three triangles complete the upper section. Color B connects the motifs, while Color C provides the border and straps.
The border also deserves attention because its stitch placement helps maintain the shape of the finished piece. The 3 sc at the bottom point, the 2 sc in the center triangle loop, and the 3 hdc at the granny-square corners all belong to the original finishing instructions.
Once the last ends have been woven in, you have a lightweight handmade bandana with an approximately 22-inch corner-to-corner width, approximately 10-inch depth, and approximately 11-inch straps. The Coral, Teal, and Navy color combination gives the original version a cheerful summer character, while the modular granny construction makes the project enjoyable to work through one piece at a time.
Whether you are looking for an easy summer crochet project or want to practice joining granny motifs into a wearable design, this pattern offers a satisfying combination of simple stitches, colorful rounds, careful assembly, and a polished finished border.