
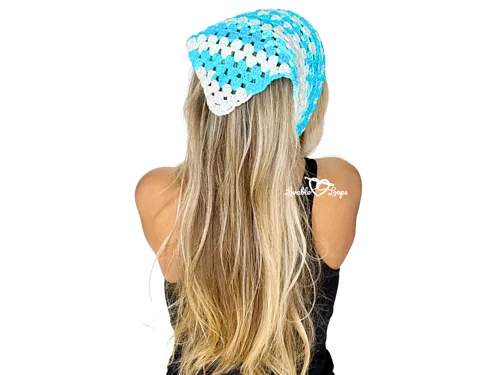
If you enjoy crochet projects that combine a familiar stitch with a useful finished result, this granny stitch crochet bandana is a lovely project to add to your handmade collection. The design is based on the classic granny stitch and is worked into a simple triangular shape, making the construction easy to understand once you become familiar with the repeating pattern.
This crochet bandana is designed for an advanced beginner. You should be comfortable with basic crochet stitches, working in rows, and reading simple written instructions. The project does not require complicated shaping or multiple pieces that must be joined together. Instead, the main triangular section is worked continuously from the top point downward, with the width increasing evenly as the rows progress.
Both child and adult sizes are included. The child version is approximately 9 inches wide by 17 inches tall (23 cm × 43 cm), while the adult version is approximately 10 inches wide by 20.5 inches tall (25 cm × 52 cm). Both versions use the same fundamental construction and finish with simple chain straps.
The specified materials are an H-8 (5 mm) crochet hook and worsted weight yarn #4, along with a yarn needle, scissors, and stitch markers. The pattern is written in US crochet terms. If you are ready to work through the project step by step, the sections below explain the construction, stitch pattern, sizing, row progression, straps, and finishing process while keeping the original technical instructions intact.
What Makes This Bandana Special?
The appeal of this project comes from its combination of simplicity and texture. The granny stitch is one of those crochet techniques that can create a recognizable fabric without requiring a complicated stitch sequence. In this design, granny stitch clusters are placed into chain spaces, and the number of spaces increases as the triangular bandana grows.
The pattern also offers two sizes without introducing a completely different construction for each one. The child and adult versions begin in the same way. The main difference is how many rows are worked before the strap row is reached.
- Child size: approximately 9 inches wide × 17 inches tall (23 cm × 43 cm)
- Adult size: approximately 10 inches wide × 20.5 inches tall (25 cm × 52 cm)
- Skill level: advanced beginner
- Hook: H-8 (5 mm)
- Yarn: worsted weight yarn #4
- Technique: corner-to-corner granny stitch
- Construction: triangular piece worked from the top point downward
- Straps: simple chains
- Terminology: US crochet terms
Materials Checklist
Prepare your materials before starting so that you can focus on the row structure. The pattern requires only a small collection of basic crochet tools.
- H-8 (5 mm) crochet hook
- Worsted weight yarn #4
- Yarn needle
- Scissors
- Stitch markers
The yarn needle is used during finishing to weave in all loose ends. Scissors are used when fastening off, and stitch markers can help you keep track of your work while following the repeated rows.
Finished Sizes and Gauge
Before beginning the crochet work, take a moment to review the intended gauge and measurements. The stated gauge is 5 granny stitch clusters = 4 inches (10 cm) and 9 rows = 4 inches (10 cm).
The child bandana measures approximately 9 inches wide × 17 inches tall (23 cm × 43 cm). The adult bandana measures approximately 10 inches wide × 20.5 inches tall (25 cm × 52 cm).
The sizes are measured flat. The source notes that the finished dimensions may vary slightly depending on yarn choice and tension. For that reason, your personal crochet tension can influence the final measurements even when you follow the same row instructions.
Understanding the Crochet Terms
This pattern is written using US crochet terminology. The following abbreviations are used throughout the instructions:
- dc: double crochet
- ch/chs: chain/chains
- ch sp: chain space
- st/sts: stitch/stitches
- sl st: slip stitch
Knowing these abbreviations before you begin will make the written instructions easier to read. The most important abbreviation for this particular project is dc, because every granny stitch cluster is built from three double crochets followed by a chain 1.
The Granny Stitch Cluster Explained

The special stitch used in the pattern is the C2C granny stitch cluster. The granny stitch cluster is made by working (3 dc, ch 1) in the indicated space.
This simple combination is repeated throughout the body of the bandana. Once you understand how to identify the ch-1 spaces, the stitch pattern becomes much easier to follow.
There is one important variation to remember. The final ch-1 space of the regular rows receives (3 dc, ch 1, dc) rather than the standard (3 dc, ch 1). This final double crochet is part of the triangular shaping, so it should be included exactly as written.
Starting with the Magic Ring
The entire project begins with a magic ring. This starting point becomes the top point of the triangular bandana, so it establishes the foundation for all the rows that follow.
Make the magic ring, then chain 4. Work (3 dc, ch 1, dc) into the ring. Pull the yarn tail to close the ring. Chain 4 and turn your work.
The magic ring may take a little practice if you are not accustomed to the technique. Work carefully during this first row because the stitches are being created directly inside the ring rather than into established chain spaces.
Learning the Pattern Through the First Four Rows
The first four rows are where the construction becomes clear. Each new row introduces another ch-1 space, allowing another granny stitch cluster to be added. At the same time, the final space maintains the special ending combination that creates the increase.
Row 1
Make a magic ring. Chain 4. Work (3 dc, ch 1, dc) into the ring. Pull the yarn tail to close the ring. Chain 4 and turn.
Row 2
In the first ch-1 space, work (3 dc, ch 1). In the next ch-1 space, work (3 dc, ch 1, dc). Chain 4 and turn.
Row 3
In the first ch-1 space, work (3 dc, ch 1). In the next ch-1 space, work (3 dc, ch 1). In the last ch-1 space, work (3 dc, ch 1, dc). Chain 4 and turn.
Row 4
In the first ch-1 space, work (3 dc, ch 1). In the next 2 ch-1 spaces, work (3 dc, ch 1). In the last ch-1 space, work (3 dc, ch 1, dc). Chain 4 and turn.

At this stage, it is useful to stop and look at the fabric rather than focusing only on the written instructions. The triangular shape is beginning to develop, and the chain spaces should provide clear visual landmarks for the next row.
How to Read the Repeating Rows
After the first four rows, Row 5 establishes the main repeat used for the remainder of the body. The instructions become repetitive, which is one of the reasons this project works well for an advanced beginner.
For Row 5, begin in the first ch-1 space with (3 dc, ch 1). Repeat (3 dc, ch 1) in each ch-1 space across to the last space. In the last ch-1 space, work (3 dc, ch 1, dc). Chain 4 and turn.
When reading this instruction, separate the row into two ideas. First, there are the regular middle spaces. Each receives the standard granny stitch cluster. Second, there is the last space. It receives the special ending sequence.
This distinction remains important throughout the repeated rows. Keeping it in mind can make the pattern much easier to follow than trying to memorize the entire line as one long instruction.
Visualizing the Construction
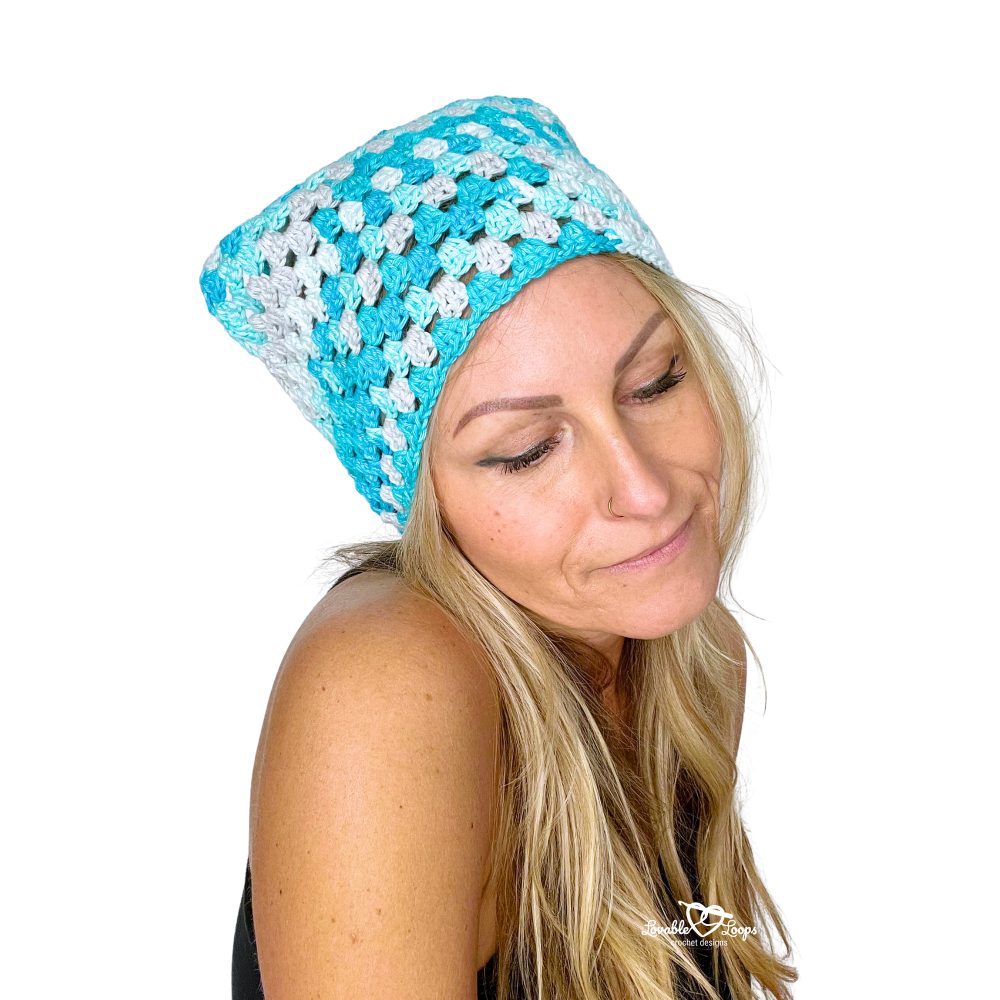
The construction is straightforward because the project is worked as a single triangular section. The pattern starts at the top point and expands evenly with each row. This is described as a corner-to-corner granny stitch technique.
You do not need to construct a separate head section, body section, or strap section and then sew them together. The triangular fabric is created first, and the two straps are added at the final row.
This continuous approach also makes the project easy to understand visually. As more rows are added, the width increases and the triangle becomes more pronounced.
Child Size: Complete Row Progression
If you are making the child version, the pattern progresses through Row 20, with Row 20 serving as the strap row.
Rows 1–4
Complete Rows 1 through 4 exactly as described earlier. These rows establish the triangular shape and introduce the increasing number of ch-1 spaces.
Row 5
In the first ch-1 space, work (3 dc, ch 1). Repeat (3 dc, ch 1) in each ch-1 space across to the last space. In the last ch-1 space, work (3 dc, ch 1, dc). Chain 4 and turn.
Rows 6–19
Repeat Row 5 for Rows 6–19.
During these repeated rows, maintain the same stitch placement. Work the granny stitch clusters into the ch-1 spaces and remember the special ending sequence in the last ch-1 space.
Row 20: Strap Row
In the first ch-1 space, work (3 dc, ch 1). In the next 18 ch-1 spaces, work (3 dc, ch 1). In the last ch-1 space, work (3 dc, ch 1, dc).
Chain 35 to form the first strap. Fasten off.
Join yarn to the opposite corner and ch 35 to form the second strap. Fasten off and weave in all ends using a yarn needle.
Adult Size: Complete Row Progression
The adult size follows the same beginning sequence as the child size. The difference is that the repeated body section continues farther before the straps are added.
Rows 1–4
Work Rows 1 through 4 using the same instructions as the child version.
Row 5
In the first ch-1 space, work (3 dc, ch 1). Repeat (3 dc, ch 1) in each ch-1 space across to the last space. In the last ch-1 space, work (3 dc, ch 1, dc). Chain 4 and turn.
Rows 6–23
Repeat Row 5 for Rows 6–23.
As with the child version, consistency is more important than speed. Check the ch-1 spaces and the final space regularly so that the triangular shape continues to develop evenly.
Row 24: Strap Row
In the first ch-1 space, work (3 dc, ch 1). In the next 22 ch-1 spaces, work (3 dc, ch 1). In the last ch-1 space, work (3 dc, ch 1, dc).
Chain 35 to form the first strap. Fasten off.
Join yarn to the opposite corner and ch 35 to form the second strap. Fasten off and weave in all ends using a yarn needle.
How to Keep Your Place While Repeating Row 5
Repeated rows are convenient, but they can also make it easy to lose track of where you are. This is particularly true if you put the project down between sessions. A simple way to avoid confusion is to record the last completed row before taking a break.
Stitch markers can also be used as visual aids. The source lists stitch markers among the materials, and they can be useful when you are learning to identify the spaces across the growing triangular fabric.
Remember the two major checkpoints:
- Every regular row begins with (3 dc, ch 1) in the first ch-1 space.
- Every regular row ends with (3 dc, ch 1, dc) in the last ch-1 space, followed by Ch 4, turn.
Keeping these two points in mind gives you a reliable framework for understanding the repeated instructions.
Working Into Chain Spaces Correctly
The granny stitch clusters are worked into the chain spaces rather than into the individual double crochet stitches. This is a key feature of the pattern.
When you look at the fabric, the ch-1 spaces create small openings between groups of double crochets. These openings are the locations where the next granny clusters are worked.
If you accidentally work into a double crochet instead of the intended ch-1 space, the texture and shape can change. When in doubt, pause and identify the next visible chain space before inserting the hook.
Checking the Edges as You Work
Because the project grows from the top point downward, the side edges are useful indicators of whether your work is progressing correctly. The increases should create an expanding triangular shape.
If one side appears noticeably different from the other, review the most recent row. Check whether every intended ch-1 space received its granny stitch cluster and whether the final space received the complete (3 dc, ch 1, dc) sequence.
It is much easier to review one recent row than to continue for several more rows and discover the issue later.
Creating the Straps Without Twisting Them
The straps are created directly from the corners of the completed triangular fabric. Each strap consists of ch 35.
After making the first strap, fasten off. Then join yarn to the opposite corner and create the second strap with another ch 35. The same strap length is used for both child and adult sizes.
Before weaving in all of your ends, lay the bandana flat and compare the two straps. They should be even and untwisted. This simple inspection can help ensure that the completed accessory sits neatly when tied.
Finishing the Crochet Bandana
Once both straps have been created, the main crochet work is complete. Fasten off and use a yarn needle to weave in all loose ends securely along the edges and strap chains.
Do not skip the finishing step. Securely woven ends help the project look polished and prepare it for regular wear or gifting.
After weaving in the ends, lay the bandana flat. Check that the triangular shape looks even and that both straps are positioned correctly.
Optional Blocking
The source pattern gives you the option of lightly steam blocking or wet blocking the finished bandana. Blocking can help the piece lay flat and show off the granny stitch texture.
Blocking is an optional finishing technique rather than a required part of the construction. If you decide to use it, allow the bandana to dry completely before wearing it.
For a first-time crocheter, it can be useful to finish the weaving-in process before deciding whether the fabric needs additional shaping. Lay the completed bandana flat and see how naturally it settles.
Finishing and Quality Check
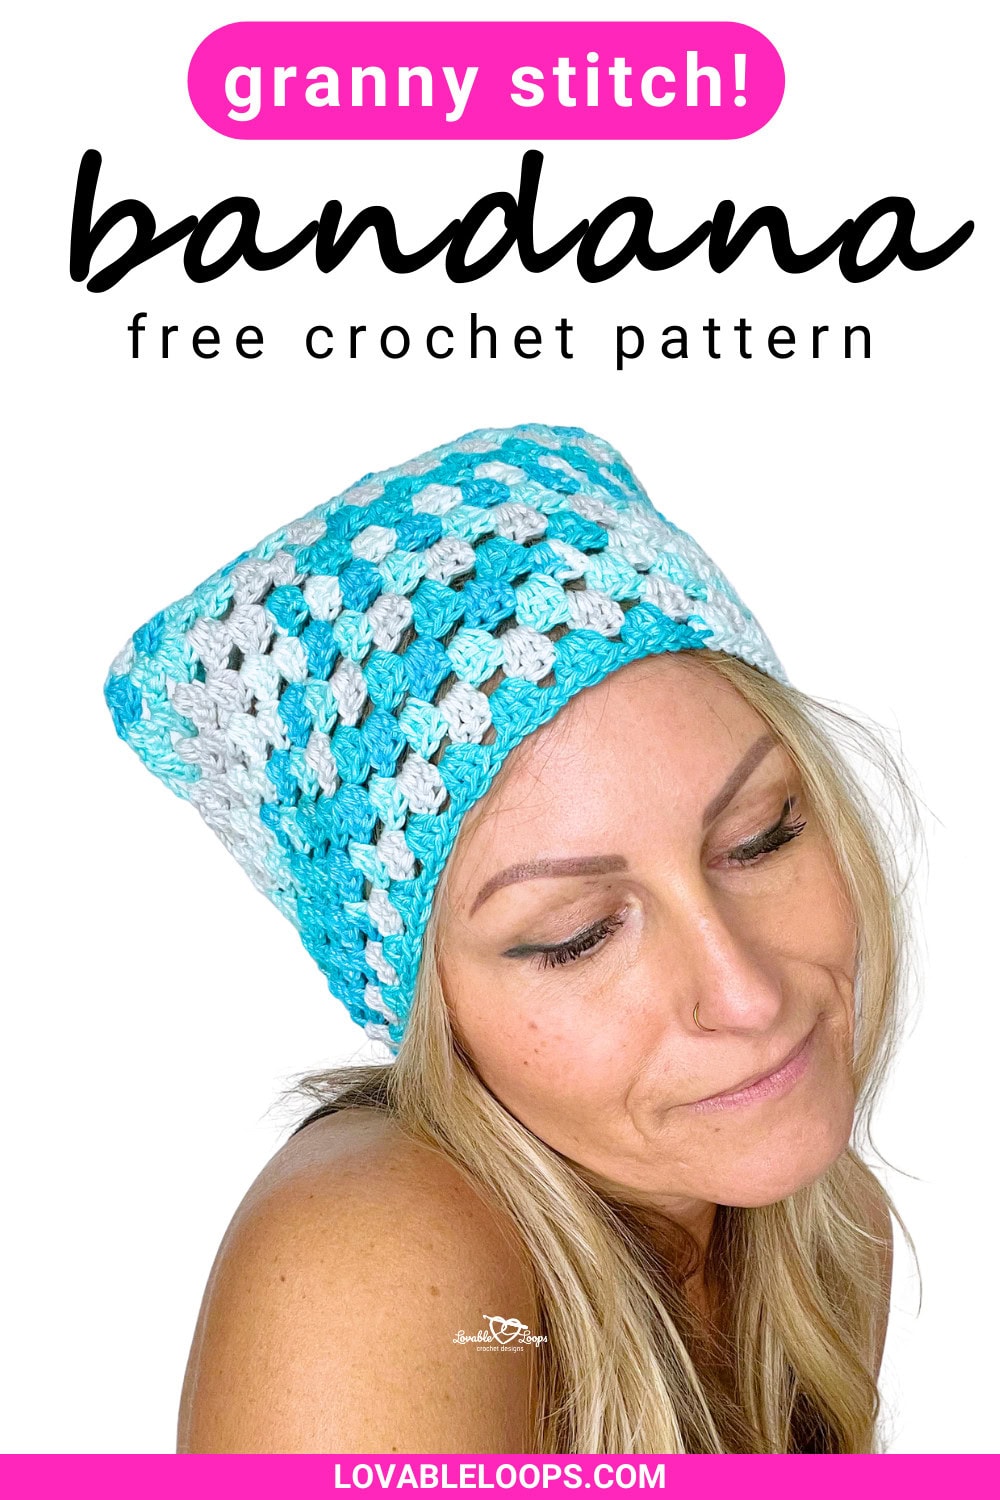
Before considering the project completely finished, perform a quick visual inspection. Look over the triangular body, both corners, the straps, and the woven-in ends.
- Are both straps present?
- Does each strap contain ch 35?
- Are the straps attached at opposite corners?
- Are the straps even?
- Are the straps untwisted?
- Have all loose ends been woven in?
- Does the triangular body lie flat?
- Would optional blocking improve the finished appearance?
These checks do not change the pattern itself. They simply provide a practical way to inspect the finished work before wearing or gifting it.
Common Issues and How to Review Your Work
The triangular shape looks uneven
Check the placement of the granny stitch clusters. The clusters should be worked into the indicated ch-1 spaces. Also check the final space of the row and make sure the complete (3 dc, ch 1, dc) sequence was worked there.
I cannot find the next place to work
Look for the next ch-1 space. The pattern is structured around these spaces, so they provide the most useful visual guide for locating the next cluster.
My bandana is a little larger or smaller
The stated measurements are approximate, and the source notes that finished dimensions may vary slightly according to yarn choice and tension. Compare your work with the stated gauge of 5 granny stitch clusters per 4 inches (10 cm) and 9 rows per 4 inches (10 cm).
The straps do not match
Both straps are made with ch 35. Check that you chained the same number for each strap and that your chain tension remained reasonably consistent.
Child Size Quick Reference
- Finished size: approximately 9 inches wide × 17 inches tall (23 cm × 43 cm)
- Rows 1–4: Follow the individual instructions.
- Row 5: Complete the main repeated granny stitch row.
- Rows 6–19: Repeat Row 5.
- Row 20: Strap row.
- First strap: ch 35.
- Second strap: ch 35.
Adult Size Quick Reference
- Finished size: approximately 10 inches wide × 20.5 inches tall (25 cm × 52 cm)
- Rows 1–4: Follow the individual instructions.
- Row 5: Complete the main repeated granny stitch row.
- Rows 6–23: Repeat Row 5.
- Row 24: Strap row.
- First strap: ch 35.
- Second strap: ch 35.
A Practical Beginner Workflow
If you prefer to approach the project in stages, use the following workflow. Start by preparing your hook, yarn, and supporting tools. Then review the abbreviations and special stitch before making the magic ring.
- Gather the H-8 (5 mm) hook and worsted weight yarn #4.
- Prepare the yarn needle, scissors, and stitch markers.
- Review the US crochet abbreviations.
- Review the granny stitch cluster: (3 dc, ch 1).
- Make the magic ring.
- Complete Row 1.
- Work Rows 2–4 carefully while identifying each ch-1 space.
- Complete Row 5.
- Repeat Row 5 according to the chosen size.
- Work the correct strap row.
- Chain 35 for the first strap.
- Fasten off.
- Join yarn at the opposite corner.
- Chain 35 for the second strap.
- Fasten off.
- Weave in all loose ends with a yarn needle.
- Check the straps for evenness and twisting.
- Lightly steam block or wet block if desired.
- Allow the bandana to dry completely if blocking was used.
Using the Granny Stitch as a Visual Guide
One of the most helpful aspects of this project is that the fabric itself can help you understand where you are. Each granny cluster forms a recognizable group of three double crochets separated by a chain 1. As the project grows, these groups become repeated visual landmarks.
Instead of viewing the pattern as a long series of individual stitches, look at each granny cluster as one unit. Then identify the ch-1 space between the clusters. This approach can make it easier to locate the correct insertion point for the next group.
The final space remains different. Remember that the last ch-1 space receives (3 dc, ch 1, dc). Keeping this final edge structure consistent is essential to the intended increase pattern.
Why This Is a Useful Practice Project
This bandana provides practice with several fundamental crochet skills in one relatively compact project. You work a magic ring, create double crochet groups, use chain spaces, turn rows, repeat a stitch sequence, maintain increasing edges, create chain straps, and finish the project with a yarn needle.
For an advanced beginner, this combination offers a useful way to reinforce pattern-reading skills without introducing a complicated construction. The repeated rows also give you plenty of opportunities to become comfortable with the granny stitch rhythm.
Because the project is worked in rows, it is also easy to pause and return to later. Keeping track of the completed row number will help you resume the correct section, especially when making the adult version with its longer repeated section.
Pattern Notes to Remember
- The pattern uses the corner-to-corner granny stitch technique.
- The bandana is worked from the top point down.
- The triangle increases evenly each row.
- The pattern begins with a magic circle.
- The tie strings are made with simple chains.
- The 3 dc made in the same space create the granny clusters.
- The pattern is written in US crochet terms.
Finished Project Inspiration
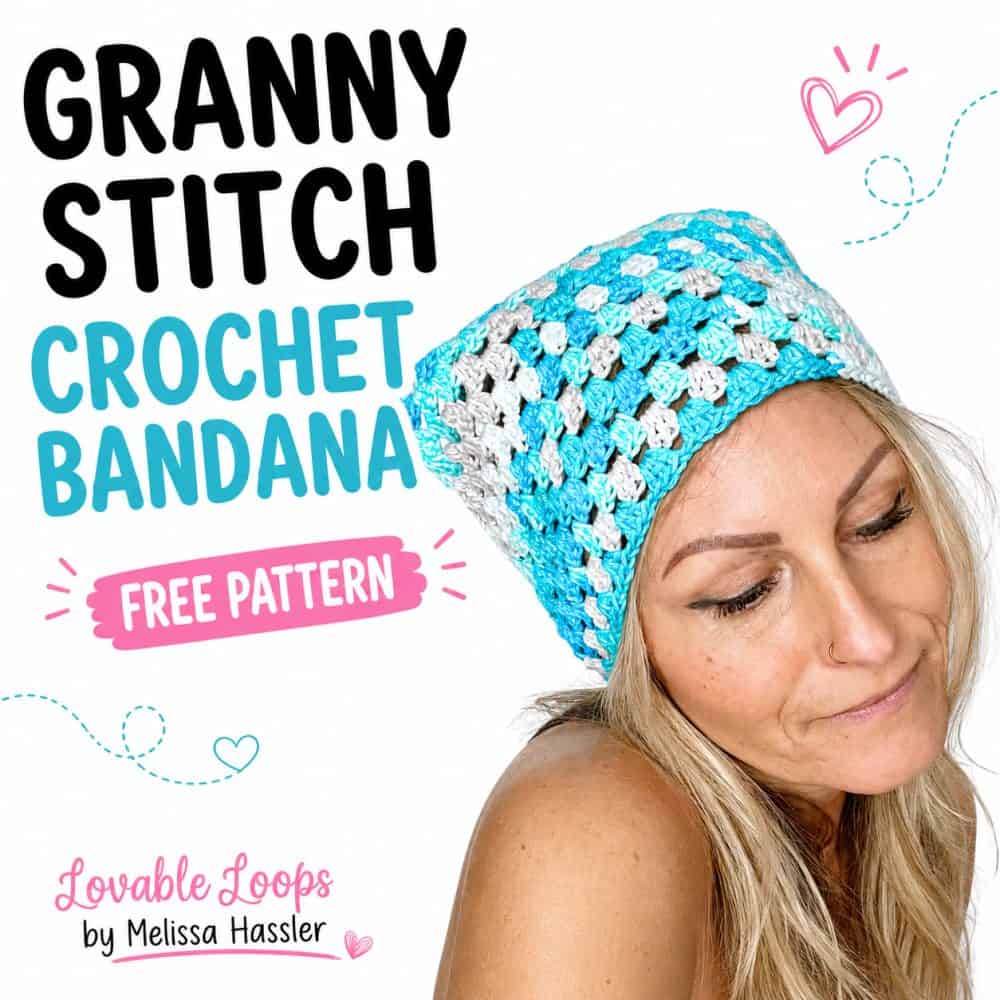
Once completed, the bandana becomes a compact handmade accessory that can be used as part of an everyday outfit. Its simple triangular silhouette gives it a classic appearance, while the granny stitch provides visual texture across the fabric.
The project can also be useful when you want to make handmade gifts. Since the pattern includes both child and adult sizes, you can select the appropriate version without learning an entirely different construction.
The source also describes the bandana as suitable for craft fairs. Its relatively straightforward construction and size flexibility make it a practical small crochet project for a handmade collection.
Frequently Asked Questions
What skill level is required?
The pattern is considered an advanced beginner project. You should be comfortable with basic crochet stitches, working in rows, and reading simple pattern instructions.
What hook size does the pattern use?
The specified crochet hook is H-8 (5 mm).
What yarn weight should I use?
The pattern calls for worsted weight yarn #4.
What are the finished sizes?
The child size is approximately 9 inches wide × 17 inches tall (23 cm × 43 cm). The adult size is approximately 10 inches wide × 20.5 inches tall (25 cm × 52 cm).
What is the gauge?
The stated gauge is 5 granny stitch clusters = 4 inches (10 cm) and 9 rows = 4 inches (10 cm).
What stitch creates the main texture?
The main texture comes from the C2C granny stitch cluster, which is made with (3 dc, ch 1) in the indicated space.
When do I add the straps for the child size?
The child size uses Row 20 as the strap row. After completing the specified granny stitch work, chain 35 for the first strap, fasten off, then join yarn to the opposite corner and chain 35 for the second strap.
When do I add the straps for the adult size?
The adult size uses Row 24 as the strap row. The first and second straps are each made with ch 35.
Can the size be adjusted?
The source notes that the bandana can be made larger or smaller by adding or removing rows. Because the body grows through repeated rows, changing the number of rows changes the finished dimensions.
Should I block the bandana?
Blocking is optional. The finishing instructions suggest lightly steam blocking or wet blocking if desired to help the bandana lay flat and show off the granny stitch texture. Allow it to dry completely before wearing it.
Final Project Checklist
- H-8 (5 mm) crochet hook used.
- Worsted weight yarn #4 used.
- Magic ring completed securely.
- Rows 1–4 followed correctly.
- Row 5 established the repeated granny stitch structure.
- Child size completed through Row 20 or adult size through Row 24.
- Each strap made with ch 35.
- Second strap joined at the opposite corner.
- All ends woven in with a yarn needle.
- Both straps checked for evenness.
- Both straps checked to ensure they are untwisted.
- Optional blocking completed if desired.
- Bandana allowed to dry completely after blocking.
Final Thoughts on the Granny Stitch Bandana
This crochet bandana is a great example of how a familiar stitch can be transformed into a practical wearable project. The design does not rely on complicated shaping. Instead, the triangular form develops naturally from the increasing granny stitch rows.
The most important part of the pattern is understanding the relationship between the granny clusters and the ch-1 spaces. Once that relationship becomes familiar, the repeated rows are straightforward to work. The final space of each row deserves special attention because it receives (3 dc, ch 1, dc), which maintains the edge shaping.
The child version works through Row 19 before using Row 20 for the straps, while the adult version continues through Row 23 before using Row 24 as the strap row. Both versions use two ch 35 straps.
After the crochet work is finished, weaving in the ends and checking the straps completes the construction. Optional light steam blocking or wet blocking can help the finished piece lay flat and highlight the granny stitch texture.
Whether you are making the child size or adult size, this project offers an enjoyable way to practice the granny stitch while creating an accessory that can be worn, gifted, or included in a handmade collection. With its simple construction and recognizable texture, the granny stitch crochet bandana is a rewarding project for any advanced beginner ready to turn basic crochet skills into a finished wearable piece.