
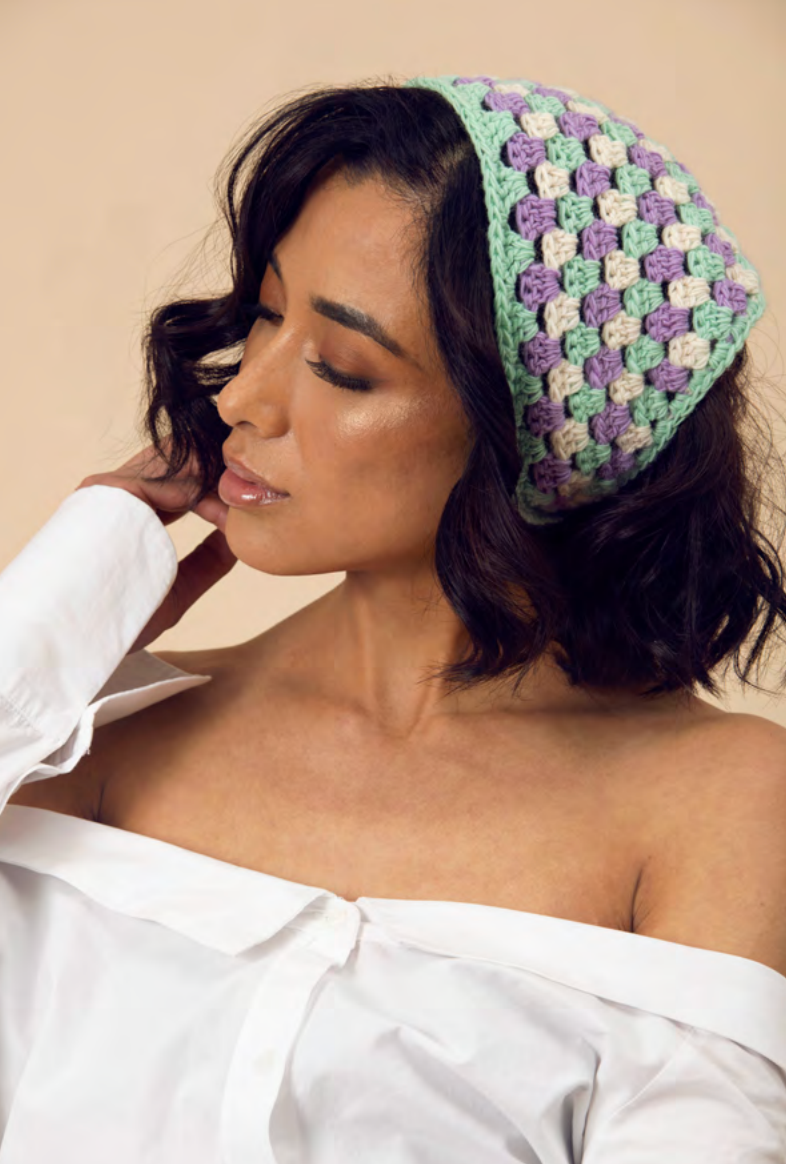
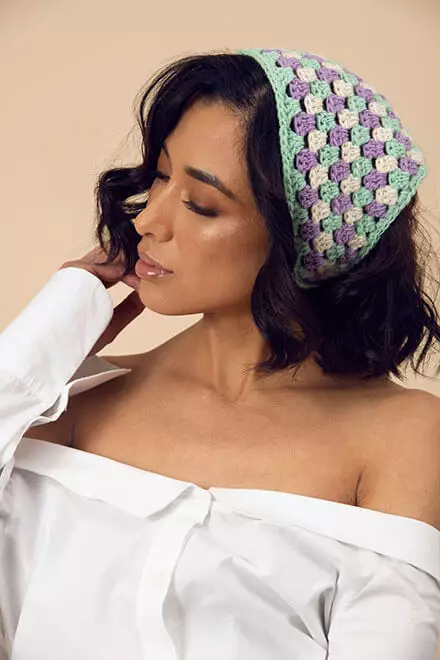
The Sofia Bandana by Toni Lipsey is an easy crochet accessory built around a simple expanding triangle, repeated 3dc groups, chain-1 spaces, and a three-color striping technique. The result is a lightweight-looking handmade head accessory with a distinctive geometric texture and two long ties for securing the bandana in place.
This photo-guided tutorial is designed to make the original construction easier to follow from the first foundation chain through the final finishing steps. The technical information remains based on the original Sofia Bandana pattern, including the hook size, yarn quantities, colors, gauge, finished measurements, row numbers, color changes, stitch placement, and finishing instructions.
The pattern is worked in one size and has a finished measurement of 18 inches wide by 8 inches long. The main body is completed through Row 18. After that, the finishing section creates the two ties and works an edging around the triangular piece.
One of the defining features of this project is the way the colors are handled. The pattern uses a three-stripe technique and specifically instructs the crocheter not to cut the yarn when changing colors. Instead, the yarn is carried up the side of the work. This makes the color sequence much more manageable and avoids fastening off after every row.
What Makes the Sofia Bandana Special?
The Sofia Bandana is a good example of how a relatively compact crochet project can create a detailed visual effect through repetition. The body does not rely on complicated shaping instructions. Instead, the triangular form develops as additional 3dc groups and chain-1 spaces are added across the rows.
The pattern is rated Easy, making it approachable for crocheters who are comfortable with basic double crochet, chain stitches, turning, and simple color changes. The three-color technique adds another skill without requiring the crocheter to cut and rejoin the yarn constantly.
The finished sample shows the colors arranged in alternating rows of clustered stitches. The combination of the triangular shape and contrasting colors gives the accessory a playful appearance while keeping the construction relatively straightforward.
Project Details at a Glance
- Pattern: Sofia Bandana
- Designer: Toni Lipsey
- Skill level: Easy
- Size: One
- Finished measurements: 18 inches wide x 8 inches long
- Hook: US I/9 (5.5mm) crochet hook or size needed to obtain gauge
- Yarn: AMANO SKINNY YANA
- Yarn weight information in source: 100g per 437yd hank
- Technique: Three-stripe color technique
- Yarn handling: Hold yarn double throughout
Materials for the Sofia Bandana
Gather everything before starting so you can concentrate on the stitch sequence and color changes once the project is underway.
- A: 1 hank AMANO SKINNY YANA, 100g per 437yd hank, #1502 Blanca, 55 yards.
- B: 1 hank AMANO SKINNY YANA, 100g per 437yd hank, #1516 [Unknown], 55 yards.
- A: 1 hank AMANO SKINNY YANA, 100g per 437yd hank, #1512 Botanical, 115 yards.
- Hook: US I/9 (5.5mm) crochet hook or size needed to obtain gauge.
- Scissors.
- Tapestry needle.
The materials section of the source labels the first two yarns A and B and prints the third yarn line with A as well. The row instructions use A, B, and C for the three-color sequence. That labeling has been retained here rather than changing the source information.
The instruction to hold the yarn double throughout is essential. Keep the yarn doubled consistently while working the main body and the finishing instructions.
Gauge and Finished Size
Before beginning the full bandana, check your gauge. The pattern gives the following measurements:
- 3.5 inches = 4 3dc groups
- 3.75 inches = 8 rows
The source instructs you to adjust the hook to meet gauge. The recommended hook is a US I/9 (5.5mm), but individual crochet tension can vary, so the hook should be adjusted if necessary to achieve the stated gauge.
The finished size is one size, measuring 18 inches wide by 8 inches long.
Gauge is particularly useful for this project because the body is built over repeated rows. If your row height differs significantly from the stated gauge, the finished proportions can change by the time you reach Row 18.
Before You Begin: Five Important Pattern Rules
Read these notes before making the first stitch. They explain several details that affect the entire project.
- The starting ch-4 counts as dc + ch 1.
- The pattern uses a 3 stripe technique.
- Do not cut yarn when changing color.
- Carry yarn up the side of the work.
- Change color on the last stitch of each row unless otherwise instructed.
The source also specifies that the yarn should be held double throughout.
These instructions work together. The color changes are not intended to be handled like separate color blocks where each yarn is cut after every row. Instead, the colors remain attached and are carried upward along the side.
How the Triangular Body Is Built
The main body begins at a narrow point and becomes wider with each row. The stitch structure is based on groups of three double crochet stitches, with chain-1 spaces between the groups.
For easier reading, think of each ch-1 space as a placement landmark. When the pattern says to work 3dc in a ch-1 space, locate that space first and then make the complete 3dc group inside it.
The turning chain also matters. Because the starting ch-4 counts as dc + ch 1, it contributes to the structure of the row and should not be treated as an ordinary chain that is ignored.
Photo Guide: The Finished Look
The sample image gives a useful visual reference for the final shape. The bandana sits across the head with the wider edge following the upper part of the head and the narrow point extending toward the back. The contrasting clusters make the three-color sequence easy to see.

The side view is also helpful for understanding why the finishing instructions include two chains of 65. These chains become the ties extending from the sides of the completed bandana.
Row-by-Row Crochet Instructions
Row 1 (WS)
Begin with Color A.
With A, ch 5, (3dc, ch 1, dc) in 5th ch from hook, turn, cc to B.
This first row creates the initial stitch structure. Work the specified stitches into the fifth chain from the hook, then turn the work.
At the end of Row 1, change color to B. Do not cut the yarn. The pattern’s three-stripe technique depends on carrying the unused yarn upward rather than fastening it off.
Row 2 (RS)
Continue with B.
Ch 4, 3dc in first ch-1 sp, ch 1, 3dc in tch sp, ch 1, dc in 3rd ch of tch, turn, cc to C.
This row expands the fabric by adding another 3dc group. Pay attention to the first ch-1 space and the turning-chain space because they are different placement points within the row.
After completing the row, turn and change to C.
Row 3
With C, work:
Ch 4, 3dc in first ch-1 sp, ch 1, 3dc in next ch-1 sp, ch 1, 3dc in tch sp, ch 1, dc in 3rd ch of tch, turn, cc to A.
Row 3 adds another 3dc group into the next available ch-1 space. At this point, the triangular expansion should become easier to recognize.
Finish the row, turn, and change color to A.
Row 4: Establishing the Repeat
Row 4 is the key row to understand because it becomes the reference for the rest of the main body.
Ch 4, 3dc in first ch-1 sp, ch 1, (3dc in next ch 1 sp, ch 1) to tch, 3dc in tch sp, ch 1, dc in 3rd ch of tch, cc to next color.
The section inside parentheses is repeated across the available chain-1 spaces until the turning chain is reached. This creates the repeating cluster pattern that continues through the remaining rows.
Once Row 4 is complete, change to the next color as instructed.
Rows 5-18: The Main Repeating Section
After Row 4, the pattern becomes much easier to organize because the same row is repeated.
Rows 5-18: Repeat Row 4, maintaining color changes. Cc to A at the end of Row 18. Fasten off A and B.
The important phrase here is “maintaining color changes.” The stitch sequence repeats, but the color sequence continues as established by the pattern.
As you work these rows, use the ch-1 spaces as visual checkpoints. Each space is an important location for the next 3dc group. If you lose track of where you are, look for the spaces rather than trying to count every double crochet individually.
Keep the carried yarn controlled along the side of the work. Avoid accidentally catching the unused strand into the visible front of the fabric.
A Simple Checkpoint System for Rows 5-18
Because Rows 5-18 repeat Row 4, you can make the process easier by checking the fabric at regular intervals.
Check the First Space
At the beginning of the row, identify the first ch-1 space before making the first 3dc group.
Check the Middle of the Row
As you repeat the 3dc and ch-1 sequence, make sure the groups are being placed into the next ch-1 spaces rather than into individual double crochet stitches.
Check the Turning Chain
At the end of the row, follow the placement around the turning-chain space exactly as written in Row 4.
Check the Color
Before turning, confirm the color change required at the end of the row. The pattern generally changes color on the last stitch unless otherwise instructed.
This checkpoint approach does not change the pattern. It simply provides a practical way to keep track of the repeated construction.
Completing Row 18
Row 18 completes the main triangular section.
Continue the Row 4 repeat while maintaining the color changes. At the end of Row 18, change to A. Then fasten off A and B as instructed.
This is a useful point to pause and inspect the main body before beginning the finishing work. The finished measurements given by the source are 18 inches wide by 8 inches long.
Adding the First Tie
The finishing instructions begin with the first tie:
Ch 65, hdc in 3rd ch from hook and each ch across.
Work carefully across the foundation chain. The tie is intentionally long and is created from a chain of 65 followed by half double crochet stitches beginning in the third chain from the hook.
After completing the chain section, rotate the work so that you can begin working along the row ends.
Working Down the Side to the Bottom Point
The next instruction is:
2sc in the end of each row to the chain at the bottom tip of bandana, 3sc in the chain, 2sc in the end of each row to the next corner.
This section follows the outer edges of the triangular body. Work 2sc in the end of each row until reaching the chain at the bottom tip.
At the bottom tip, work 3sc in the chain. This allows the edging to turn around the point before continuing up the other side.
Continue with 2sc in the end of each row until reaching the next corner.
Making the Second Tie
At the next corner, create the second tie:
Ch 65, hdc in 3rd ch from hook and each ch across.
The second tie follows the same chain and half-double-crochet construction as the first. Keeping the same chain length gives the two ties a matching appearance.
Finishing the Top Edge
Once the second tie is complete, work along the top of Row 18.
Working along the top of Row 18, sc in each st and ch-1 sp across to last st, sl st in last st. Fasten off A.
This final edging connects the finishing work around the complete outer shape. Pay attention to both stitches and chain-1 spaces because the instruction specifically calls for a single crochet in each.
After reaching the last stitch, work the specified slip stitch and fasten off A.
How to Keep the Edging Neat
The finishing stage follows the existing triangular shape, so consistent tension is useful. Avoid pulling the single crochet stitches excessively tight around the corners or bottom point.
At the lower tip, remember that the source specifically instructs you to work 3sc in the chain. This is different from the 2sc worked into the row ends along the sides.
When working across the top of Row 18, remember that both stitches and ch-1 spaces are included in the single crochet instruction.
Finishing the Bandana
The official finishing instructions are concise:
- Weave in all remaining ends.
- Steam block lightly as needed.
Use the tapestry needle to secure any remaining yarn ends. Because the colors are carried rather than cut at every row, the project does not require a separate fastening-off step for every stripe, but the remaining ends should still be woven in securely.
If the completed fabric needs a little help settling into its final shape, the pattern allows for light steam blocking as needed. Keep the blocking light and use it as a finishing step rather than as a way to compensate for incorrect gauge.
Beginner Tips for a Smoother Crochet Session
The Sofia Bandana is rated Easy, but the three-color technique can feel unfamiliar if you have mostly worked with one color at a time. The following tips can help without changing any of the original instructions.
- Keep all three colors organized before starting.
- Hold the yarn double throughout.
- Do not cut the yarn when changing colors.
- Carry the yarn up the side as instructed.
- Check the color before beginning every new row.
- Use the ch-1 spaces as placement landmarks.
- Remember that the starting ch-4 counts as dc + ch 1.
- Use Row 4 as the reference for Rows 5-18.
- Check your gauge before completing the full body.
- Keep your tension consistent when working the finishing edging.
What to Do If the Fabric Looks Uneven
If the triangular body starts looking uneven, avoid immediately changing the pattern. First, inspect the placement of the 3dc groups and ch-1 spaces.
Since Rows 5-18 repeat Row 4, an uneven section may be caused by a missed ch-1 space or a cluster worked in the wrong location. Compare the current row with the Row 4 instructions and check the placement before continuing.
If the overall dimensions are different from the expected measurements, check gauge. The pattern specifies 3.5 inches for 4 3dc groups and 3.75 inches for 8 rows, and it instructs you to adjust the hook to meet gauge.
Color-Change Troubleshooting
The three-color technique becomes easier once the yarn is treated as a continuous working system rather than three separate projects.
Do not cut the yarn after each color change. Instead, carry the unused yarn up the side of the work. Change color on the last stitch of each row unless the instructions say otherwise.
During Rows 1-4, pay particular attention to the explicit color sequence:
- Row 1: change to B.
- Row 2: change to C.
- Row 3: change to A.
- Row 4: change to the next color.
For Rows 5-18, continue maintaining the color changes while repeating Row 4.
Quick Construction Checklist
- Prepare the three listed AMANO SKINNY YANA colors.
- Prepare the US I/9 (5.5mm) crochet hook or the hook size needed to obtain gauge.
- Prepare scissors and a tapestry needle.
- Hold yarn double throughout.
- Check the gauge of 3.5 inches = 4 3dc groups.
- Check the gauge of 3.75 inches = 8 rows.
- Begin Row 1 with A.
- Change to B after Row 1.
- Change to C after Row 2.
- Change to A after Row 3.
- Complete Row 4 and establish the repeating structure.
- Repeat Row 4 through Row 18.
- Maintain the color changes without cutting the yarn.
- Change to A at the end of Row 18.
- Fasten off A and B.
- Make the first ch-65 tie and work hdc across it.
- Work 2sc along the row ends to the bottom tip.
- Work 3sc in the chain at the bottom tip.
- Continue with 2sc along the row ends to the next corner.
- Make the second ch-65 tie and work hdc across it.
- Work sc in each stitch and ch-1 space along the top of Row 18.
- Sl st in the last stitch.
- Fasten off A.
- Weave in remaining ends.
- Steam block lightly as needed.
Sofia Bandana Stitch Reference
The source provides a detailed abbreviation and terminology list. The following terms are retained from the original pattern:
- Beg: Beginning
- Bor: Beginning of round
- Bpdc: Back post double crochet
- CC: Change color
- Ch: Chain
- CO: Cast n
- Dc: Double crochet
- Dc2tog: Double crochet 2 stitches together, 1 stitch decreased
- Dec’d: Decreased
- Esc: Extended single crochet
- Est’d: Established
- Fpdc: Front post double crochet
- Hdc: Half double crochet
- Inc’d: Increased
- K: Knit
- K2tog: Knit 2 stitches together. 1 stitch decreased.
- K3tog: Knit 3 stitches together. 2 stitches decreased.
- M: Marker
- M1L: Insert left needle, from front to back, under the horizontal strand which lies between the stitch just knit, and the following stitch; then knit into the back of this loop. 1 stitch increased.
- M1R: Insert left needle, from back to front, under the horizontal strand which lies between the stitch just knit, and the following stitch; then knit into this loop. 1 stitch increased.
- P: Purl
- P3tog: Purl 3 stitches together. 2 stitches decreased.
- Patt: Pattern
- PM: Place marker
- Pwise: Purlwise
- Rem: Remain
- Rep: Repeat
- Rnd: Round
- RS: Right side
- Sc: Single crochet
- Sl: Slip
- Sl st: Slip stitch
- Sm: Slip Marker
- Sp: Space
- Ssk: Slip next 2 stitches, individually, knitwise. Return them to the left needle without twisting and knit them together through the back loop. 1 stitch decreased.
- St st: Stockinette stitch
- St(s): Stitch(es)
- W&T: Wrap and turn
- Yo: Yarn over
Frequently Asked Questions
Is the Sofia Bandana suitable for beginners?
The source lists the skill level as Easy. The main construction uses double crochet groups, chain-1 spaces, turning chains, and a repeating row structure. The main additional technique is carrying the yarn along the side during color changes.
What size is the finished Sofia Bandana?
The pattern is available in one size and gives finished measurements of 18 inches wide by 8 inches long.
What crochet hook size is recommended?
The pattern specifies a US I/9 (5.5mm) crochet hook or the size needed to obtain gauge.
How much yarn is listed?
The materials section lists 55 yards of #1502 Blanca, 55 yards of #1516 [Unknown], and 115 yards of #1512 Botanical, using AMANO SKINNY YANA at 100g per 437yd hank.
Do I hold one strand or two?
The pattern specifically says to hold yarn double throughout.
Should I cut the yarn when changing colors?
No. The three-stripe technique requires the yarn to be carried up the side of the work rather than cut at each color change.
What happens after Row 4?
Rows 5-18 repeat Row 4 while maintaining the color changes. At the end of Row 18, change to A and fasten off A and B.
How are the ties made?
Each tie begins with ch 65, followed by hdc in the third chain from the hook and each chain across.
What is worked at the bottom point?
The finishing instructions call for 3sc in the chain at the bottom tip of the bandana, with 2sc worked in the ends of the rows along the sides.
How is the top edge finished?
Working along the top of Row 18, work sc in each stitch and ch-1 space across to the last stitch, then sl st in the last stitch and fasten off A.
Is blocking required?
The finishing instructions say to steam block lightly as needed.
Final Inspection Before Wearing
When the crochet work is complete, take a moment to inspect the entire bandana. The main body should reflect the repeated 3dc and ch-1 structure established in Row 4. The color sequence should remain consistent, and the yarn should have been carried rather than cut at every color change.
Check that both ties were started with ch 65 and worked with hdc from the third chain from the hook. Inspect the lower point to confirm that the 3sc instruction was followed, and check the top edge to make sure the sc stitches were worked in each stitch and ch-1 space as instructed.
Finally, secure the remaining ends with the tapestry needle. If the finished piece would benefit from additional shaping, the source permits light steam blocking as needed.
Conclusion
The Sofia Bandana is an enjoyable project for crocheters who want to combine a simple triangular construction with a striking three-color effect. Its Easy skill level makes the basic structure approachable, while the carried-color technique provides useful practice for anyone learning to manage several yarn colors without repeatedly fastening off.
The project begins with a small five-chain foundation and grows through Rows 1-18. The first three rows establish the color sequence and expanding stitch structure, while Row 4 introduces the repeat that carries the project through the remaining main-body rows.
The finishing stage completes the accessory by adding two ch-65 ties, edging the sides and bottom point with single crochet, and working single crochet across the top of Row 18. Once the remaining ends are woven in and the piece is lightly steam blocked as needed, the bandana is ready to wear.
For the most consistent result, focus on the details that define the original pattern: hold the yarn double, meet the stated gauge, keep the three colors attached, carry the yarn up the side, respect the specified color changes, and use Row 4 as the reference for Rows 5-18. Those small checkpoints make the entire Sofia Bandana much easier to manage from beginning to end.