
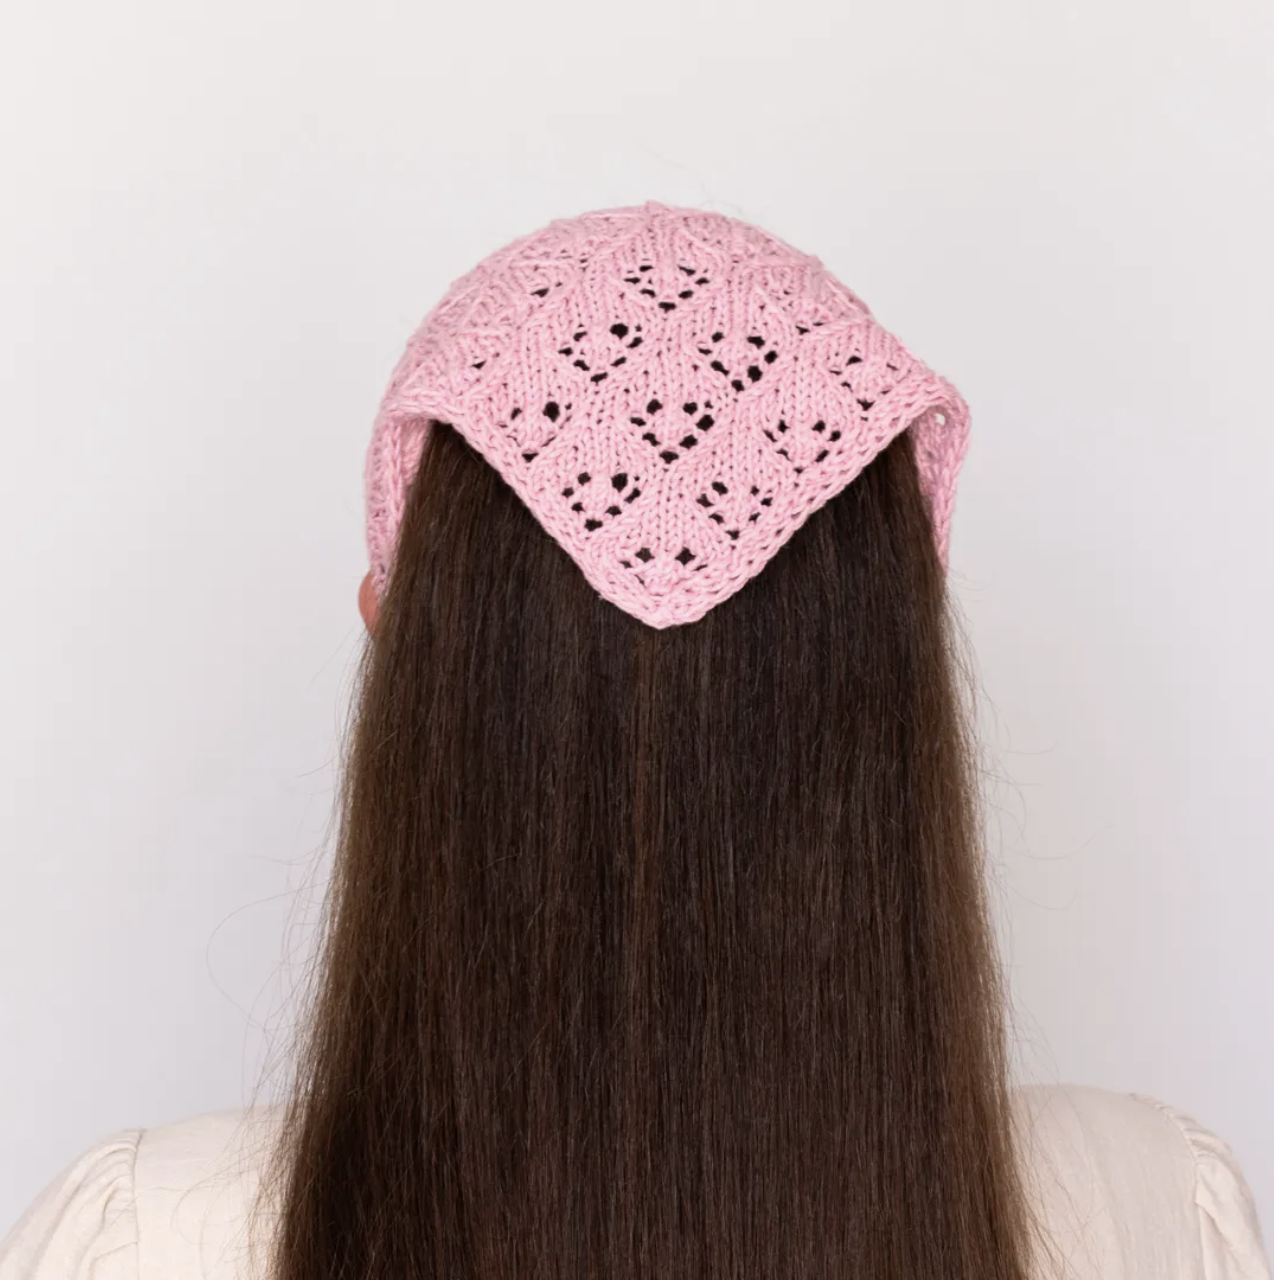
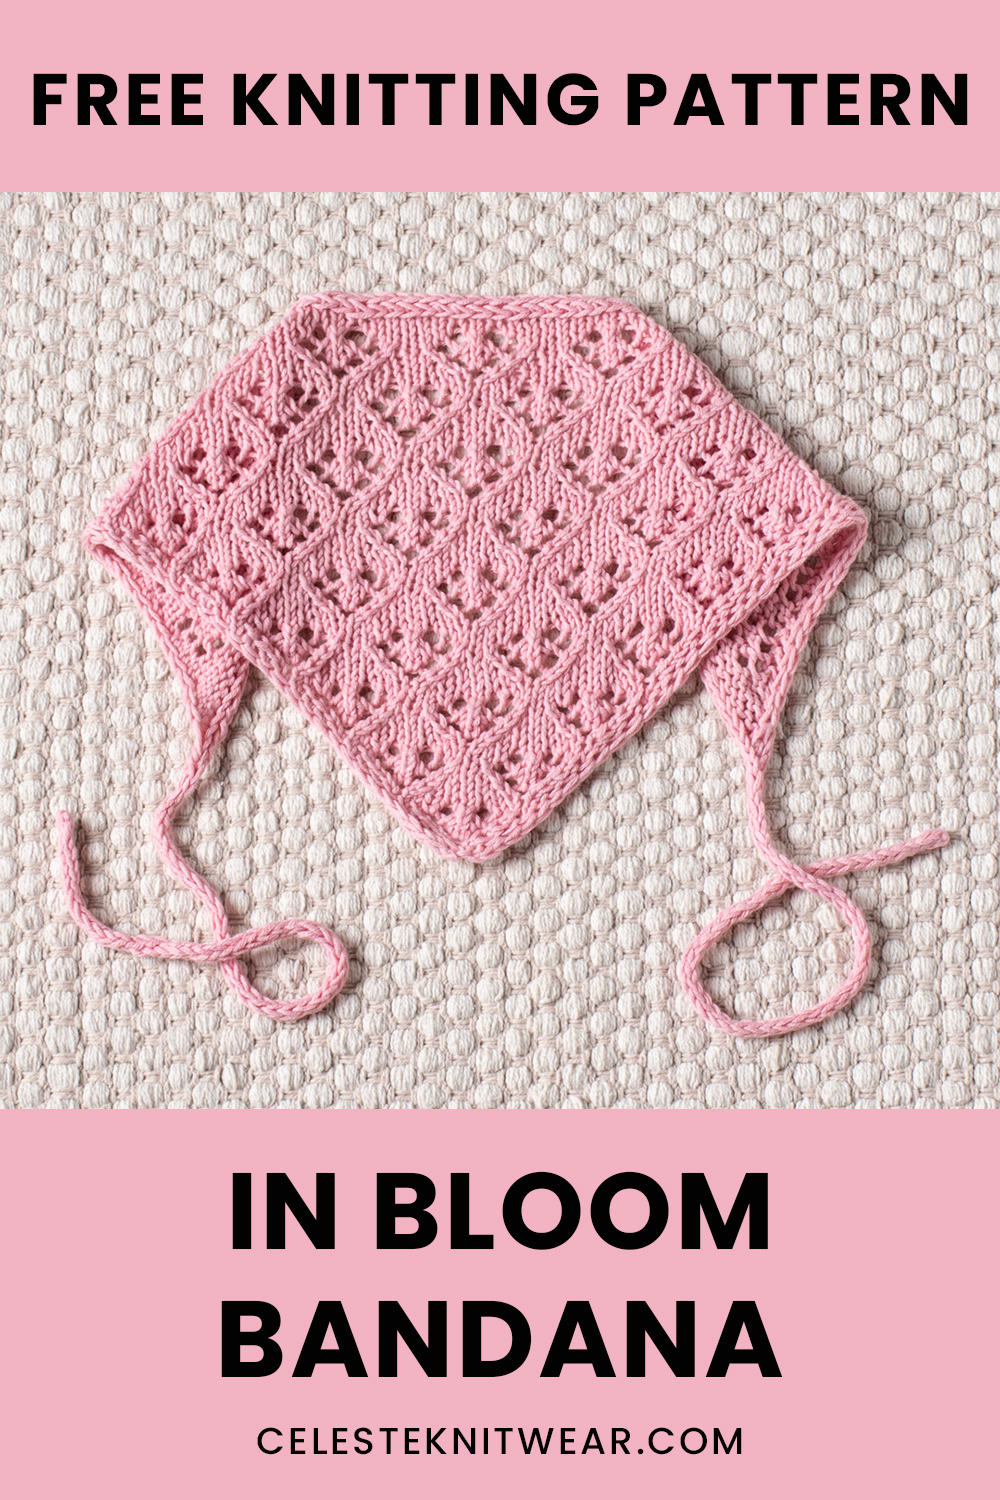
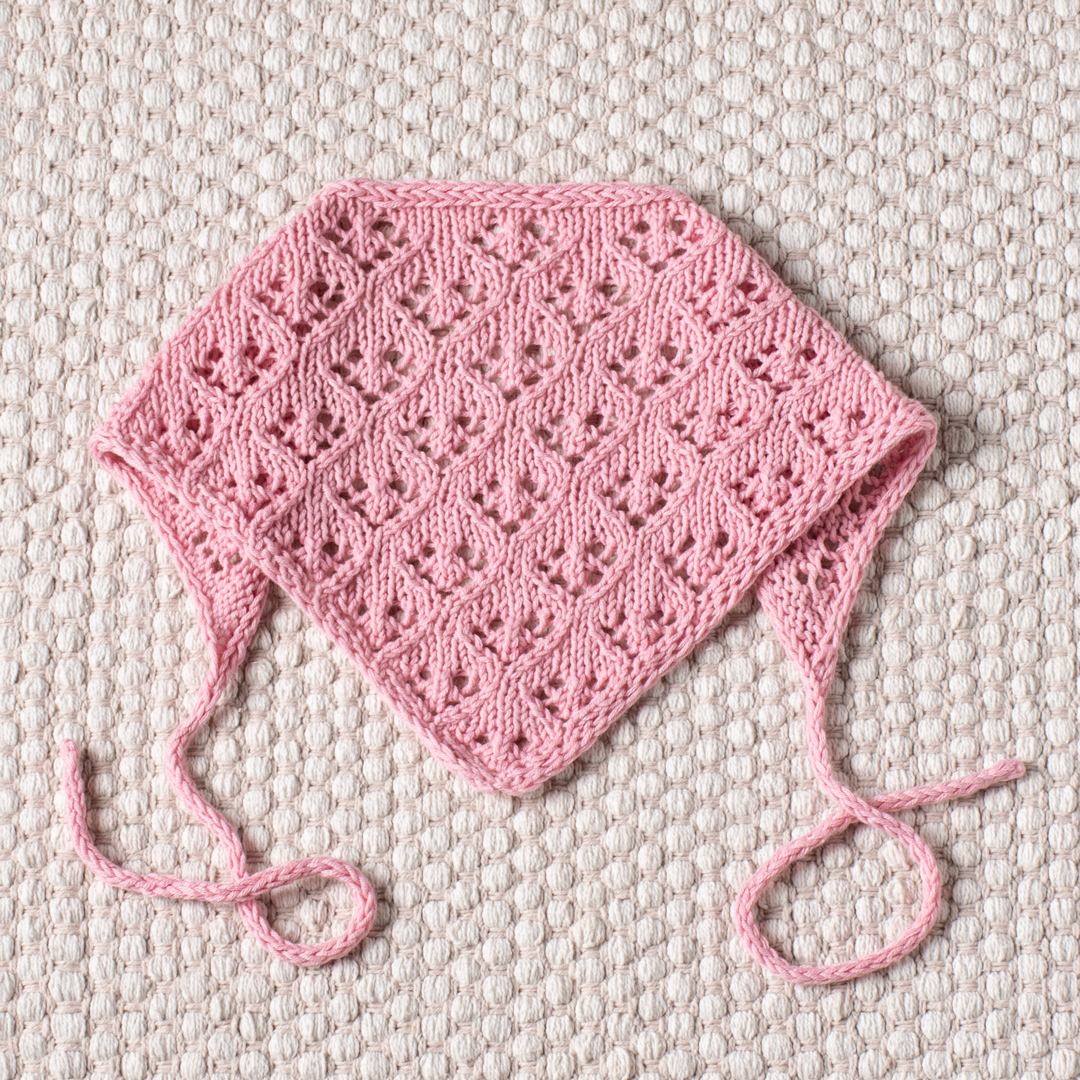
The In Bloom Bandana is a lightweight knitted accessory designed for spring and summer. Its triangular silhouette, delicate lace texture, and narrow i-cord ties create a simple finished piece with plenty of visual detail. Although the completed bandana looks intricate, its construction follows a logical progression: begin with a small five-stitch foundation, build the triangle with regular increases, repeat the lace sequence, and finish the project with integrated i-cord edging and two ties.
This pattern is worked back and forth using sport-weight cotton yarn. The first and last 2 stitches of every row form an i-cord edging, while the center section carries the lace pattern. On the right-side shaping rows, 2 stitches are increased, allowing the fabric to grow wider as the bandana becomes longer.
One of the useful features of this design is its flexibility. The standard instructions are written for one size, but the triangle can be made shorter or longer by adding or subtracting complete repeats. That makes the eight-row lace rhythm particularly important: it gives the knitter a consistent unit for adjusting the finished length without changing the actual lace instructions.
What Makes This Bandana Construction Special?
The most useful way to understand this project is to separate it into three construction stages.
- Triangle formation: the work begins at the bottom edge with 5 stitches and expands through increases.
- Lace development: the main body is created with a repeating eight-row lace sequence.
- I-cord finishing: the triangular section is connected to two approximately 30 cm i-cord ties.
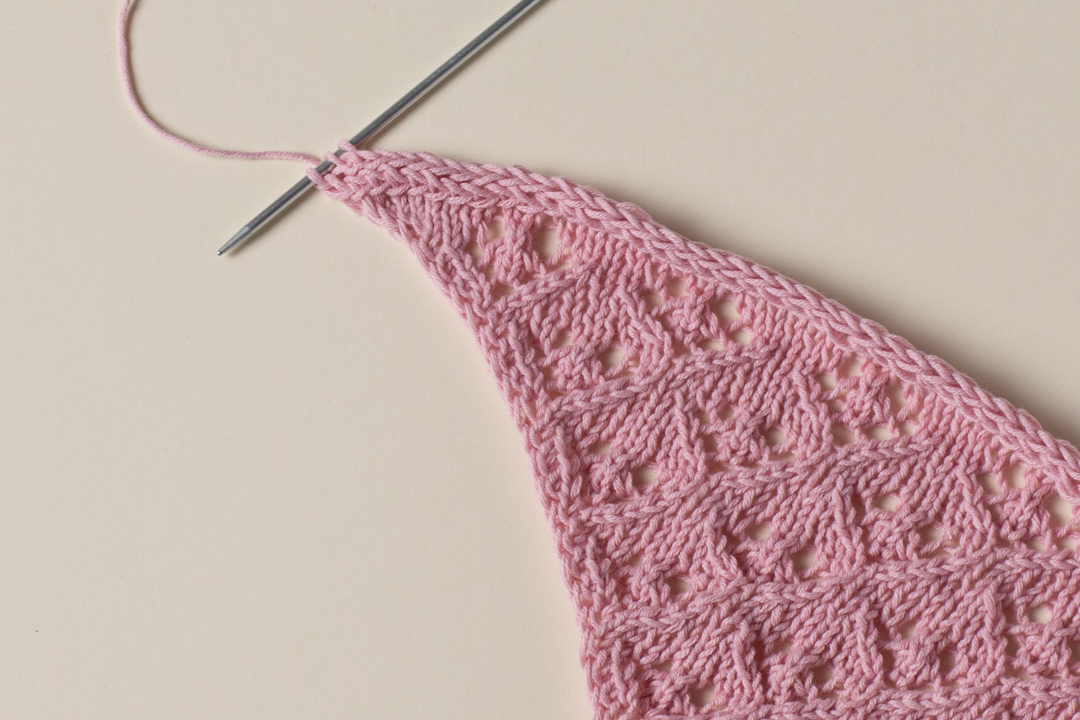
The i-cord treatment is incorporated into the design from the beginning. Rather than adding a border after the lace fabric has been completed, the first 2 stitches are knitted and the final 2 stitches are slipped on every row. This creates clean side edges while helping the bandana resist curling.
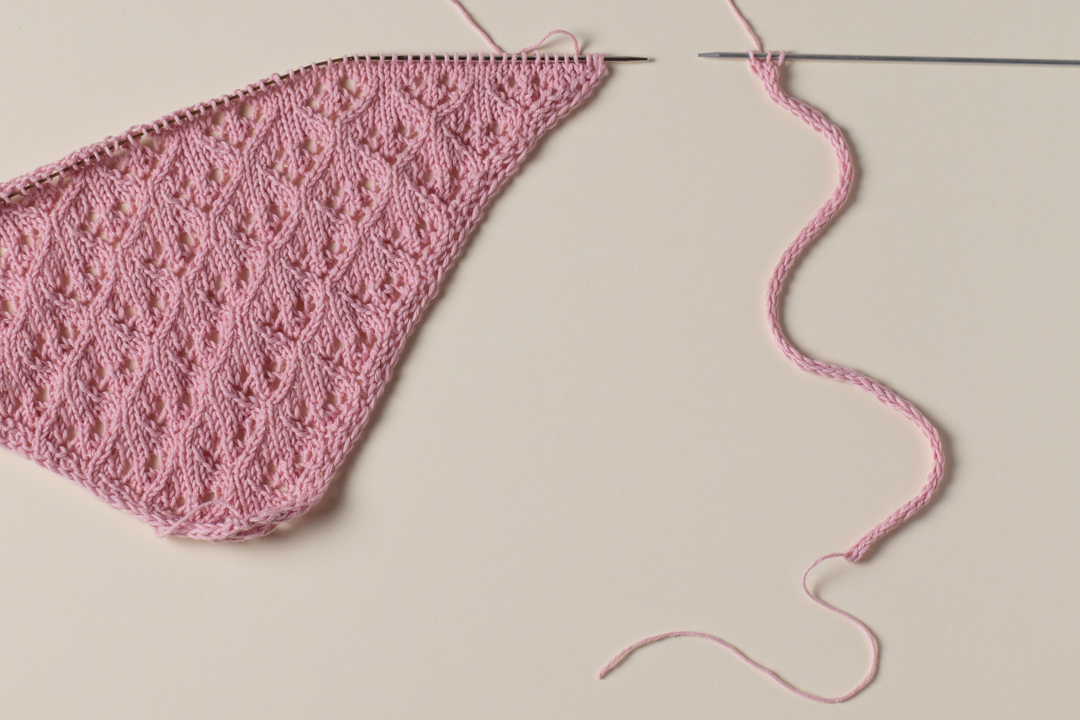
The same i-cord idea continues into the ties. The first tie is worked separately, joined to the live bandana stitches, and then carried across the opposite edge before becoming the second tie.
Pattern Specifications at a Glance
- Size: One size
- Finished length without ties: 46 cm / 18 in
- Height: 21 cm / 8.25 in
- Yarn: Drops Safran
- Color: Light rose, uni color 77
- Yarn quantity: 1 ball
- Main needles: 3 mm / US 2.5 knitting needles
- Tie needles: Pair of 3 mm / US 2.5 DPNs
- Gauge: 24 stitches x 32 rows in stockinette stitch = 10 x 10 cm / 4 x 4 in after blocking
The finished length measurement excludes the ties. Each tie is worked to approximately 30 cm, giving the completed accessory its adjustable fastening system.
Materials Checklist
Gather everything before beginning so that the project can move smoothly from the lace triangle into the i-cord finishing stage.
- 1 ball of Drops Safran in light rose, uni color 77
- 3 mm / US 2.5 knitting needles
- Pair of 3 mm / US 2.5 DPNs for the ties
- Tapestry needle
- Measuring tape
- Scissors
Because the project uses only one ball of yarn according to the source, careful yarn management is useful, particularly when making the two approximately 30 cm ties.
Gauge and Finished Size
The stated gauge is 24 stitches x 32 rows in stockinette stitch over 10 x 10 cm / 4 x 4 in after blocking.
The finished bandana measures approximately 46 cm / 18 in in length without ties and 21 cm / 8.25 in in height.
Gauge is especially useful as a reference when working a garment-sized project, but it also provides valuable information here because changing the tension can affect the final proportions of a small triangular accessory. The source measurements should remain the reference point when checking the finished fabric.
Abbreviations and Lace Vocabulary
This project uses several standard knitting abbreviations. The decrease instructions are particularly important because they form the lace motifs.
- k – knit.
- k2tog – knit 2 stitches together.
- k3tog – knit 3 stitches together: slip the next 2 stitches knitwise (slip both stitches together, not one by one) to the right-hand needle, knit the next stitch, pass the 2 slipped stitches over the knit stitch.
- M1L – make 1 left.
- M1R – make 1 right.
- p – purl.
- RS – right side.
- sl – slip stitch as if to purl with yarn in front.
- ssk – slip 1 stitch knitwise, slip the next stitch knitwise, return the 2 stitches back to the left needle, knit those 2 stitches together through the back loops.
- WS – wrong side.
- yo – yarn over.
- *-* – repeat the instructions in between the asterisks the number of times specified.
Before You Start: Two Rules That Control the Whole Project
Rule One: Protect the I-Cord Edges
Knit the first 2 stitches of every row. At the end of every row, slip the last 2 stitches with yarn in front. The source specifically advises not tightening these edge stitches.
This creates the narrow border that frames the lace. If the edge is pulled tightly, the sides may become distorted, so keeping a relaxed and consistent tension here is worthwhile.
Rule Two: Increase Only Where the Pattern Says
On each right-side increase row, 2 stitches are added at the beginning and end of the lace section. The M1R is placed before the main body of stitches, while the M1L is worked before the final 2 slipped edge stitches.
The source also allows an optional simplification: M1L and M1R can be replaced with yo. If you use this alternative, keep the same choice throughout the project.
Start the Bandana With 5 Stitches
Cast on 5 stitches.
Then work the setup row:
Set-up row (WS): k2, p1, sl2.
This establishes the basic edge arrangement before the lace shaping begins.
Creating the First Decorative Section
The opening rows gradually introduce the increases, yarn overs, and decreases that will define the finished lace pattern. The explicit stitch counts provide excellent opportunities to check your work before moving into the longer repeating section.
Rows 1 and 2
Row 1 (RS): k2, M1R, k1, M1L, sl2 (7sts).
Row 2: k2, p to last 2 sts, sl2.
Row 1 increases the starting five stitches to 7 stitches.
Rows 3 and 4
Row 3: k2, M1R, k2tog, yo, k1, M1L, sl2 (9sts).
Row 4: k2, p to last 2 sts, sl2.
The first yarn-over and decrease combination appears here. The lace is beginning to open while the outer shaping continues.
Rows 5 and 6
Row 5: k2, M1R, k2tog, yo, k1, yo, ssk, M1L, sl2 (11sts).
Row 6: k2, p to last 2 sts, sl2.
There are now 11 stitches after Row 5.
Rows 7 and 8
Row 7: k2, M1R, k2tog, yo, k3, yo, ssk, M1L, sl2 (13sts).
Row 8: k2, p to last 2 sts, sl2.
The central knitted section grows wider, while the same two-stitch increase structure remains at the outer edges.
Rows 9 and 10
Row 9: k2, M1R, k3, yo, k3tog, yo, k3, M1L, sl2 (15sts).
Row 10: k2, p to last 2 sts, sl2.
After Row 9, the stitch count is 15. The k3tog movement creates another distinctive part of the lace design.
The Eight-Row Pattern That Builds the Triangle
After the initial ten rows, the pattern settles into an eight-row rhythm. The wrong-side rows are intentionally straightforward, allowing attention to remain on the right-side lace rows.
Pattern Row 1
Row 1 (RS): k2, M1R, *k2tog, yo, k6* to last 5sts, k2tog, yo, k1, M1L, sl2 (2sts increased).
Pattern Row 2
Row 2 (WS): k2, p to last 2 sts, sl2.
Pattern Row 3
Row 3: k2, M1R, *k2tog, yo, k1, yo, ssk, k3* to last 7sts, k2tog, yo, k1, yo, ssk, M1L, sl2 (2sts increased).
Pattern Row 4
Row 4: k2, p to last 2 sts, sl2.
Pattern Row 5
Row 5: k2, M1R, *k2tog, yo, k3, yo, ssk, k1* to last 9sts, k2tog, yo, k3, yo, ssk, M1L, sl2 (2sts increased).
Pattern Row 6
Row 6: k2, p to last 2 sts, sl2.
Pattern Row 7
Row 7: k2, M1R, *k3, yo, k3tog, yo, k5* to last 8 sts, yo, k3tog, yo, k3, M1L, sl2 (2sts increased).
Pattern Row 8
Row 8: k2, p to last 2 sts, sl2.
These eight rows form the central repeat. Each right-side lace row adds 2 stitches, while every wrong-side row maintains the characteristic i-cord edge treatment.
Repeat the Lace Without Losing Your Place
Repeat Rows 1–8 7 more times or until desired length.
For a smoother knitting experience, treat each group of eight rows as a single completed unit. Rather than thinking about the entire bandana at once, finish one repeat, verify the lace, and then begin the next.
This is particularly useful because Rows 2, 4, 6, and 8 are identical in their basic structure:
k2, p to last 2 sts, sl2.
The decorative changes are concentrated on the right-side rows. This gives the pattern a predictable rhythm and makes it easier to recognize where you are if you need to stop and resume later.
If you want to modify the size, the source allows adding or subtracting repeats. Keep complete eight-row repeats together when making that adjustment.
A Better Way to Check Lace Rows
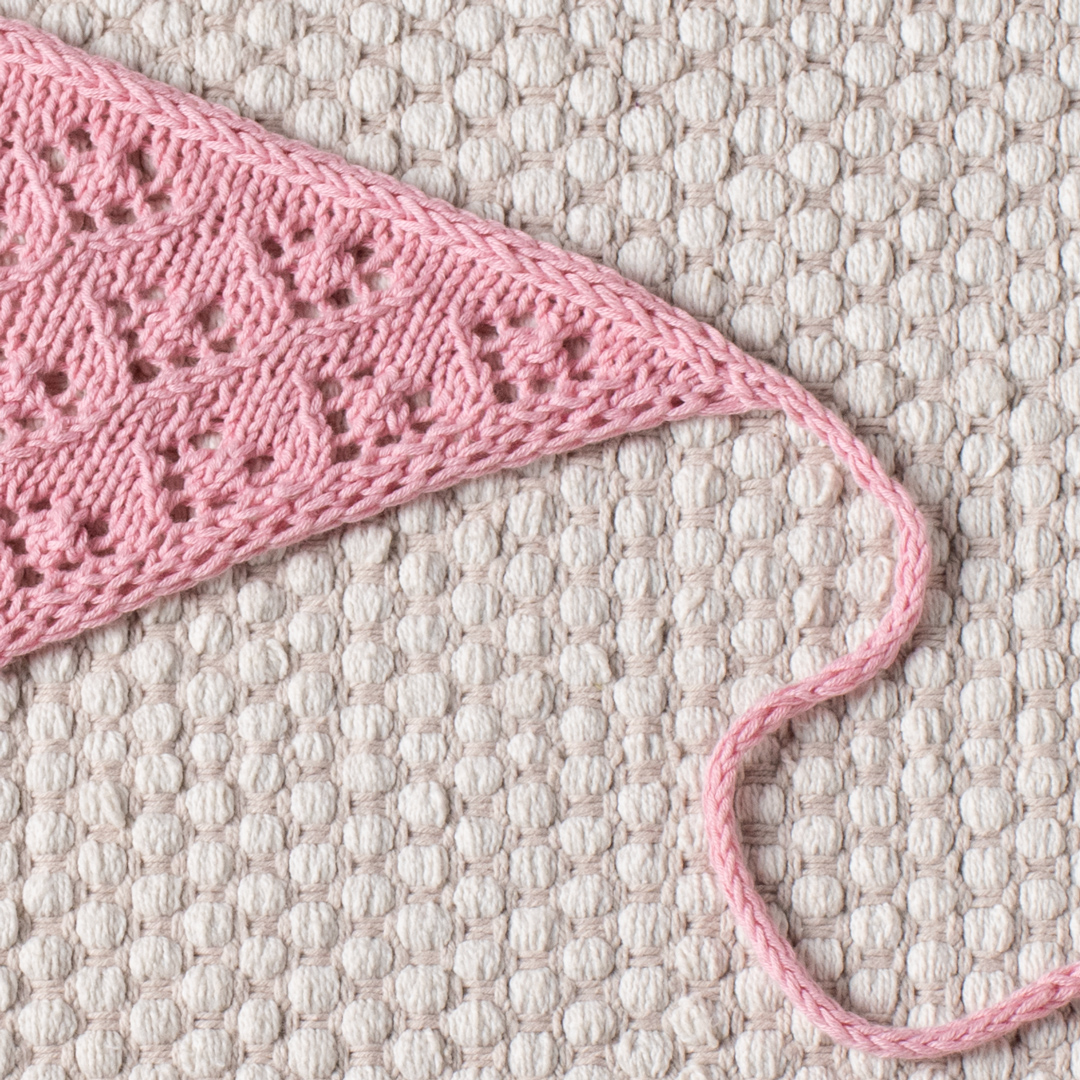
When knitting lace, counting stitches is only one part of checking your work. The visual arrangement of decreases and yarn overs can also provide clues.
After a right-side row, look for the intended balance between the yarn overs and decreases. If a hole appears where you do not expect one, or if a section suddenly looks denser than the surrounding repeats, check the row before continuing.
Do not automatically unravel a large section because something looks slightly unfamiliar. First compare the row with the written instructions. The source pattern deliberately combines different lace movements across Rows 1, 3, 5, and 7, so the appearance is not identical on every right-side row.
Ending the Triangle
When the bandana reaches the desired length, move into the final two rows:
Row 1: k2, M1R, k to last 2 sts, M1L, sl2.
Row 2: k2, p to last 2 sts, sl2.
Break the yarn, leaving a 10 cm (4″) tail.
Set the bandana aside but keep the stitches on the needle. These live stitches are important because the first i-cord tie will be joined directly to the bandana edge.
Make the First I-Cord Tie
For the tie, use the pair of 3 mm / US 2.5 DPNs.
Cast on 3 stitches. Do not turn.
Then repeat:
*Slip the 3 stitches to the right side of the needle. Knit 3.*
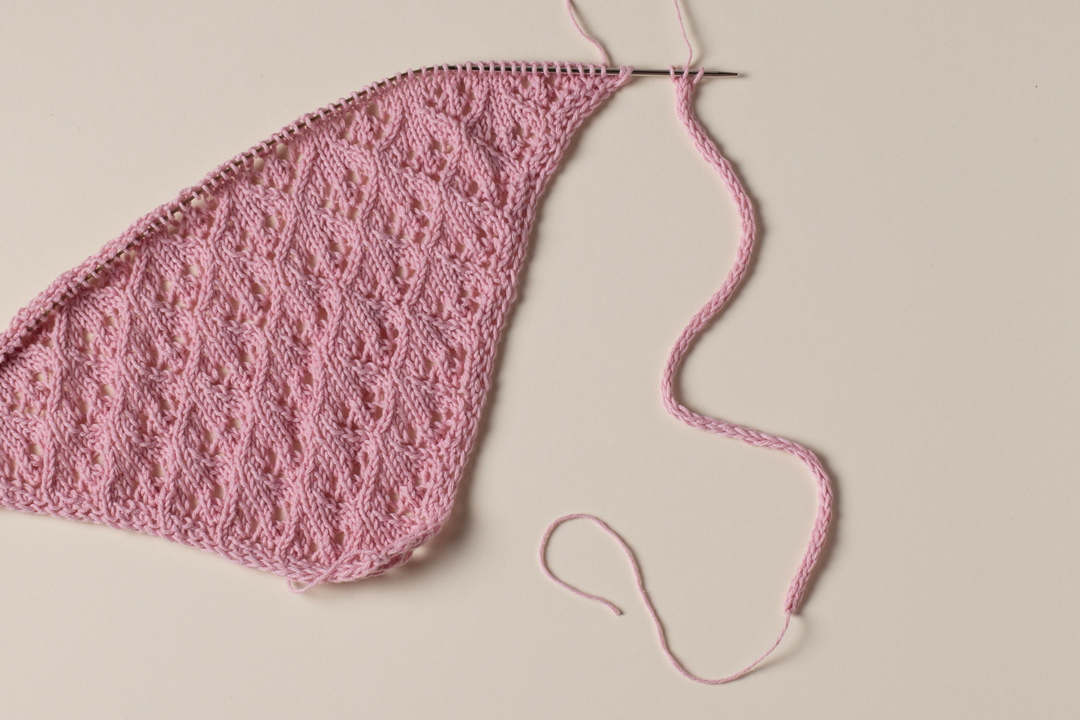
Continue until the i-cord tube measures approximately 30 cm.
Do not cut the yarn.
The instruction not to turn is a key part of making an i-cord. The three stitches are moved to the opposite end of the needle and knitted again, creating the characteristic narrow tube.
Attach the I-Cord to the Live Bandana Stitches
Now the separate cord becomes part of the finished edge.
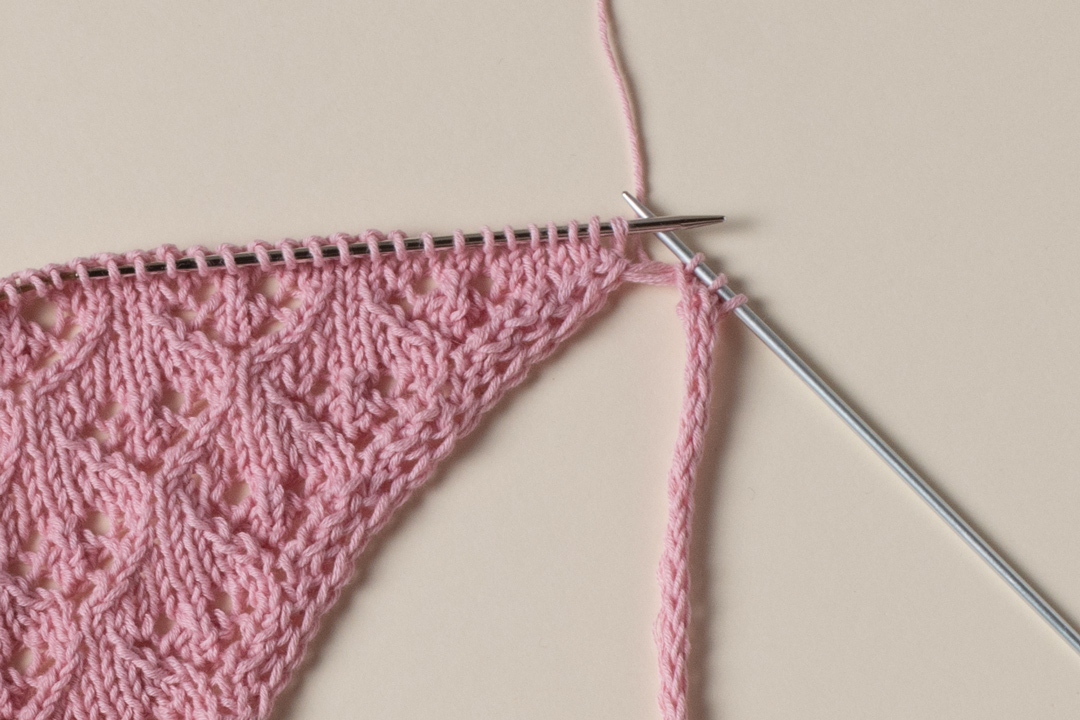
Transfer the 3 i-cord stitches to the needle while holding the live bandana stitches.
Work the following connection:
Knit the first two i-cord stitches, ssk (knit last i-cord stitch together with first bandana stitch).
Then transfer the first 3 stitches to the needle while holding the live bandana stitches.
Continue with:
*k2, ssk, transfer 3 stitches to the needle, holding the live bandana stitches*
Repeat this construction until 3 stitches are left.
The ssk gradually incorporates the live bandana stitches into the i-cord edging. This is why the bandana stitches were left live instead of being bound off earlier.
Finish With the Second Tie
When the edging reaches the opposite side and 3 stitches remain, begin the second i-cord tie.
Work the same i-cord movement:
*Slip the 3 stitches to the right side of the needle. Knit 3.*
Continue until the second tube measures approximately 30 cm.
Bind off, cut the yarn, and weave in tails.
At this stage, the basic construction of the In Bloom Bandana is complete.
Finishing and Shape Check
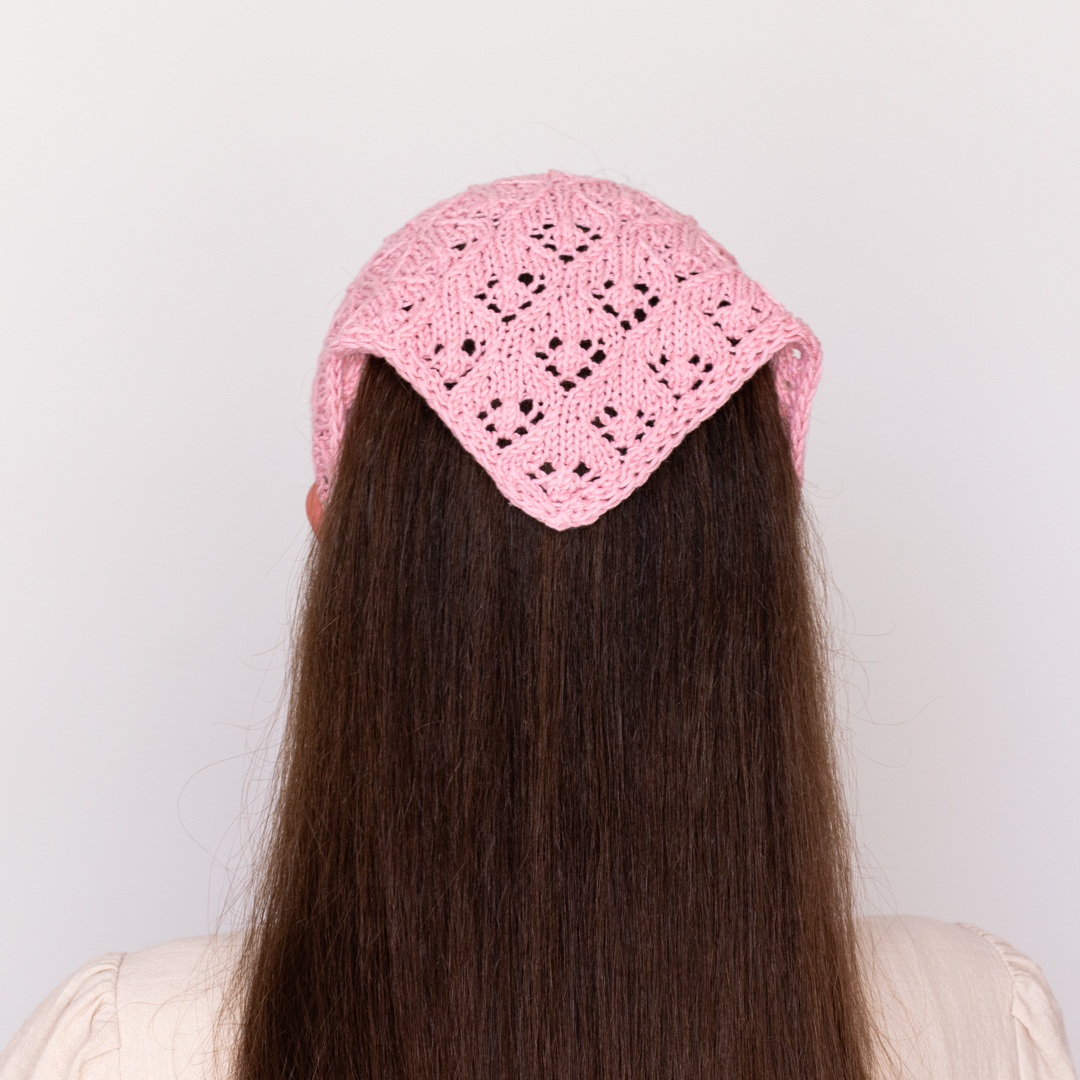
Before considering the project finished, check the triangle and both ties. The body should correspond approximately to the stated finished measurements, while the ties should each measure approximately 30 cm.
Because the bandana uses lace, blocking can help the fabric settle and make the stitch pattern easier to see. The gauge supplied by the source is measured after blocking, so blocking is also relevant when comparing your finished fabric with the stated dimensions.
Use gentle shaping to preserve the triangular outline. The goal is not to change the pattern but to allow the existing lace structure to open and settle naturally.
Troubleshooting Guide
I Lost a Stitch in the Lace Repeat
Start by checking the most recent right-side row. Look for the two outer shaping increases first. Then check the yarn overs and decreases inside the repeat. A missed yarn over or accidental decrease can alter the stitch count and the appearance of the next row.
My Triangle Is Not Growing Evenly
The pattern adds 2 stitches on every right-side main pattern row. Check that both M1R and M1L were completed. Also make sure the first and last 2 stitches remain dedicated to the i-cord edging.
The Lace Looks Too Tight
A lace fabric often becomes clearer after blocking. Before making changes, compare your work with the stated gauge and finished measurements. Also make sure yarn overs are being worked correctly and that the decreases are not being tightened excessively.
The Side Edge Curls
The design uses an i-cord edge specifically to create a neat border and help prevent curling. Check that you are knitting the first 2 stitches, slipping the last 2 stitches with yarn in front, and not tightening those edge stitches.
I Am Confused by k3tog
The source gives a precise method: slip the next 2 stitches knitwise together to the right-hand needle, knit the next stitch, and pass the 2 slipped stitches over the knit stitch. The two stitches are slipped together rather than one at a time.
The I-Cord Does Not Look Like a Tube
Remember that the work should not be turned. After knitting the 3 stitches, slide them to the other side of the needle and knit them again. Continue this movement to create the narrow cord.
Beginner-Friendly Lace Habits
If this is one of your first lace projects, a few simple habits can make the pattern much easier to manage.
- Keep the written pattern close to your work.
- Read each right-side row from beginning to end before knitting it.
- Separate the edge stitches mentally from the lace section.
- Use the stated stitch counts as checkpoints.
- Finish complete eight-row repeats when adjusting length.
- Pay close attention to the difference between k2tog, ssk, and k3tog.
- Keep the i-cord stitches relaxed rather than pulling them tightly.
- Measure the ties instead of relying only on visual estimation.
The project becomes more predictable once the repeating structure is recognized. The four wrong-side rows in the main repeat share the same basic instruction, while the four right-side rows carry the lace design and shaping.
Why the Repeating Structure Matters
The eight-row repeat is not only a decorative feature; it is also a useful organizational tool. Rows 1, 3, 5, and 7 each have a different lace arrangement, while Rows 2, 4, 6, and 8 return to the same wrong-side framework.
This alternating rhythm gives the bandana a controlled progression. It also means you do not need to memorize the entire pattern to work it successfully. Keeping track of whether you are on an even or odd row can provide an immediate orientation point.
For knitters who prefer written instructions, the full row-by-row directions remain the safest reference. The visual rhythm should be treated as a support for reading the pattern, not as a replacement for the original instructions.
Quick Project Checklist
- 5 stitches cast on.
- Set-up row completed on WS.
- Initial stitch counts checked through 15 stitches.
- I-cord edge maintained with the first 2 knitted and final 2 slipped stitches.
- Main eight-row lace sequence completed.
- Rows 1–8 repeated 7 more times or until desired length.
- Final two rows completed.
- 10 cm (4″) yarn tail left after breaking the bandana yarn.
- First 3-stitch i-cord tie made to approximately 30 cm.
- First tie joined to the live bandana stitches.
- I-cord edging worked until 3 stitches remain.
- Second tie made to approximately 30 cm.
- Second tie bound off.
- Yarn tails woven in.
- Finished measurements checked after blocking.
Frequently Asked Questions
What type of yarn does the pattern use?
The pattern uses sport-weight cotton yarn, specifically Drops Safran in light rose, uni color 77, with one ball required.
What size needles are needed?
The bandana is knitted with 3 mm / US 2.5 knitting needles. A pair of 3 mm / US 2.5 DPNs is used for the i-cord ties.
What is the finished size?
The stated finished length without ties is 46 cm / 18 in, and the height is 21 cm / 8.25 in.
How long should each tie be?
Each i-cord tie is knitted until it measures approximately 30 cm.
Can I make the bandana shorter or longer?
Yes. The source allows the size to be modified by adding or subtracting repeats. The main pattern repeat consists of Rows 1–8, so complete repeats are the natural place to adjust the length.
Why are the bandana edges worked as i-cord?
The i-cord edging keeps the sides neat and helps prevent curling. It also provides a visually clean transition into the finishing ties.
Do I need to bind off the triangle before attaching the tie?
No. The bandana stitches remain live after the final two rows. The first i-cord is attached directly to these live stitches using the specified ssk construction.
What should I do if the pattern is unclear?
Do not invent or alter a stitch count. Return to the exact written row, verify the edge stitches, and check the preceding row for missed increases, yarn overs, or decreases.
Final Finishing Notes
The In Bloom Bandana is a good example of how a relatively small knitted project can combine several useful techniques in one piece. The beginning teaches controlled increases, the center develops a repeating lace rhythm, and the ending introduces an integrated i-cord construction.
The most important technical detail throughout the project is consistency. The first and last 2 stitches should remain part of the i-cord edging, the right-side shaping rows should gain 2 stitches, and the lace instructions should be followed exactly. Once those principles are understood, the repeated section becomes much easier to navigate.
The final construction is equally systematic. A 3-stitch i-cord is worked to approximately 30 cm, attached to the live bandana stitches, carried across the edge through repeated ssk joins, and then continued into a second approximately 30 cm tie. This creates the finished accessory without requiring a separate sewn-on border.
Complete Construction in Short Form
- Cast on 5 stitches.
- Work the WS setup row.
- Complete the initial ten-row shaping section.
- Begin the eight-row lace repeat.
- Repeat Rows 1–8 7 more times or until desired length.
- Work the final right-side increase row.
- Work the final WS row.
- Break the yarn, leaving a 10 cm (4″) tail, and leave the live stitches on the needle.
- Cast on 3 stitches for the first i-cord.
- Work the i-cord to approximately 30 cm.
- Join the i-cord to the live bandana stitches using the specified ssk method.
- Continue the i-cord edging until 3 stitches remain.
- Work the second i-cord tie to approximately 30 cm.
- Bind off and weave in the yarn tails.
- Check the finished dimensions and gently block the lace fabric.
With its light rose cotton yarn, triangular lace body, tidy i-cord borders, and adjustable ties, the In Bloom Bandana makes a compact project with a polished finish. The pattern is small enough to be approachable while still providing useful practice with increases, lace decreases, yarn overs, i-cord construction, live-stitch joining, and finishing.
For the most reliable result, let the written pattern remain your technical reference throughout the project. Use the stitch counts, row numbers, measurements, and construction instructions exactly as given, while using the finished photographs as visual guidance for the overall shape and appearance.