
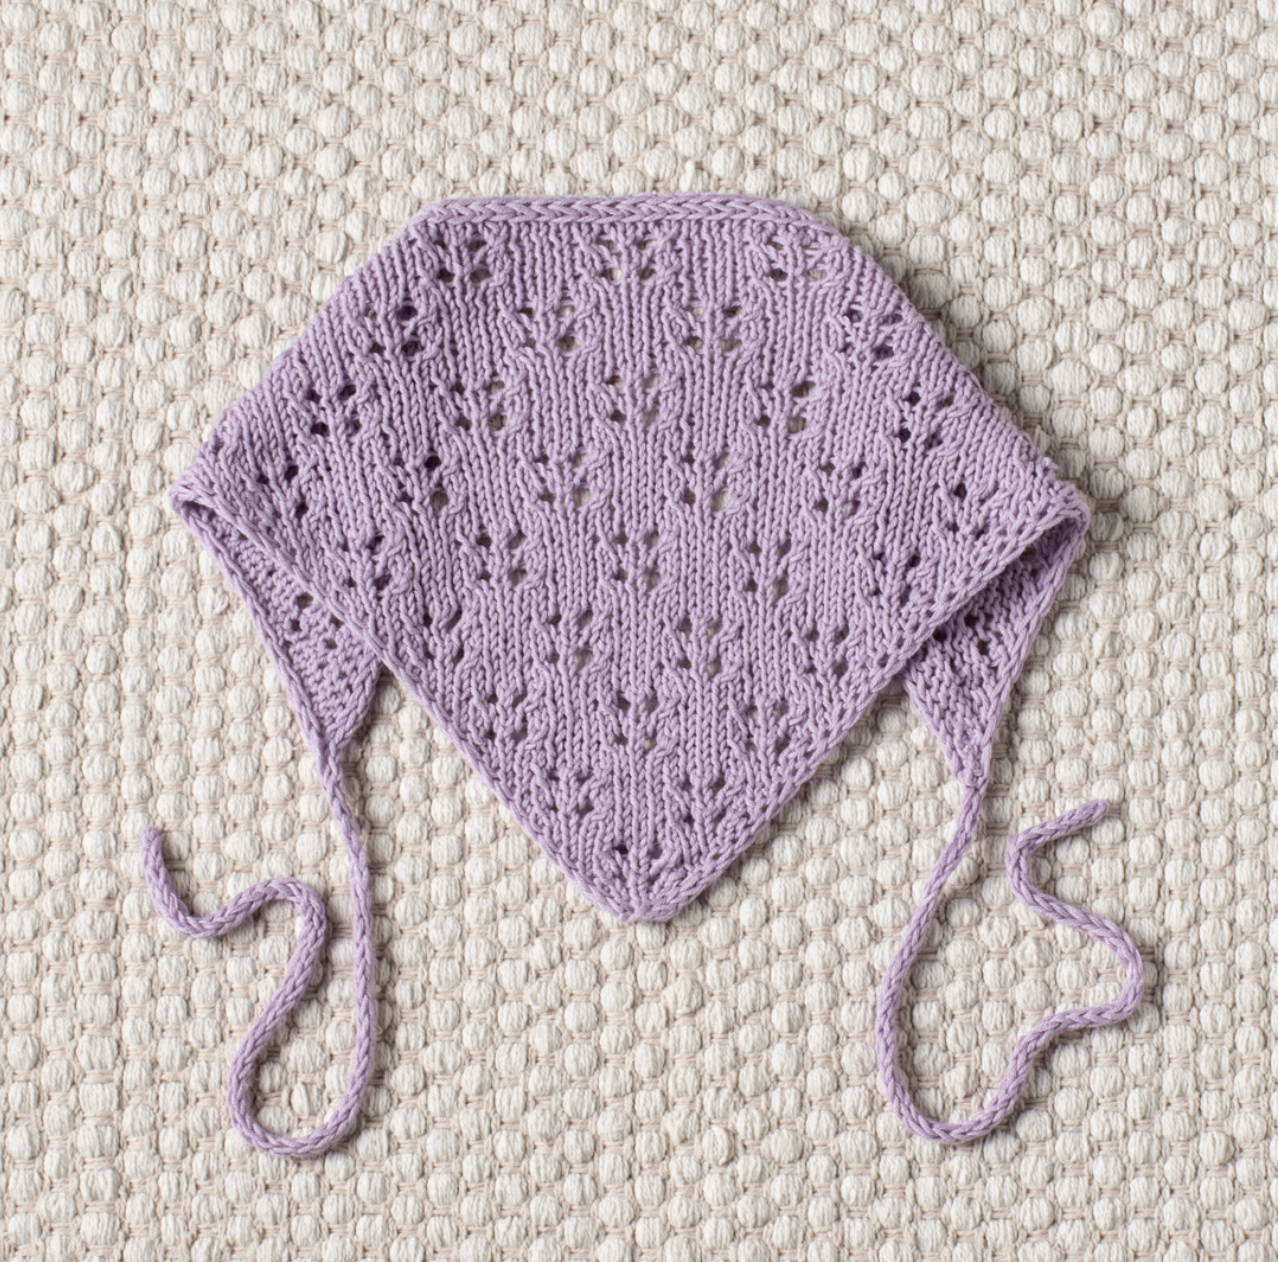
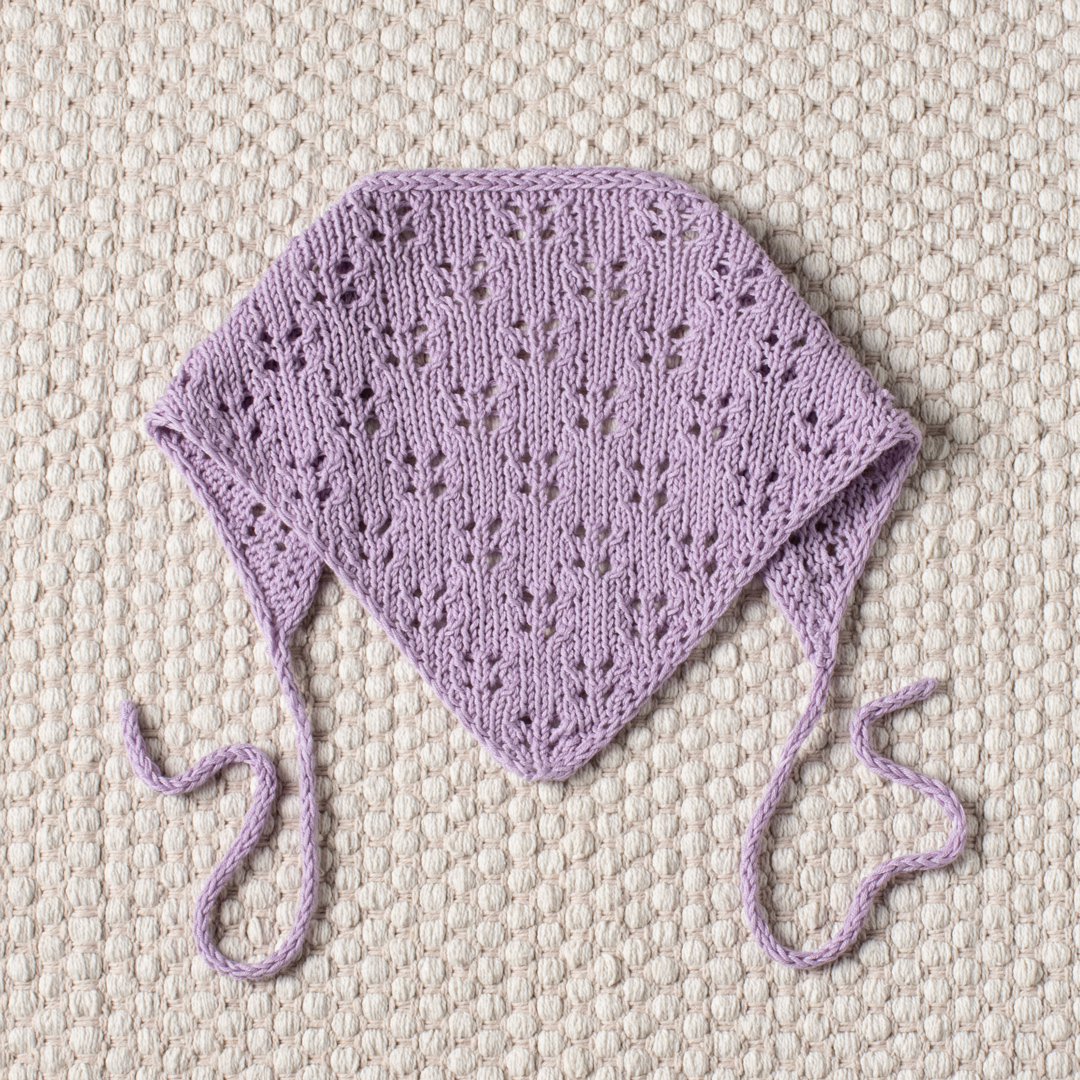
The Flower Bed Bandana is a delicate knitted accessory built from a surprisingly clear combination of simple structural ideas: a growing triangular fabric, decorative eyelets, neat i-cord edges, and long knitted ties. Although the finished piece has an intricate lace-like appearance, the construction becomes much easier to understand when it is divided into stitch-count checkpoints and clearly defined stages.
This guide walks through the complete Flower Bed Bandana knitting pattern while keeping the original pattern information intact. The finished bandana is designed in one size and measures approximately 43cm/17in in length without the ties and 22cm/8.75in in height. The decorative fabric is worked with a combination of increases and eyelet rows, while the edges are maintained with an i-cord technique.
What Makes This Bandana Easy to Follow?
The most useful way to approach this pattern is to think of it as a sequence of controlled increases. The bandana begins with only 5 stitches. As the work progresses, stitches are added at both ends of every right-side increase row. Between those increases, the wrong-side rows establish the simple purl structure and maintain the two-stitch i-cord edging.
The decorative eyelets are introduced during selected right-side rows. Once the initial section is complete, the main pattern settles into an eight-row repeat. This repeat is worked seven more times or until the desired length is reached.
The construction then changes direction. Instead of binding off the bandana normally, the live stitches remain on the needle. A three-stitch i-cord is worked first, attached to one side of the bandana through an ssk decrease, and then continued into the second tie. This creates a continuous and tidy transition from the knitted triangle to its ties.
Project Specifications at a Glance
- Size: One size.
- Finished length without ties: 43cm/17in.
- Finished height: 22cm/8.75in.
- Gauge: 24 stitches x 32 rows in stockinette stitch over 10 x 10 cm (4 x 4in) after blocking.
- Yarn: Drops Safran in lavender, uni color 05.
- Yarn quantity: 1 ball.
- Main needles: 3mm (US 2.5) knitting needles.
- Tie needles: A pair of 3mm (US 2.5) DPNs.
- Other supplies: Tapestry needle, measuring tape, scissors.
Because this is a one-size design, the finished measurements and gauge are useful reference points while working. The stated gauge is measured after blocking, so the final fabric should be evaluated after the piece has been blocked rather than judging the finished size only from the unblocked knitting.
Understanding the Four Construction Zones
Before beginning, it helps to divide the project into four practical zones:
- Foundation: The bandana starts with 5 stitches and a wrong-side set-up row.
- Growth section: Rows 1–12 establish the increasing triangular shape and introduce the first eyelets.
- Main lace section: An eight-row pattern is repeated seven more times or until the desired length is reached.
- Integrated ties: The live bandana stitches are joined to a first i-cord, followed by a second approximately 30cm tie.
This organization is especially useful if you pause during the project. Instead of asking where you are in the entire pattern, identify which construction zone you are currently working on.
Materials and Preparation
Gather the Drops Safran yarn in lavender, uni color 05, and the required needles before starting. You will use 3mm (US 2.5) knitting needles for the bandana itself and a pair of 3mm (US 2.5) DPNs for the ties.
The additional tools are simple: a tapestry needle for weaving in ends, a measuring tape for checking the tie length and finished dimensions, and scissors for cutting the yarn.
It is worth keeping the measuring tape nearby throughout the project. The first tie is knitted until it measures approximately 30 cm, and the second tie is also knitted until it measures approximately 30 cm. Measuring these sections as you work is more reliable than estimating their length visually.
Abbreviations You Will Use
- k – knit.
- k2tog – knit 2 stitches together.
- M1L – make 1 left.
- M1R – make 1 right.
- p – purl.
- RS – right side.
- sl – slip stitch as if to purl with yarn in front.
- ssk – slip 1 stitch knitwise, slip the next stitch knitwise, return the 2 stitches back to the left needle, knit those 2 stitches together through the back loops.
- WS – wrong side.
- yo – yarn over.
- *-* – repeat the instructions in between the asterisks the number of times specified.
Three Pattern Techniques to Keep in Mind
The I-Cord Edge
The bandana has an i-cord edging created directly within the rows. The first 2 stitches of every row are knitted, while the last 2 stitches of every row are slipped with yarn in front.
The source pattern specifically notes not to tighten these edge stitches. This is important because the edging needs enough flexibility to sit naturally alongside the growing fabric. Pulling the edge stitches too firmly can make the border unnecessarily tight.
The Increase Structure
Two stitches are increased at the beginning and end of each right-side row. The increases are made using M1R or M1L before and after the 2 i-cord edge stitches.
Again, the original instructions emphasize not tightening the increased stitches. These increases are responsible for the gradual expansion of the bandana.
The pattern also provides a simplification: M1L and M1R can be replaced with yo. If you choose that substitution, remember that the source pattern’s stated increase method remains M1L/M1R; the yarn-over method is simply the permitted simplification.
The Eyelet Pattern
The eyelet pattern is:
k2tog, yo, k1, yo, ssk.
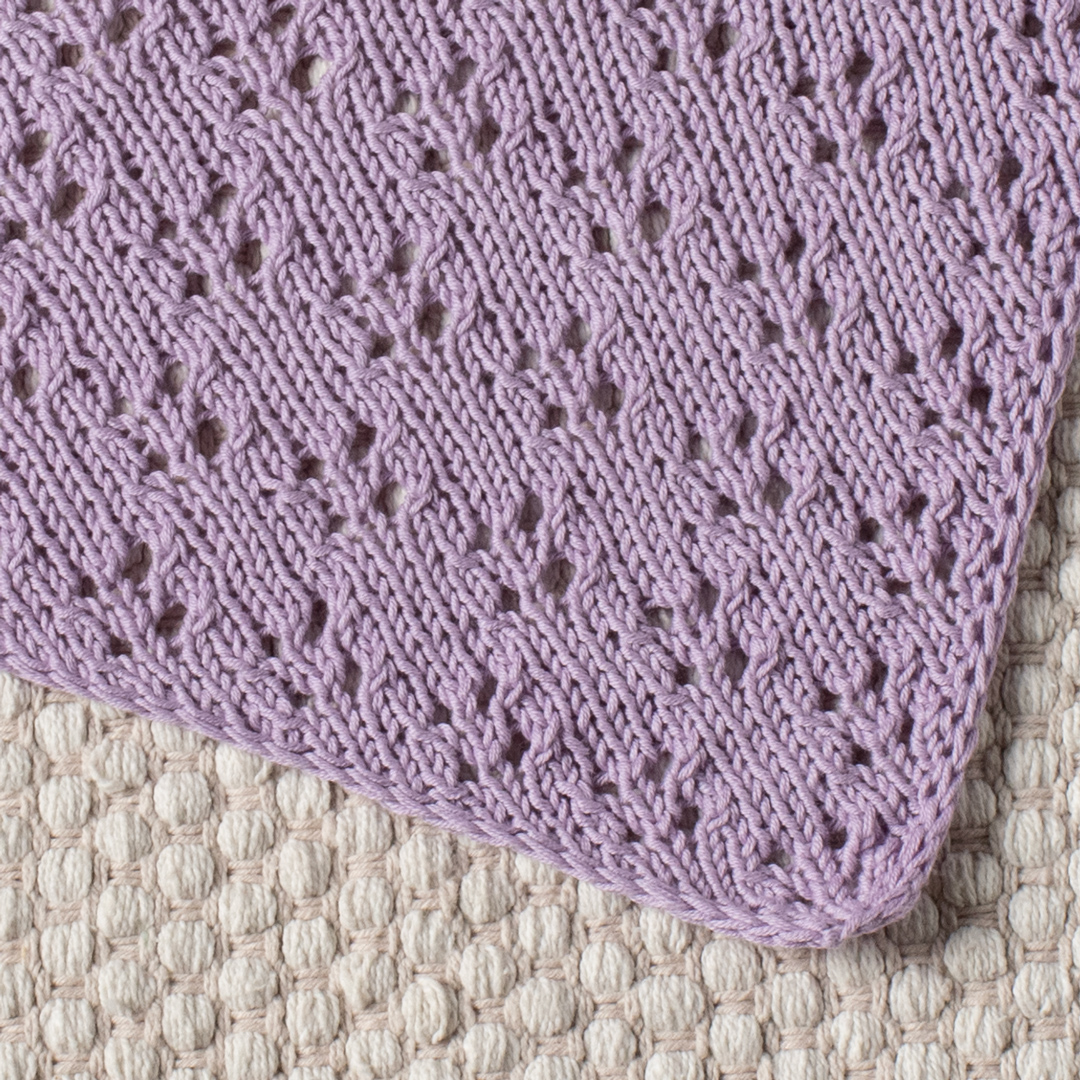
This compact sequence creates the decorative openings that give the bandana its lace character. Since the eyelets appear only on particular right-side rows, keeping track of the row number is important.
Starting the Bandana
Begin by casting on 5 stitches.
The set-up row is worked on the wrong side:
Set-up row (WS): k2, p1, sl2.
This establishes the edge behavior before the first increase row. At this stage the project is very small, so it may not yet resemble the finished bandana. That is normal. The shape develops progressively as the right-side rows add two stitches at a time.
The First Twelve Rows: Establishing the Shape
The opening sequence contains twelve rows. Treat this part as the foundation of the decorative construction. The stitch counts at the end of the increasing rows provide useful checkpoints.
Rows 1–4
Row 1 (RS): k2, M1R, k1, M1L, sl2 (7sts).
Row 2: k2, p to last 2 sts, sl2.
Row 3: k2, M1R, k3, M1L, sl2 (9sts).
Row 4: k2, p to last 2 sts, sl2.
The first important checkpoint is the move from 5 stitches to 7 stitches after Row 1, followed by 9 stitches after Row 3. Rows 2 and 4 maintain the established edge and wrong-side structure.
Rows 5–8
Row 5: k2, M1R, eyelet pattern, M1L, sl2 (11sts).
Row 6: k2, p to last 2 sts, sl2.
Row 7: k2, M1R, k to last 2 sts, M1L, sl2 (13sts).
Row 8: k2, p to last 2 sts, sl2.
Row 5 is the first place where the eyelet pattern appears in the foundation. The stitch count rises to 11 stitches. After the next increase row, Row 7, the work reaches 13 stitches.
Rows 9–12
Row 9: k2, M1R, k2, eyelet pattern, k2, M1L, sl2 (15sts).
Row 10: k2, p to last 2 sts, sl2.
Row 11: k2, M1R, k to last 2 sts, M1L, sl2 (17sts).
Row 12: k2, p to last 2 sts, sl2.
At the end of Row 11, the stitch count is 17 stitches. This completes the initial twelve-row foundation and prepares the project for the repeating lace section.
Checkpoint: The Foundation Stitch Counts
If you like using checkpoints rather than counting every stitch repeatedly, the increasing rows give you a straightforward sequence:
- After Row 1: 7 stitches.
- After Row 3: 9 stitches.
- After Row 5: 11 stitches.
- After Row 7: 13 stitches.
- After Row 9: 15 stitches.
- After Row 11: 17 stitches.
These numbers are particularly useful if you suspect an error. If your stitch count does not match the expected checkpoint, it is better to investigate immediately rather than continuing for many rows and trying to locate the mistake later.
Moving Into the Main Lace Repeat
Once Row 12 is complete, the pattern changes into its principal eight-row sequence. This section is where the flower-bed-like eyelet arrangement becomes more prominent.
Pattern Rows 1–4
Row 1 (RS): k2, M1R, *eyelet pattern, k3* until 5sts left, eyelet pattern, M1L, sl2 (2sts increased).
Row 2 (WS): k2, p to last 2 sts, sl2.
Row 3: k2, M1R, k to last 2 sts, M1L, sl2 (2sts increased).
Row 4: k2, p to last 2 sts, sl2.
Rows 1 and 3 both increase by two stitches. Row 1 is decorative because it combines the eyelet pattern with repeated knit sections, while Row 3 is primarily a growth row.
Pattern Rows 5–8
Row 5: k2, M1R, k2, *eyelet pattern, k3* until 7sts left, eyelet pattern, k2, M1L, sl2 (2sts increased).
Row 6: k2, p to last 2 sts, sl2.
Row 7: k2, M1R, k to last 2 sts, M1L, sl2 (2sts increased).
Row 8: k2, p to last 2 sts, sl2.
Rows 5 and 7 provide another pair of increase rows. The wrong-side rows continue the same edge structure, making the overall repeat easier to recognize once you have worked through it once.
How to Manage the Eight-Row Repeat
The source pattern instructs you to repeat Rows 1–8 7 more times or until desired length. This means the eight-row sequence is the central repeat of the bandana body.
A simple way to stay oriented is to record each completed eight-row repeat. For example, you can make a small handwritten list with seven spaces and mark each repeat as it is finished. This is not a change to the pattern; it is simply a practical tracking method.
It is also useful to identify whether you are on an RS or WS row before beginning. The RS rows are where the increases and, on selected rows, the eyelets occur. The WS rows use the consistent instruction of knitting the first two stitches, purling to the last two stitches, and slipping the final two stitches with yarn in front.
Checking the Fabric as It Grows
As the triangle becomes larger, look for three visual characteristics. First, the two edges should remain relatively consistent because of the i-cord construction. Second, the fabric should gradually widen because two stitches are added on each specified RS row. Third, the eyelet sections should appear as deliberate decorative openings rather than random holes.
If the bandana seems to be growing unevenly, check the increase points before assuming there is a problem with the yarn or needle size. The M1R and M1L increases occur in specific positions around the edge stitches, so accidentally placing an increase in the wrong location can affect the symmetry of the entire piece.
Preparing to Finish the Bandana Body
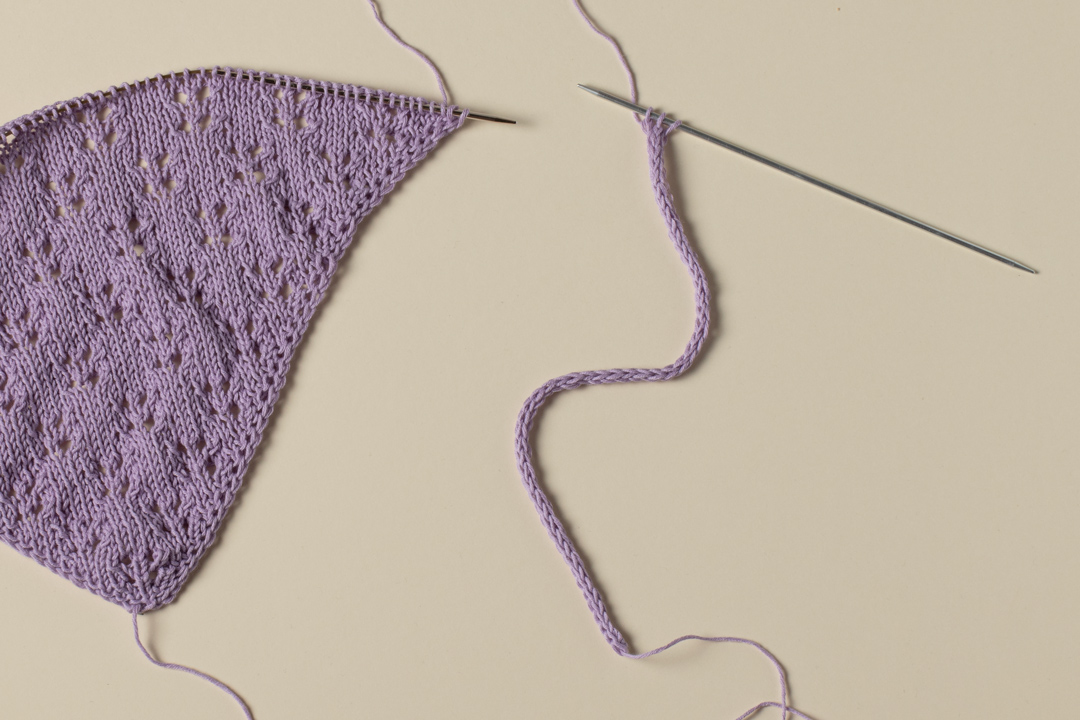
When the desired length has been reached, the pattern does not instruct you to bind off the bandana body in the usual way. Instead, break the yarn while leaving a 10cm (4″) long tail.
Set the bandana aside while leaving the stitches on the needle as they are. This is an important construction detail because those live stitches will later become part of the integrated i-cord edging.
Building the First I-Cord Tie
The first tie begins separately. Cast on 3 stitches and do not turn.
Then work:
*Slip the 3 stitches to the right side of the needle. Knit 3.*
Continue knitting this i-cord until the tube measures approximately 30 cm. Do not cut the yarn.
The instruction not to turn is part of the i-cord construction. The stitches are moved to the right side of the needle and then knitted again, producing a small tube rather than a flat strip.
Joining the I-Cord to the Live Bandana Stitches
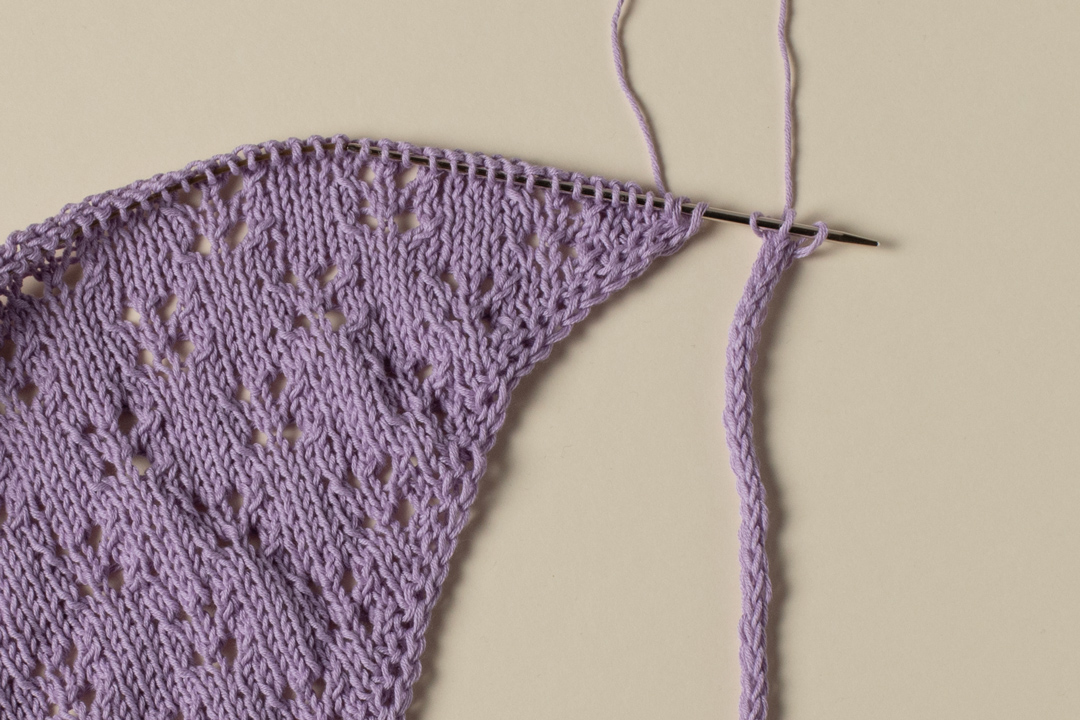
This is one of the most distinctive parts of the construction. Once the first tie reaches approximately 30 cm, transfer the 3 i-cord stitches to the needle while holding the live bandana stitches.
Then knit the first two i-cord stitches and work ssk, knitting the last i-cord stitch together with the first bandana stitch.
Next, transfer the first 3 stitches to the needle while holding the live bandana stitches.
The attachment sequence is then repeated:
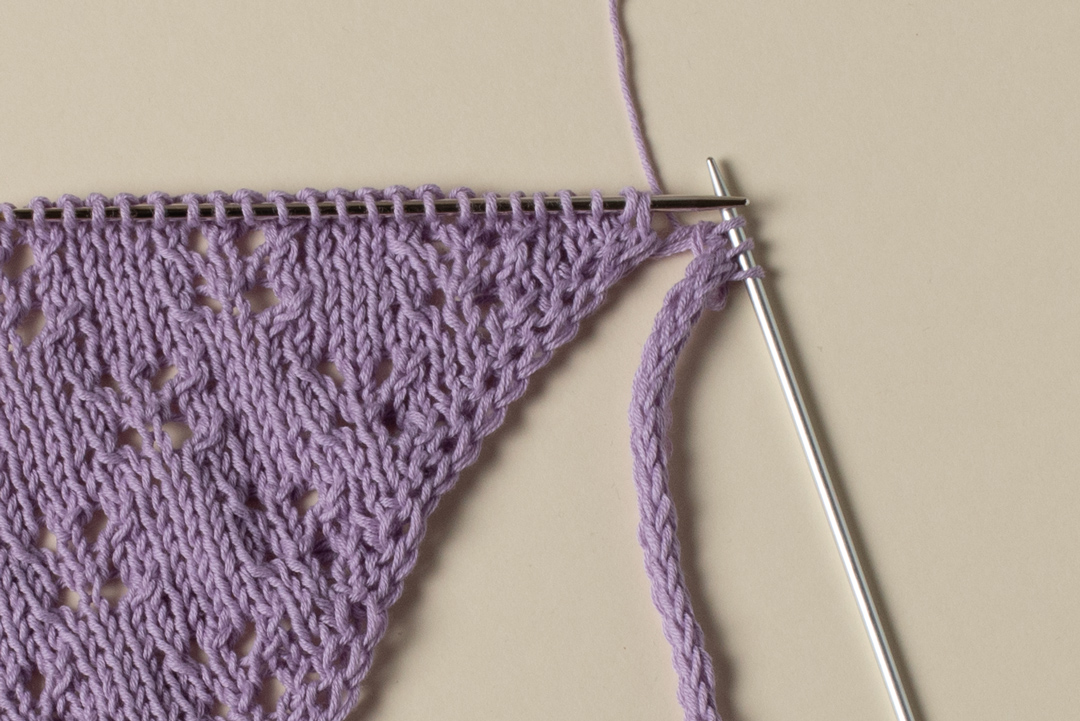
*k2, ssk, transfer 3 stitches to the needle, holding the live bandana stitches*
Continue until 3 stitches remain.
This method incorporates the bandana’s live stitches into the edging rather than adding a separate sewn-on border. Keeping the sequence orderly is important because the i-cord and bandana stitches are being worked together during this stage.
Working the Second Tie
After the edging reaches the point where 3 stitches remain, begin the second i-cord tie using the same basic technique as the first.
Work:
*Slip the 3 stitches to the right side of the needle. Knit 3.*
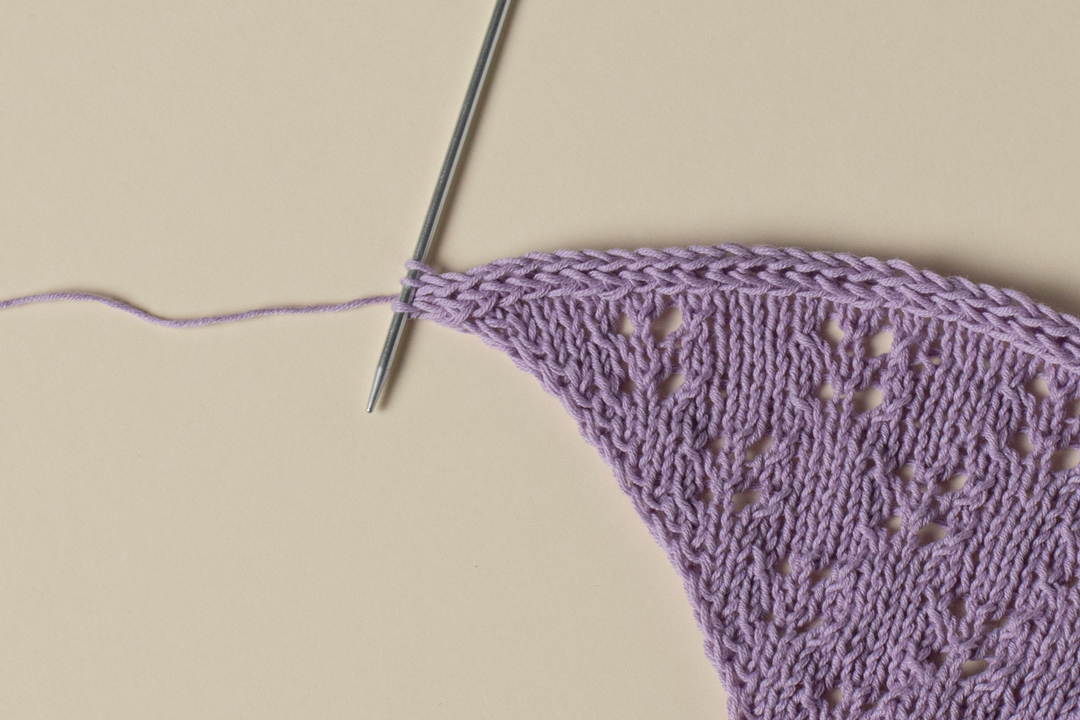
Continue knitting the i-cord until the tube measures approximately 30 cm.
At the end, bind off, cut the yarn, and weave in the tails.
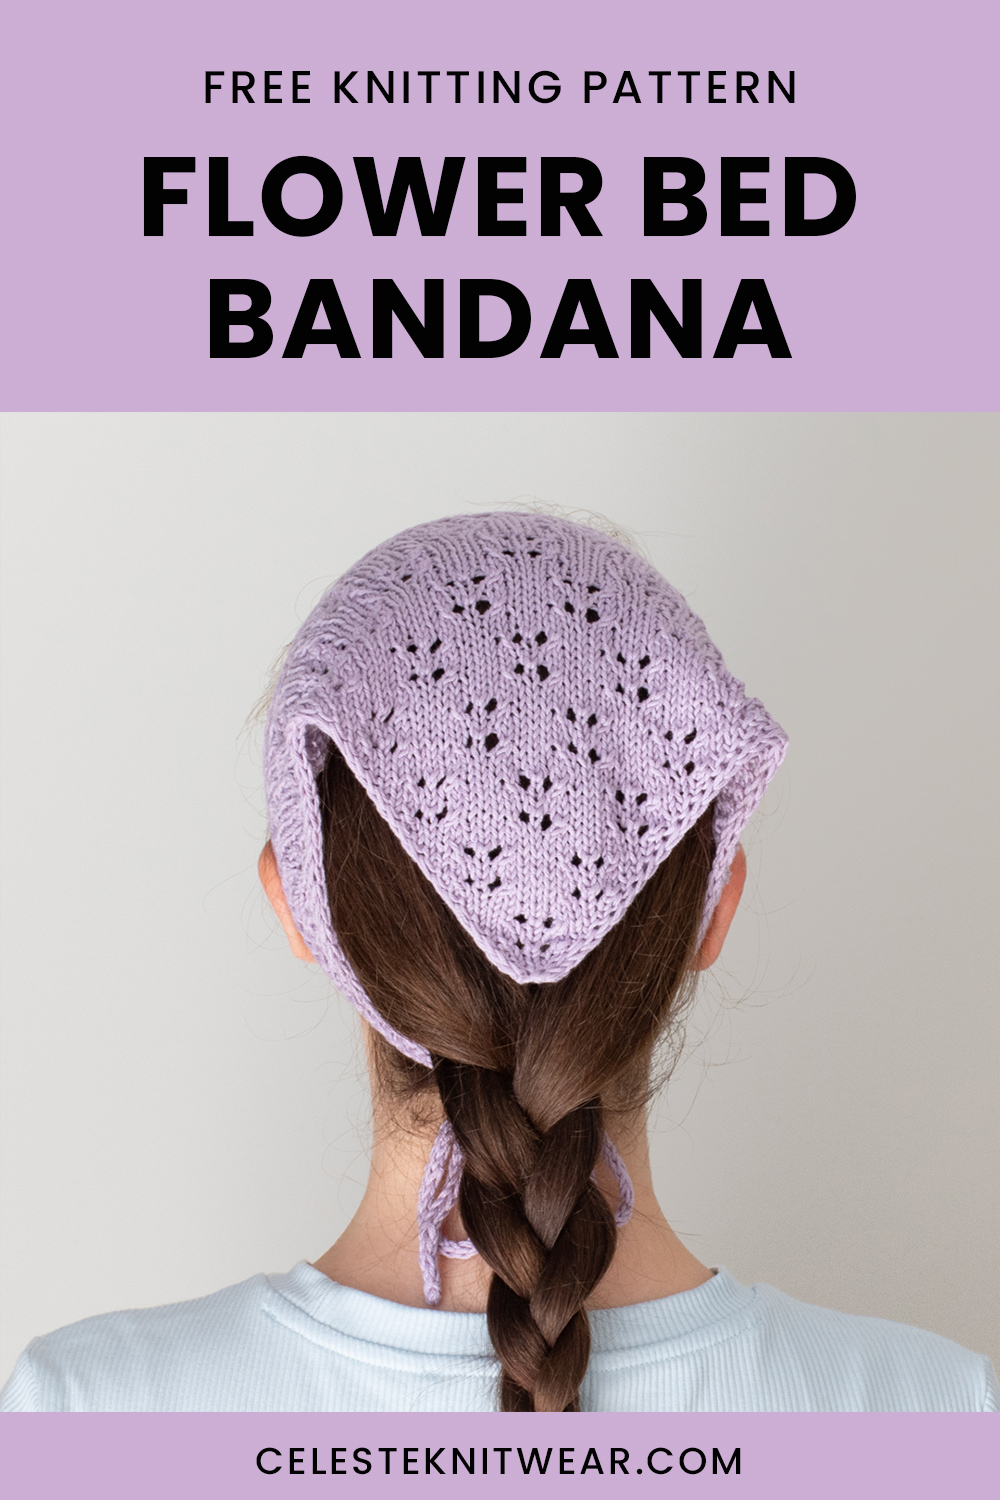
The result is a bandana with a continuous-looking knitted edge and two long ties, both approximately 30 cm long according to the pattern instructions.
Finishing and Measuring the Completed Piece
Once the second tie has been bound off and all tails have been woven in, measure the bandana body. The finished target measurements are approximately 43cm/17in in length without ties and 22cm/8.75in in height.
The gauge is specified as 24 stitches x 32 rows over 10 x 10 cm (4 x 4in) in stockinette stitch after blocking. Because the gauge is stated after blocking, the final evaluation of size should take blocking into account.
Blocking can also help the lace structure settle into a more defined shape. When handling the eyelet fabric, avoid using excessive force. The goal is to allow the knitted fabric to settle according to the stated finished measurements rather than stretching it arbitrarily.
A Practical Error-Checking Method
If something looks wrong during knitting, stop at the earliest point where the fabric stops matching the pattern rather than immediately undoing a large section.
- Check the edge: The first 2 stitches should be knitted and the final 2 stitches slipped with yarn in front on every row.
- Check increases: On the specified RS increase rows, there should be two added stitches.
- Check the foundation checkpoints: The increasing rows should finish with 7, 9, 11, 13, 15, and 17 stitches respectively.
- Check eyelets: The eyelet pattern is specifically k2tog, yo, k1, yo, ssk.
- Check row direction: Make sure you are following RS and WS instructions on the correct side.
- Check live stitches: After the body is finished, do not bind them off; they are needed for the i-cord edging.
Beginner-Friendly Tips for Cleaner Results
Use the Stitch Counts as Milestones
Counting every stitch repeatedly can become tiring, particularly as the bandana grows. The listed stitch counts on the early increase rows are excellent checkpoints. Use them to confirm that the shape is developing correctly.
Do Not Pull the Edge Stitches Tight
The pattern specifically says not to tighten the edge stitches or the increased stitches. Follow this instruction consistently. A relaxed edge will make it easier to maintain the intended shape.
Keep the Eyelet Sequence Familiar
The eyelet pattern is short, but it contains several actions: k2tog, yo, k1, yo, ssk. Read the full sequence before beginning a decorative row. Once the motif becomes familiar, the repeated structure becomes easier to recognize visually.
Measure the Ties Instead of Guessing
Both ties are worked to approximately 30 cm. Use the measuring tape rather than relying on how long the cord appears in your hand.
Protect the Live Stitches
When the body is complete, leave the stitches on the needle as instructed. These stitches are not waste stitches; they are part of the later edging construction.
Quick Construction Checklist
- Gather Drops Safran in lavender, uni color 05, 1 ball.
- Prepare 3mm (US 2.5) knitting needles.
- Prepare a pair of 3mm (US 2.5) DPNs for the ties.
- Have a tapestry needle, measuring tape, and scissors ready.
- Cast on 5 stitches.
- Work the WS set-up row.
- Complete foundation Rows 1–12.
- Use the stitch-count checkpoints throughout the foundation.
- Work the eight-row main pattern.
- Repeat Rows 1–8 seven more times or until desired length.
- Break yarn with a 10cm (4″) tail.
- Leave the bandana stitches on the needle.
- Make the first 3-stitch i-cord.
- Continue until it measures approximately 30 cm.
- Attach the i-cord to the live bandana stitches using the stated ssk construction.
- Continue until 3 stitches remain.
- Work the second i-cord for approximately 30 cm.
- Bind off, cut yarn, and weave in tails.
- Check the finished measurements and block the piece.
Frequently Asked Questions
What size is the Flower Bed Bandana?
The pattern is written for one size. The finished measurements are 43cm/17in in length without ties and 22cm/8.75in in height.
What yarn is required?
The pattern uses Drops Safran in lavender, uni color 05, with 1 ball required.
What needle size should I use?
The main bandana is knitted with 3mm (US 2.5) knitting needles. A pair of 3mm (US 2.5) DPNs is used for the ties.
How long are the ties?
Each i-cord tie is knitted until the tube measures approximately 30 cm.
How is the decorative eyelet made?
The eyelet pattern is worked as k2tog, yo, k1, yo, ssk.
Can M1L and M1R be simplified?
Yes. The pattern notes that M1L/M1R can be replaced with yo.
Should the bandana stitches be bound off after the main body?
No. After reaching the desired length, break the yarn leaving a 10cm (4″) tail and set the bandana aside while leaving the stitches on the needle. The live stitches are used during the i-cord edging stage.
Why are the final two stitches slipped?
The last two stitches are slipped with yarn in front as part of the i-cord edging construction. This treatment is used consistently on every row.
Final Finishing Guide
The Flower Bed Bandana is a good example of how a relatively small number of knitting techniques can create a highly decorative accessory. The triangular fabric grows through controlled increases, the eyelet pattern introduces openwork, and the i-cord edges give the finished piece a polished outline.
The most important thing is not to rush the transition from the body to the ties. The bandana’s live stitches have a specific role in the edging, so keeping them secure and following the transfer-and-ssk sequence carefully will make the finishing stage much more manageable.
Once the final i-cord has been bound off and the yarn tails woven in, check the measurements again. The target finished body measurements are 43cm/17in in length without ties and 22cm/8.75in in height. The stated gauge is 24 stitches x 32 rows over 10 x 10 cm (4 x 4in) in stockinette stitch after blocking.
Final Thoughts
The Flower Bed Bandana offers a compact project with several useful knitting lessons built directly into its construction. You practice increasing evenly on right-side rows, maintaining a consistent i-cord edge, creating eyelets, reading an eight-row repeat, preserving live stitches, and constructing i-cord ties.
For the cleanest result, keep the technical checkpoints close at hand: start with 5 stitches, follow the foundation sequence through the 17-stitch checkpoint after Row 11, work the main eight-row pattern as instructed, retain the live stitches at the end of the body, and measure each tie to approximately 30 cm.
Following those landmarks makes the project easier to navigate without changing any of the original construction. The result is a lightweight knitted bandana with a decorative lace surface, neat i-cord edging, and two practical ties that complete the accessory.