
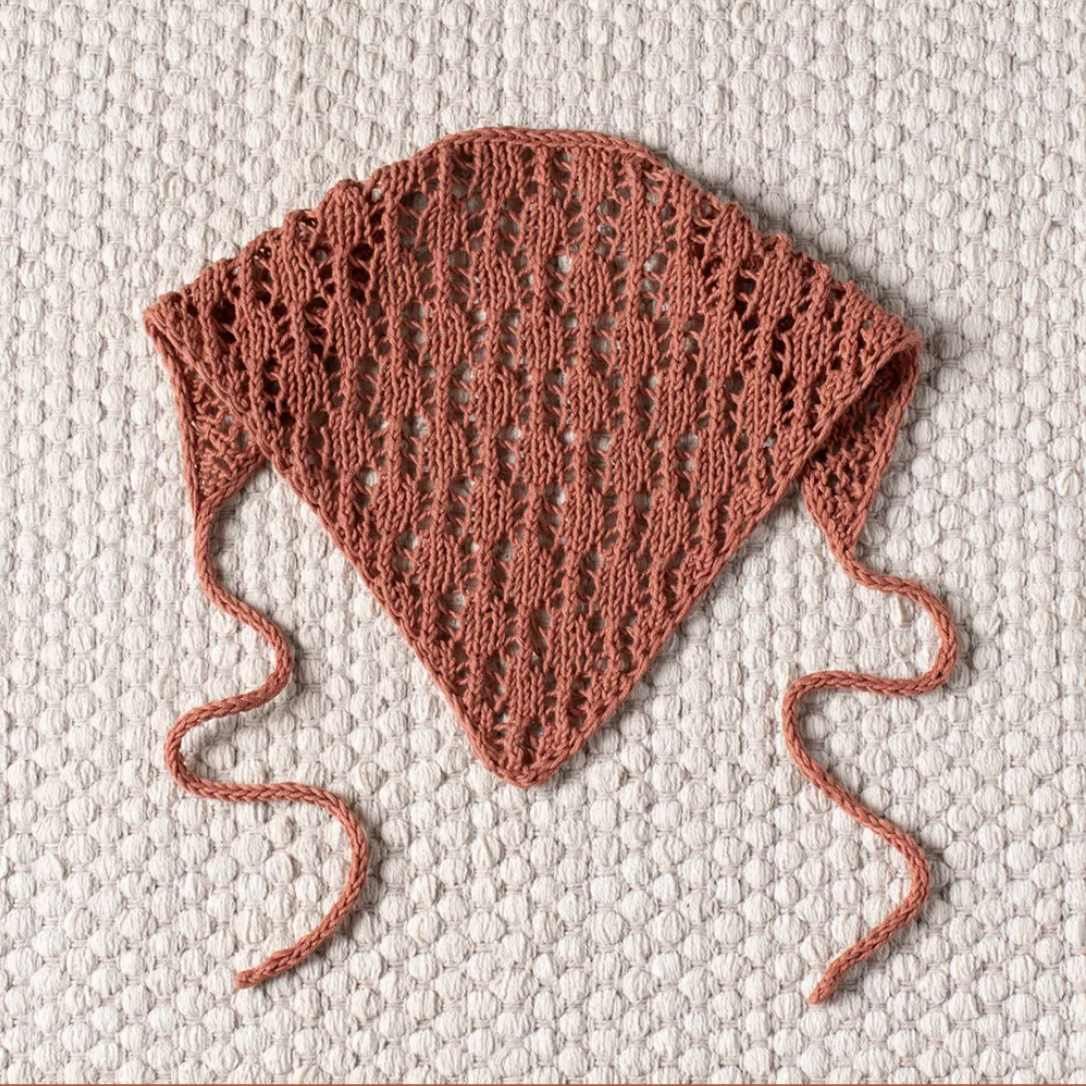
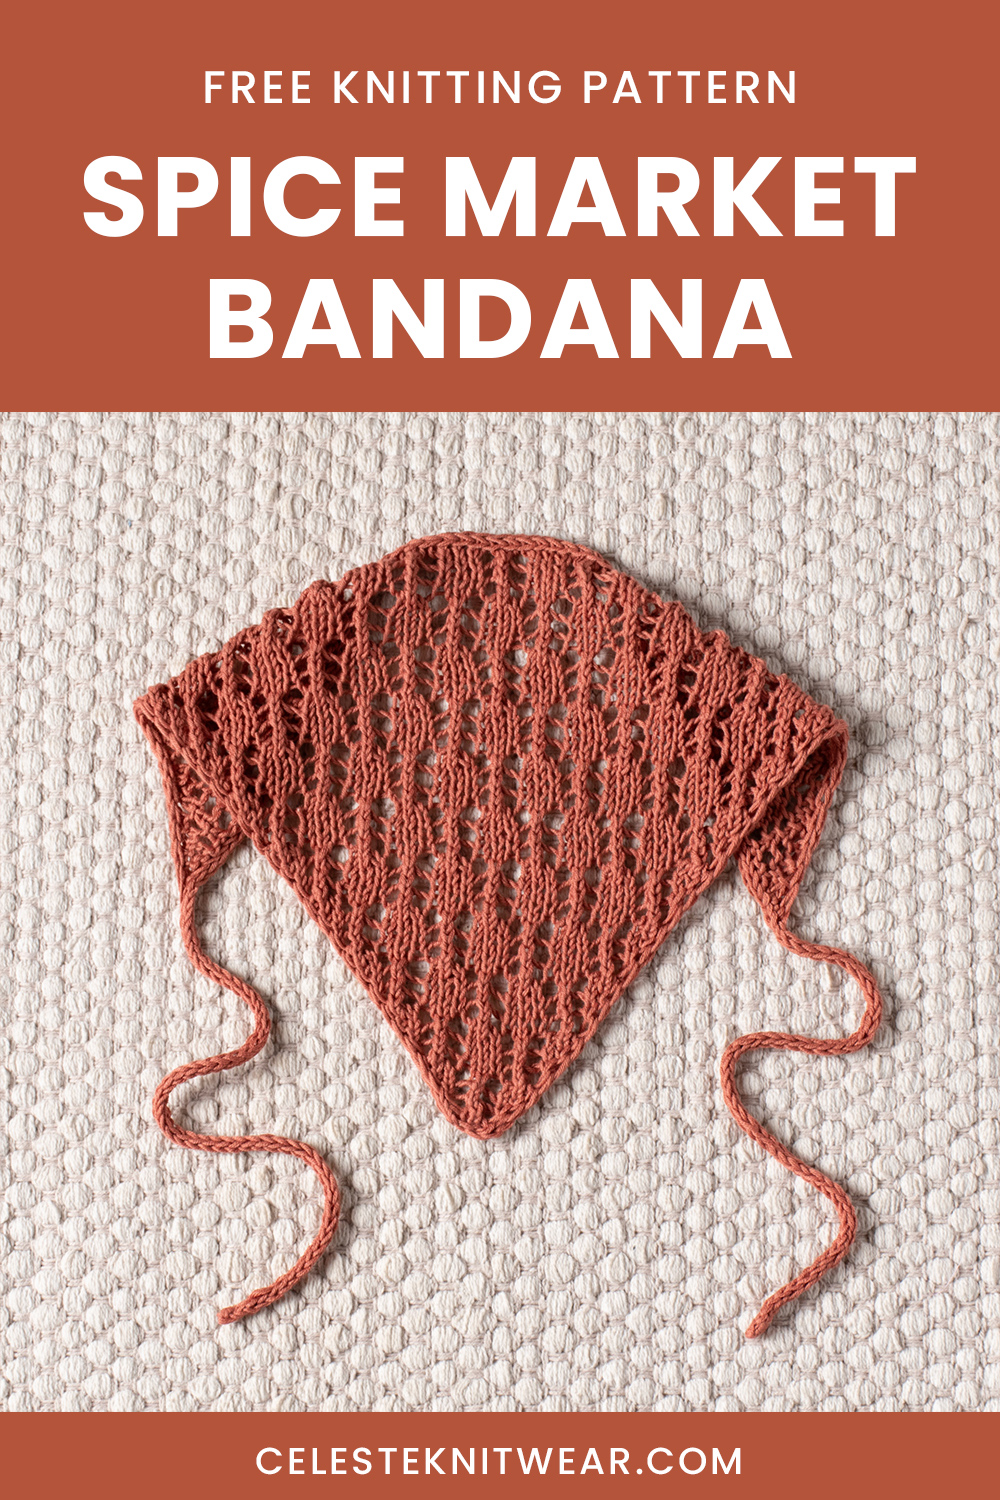
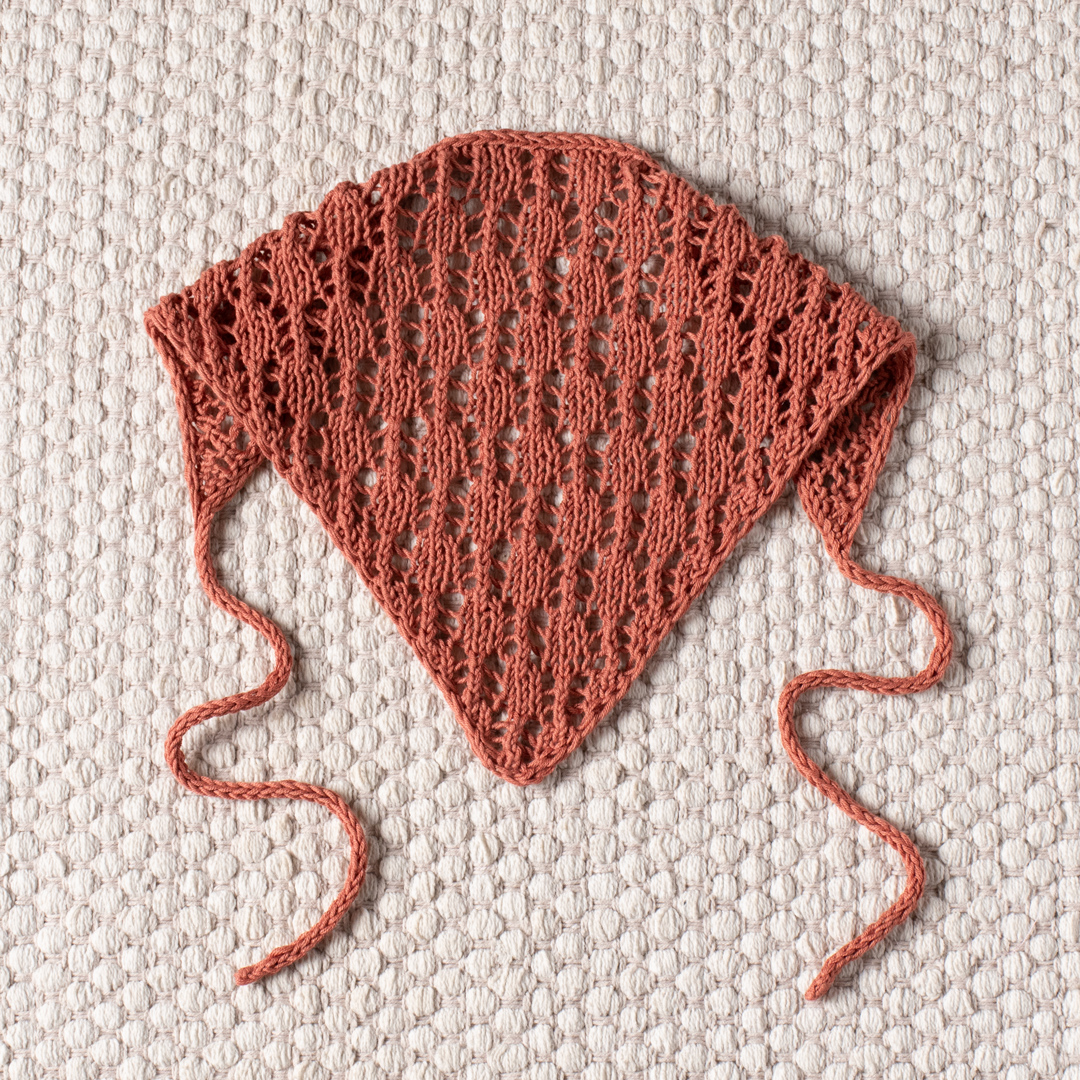
The Spice Market Bandana is a charming knitted summer accessory made from sport-weight cotton yarn. Its triangular shape, open lace stitch, tidy i-cord edges, and long knitted ties give it a polished handmade finish while keeping the construction surprisingly compact. The project is worked back and forth, beginning at the bottom edge and gradually growing through increases worked on the right-side rows.
This guide takes a workshop-style approach to the pattern. Instead of looking at the project as one long set of instructions, we will examine the important construction checkpoints: preparing the materials, understanding the edge stitches, completing the setup, recognizing the lace sequence, maintaining the correct increases, preserving the live stitches, and finally attaching the i-cord ties.
The original design is written for one size, but it also allows the finished size to be modified by adding or subtracting repeats. This makes the pattern useful for knitters who want to understand not only how to follow the written instructions, but also how the six-row repeat controls the growth of the triangular fabric.
Project Overview
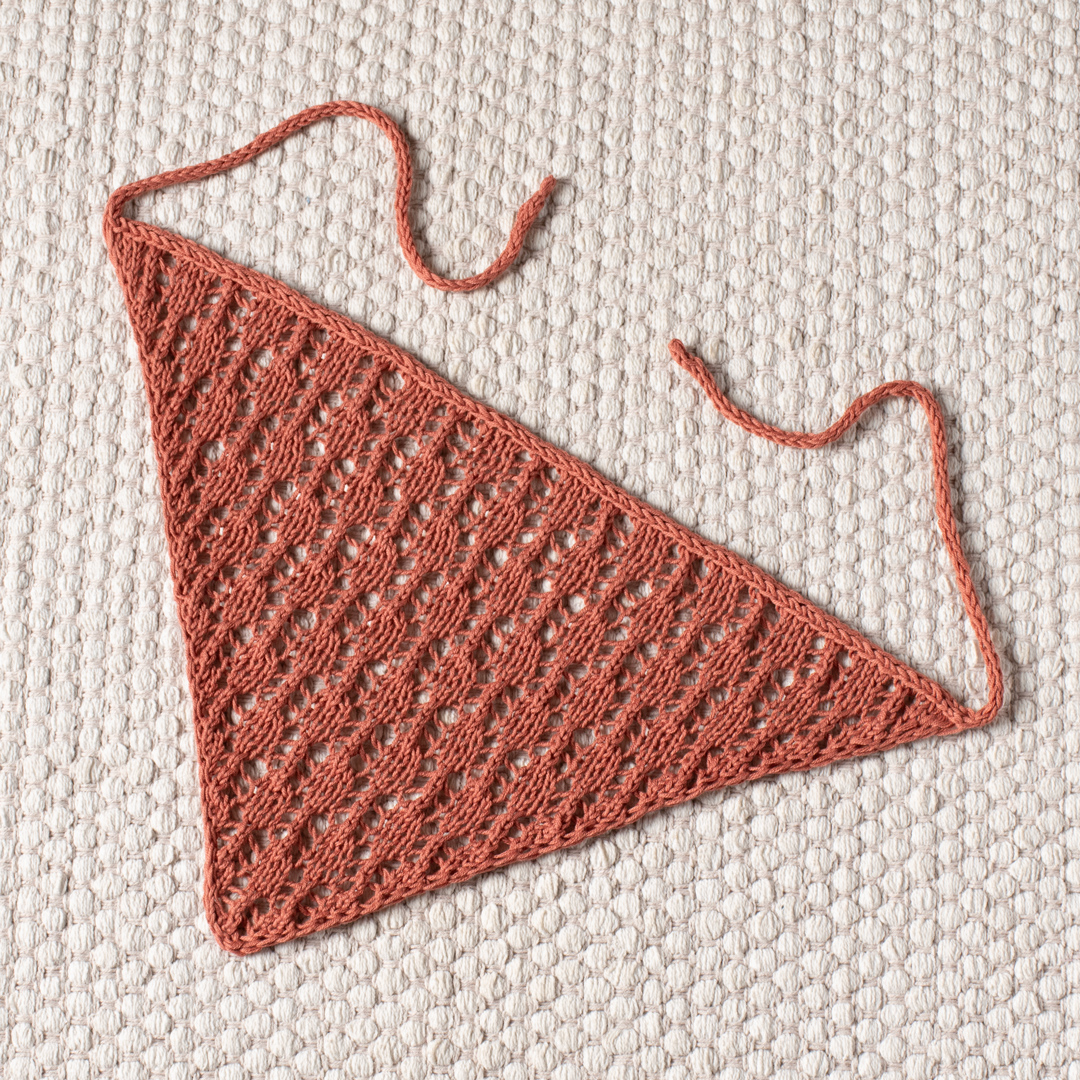
The bandana is knitted from the bottom edge upward. The main fabric is not worked in the round; instead, it is knitted back and forth. The triangle becomes larger as stitches are added on the right-side rows.
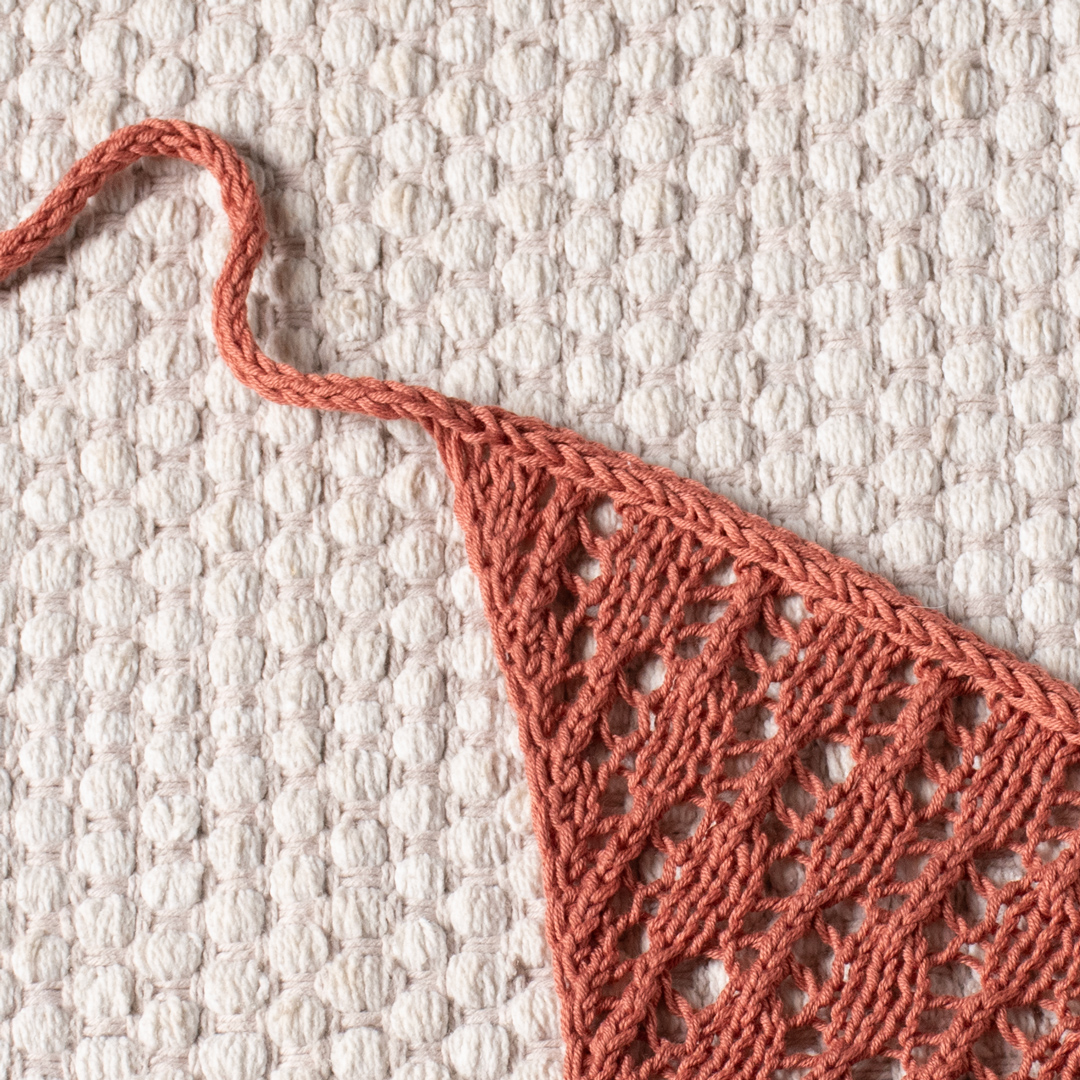
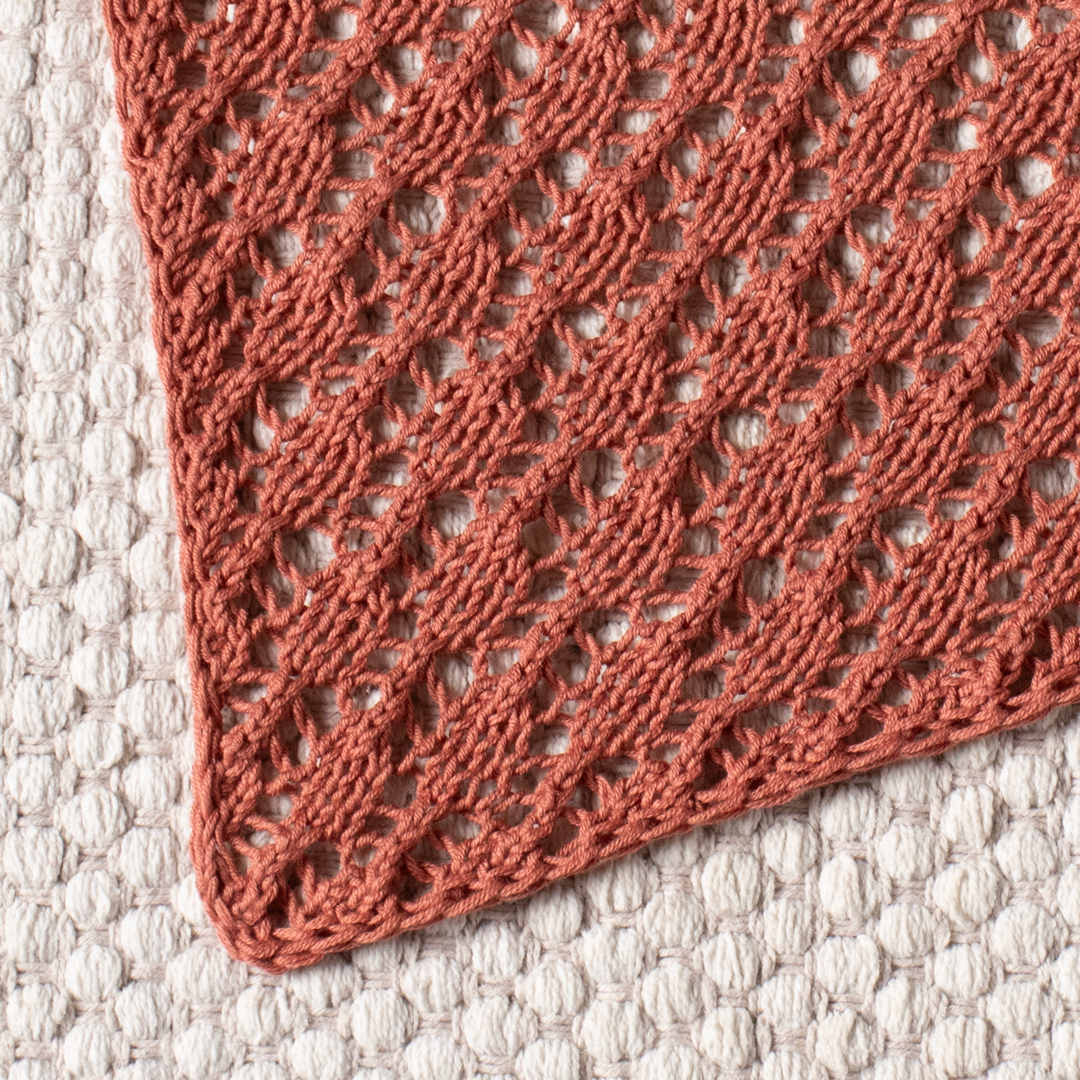
The design has two especially recognizable details. First, the lace stitch creates decorative openings throughout the fabric. Second, the first and last two stitches of every row form i-cord edging. This edging keeps the sides neat and helps prevent the fabric from curling.
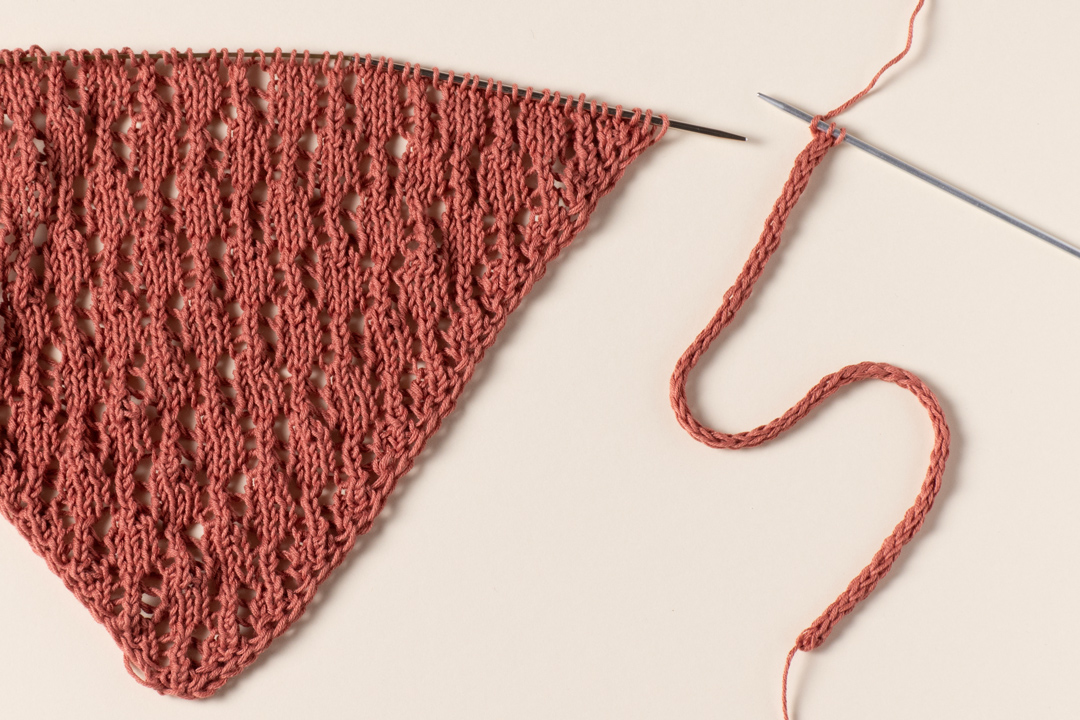
Once the main triangle is complete, the project transitions into the tie construction. A three-stitch i-cord is knitted first, then attached directly to the live stitches of the bandana. The edging continues across the bandana, after which the second i-cord tie is worked.
This means that the project can be thought of as three main sections:
- Main triangle: the lace-patterned bandana fabric worked from the bottom edge upward.
- First tie and i-cord edging: the first approximately 30 cm tie is connected to the live bandana stitches.
- Second tie: the final approximately 30 cm i-cord is worked and finished.
Materials and Tools
The source specifies Drops Safran in red clay, uni color 59. The required quantity is one ball. This is a sport-weight cotton yarn, making it appropriate for the lightweight character of the accessory.
- Yarn: Drops Safran
- Color: red clay, uni color 59
- Quantity: 1 ball
- Main knitting needles: 3mm (US 2.5)
- DPNs for the ties: pair of 3mm (US 2.5) DPNs
- Tapestry needle
- Measuring tape
- Scissors
Finished Measurements and Gauge
The Spice Market Bandana is written in one size. The finished length without the ties is 40cm/15.75in, while the height is 23cm/9in.
The specified gauge is 24 stitches by 32 rows over 10 x 10 cm (4 x 4in) in stockinette stitch after blocking. The gauge information is important when checking the scale of the finished fabric, especially if your knitting tension differs from the pattern tension.
- Size: One size
- Finished length without ties: 40cm/15.75in
- Height: 23cm/9in
- Gauge: 24 sts x 32 rows over 10 x 10 cm (4 x 4in) in stockinette stitch after blocking
Learn the Pattern Language First
Several abbreviations appear repeatedly in the instructions. Understanding them before starting makes the lace section considerably easier to follow.
- k: knit.
- k3tog: knit 3 stitches together. Slip the next 2 stitches knitwise, slipping both stitches together rather than one by one, to the right-hand needle. Knit the next stitch, then pass the 2 slipped stitches over the knit stitch.
- p: purl.
- RS: right side.
- sl: slip stitch as if to purl with yarn in front.
- ssk: slip 1 stitch knitwise, slip the next stitch knitwise, return the 2 stitches back to the left needle, and knit those 2 stitches together through the back loops.
- WS: wrong side.
- yo: yarn over.
- *-*: repeat the instructions between the asterisks the number of times specified.
The Key to the Neat Edges
The i-cord edges are built into the bandana rather than added separately. The first two stitches of every row are knitted. The final two stitches of every row are slipped as if to purl with the yarn in front.
These edge stitches are intentionally handled differently from the center of the work. They create the clean side borders that frame the lace fabric and help prevent curling.
One important instruction from the pattern is not to tighten the edge stitches. Allow them to remain relaxed as you work. Pulling them tightly can interfere with the intended appearance and flexibility of the edging.
Understanding the Increase System
The triangular shape depends on increases worked at the beginning and end of every right-side row. Two stitches are added on each RS row using M1R and M1L before and after the two i-cord edge stitches.
The source also provides a simplification: M1L and M1R can be replaced with yo. This option is included to make the shaping easier to work if preferred.
As with the edge stitches, the pattern says not to tighten the increased stitches. Maintaining even tension helps the expanding triangle develop naturally.
Beginning the Bandana
Cast on 5 stitches to begin. The first section establishes the basic structure before the full six-row lace repeat takes over.
Set-Up Row — WS
Work: k2, p1, sl2.
This establishes the two-stitch knitted edge, the central purl stitch, and the final two slipped stitches.
Row 1 — RS
Work: k2, M1R, k1, M1L, sl2 (7sts).
Row 2
Work: k2, p to last 2 sts, sl2.
Row 3 — RS
Work: k2, M1R, yo, k3tog, yo, M1L, sl2 (9sts).
Row 4
Work: k2, p to last 2 sts, sl2.
Row 5 — RS
Work: k2, M1R, k1, yo, k3tog, yo, k1, M1L, sl2 (11sts).
Row 6
Work: k2, p to last 2 sts, sl2.
Row 7 — RS
Work: k2, M1R, k2, yo, k3tog, yo, k2, M1L, sl2 (13sts).
Row 8
Work: k2, p to last 2 sts, sl2.
Moving Into the Six-Row Repeat
After the setup section, the main lace pattern is worked over six rows. The sequence alternates between right-side shaping rows and wrong-side rows.
Rows 1, 3, and 5 are the shaping rows. Each of these rows increases the total stitch count by two. Rows 2, 4, and 6 are wrong-side rows worked as k2, p to the last 2 stitches, sl2.
Pattern Row 1 — RS
Work: k2, M1R, *yo, k3tog, yo, k3* to last 5sts, yo, k3tog, yo, M1L, sl2 (2sts increased).
Pattern Row 2 — WS
Work: k2, p to last 2 sts, sl2.
Pattern Row 3
Work: k2, M1R, k1, *yo, k3tog, yo, k3* to last 6sts, yo, k3tog, yo, k1, M1L, sl2 (2sts increased).
Pattern Row 4
Work: k2, p to last 2 sts, sl2.
Pattern Row 5
Work: k2, M1R, k2, *yo, k3tog, yo, k3* to last 7sts, yo, k3tog, yo, k2, M1L, sl2 (2sts increased).
Pattern Row 6
Work: k2, p to last 2 sts, sl2.
Repeat rows 1-6 9 more times or until the desired length is reached.
Reading the Lace Without Losing Your Place
The lace section becomes easier to manage when you separate the pattern into its three right-side variations. Pattern Row 1 begins with the edge stitches and M1R, followed by the repeated lace sequence. Pattern Row 3 adds one knit stitch before and after the repeated lace section. Pattern Row 5 uses two knit stitches in those positions.
The wrong-side rows are intentionally simple. This gives you an opportunity to check your work before returning to the next shaping row.
A practical way to organize your knitting is to keep the six rows visible while working. After each completed row, mark it on paper or in your preferred row-counting system. This does not change the pattern and can make the repeated sequence easier to navigate.
Stitch Checkpoints During the Setup
The setup section provides useful stitch-count checkpoints. You begin with 5 stitches. After Row 1, there are 7 stitches. Row 3 brings the total to 9 stitches, Row 5 to 11 stitches, and Row 7 to 13 stitches.
These numbers are useful when checking whether the increases have been worked correctly. If your stitch count is different, it is worth reviewing the most recent right-side row before proceeding.
- Beginning: 5 stitches
- After Row 1: 7 stitches
- After Row 3: 9 stitches
- After Row 5: 11 stitches
- After Row 7: 13 stitches
Completing the Main Triangle
Continue repeating Rows 1-6 9 more times or until the desired length is reached. The pattern is designed so that the triangle expands as the right-side rows add stitches.
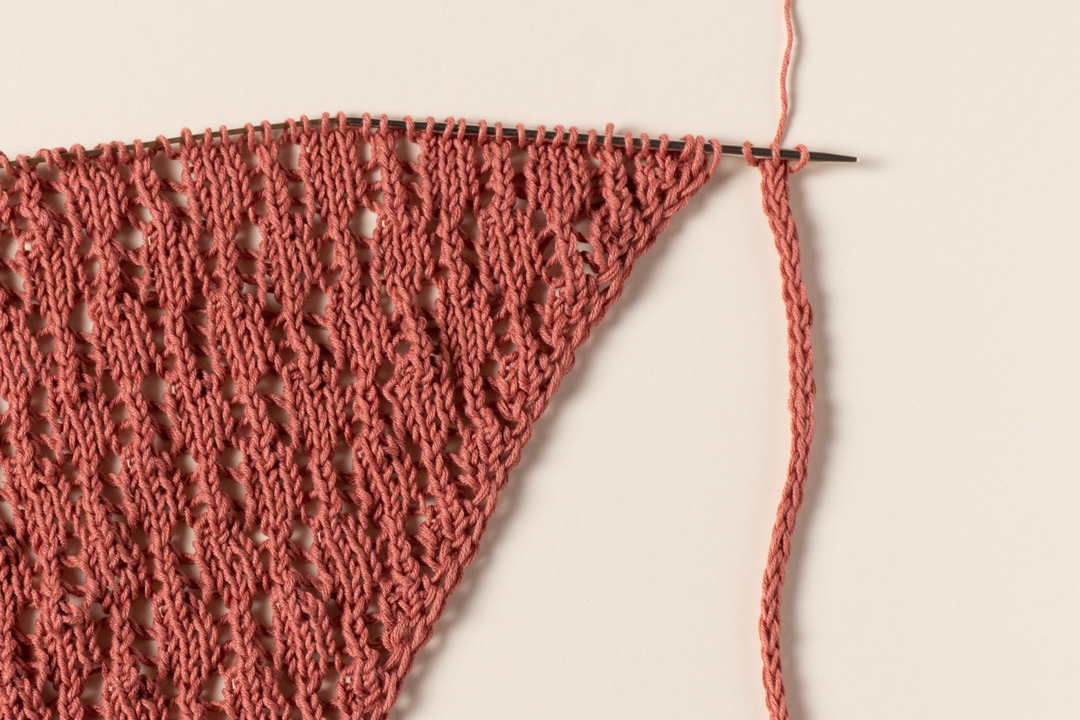
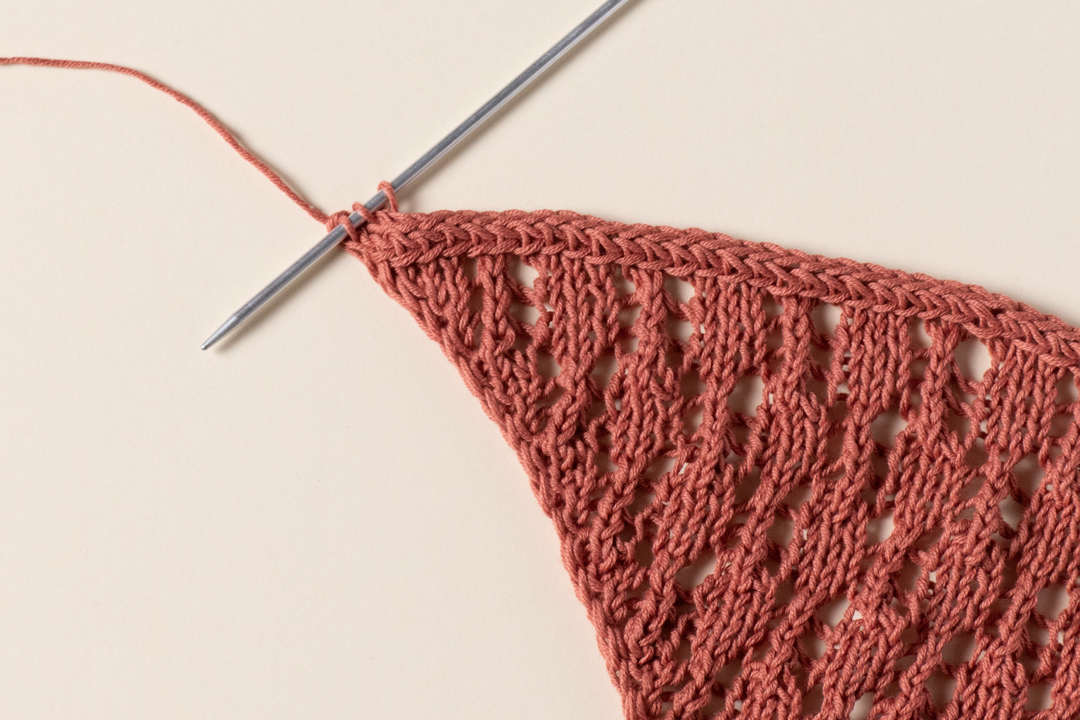
When the main section is complete, break the yarn leaving a 10cm (4″) tail. Set the bandana aside, but keep the live stitches on the needle.
This is one of the most important transition points in the entire project. The live stitches are not discarded because they will be incorporated into the i-cord edging. Binding them off would prevent you from following the stated construction.
Creating the First Tie
The first tie is worked on a pair of 3mm (US 2.5) DPNs. Cast on 3 stitches and do not turn.
Work the following repeated movement:
*Slip the 3 stitches to right side of needle. Knit 3.*
Continue until the i-cord tube measures approximately 30 cm. Do not cut the yarn.
The instruction not to turn is important because the i-cord is created by moving the stitches to the opposite end of the needle and knitting them again. This produces a narrow tube rather than a flat strip.
Joining the I-Cord to the Live Stitches
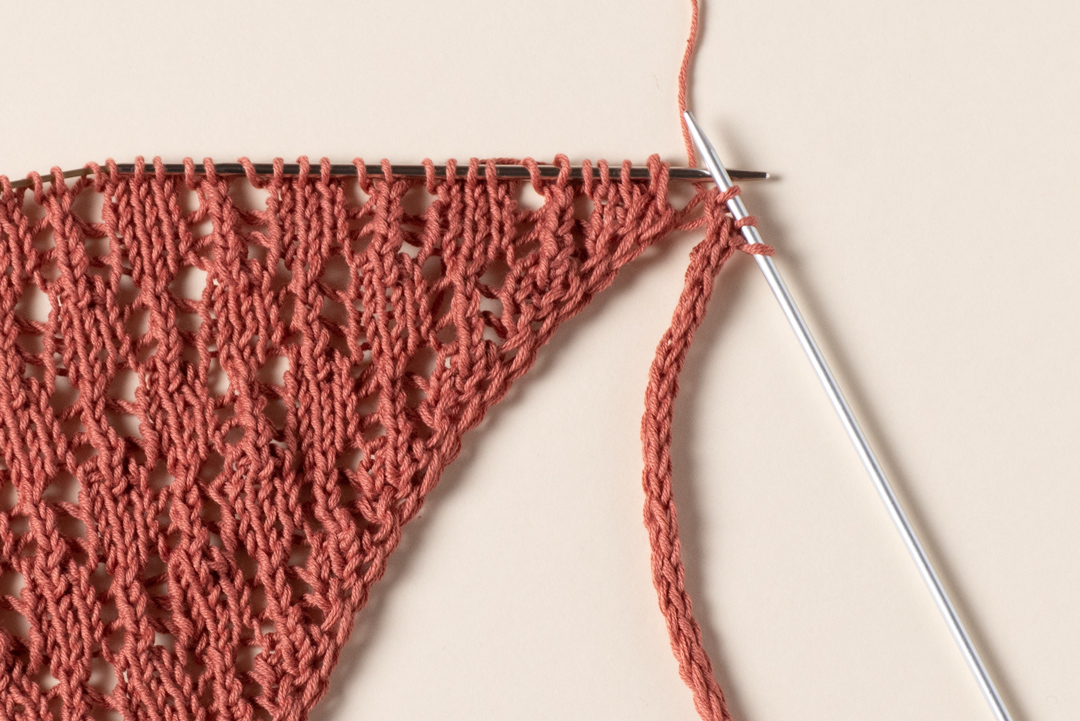
Once the first i-cord measures approximately 30 cm, transfer the 3 i-cord stitches to the needle while holding the live bandana stitches.
Begin by knitting the first two i-cord stitches. Then work an ssk, knitting the last i-cord stitch together with the first bandana stitch.
Next, transfer the first 3 stitches to the needle while holding the live bandana stitches. Continue with the repeated edging sequence:
*k2, ssk, transfer 3 stitches to needle, holding live bandana stitches*
Repeat this sequence until only 3 stitches remain.
The ssk is therefore used as the joining action. It incorporates one bandana stitch into the i-cord while the remaining i-cord stitches continue forward. The repeated process turns the first tie into a continuous edge that travels across the bandana.
Understanding the SSK Used for the Edging
The pattern defines ssk as follows: slip 1 stitch knitwise, slip the next stitch knitwise, return the 2 stitches back to the left needle, and knit those 2 stitches together through the back loops.
During the bandana edging, the last i-cord stitch is knitted together with the first available bandana stitch. Afterward, the first three stitches are transferred to the other side of the needle so the i-cord can continue.
If this movement feels unfamiliar, work slowly during the first few repetitions. The objective is not speed but maintaining the three-stitch i-cord structure while incorporating the live stitches one at a time.
Working the Second Tie
When the edging reaches the point where only 3 stitches remain, begin the second i-cord tie.
Work the same basic sequence used for the first tie:
*Slip 3 stitches to right side of needle. Knit 3.*
Continue until the second tube measures approximately 30 cm.
Unlike the first tie, the second tie is completed independently. Once it reaches approximately 30 cm, bind off, cut the yarn, and weave in the tails.
How the Size Can Be Modified
The pattern allows the size to be modified by adding or subtracting repeats. The main repeating section consists of Rows 1-6, and the written instructions specify repeating those rows 9 more times or continuing until the desired length is reached.
This flexibility comes from the way the triangle grows. The lace repeat continues while the right-side rows add two stitches. Therefore, changing the number of repeats changes the amount of fabric produced before moving to the tie construction.
When modifying the size, the important point is to preserve the structure of the written repeat rather than changing individual stitch instructions. The i-cord edges and the lace sequence remain part of the characteristic design.
Common Mistakes to Watch For
Accidentally Tightening the Edges
The first and last two stitches should not be tightened. They are part of the i-cord edging, so allowing them to remain relaxed helps maintain the intended border.
Missing an Increase
The right-side shaping rows increase by two stitches. Check the M1R and M1L positions whenever the stitch count does not look correct.
Confusing the Lace Rows
Rows 1, 3, and 5 of the main repeat are not identical. Row 1 has the repeated lace sequence immediately after M1R, Row 3 includes k1 before and after that sequence, and Row 5 includes k2.
Turning the I-Cord
The i-cord instructions specifically say not to turn. Instead, slip the three stitches to the right side of the needle and knit three.
Binding Off Too Early
When the main triangle is complete, the live stitches must remain on the needle. Break the yarn leaving a 10cm (4″) tail and set the bandana aside without binding off those stitches.
Finishing Checklist
- Confirm the main bandana has been worked to the desired length.
- Check that the main section follows the six-row repeat.
- Confirm that two stitches are added on each right-side pattern row.
- Break the yarn with a 10cm (4″) tail after the main section.
- Keep the live stitches on the needle.
- Work the first three-stitch i-cord to approximately 30 cm.
- Connect the i-cord to the live stitches using the specified ssk method.
- Continue the edging until only 3 stitches remain.
- Work the second i-cord to approximately 30 cm.
- Bind off the second tie.
- Cut the yarn and weave in the tails.
Final Measurement Check
For the stated one-size version, the finished bandana should measure approximately 40cm/15.75in in length without ties and 23cm/9in in height. Each tie is worked to approximately 30 cm.
The gauge given by the pattern is 24 stitches and 32 rows over 10 x 10 cm (4 x 4in) in stockinette stitch after blocking. Because the finished measurements and gauge are separate pieces of information, use both when evaluating the result rather than relying on appearance alone.
Why the Construction Works So Well
The strength of this design is its efficient construction. The main triangle is worked as one continuous piece, so there are no separate triangular sections that need to be joined. The lace is integrated directly into the shaping, and the i-cord edges are created while knitting the main fabric.
The ties also become part of the construction rather than being sewn on as separate finished pieces. The first tie transitions directly into the i-cord edging through the live bandana stitches, and the second tie continues from the opposite side.
This approach keeps the final accessory visually clean. The lace provides decoration, the cotton yarn keeps the project lightweight, and the i-cord borders provide a structured finish.
Quick Reference for the Entire Pattern
- Pattern name: Spice Market Bandana
- Project type: Summer knitted accessory
- Construction: Worked back and forth from the bottom edge upward
- Yarn: Drops Safran
- Color: red clay, uni color 59
- Quantity: 1 ball
- Yarn weight: Sport-weight cotton
- Main needles: 3mm (US 2.5) knitting needles
- Tie needles: pair of 3mm (US 2.5) DPNs
- Starting stitches: 5
- Finished length without ties: 40cm/15.75in
- Height: 23cm/9in
- Gauge: 24 sts x 32 rows over 10 x 10 cm (4 x 4in) in stockinette stitch after blocking
- Main repeat: Rows 1-6
- Repeat instruction: Repeat rows 1-6 9 more times or until desired length
- First tie: approximately 30 cm
- Second tie: approximately 30 cm
- Main-section yarn tail: 10cm (4″)
Frequently Asked Questions
Is this pattern suitable for a summer accessory?
Yes. The design is described as a summer accessory and uses sport-weight cotton yarn, specifically Drops Safran in red clay, uni color 59.
What creates the lace effect?
The lace pattern uses yarn overs and k3tog decreases within the right-side rows. These are combined with the shaping increases that expand the triangular fabric.
How are the edges kept neat?
The first two stitches of every row are knitted, while the final two stitches are slipped with yarn in front. These stitches form i-cord edges. The pattern also instructs the knitter not to tighten the edge stitches.
How many stitches are cast on?
The pattern begins with 5 stitches.
What happens after the setup rows?
The main six-row lace repeat begins. Rows 1, 3, and 5 contain the right-side increases and lace work, while Rows 2, 4, and 6 are wrong-side rows.
How many times should the six-row repeat be worked?
The instructions say to repeat Rows 1-6 9 more times or until the desired length is reached.
How long should the ties be?
Both i-cord ties are worked until the tube measures approximately 30 cm.
What should I do with the live stitches after finishing the triangle?
Break the yarn leaving a 10cm (4″) tail and set the bandana aside while keeping the live stitches on the needle. They are needed for the i-cord edging connection.
Can the size be adjusted?
Yes. The source states that the size can be modified by adding or subtracting repeats.

Final Thoughts
The Spice Market Bandana is a compact pattern that brings together several useful knitting techniques in a single project. The triangular shape is created through controlled increases, the lace section is formed with yarn overs and k3tog decreases, and the edges are finished with integrated i-cord stitches.
The project also has a logical progression that makes it easier to understand when divided into checkpoints. Begin with the five-stitch cast-on, establish the edge structure, complete the setup rows, and then move into the six-row repeat. Once the desired length is reached, preserve the live stitches and transition into the first i-cord tie and edging.
Paying attention to the small details is especially valuable with this pattern. Keep the first and last two stitches relaxed, maintain the two-stitch increases on the right-side rows, follow the lace sequence carefully, and do not turn the work while creating the i-cord.
When the construction is complete, the result is a lightweight triangular accessory measuring approximately 40cm/15.75in in length without ties and 23cm/9in in height for the stated size. The approximately 30 cm i-cord ties complete the design and make the finished bandana practical to wear.
Whether you follow the stated size exactly or use the option to add or subtract repeats, the key to a successful result is consistency. Keep the technical instructions unchanged, use the specified yarn and needles, monitor the stitch counts at the important checkpoints, and allow the lace and i-cord edging to develop without excessive tension.