
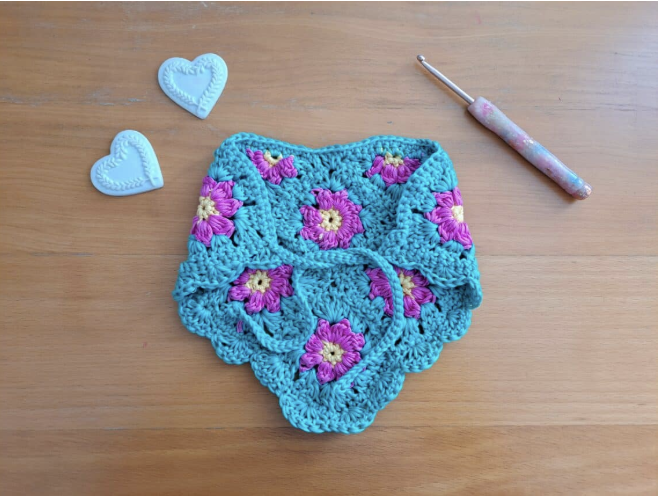
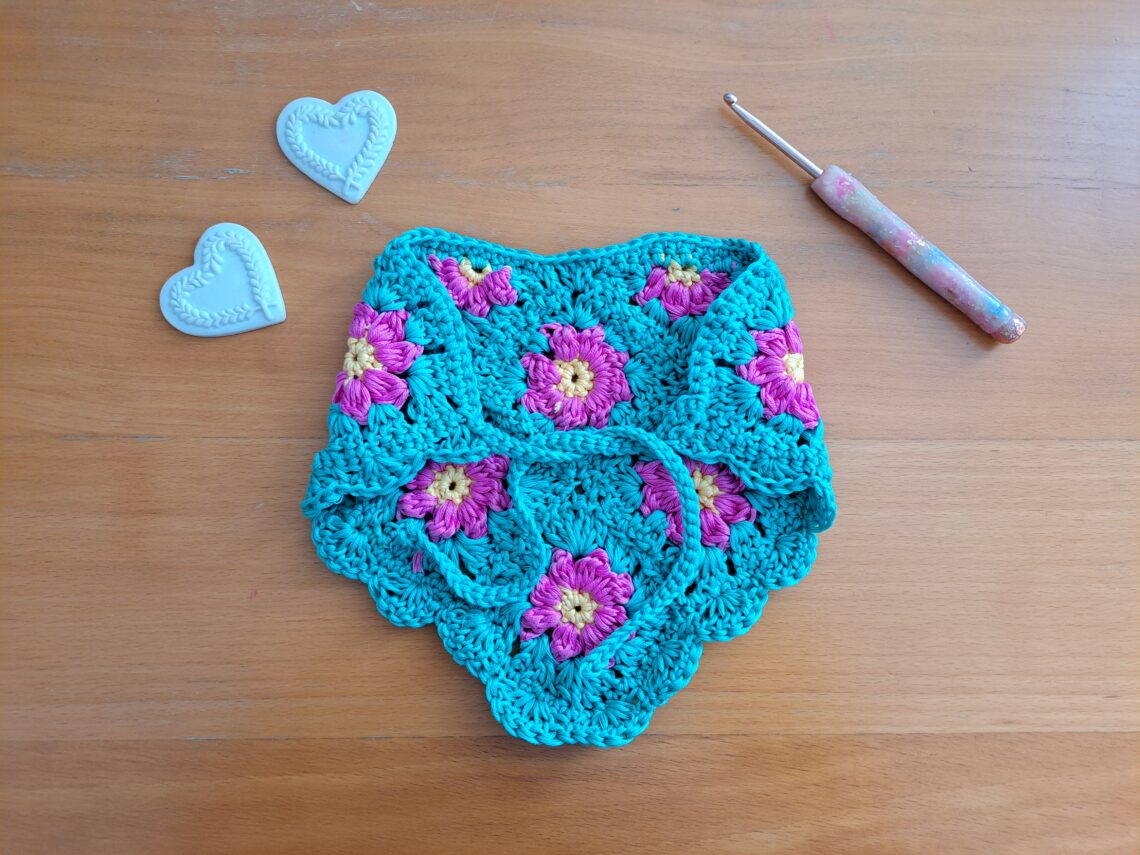
If you love crochet projects that feel connected to spring, handmade fashion, and the gentle charm of the cottagecore aesthetic, the Lilly Cottagecore Bandana is a particularly enjoyable project to make. Instead of being worked as one large piece, this design is built from several small floral motifs that are later sewn together. The result is a triangular bandana with long ties and a decorative shell stitch edge.
The inspiration behind the design comes from spring and the traditional May 1st lily-of-the-valley celebration in France, often associated with the “1er Mai” and “Fete du Muguet.” The floral theme is translated into crochet through small flower granny squares and matching flower granny triangles. Vanilla Yellow creates the flower centers, Pink Panther forms the petals, and Mint Green provides the surrounding granny structure.
This project is rated Easy + and uses US crochet terminology, with British equivalents supplied in brackets. It is a useful project for crocheters who already know basic stitches and want to practice working in the round, changing colors, creating granny-style motifs, joining separate pieces, and adding a decorative border.
The finished bandana is approximately 8 x 12 inches (20.5 x 30.5 cm), including the shell stitch edging. Each granny square is approximately 3 x 3 inches (7 x 7 cm). The pattern states that gauge is not crucial, but consistent tension is still valuable because the individual motifs need to come together neatly.
What Makes This Bandana Different?
The most interesting feature of this pattern is its modular construction. Six flower granny squares form the central motif structure, while two flower granny triangles help complete the triangular shape. Each flower is made in three rounds, but the square and triangle versions use different starting stitch counts and different final constructions.
After the motifs are sewn together, the project becomes a wearable accessory through a simple upper border and two long ties. The lower V-shaped section is then finished with a shell stitch edging. This gives the bandana a decorative outline while maintaining the handmade floral character of the motifs.
Because the project is divided into individual motifs, you can work on the squares separately before thinking about the final assembly. This can be particularly convenient if you enjoy portable crochet projects or prefer completing small sections one at a time.
Materials and Measurements
The original pattern specifies Drops Muskat, a 100% mercerized cotton yarn in DK/Light 3 weight. Three colors are required, with one skein of each listed color.
- Yarn: Drops Muskat, 100% mercerized cotton, DK/Light 3
- Mint Green: 1 skein, shade 03
- Vanilla Yellow: 1 skein, shade 30
- Pink Panther: 1 skein, shade 29
- Crochet hook: 4 mm
- Scissors: 1 pair
- Tapestry needle: 1
- Stitch marker: optional
- Gauge: not crucial
- Approximate granny square size: 3 x 3 inches (7 x 7 cm)
- Finished bandana size: 8 x 12 inches (20.5 x 30.5 cm), including shell stitch edging
The three-color combination is central to the appearance of the finished accessory. Vanilla Yellow is used for the flower centers, Pink Panther for the petals, and Mint Green for the surrounding structure. Keeping these color roles consistent throughout the motifs helps all the pieces look like parts of one coordinated design.
Pattern Abbreviations
Before starting, become familiar with the abbreviations used throughout the instructions. The source uses US crochet terminology.
- Ch: chain
- Sl st: slip stitch
- St: Stitch
- Sk: skip
- DC: Double Crochet (UK Treble)
- SC: Single Crochet (UK Double)
- EOR: End of row/end of round
The terminology matters because a US Double Crochet is not the same stitch name used for a British Double Crochet. If you normally follow UK terminology, use the British equivalents provided in the pattern rather than changing the stitch instructions yourself.
Before Crocheting the First Flower
Although the pattern does not require a strict gauge, preparation can make a significant difference to the final assembly. Have all three yarn colors ready, make sure your 4 mm hook is comfortable in your hand, and keep a tapestry needle nearby for fastening off and sewing the motifs together.
A stitch marker is optional. The project is worked in rounds, and the instructions use slip stitches to close the rounds, so a marker may help if you prefer having an additional visual reference.
It is also useful to decide how you will organize the completed motifs. Since there are six squares and two triangles, keeping them together in a small project bag or container can prevent individual pieces from becoming separated before assembly.
The Six Floral Granny Squares
The six granny squares are the primary repeated component of the project. Each square has three rounds and three colors. The first round establishes a small yellow center, the second round creates eight pink petals, and the third round turns the flower into a granny-style square using Mint Green.
Round 1: The Yellow Flower Center
Begin with Vanilla Yellow yarn. Chain 4. Slip stitch into the first stitch to form a ring. Place 8 SC directly into the ring. Slip stitch to the first SC to close off the round.
Fasten off the yellow yarn. Attach Pink Panther to any SC.
This first round is small, but it establishes the foundation for the flower. Make sure the eight SC are worked directly into the ring and that the round is closed with the slip stitch specified in the pattern.
Round 2: Eight Pink Petals
With Pink Panther attached, chain 3, which counts as a DC, and turn. Place 2 DC into the same SC. Continue by placing 3 DC into the next SC and into every stitch until EOR. The round produces 8 petals.
Slip stitch to the first chain 3. Fasten off Pink Panther. Attach Mint Green in between any pink petal from the previous round, specifically in the space formed by the 3DC group.

At the end of this round, the flower should have eight clearly recognizable petals. This is an excellent point to compare your motif with the other squares once you begin making multiples. Similar petal size and tension will help the completed set look cohesive.
Round 3: The Green Granny Structure
With Mint Green attached, chain 3, which counts as a DC, and place 2 DC into the same space.
Then work the following sequence: go directly into the next space and place 3 DC, chain 2, and 3 DC; go into the next space and place 3 DC. Repeat this sequence 3 times.
After completing those repeats, go directly into the next space and place 3 DC. Slip stitch to the first chain 3. Fasten off the green yarn.
The chain-2 spaces create the corners, while the groups of 3 DC establish the sides of the granny square. This is the stage where the circular flower begins to take on its square geometry.

Repeating the Square Without Losing Consistency
Repeat the three-round construction until you have six completed granny squares. Because these pieces will eventually be sewn together, consistency is more important than completing them quickly.
After finishing each square, check its approximate dimensions against the 3 x 3 inch (7 x 7 cm) measurement given in the pattern. The source does not require a strict gauge, so small variations can occur, but keeping the motifs visually similar will make assembly easier.
It is also useful to inspect the four green corners. They should be recognizable and consistent because they determine how the square connects to neighboring pieces.
Creating the Two Flower Granny Triangles
The two triangular motifs are made with the same three main colors but use a smaller center and a different final construction. Their purpose is to help shape the main piece into a bandana triangle.

Triangle Round 1
Start by chaining 4 and slip stitching through the first chain to form a ring.
With Vanilla Yellow yarn, chain 4 and slip stitch to the first chain space to create the ring. Place 4 SC directly into the ring. Slip stitch to the first SC to close. Fasten off the yellow yarn and attach Pink Panther to any SC.
The four SC foundation is what distinguishes this flower from the eight-stitch center used for the granny squares.
Triangle Round 2
Chain 3, which counts as a DC, and turn. Place 2 DC into the same SC. Place 3 DC into the next SC and continue into every stitch until EOR, creating 4 petals.
Slip stitch to the first chain 3. Fasten off Pink Panther and attach Mint Green in between the 1st and 2nd DCs on either side of the project.
Take care with the attachment point because the triangle’s final shape depends on the position of the green yarn and the construction of the next round.
Triangle Round 3
The source gives the final triangle round in the following sequence: chain 3, which counts as a DC, and place 2 DC into the same space; go directly into the next space and place 3 DC; go directly into the next space and place 3 DC, chain 2, 3 DC; go into the next space and place 3 DC; to finish off this triangle, go directly between the 2nd before last and last DCs and place 3 DCs and place 3 DCs. Fasten off green yarn.
The wording above follows the supplied source rather than introducing an alternative correction or interpretation. When a pattern contains an unusual sentence structure, the safest approach is to preserve the source instructions and compare your work with the supplied project photographs.
How to Use the Photos as Construction Checkpoints
One advantage of this project is that the visual progression is easy to understand. The photographs can be treated as checkpoints rather than simply decoration. The early flower image helps you recognize the first two rounds, the green-round image helps identify the completed square structure, and the triangle photograph gives a visual reference for the smaller motifs.
When working from a written pattern, photographs are especially helpful for confirming the overall appearance without changing the technical instructions. Use them to compare shape, orientation, and construction rather than to invent additional stitches or measurements.
Preparing the Eight Pieces for Assembly
Once you have six squares and two triangles, place all eight motifs on a flat surface. Arrange them according to the pattern image before picking up the tapestry needle.

This arrangement stage is worth taking seriously. Individual crochet squares can look correct while still being placed in the wrong orientation. Lay the pieces out first, check the flower directions, and make sure the triangular pieces are positioned as shown by the project design.
The final assembly should produce the main triangular bandana form. If the arrangement does not look right before sewing, stop and reposition the pieces rather than trying to correct the shape afterward.
Sewing the Floral Motifs Together
Use the tapestry needle to sew the six granny squares and two granny triangles together according to the pattern image. Work carefully along the joining areas so the motifs remain aligned.
Try to maintain even sewing tension. Pulling too tightly can cause the seams to draw together and distort the motif shapes. On the other hand, extremely loose joins may create visible gaps between the pieces.
Once all eight pieces have been joined, lay the entire bandana flat and inspect the outline. The lower point should read clearly as the V-shaped center of the bandana, while the upper edge should provide a stable foundation for the ties and top border.
Beginning the Border and First Tie
After the main motif assembly is complete, attach the yarn to the top corner. Chain 40. Slip stitch through each chain until the last chain. Then slip stitch through the space where you first began on the project to secure the hair tie.
This creates the first long tie. The chain length is specified as 40, so maintain that number rather than adjusting it based on personal preference if you want to follow the source pattern exactly.

Working Across the Top
Place SC in each stitch across the top until you reach the 5 central stitches at the top center. In these 5 stitches, place DC instead of SC. Continue placing SC in each stitch across until you reach the other top corner.
The five central DC stitches are an intentional feature of the border. Keep them together in the center rather than spreading them across the top edge. The change from SC to DC creates a small raised section that helps define the upper center.
When working along the joined motifs, keep your tension even. The border should follow the top edge naturally without pulling the floral pieces out of alignment.
Creating the Second Tie
At the other corner, chain 40. Slip stitch through every chain across until you reach the stitch where you began. Slip stitch through that stitch to secure the second hair tie.
Both sides now have matching chain-40 ties. Take a moment to compare them visually. Consistent chain tension will help them appear similar in length and thickness.
Completing the V-Shaped Foundation Edge
Continue with Single Crochet by placing SC in each stitch across the V part until you reach the first SC on the other top corner. Slip stitch through that stitch to finish the round.
This first edging round prepares the V-shaped lower edge for the decorative shell stitch. It is helpful to inspect the edge before beginning the next round, especially around the lower point and the transition toward the upper corners.

Adding the Shell Stitch Border
The shell stitch edging is the final decorative construction stage. It is worked across the V from one hair tie to the other and creates the soft, scalloped look that complements the floral motifs.
Begin Round 2 with chain 3, which counts as a DC. Place 2 DC in the first stitch to form a half shell.
Skip 2 stitches and place an SC into the next stitch.
Then repeat the main shell sequence: skip 2 stitches, place 5 DC into the next stitch, skip 2 stitches, and place an SC into the next stitch.
Continue this sequence until you reach the last 3 stitches on the other side of the V.
Skip 2 stitches and place 3 DC into the last stitch to form the second half shell.
Fasten off and tidy the loose ends.
The shell groups are the main decorative feature of the border. Keeping the five DC together in their designated stitch creates the fuller scallop, while the SC sections separate one shell from the next.
Reading the Shell Sequence as a Rhythm
If you are new to shell edging, it can help to think of the round as a repeated rhythm rather than one long instruction. The sequence moves through skipped stitches, an SC, more skipped stitches, and then a five-DC shell. Once the pattern becomes visually familiar, it becomes easier to see whether you are still following the correct sequence.
The first and last sections are different because they form half shells. The round therefore begins with 3 DC in total when the starting chain 3 is counted, and finishes with 3 DC in the final stitch.
Do not add additional shell groups simply because the edge appears to have room. Follow the stitch sequence and stop where the pattern specifies.
Optional Sewing Around the Hair Ties

The source offers one optional finishing detail: sew the two half shells on each side to the hair ties for a neater finish.
If you choose to add this detail, use the tapestry needle and sew carefully so the connection remains secure without making the tie stiff. The purpose is primarily to improve the visual transition between the decorative edge and the tie.
This step can be especially useful if you want the side sections to sit more neatly when the bandana is worn.
Finishing and Tidying the Project
Once the shell stitch round is complete, fasten off and tidy all loose ends. Because the project uses three colors across several individual motifs, there may be multiple yarn tails to secure.
Take time to finish these ends carefully. A small accessory like a bandana is handled frequently, so secure finishing contributes to the durability and overall appearance of the completed project.
After the ends are tidy, gently lay the bandana flat and inspect the complete shape. Look at the joined flowers, the upper border, both ties, and the shell edging as one finished piece.
Finished Dimensions and Shape
The approximate size of each granny square is 3 x 3 inches (7 x 7 cm). The completed bandana, including the shell stitch edging, measures approximately 8 x 12 inches (20.5 x 30.5 cm).
These measurements are useful reference points rather than a reason to force the crochet fabric into a particular size, especially because the source states that gauge is not crucial. Your tension can influence the final measurements slightly, but maintaining consistent construction is the best way to stay close to the intended proportions.
Practical Tips for a Cleaner Assembly
Make the Squares in One Batch
Completing all six square motifs before assembly allows you to compare them side by side. This makes differences in tension or petal size easier to notice.
Complete the Triangles Separately
The triangles have their own construction, so keep them separate from the square workflow. Once both are complete, bring all eight motifs together for the layout stage.
Arrange Before Sewing
Always place the pieces according to the pattern image before sewing. Once a seam has been made, correcting an orientation mistake can require additional work.
Keep Color Changes Organized
The color progression is repeated throughout the project. Yellow forms the center, pink forms the petals, and green frames the flowers. Keeping those roles consistent gives the finished bandana its coordinated appearance.
Check the Center Before the Shell Border
The five central DC stitches are worked along the upper edge before the V-shaped SC border and shell round. Use this as a checkpoint so you do not accidentally continue with SC through the center.
What to Check if Something Looks Wrong
When a crochet project is made from several small motifs, it is usually easier to identify a problem by tracing the construction backward. If a square does not look right, inspect Round 3 first, then Round 2, and finally the foundation round.
If the flower itself looks uneven, compare the eight petals in Round 2. If the square shape looks distorted, inspect the green corner spaces in Round 3. If the final bandana shape looks incorrect, check the arrangement of the squares and triangles before blaming the border.
For the edging, check the five central DC stitches and then review the V-shaped SC round before examining the shell sequence. This approach keeps troubleshooting focused instead of requiring you to undo a large section unnecessarily.
Why the Cottagecore Style Works Here

Cottagecore crochet designs often work especially well when traditional-looking techniques are combined with soft color combinations and practical handmade accessories. This bandana captures that idea through granny motifs, flower shapes, cotton yarn, and a decorative scalloped border.
The construction also gives the piece a handcrafted quality that is difficult to reproduce with a simple flat stitch pattern. Every flower is individually formed, and the finished arrangement reveals how those small pieces work together as a larger design.
The spring inspiration makes the floral theme particularly appropriate. The yellow, pink, and green palette creates a garden-like impression without requiring complicated colorwork inside a single row.
A Simple Project Checklist
Before calling your Lilly Cottagecore Bandana finished, use this checklist to verify the major pattern elements.
- Yarn: Drops Muskat, 100% mercerized cotton, DK/Light 3
- Colors: shade 03 Mint Green, shade 30 Vanilla Yellow, shade 29 Pink Panther
- Hook: 4 mm
- Squares: 6 completed flower granny squares
- Triangles: 2 completed flower granny triangles
- Square size: approximately 3 x 3 inches (7 x 7 cm)
- Finished size: approximately 8 x 12 inches (20.5 x 30.5 cm), including edging
- First tie: chain 40
- Second tie: chain 40
- Top center: 5 DC stitches
- V border: SC round
- Decorative edge: shell stitch round
- Final step: fasten off and tidy loose ends
- Optional: sew the half shells to the hair ties
Styling and Wearing the Finished Bandana
The long ties make this design practical as a wearable head accessory. The triangular body gives the piece its classic bandana silhouette, while the flower motifs make it decorative even when viewed from a distance.
The handmade nature of the piece also means that the floral motifs remain the main visual focus. The shell border frames the lower edge without overwhelming the flowers, and the green granny structure visually connects the yellow and pink flower centers.
Because the finished dimensions are compact, the project is also a manageable way to experiment with handmade crochet fashion without committing to a large garment. It uses a relatively small number of repeated components while still offering several different construction techniques to practice.
Final Finished View

When all the elements are complete, the Lilly Cottagecore Bandana becomes much more than a collection of individual motifs. The six flower granny squares provide the main body, the two triangles complete the triangular silhouette, and the two chain-40 ties transform the crocheted shape into a practical accessory.
The final shell stitch edging is especially important to the overall appearance. The half shells at the ends frame the border, while the repeated five-DC shells create a decorative rhythm across the V. The combination gives the bandana a soft, feminine handmade finish that fits naturally with its cottagecore inspiration.
Frequently Asked Questions
How many flower granny squares are needed?
The design requires 6 individual flower granny squares.
How many flower granny triangles are needed?
You need 2 flower granny triangles to complete the main bandana shape.
How many rounds are in each granny square?
Each square has 3 rounds: a yellow center, pink petals, and a green granny-style outer round.
How many petals does the square flower have?
The second round creates 8 petals.
How many petals does each triangle have?
The triangle’s second round creates 4 petals.
Is the gauge important?
The source states that gauge is not crucial. However, consistent tension is still recommended so the six squares remain approximately the same size and join neatly.
What size hook does the pattern use?
The pattern uses a 4 mm crochet hook.
What yarn is used for the bandana?
The specified yarn is Drops Muskat, 100% mercerized cotton, DK/Light 3. The colors are shade 03 Mint Green, shade 30 Vanilla Yellow, and shade 29 Pink Panther, with 1 skein of each.
How long are the ties?
Each tie begins with a chain of 40.
What stitch is used for the decorative edge?
The second edging round uses a shell stitch sequence based on groups of 5 DC separated by skipped stitches and SC stitches, with a half shell at each end.
Can the final half shells be attached to the ties?
Yes. The source gives this as an optional finishing step. The two half shells on each side can be sewn to the hair ties for a neater finish.
Final Thoughts on the Lilly Cottagecore Bandana
The Lilly Cottagecore Bandana is a charming project for crocheters who enjoy combining small motifs into a larger wearable design. Its construction is structured enough to provide clear checkpoints while still offering variety from one stage to the next.
The six flower granny squares teach the basic floral motif construction, while the two triangles demonstrate how a similar flower concept can be adapted to create a different geometric shape. Sewing the pieces together introduces an important assembly skill, and the two border rounds provide practice with working along an already constructed edge.
Most importantly, the project rewards patience and consistency. The source specifications are straightforward: a 4 mm hook, Drops Muskat in the three specified shades, six granny squares, two flower granny triangles, two chain-40 ties, a central group of five DC stitches, and the two-round edging sequence. Following those details carefully allows the finished bandana to retain the proportions and character of the original design.
With its spring inspiration, flower centers, colorful petals, green granny framing, triangular shape, and shell stitch border, this bandana makes a memorable handmade accessory. It is small enough to be approachable, detailed enough to keep an experienced crocheter interested, and versatile enough to serve as a practical introduction to motif-based crochet construction.