
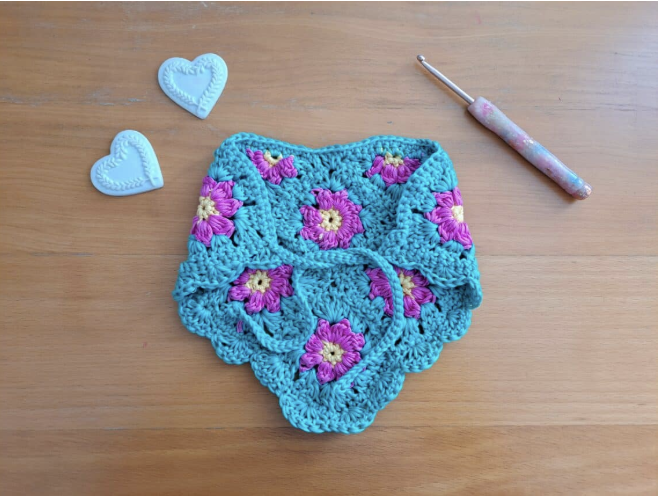
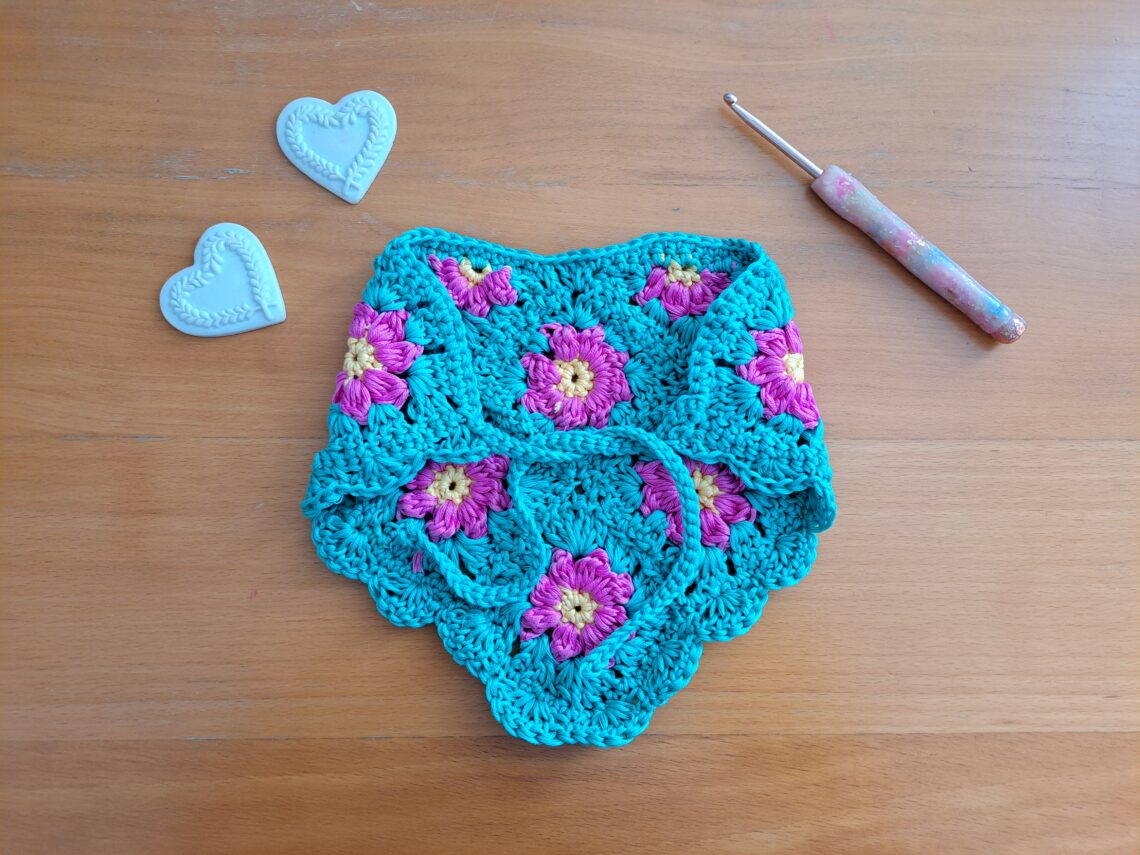
There is something especially charming about crochet accessories inspired by the soft, romantic side of spring. The Lilly Cottagecore Bandana brings together simple floral motifs, cheerful colors, and a delicate scalloped-looking shell edging to create a wearable piece with a distinctly cottagecore character. It is a small project, but it includes several useful crochet techniques, making it a rewarding project for anyone who enjoys motifs and careful assembly.
This design is inspired by springtime and by the traditional lily-of-the-valley celebration associated with May 1st in France. The result is a floral bandana made from individual crochet motifs rather than one large piece worked from beginning to end. Six flower granny squares and two flower granny triangles are sewn together to create the main triangular shape. The upper edge is then finished with ties and a shell stitch border.
The project uses three colors of Drops Muskat, a 100% mercerized cotton yarn in DK/Light 3 weight. The color combination of Mint Green, Vanilla Yellow, and Pink Panther gives the flowers a fresh spring appearance while keeping the finished accessory soft and playful.
This version of the tutorial focuses on construction control, motif consistency, joining, edging, and finishing. Rather than rushing from one round to the next, you can use each section as a checkpoint. That makes it easier to keep the flowers uniform and to notice small issues before the bandana is assembled.
Project Snapshot Before You Begin
The pattern is rated Easy + and uses US crochet terminology, with British terminology given in brackets where applicable. The project does not require a specific gauge, which makes it relatively flexible. However, maintaining a consistent tension throughout the motifs is still useful because the individual squares need to fit together neatly during assembly.
- Skill level: Easy +
- Crochet terms: US terms, with British terms in brackets
- Hook: 4 mm
- Yarn: Drops Muskat, 100% mercerized cotton, DK/Light 3
- Mint Green: 1 skein, shade 03
- Vanilla Yellow: 1 skein, shade 30
- Pink Panther: 1 skein, shade 29
- Scissors: 1 pair
- Tapestry needle: 1
- Stitch marker: optional
- Gauge: not crucial
- Approximate granny square size: 3 x 3 inches (7 x 7 cm)
- Finished bandana size: 8 x 12 inches (20.5 x 30.5 cm), including shell stitch edging
Because the gauge is not crucial, this is a forgiving project in terms of tension. Nevertheless, try to crochet all six squares with approximately the same tension. A noticeably tighter or looser square can affect the shape of the finished bandana when the motifs are sewn together.
Understanding the Color Sequence
Each flower motif is built with three colors. Vanilla Yellow forms the center, Pink Panther creates the petals, and Mint Green creates the surrounding granny-style structure. The color changes are part of the visual identity of the project, so it is worth paying attention to where each color is attached.
The six granny squares begin with yellow, followed by pink, and finish with green. The two triangular motifs follow the same basic color progression. Keeping a small amount of yarn organized for each color can make the project more enjoyable and can help prevent accidental color substitutions.
Since the flowers are individual motifs, you can also treat each completed round as a visual checkpoint. Before moving to the next color, make sure the current round is closed properly and the yarn end is fastened off as instructed.

Essential Crochet Abbreviations
The pattern uses a compact set of standard crochet abbreviations. Having these beside you while working can make the written instructions easier to follow.
- Ch: chain
- Sl st: slip stitch
- St: stitch
- Sk: skip
- DC: Double Crochet (UK Treble)
- SC: Single Crochet (UK Double)
- EOR: End of row/end of round
One important detail is that the pattern uses US terms. In particular, DC means Double Crochet in US terminology, while SC means Single Crochet. If you normally work from British patterns, use the equivalents listed above rather than automatically converting the instructions yourself.
Building the Six Flower Granny Squares
The six square motifs are the main building blocks of the bandana. Each one has three rounds. The first round creates the compact yellow center, the second round transforms that center into eight pink petals, and the third round surrounds the flower with green granny-style clusters and corners.
Round 1: Creating the Flower Center
Begin with the Vanilla Yellow yarn. Chain 4 and slip stitch into the first stitch to form a ring. Place 8 SC directly into the ring. Slip stitch to the first SC to close off the round.
Once Round 1 is complete, fasten off the yellow yarn. Attach Pink Panther to any SC. This color change is the beginning of the flower petals, so take a moment to check that the yellow center is sitting evenly before continuing.
The center does not need to be pulled excessively tight. The goal is to create a stable little ring that can support the eight stitches of the flower center while leaving enough room for the next round to be worked cleanly.
Round 2: Forming Eight Pink Petals
With Pink Panther attached to any SC, chain 3, which counts as a DC, then turn. Place 2 DC into the same SC. Continue by placing 3 DC into the next SC and into every stitch until EOR. This creates 8 petals in total.
Slip stitch to the first chain 3 to close the round. Fasten off the Pink Panther yarn and attach Mint Green in between any pink petal from the previous round, specifically in the space associated with the 3DC petal.
At this stage, the flower should clearly resemble a small eight-petal blossom. If one petal appears significantly tighter than the others, check your tension before beginning Round 3.

Round 3: Turning the Flower Into a Square
With Mint Green attached, chain 3, which counts as a DC, and place 2 DC into the same space.
Then work the repeated section as written: go directly into the next space and place 3 DC, chain 2, and 3 DC; go into the next space and place 3 DC. Repeat this sequence 3 times.
After those repeats, go directly into the next space and place 3 DC. Slip stitch to the first chain 3 to close the round. Fasten off the green yarn.
The important visual change in this round is that the flower is no longer simply a circular blossom. The green clusters create the structure that gives the motif its square shape. The chain-2 spaces become the corners of the granny square, while the groups of 3 DC form the characteristic granny-style clusters.
Complete all six granny squares using the same three-round construction. Consistency is more important here than speed. Place your finished squares together occasionally so you can compare their size and shape before moving to assembly.
A Useful Motif Checkpoint
Before sewing the six squares together, check three things. First, each square should have approximately the same dimensions: about 3 x 3 inches (7 x 7 cm). Second, the color order should remain yellow, pink, and green. Third, the four corners of each square should be clearly formed by the green round.
If a square is slightly different because of tension, blocking may sometimes help even out the appearance, but the source does not require a specific blocking procedure. The safest approach is to maintain consistent tension as you make the motifs rather than changing the dimensions afterward.
Making the Two Flower Granny Triangles
The two triangular motifs are smaller structural pieces that help create the final triangular bandana shape. They use the same three-color concept but begin with only four SC in the center ring rather than eight.

Triangle Beginning and Round 1
Start by chaining 4 and slip stitching through the first chain to form a ring. With Vanilla Yellow yarn, chain 4 and slip stitch to the first chain space to create the ring.
Place 4 SC directly into the ring. Slip stitch to the first SC to close the round. Fasten off the yellow yarn and attach Pink Panther to any SC.
This smaller center is intentional. The four SC establish the foundation for the four-petal triangular motif.
Triangle Round 2
With Pink Panther attached, chain 3, which counts as a DC, then turn. Place 2 DC into the same SC. Place 3 DC into the next SC and continue into every stitch until EOR, creating 4 petals.
Slip stitch to the first chain 3. Fasten off the Pink Panther yarn. Attach Mint Green in between the first and second DCs on either side of the project.
Before starting the final triangle round, make sure the pink flower is centered and that the green yarn is attached in the position specified by the pattern.
Triangle Round 3
The source gives the final triangle round as follows: chain 3, which counts as a DC, and place 2 DC into the same space. Go directly into the next space and place 3 DC, then go directly into the next space and place 3 DC, chain 2, and 3 DC. Go into the next space and place 3 DC. To finish off this triangle, go directly between the 2nd before last and last DCs and place 3 DCs and place 3 DCs. Fasten off the green yarn.
Because this round is written in the source with its original wording and punctuation, follow the source carefully rather than introducing an alternative interpretation. The important principle for this project is to preserve the original pattern sequence exactly as provided.
Organizing the Motifs Before Sewing
Once all six squares and two triangles are complete, resist the temptation to sew immediately. Lay every piece flat first and arrange the motifs according to the pattern image. This is one of the easiest ways to avoid joining a motif in the wrong orientation.

The arrangement is especially important because the final piece needs to form a bandana triangle. Take a clear look at the direction of each flower, the position of the green corners, and the placement of the triangular motifs. If necessary, photograph your layout before you begin sewing so you have a visual reference while joining.
Sewing the Main Bandana Shape
Sew the six granny squares and two flower granny triangles together according to the pattern image. A tapestry needle is used for this stage. Work carefully so that the seams remain neat and the motifs stay aligned.
When joining crochet motifs, avoid pulling the yarn so tightly that the seam puckers. The goal is to connect the pieces securely while allowing the fabric to retain its natural flexibility. At the same time, loose joining can leave visible gaps or cause the motifs to shift, so aim for even tension along each seam.
After the eight motifs have been joined, inspect the entire bandana before starting the border. Check that the upper edge is clearly defined and that the lower point forms the intended triangular shape.
Creating the First Hair Tie
Once the motif assembly is complete, attach the yarn to the top corner. Chain 40. Slip stitch through each chain until the last chain. Then slip stitch through the space where you first began on the project to secure the hair tie.
The chain of 40 becomes one of the long ties used to fasten the bandana. Work each chain consistently so the tie has an even appearance from beginning to end.
Do not rush this part. If the chain tension changes dramatically halfway through, the tie can appear uneven. A steady rhythm usually produces a cleaner result.

Working Across the Top Edge
After securing the first hair tie, place SC in each stitch across the top until you reach the 5 central stitches at the top center. In these 5 stitches, place DC instead of SC. Continue placing SC in each stitch across until you reach the other top corner.
The five central DC stitches are an important visual detail. They create a slightly raised center section along the upper edge, so make sure you do not accidentally work SC into these five stitches.
As you cross the top, keep your stitches evenly tensioned. The border should sit naturally along the joined motifs rather than pulling them upward or creating loose loops.
Adding the Second Hair Tie
At the other top corner, chain 40. Slip stitch through every chain across until you reach the stitch where you began. Slip stitch through that stitch to secure the second hair tie.
You now have a long tie on each side of the bandana. These ties are part of the finished structure and should be checked for similar length and tension.
Completing the First Border Round
Continue with Single Crochet by placing SC in each stitch across the V part until you reach the first SC on the other top corner. Slip stitch through that stitch to finish the round.
This first border round establishes the foundation for the shell stitch edging. It is worth checking the V shape at this point because the shell round that follows depends on the stitches being positioned consistently along this edge.

Shell Stitch Round: Giving the Bandana Its Cottagecore Finish
The second border round is where the project takes on its distinctive decorative finish. The shell stitch creates fuller groups of DC separated by smaller SC sections, producing a soft scalloped effect along the V-shaped edge.
Work this round across the V from one hair tie to the other.
Begin with chain 3, which counts as a DC. Place 2 DC in the first stitch to create a half shell.
Skip 2 stitches and place an SC into the next stitch.
Then repeat the following sequence: skip 2 stitches, place 5 DC into the next stitch, skip 2 stitches, and place an SC into the next stitch.
Continue this sequence until you reach the last 3 stitches on the other side of the V.
Skip 2 stitches and place 3 DC into the last stitch to create the second half shell.
Fasten off and tidy the loose ends.
As you work the shells, keep the five-DC groups full and evenly tensioned. The purpose of the shell round is decorative, so consistent stitch height helps the edge look intentional and balanced.
Checking the Shell Pattern as You Go
A useful way to avoid losing your place is to treat each SC as a checkpoint between shells. After a five-DC group, you should move through the skipped stitches and arrive at an SC before beginning the next shell. This rhythm makes the border easier to read visually.
If the shell groups begin drifting out of position, stop and review the previous stitches rather than continuing and hoping the difference will disappear. The written pattern specifically establishes the skip-2, SC, skip-2, 5-DC sequence, so maintaining that order is important.
Optional Half-Shell Finishing Detail

The source includes an optional finishing step: sew the two half shells on each side to the hair ties for a neater finish. This is not required to complete the basic border, but it can help integrate the decorative edge with the ties and give the side sections a more secure appearance.
Use the tapestry needle and take small, controlled stitches. Avoid pulling too tightly because the hair ties need to remain flexible and comfortable to use.
How to Keep the Finished Bandana Neat
Once the final border is complete, examine the bandana from several angles. The finished measurements, including the shell stitch edging, are approximately 8 x 12 inches (20.5 x 30.5 cm). The exact appearance can vary slightly with individual tension, but the finished piece should retain the intended triangular bandana shape.
Check the upper corners, ties, central top section, and lower V-shaped edge. The motifs should remain joined securely, the flowers should be visible, and the shell edging should follow the lower edge without excessive twisting.
Loose ends should be tidied carefully. Since this project contains multiple color changes and individual motifs, there can be several yarn tails. Secure them neatly so they do not interfere with wearing or washing the finished accessory.
Common Construction Problems to Watch For
Uneven Granny Squares
If the six squares are noticeably different in size, compare your tension and stitch placement. The approximate target for each granny square is 3 x 3 inches (7 x 7 cm). Keeping your DC groups consistent from motif to motif is one of the best ways to maintain uniformity.
Flower Petals That Look Uneven
Uneven petals are often caused by inconsistent tension or by accidentally missing a foundation stitch. Round 2 of the square creates 8 petals, so use that number as a checkpoint before moving on.
Triangle Motifs Looking Incorrect
The triangular motifs have a different foundation from the squares. Their first round contains 4 SC, followed by a second round producing 4 petals. Do not use the square construction as a substitute for the triangle instructions.
Border Pulling or Ruffling
If the border does not lie comfortably along the edge, review the stitch sequence and your tension. The first border round uses SC except for the 5 central stitches, where DC are used. The shell round then introduces the skip and shell pattern. Following the written sequence carefully helps maintain the intended edge.
Uneven Ties
Both hair ties are made with chain 40. If one appears substantially longer than the other, compare your chain tension and make sure both were worked with the same technique. The number of chains should remain 40 for each tie.
A Beginner-Friendly Workflow for the Whole Project
If you prefer to work in manageable stages, divide the project into five checkpoints. First, prepare all materials and understand the abbreviations. Second, complete the six granny squares. Third, make the two flower granny triangles. Fourth, arrange and sew the motifs into the bandana shape. Fifth, complete the ties and two rounds of edging.
This approach prevents the project from feeling like one large task. It also makes it easier to identify where a mistake occurred. If something looks unusual during assembly, you can return to the individual motif stage instead of having to unravel the finished border.
- Checkpoint 1: Confirm yarn colors, 4 mm hook, tools, and terminology.
- Checkpoint 2: Complete 6 three-round granny squares.
- Checkpoint 3: Complete 2 three-round flower granny triangles.
- Checkpoint 4: Arrange and sew the 8 motifs according to the pattern image.
- Checkpoint 5: Add both chain-40 ties, the top border, and shell stitch edging.
Styling the Finished Cottagecore Accessory

The finished bandana has a distinctly spring-inspired appearance because of its floral construction and pastel-style color combination. The three yarn shades work together to create contrast between the flower centers, petals, and green granny structure.
Its triangular construction makes it suitable for tying around the head, while the long chain ties allow the accessory to be adjusted when worn. The shell edging adds a decorative finishing line that complements the flower motifs instead of competing with them.
Why the Motif Construction Works So Well
One of the strengths of this project is that the visual complexity comes from combining relatively small components. The flower squares are individually manageable, yet when six are joined with two triangles, they create a much more elaborate finished shape.
This modular construction also makes the project easy to understand conceptually. The yellow center establishes the flower, the pink round provides the petals, and the green round converts the flower into a geometric granny motif. The triangles use the same color story while adapting the construction to the outer shape of the bandana.
The final border then unifies everything. The top edge provides the structure for the ties, while the shell stitch adds a decorative transition around the V-shaped lower edge.
Final Quality Checklist
Before considering the project complete, use the following checklist to inspect the finished bandana.
- There are 6 completed flower granny squares.
- There are 2 completed flower granny triangles.
- The squares measure approximately 3 x 3 inches (7 x 7 cm).
- The finished bandana is approximately 8 x 12 inches (20.5 x 30.5 cm), including the shell stitch edging.
- The flower colors follow the specified yellow, pink, and green sequence.
- The upper edge has 5 central DC stitches instead of SC.
- Both hair ties contain 40 chains.
- The first border round is worked with SC across the V section.
- The shell edging follows the specified skip, SC, and 5-DC sequence.
- The final edge has a half shell at each end.
- Loose ends have been tidied.
- The optional half-shell-to-hair-tie sewing has been completed if desired.
Final Look and Finishing Perspective

The beauty of the Lilly Cottagecore Bandana comes from the relationship between its individual details. The tiny yellow centers, pink petals, green granny framing, triangular motifs, long ties, and shell border all contribute to the finished design.
It is also a useful project for practicing crochet beyond a simple linear pattern. You work in the round, change colors, build granny-style corners, create triangular motifs, sew separate components together, and finish the project with a decorative border. Each stage teaches a different aspect of crochet construction without requiring a large amount of yarn.
The original inspiration from spring and the May 1st lily-of-the-valley tradition gives the project an especially fitting seasonal character. The Drops Muskat yarn, with its 100% mercerized cotton construction and DK/Light 3 weight, provides the material specified for the design, while the 4 mm hook completes the basic tool setup.

Frequently Asked Questions
Is this crochet bandana suitable for beginners?
The source rates the project Easy +. It uses fundamental stitches such as chain, slip stitch, Single Crochet, and Double Crochet, but it also introduces color changes, motif construction, sewing, and decorative edging. Beginners who are comfortable reading short written instructions can use the project as a gradual introduction to these techniques.
Is a specific gauge required?
No. The source states that gauge is not crucial. However, consistent tension is still helpful because the six granny squares need to fit together neatly and the finished bandana has an approximate finished size of 8 x 12 inches (20.5 x 30.5 cm), including the shell stitch edging.
How many granny squares are required?
The project uses 6 individual flower granny squares and 2 flower granny triangles.
How many petals does each square flower have?
Round 2 of each granny square creates 8 petals. The triangular motif creates 4 petals.
What hook size is used?
The pattern uses a 4 mm crochet hook.
What yarn is specified?
The source specifies Drops Muskat, 100% mercerized cotton, DK/Light 3. The three colors are shade 03 Mint Green, shade 30 Vanilla Yellow, and shade 29 Pink Panther, with 1 skein of each listed color.
How long are the crochet ties?
Each hair tie begins with a chain of 40. Both sides use the same chain-40 instruction.
What creates the decorative edge?
The lower V-shaped edge is finished with a shell stitch round. The sequence includes 5 DC in designated stitches, separated by skipped stitches and SC stitches, with a half shell at each end.
Is the final sewing of the half shells necessary?
The source describes sewing the two half shells on each side to the hair ties as optional. It can be used to create a neater finished appearance.
Final Thoughts
The Lilly Cottagecore Bandana is a lovely example of how a handful of small crochet motifs can become a complete wearable accessory. Its construction encourages careful attention to color changes, stitch placement, motif sizing, and assembly while keeping each individual section approachable.
For the cleanest result, concentrate on consistency rather than speed. Make the six granny squares with similar tension, keep the four-petal triangles clearly oriented, arrange all eight motifs before sewing, and treat the first and second border rounds as separate finishing checkpoints. Once the shell edging is complete and the loose ends are tidied, the floral bandana takes on its final cottagecore character.
With its spring-inspired palette, floral centers, granny construction, triangular silhouette, and decorative shell edge, this project is a compact crochet make that combines technique and charm. Following the original stitch sequence carefully allows the finished accessory to retain the proportions, colors, measurements, and construction details of the pattern while giving you plenty of opportunities to practice neat crochet workmanship.