
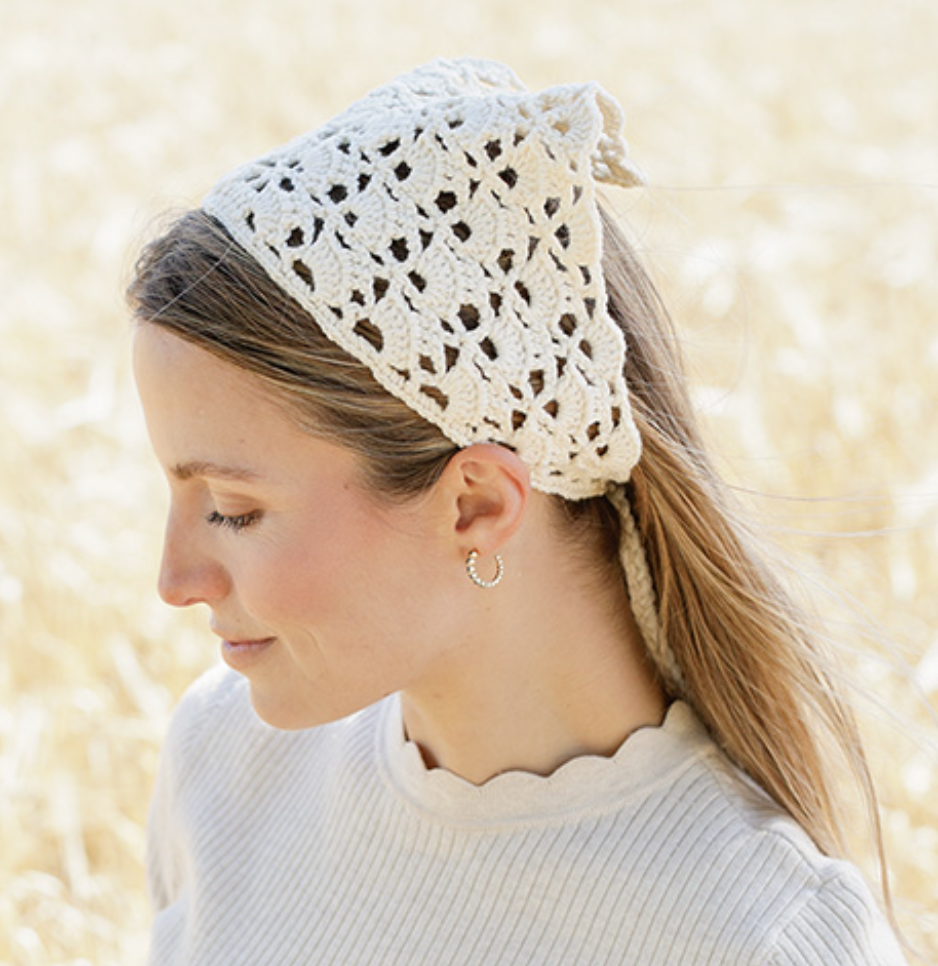
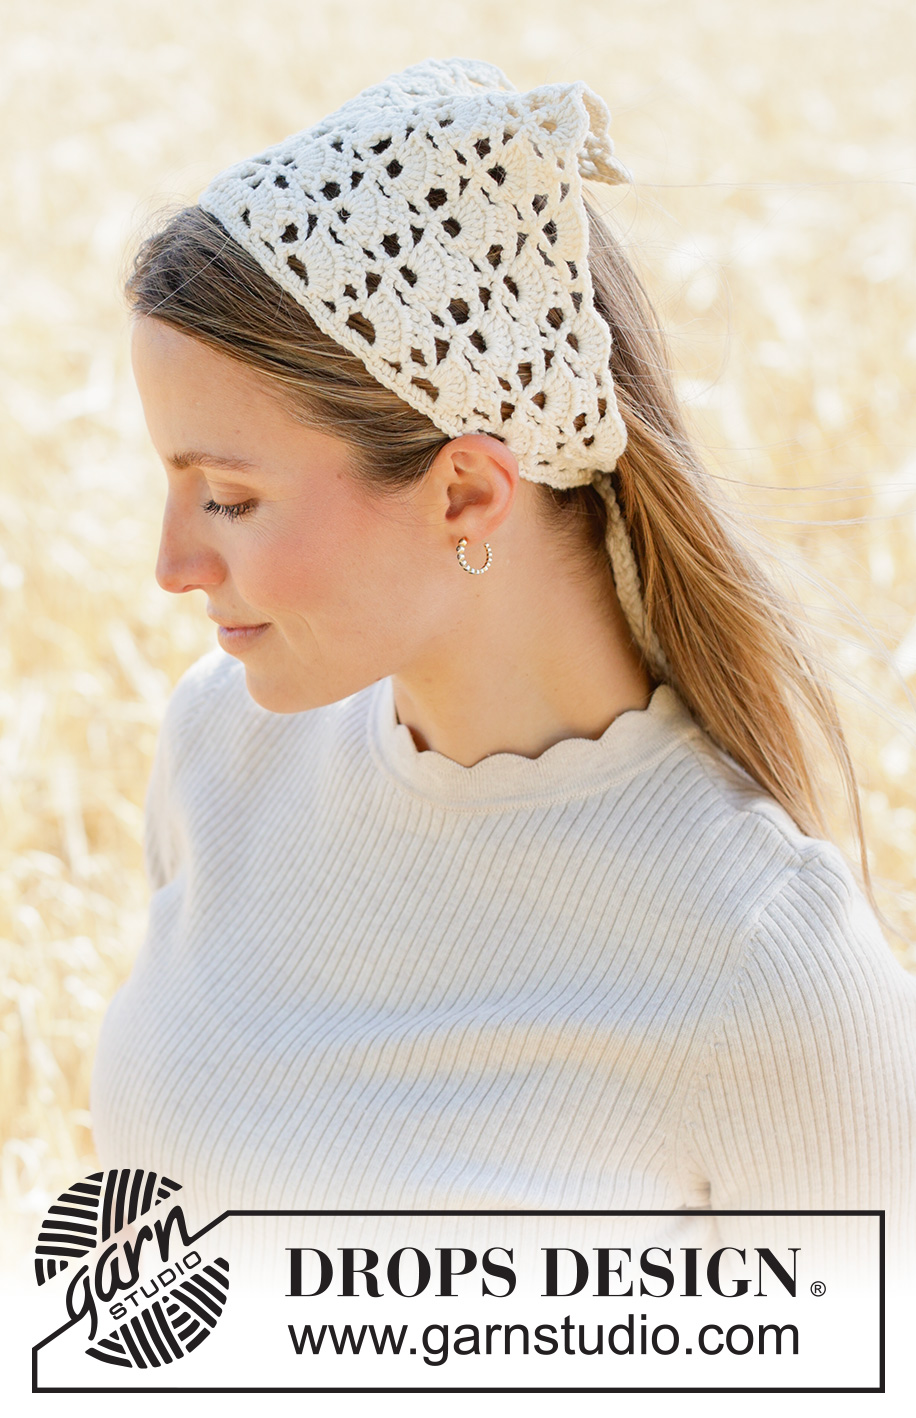
The Moon Dust Bandana is a delicate crocheted headscarf designed for makers who enjoy openwork texture, chart-based crochet, and practical handmade accessories. Worked in DROPS Cotton Merino, this project creates a lightweight triangular fabric that can be tied around the head with two handmade braided cords.
Unlike a conventional rectangular headband, this design grows into a triangle as the pattern progresses. The decorative surface comes from a repeating fan pattern, while the long edge is finished separately with diagram A.7 before the fastening cords are added. The result is a small accessory with a distinctive lace-like appearance and a clear construction sequence.
This guide presents the project as a complete crochet workshop, starting with yarn and tension preparation, moving through the central pattern and expanding side repeats, and ending with the long-edge finishing row and braided cords. The original measurements, yarn quantity, hook size, stitch terminology, pattern references, and construction requirements are retained.
Project Overview
The Moon Dust Bandana is worked back and forth rather than in rounds. The main fabric eventually forms a triangle, and the two cords are attached to the ends of its longest side. These cords are used to fasten the headscarf when it is worn.
The pattern is identified as DROPS 265-7, with the design listed as DROPS Design: Pattern cm-162. It belongs to yarn group B and uses one colour throughout the project.
- Finished length: 44 cm without cords
- Finished height: 18 cm
- Yarn: DROPS Cotton Merino from Garnstudio
- Yarn group: B
- Yarn quantity: 50 g
- Colour: 01, Off White
- Crochet hook: DROPS Crochet Hook size 3.5 mm
- Gauge: 20 treble crochets in width and 10 rows in height = 10 x 10 cm
- Main construction: Worked back and forth
- Shape: Triangle
- Finishing edge: Double crochet row worked along the longest side using A.7
- Cords: Two braided cords
Why the Triangle Is the Heart of the Design
The shape of the Moon Dust Bandana is not created by sewing separate sections together. Instead, the triangle develops naturally as the crocheted pattern continues. The central section established in A.1 becomes the reference point for the following diagrams, while additional repeats are introduced progressively on both sides.
This makes the project particularly interesting for crocheters who enjoy seeing a fabric grow directly from a chart. Rather than building a large rectangle and shaping it afterward, the pattern establishes the triangular form during the crochet process itself.
The open spaces are equally important. The fan pattern gives the fabric a decorative, airy quality. When the finished bandana is worn, the openwork remains visible and creates a lightweight visual effect rather than the dense appearance of a solid crochet fabric.
Prepare the Yarn and Hook
The specified yarn is DROPS Cotton Merino from Garnstudio. The pattern calls for 50 g in colour 01, Off White. The project uses a DROPS Crochet Hook size 3.5 mm.
The neutral Off White colour works especially well with the open fan structure because the individual stitches remain easy to distinguish. It also emphasizes the spaces between the motifs and gives the finished accessory its light appearance.
Before beginning the main piece, gather the complete 50 g quantity and the 3.5 mm crochet hook. Since the design relies on a specific crochet tension, it is worthwhile to check the gauge before committing to the full triangular fabric.
Gauge: Your First Important Checkpoint
The stated crochet tension is 20 treble crochets in width and 10 rows in height with hook size 3.5 mm = 10 x 10 cm.
The pattern specifically explains that hook size is only a guide. If you get too many stitches within 10 cm, change to a larger hook size. If you get too few stitches within 10 cm, change to a smaller hook size.
This instruction matters because the hook size itself is not the final goal. The required tension is the important reference. Your personal crochet style can affect how tightly or loosely the yarn is worked, so the gauge measurement provides a practical way to check whether your fabric is developing at the intended scale.
- Width: 20 treble crochets per 10 cm
- Height: 10 rows per 10 cm
- Gauge area: 10 x 10 cm
- Specified hook for the gauge: 3.5 mm
Reading the Seven Diagrams
The Moon Dust Bandana uses diagrams A.1 through A.7. These charts are not seven separate pieces. Together, they explain how the central structure develops, how the fan pattern expands, and how the final long edge is completed.
Diagram A.1 establishes the initial section. Once A.1 is finished, diagrams A.2 through A.6 explain how the work continues. The later charts contain grey areas representing A.1. These grey areas have already been worked and are included to make it easier to see how the following stitches connect with the existing fabric.
The same idea is used in diagram A.7. Its grey section helps show how the stitches in the finishing row relate to the already completed triangular piece.
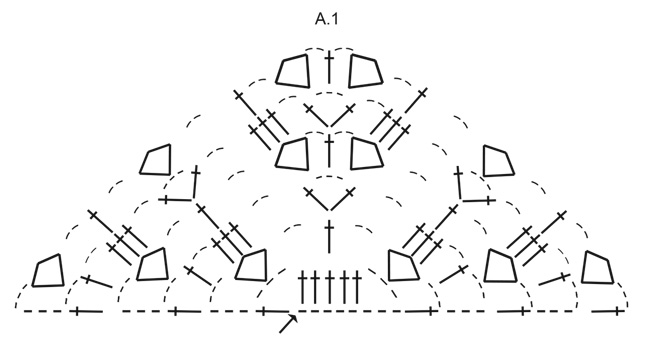
Several chart symbols are used throughout the instructions. The diagram explanations include chain stitches, treble crochets worked in the stitch below or around a chain space below, the starting point, groups of seven treble crochets around a chain space, already-worked rows, slip stitches, and double crochets.
If you are more comfortable with written instructions than charts, keep the written sequence beside the diagrams. The two formats work together: the written directions explain the order of the pattern sections, while the chart makes the shape and placement easier to visualize.
Beginning with A.1
Start the headscarf with the 3.5 mm crochet hook and DROPS Cotton Merino.
Follow diagram A.1 first. This initial chart is the foundation for the rest of the triangular design. It is worth spending extra attention on this section because later instructions repeatedly refer to the chain space in the middle of A.1.
Think of A.1 as the central map for the rest of the project. Once it is complete, you will not simply repeat A.1 unchanged. Instead, the following diagrams show how new stitches are built around and beside this original structure.
Do not rush into the expanding pattern until the starting section is clearly established. A clean beginning makes it much easier to recognize the centre and keep the two sides visually balanced.
Moving from A.1 into A.2 Through A.6
When A.1 is finished, continue with diagrams A.2 to A.6. Remember that the grey portion in these diagrams represents A.1 and has already been worked.
The row sequence is organized around the chain spaces at the beginning, middle, and end of the existing pattern. The written instructions specify that A.2 is worked around the chain space at the beginning of the row.
Then work A.3 and A.4 until there are 7 treble crochets left before the chain space in the middle of A.1.
At this point, work A.3, followed by A.5 across the stitches in the middle.
After the centre section, continue with A.3 and A.4 until there are again 7 treble crochets left before the chain space at the end of the row.
Finish that sequence by working A.3 and then A.6 around the chain space.
The centre therefore acts as a dividing point. The pattern grows on the left and right sides while A.5 handles the middle section.
The Expansion Rhythm of the Fan Pattern
One of the most useful features of this pattern is the predictable way the fan motifs increase. Each time the 2 rows in A.2 to A.6 are worked, there is room for 2 more repeats of A.3 and A.4 on each side.
This is an excellent checkpoint while crocheting. Instead of judging the size only by appearance, you can watch how the repeated sections develop after each two-row sequence.
The additional repeats are what allow the fabric to expand into its triangular shape. The increase is not handled as a conventional written increase instruction. Instead, it appears through the pattern’s expanding arrangement of repeats and chain spaces.
For this reason, it helps to keep your work oriented consistently. Identify the centre and compare both sides as you progress. The left and right portions should develop according to the same overall pattern structure.
Keeping the Fan Motifs Consistent
Openwork patterns can look complicated when viewed as a whole, but they become easier to manage when divided into recognizable sections. In this design, A.3 and A.4 are the repeating building blocks that expand along the sides.
Rather than trying to count every visible opening in the finished fabric, use the diagram labels and the written sequence as your primary checkpoints. The instruction to stop with 7 treble crochets before the central chain space provides an especially useful positional reference.
Consistent crochet tension also helps. Treble crochets that vary substantially in height can change the appearance of the fan motifs. A steady rhythm makes the lace structure cleaner and makes the two sides easier to compare.
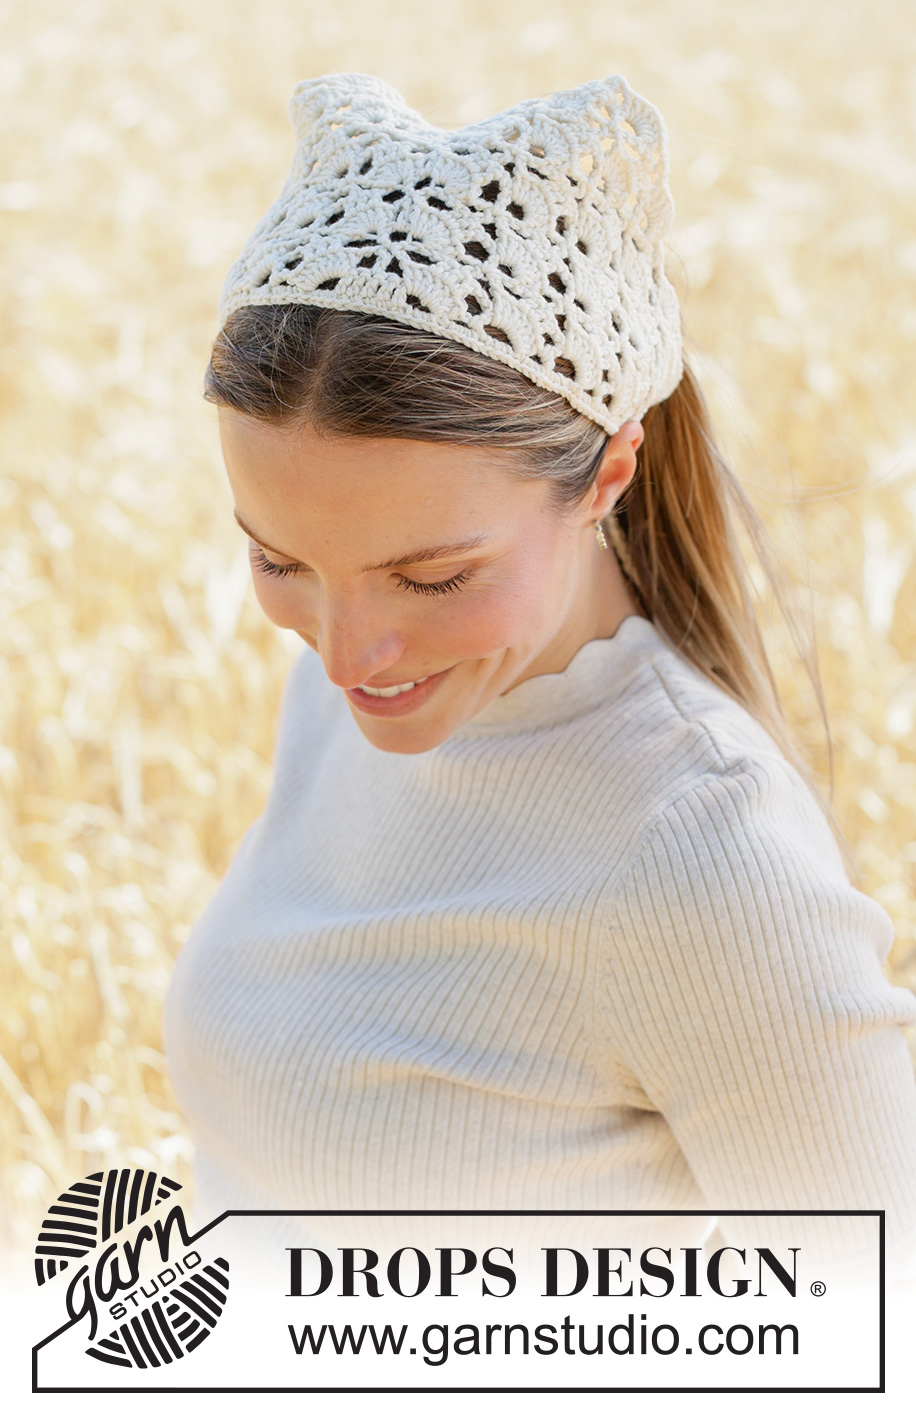
Measuring the Main Triangle
Continue the pattern until the piece measures 18 cm, measured along the middle.
There is an additional requirement at this point: finish after a complete repeat in height. The measurement and the pattern repeat therefore work together. Do not simply stop at the first point where the ruler reaches 18 cm if the repeat in height has not been completed.
This is an important finishing checkpoint because the next stage begins along the longest side of the triangle. Once the main pattern is correctly completed, the work transitions into the border section.
Another important instruction is to do not cut the strand at the end of the triangular pattern. The existing working strand is needed for the next stage.
Recognizing the Finished Triangle
At the end of the main fan-pattern section, the project should clearly have a triangular form. The two shorter sides meet at the point of the triangle, while the opposite side becomes the longest edge.
This longest side is where the finishing row is worked. Understanding this orientation before beginning A.7 makes the next instruction much easier to follow.
The finished main section should measure 44 cm in length without the cords and 18 cm in height. The 44 cm measurement refers to the completed headscarf before the fastening cords are considered.
Working the Longest Edge
Once the triangular piece has reached the required dimensions and complete pattern repeat, the next step is to work a row of double crochets along the longest side.
Rotate the piece so that you continue from the same side, then work A.7 along the long side.
Diagram A.7 does not display every row or every stitch across the entire length. Instead, it shows how the beginning, middle, and end of the row are worked. This makes it a reference diagram for understanding the structure of the finishing edge.
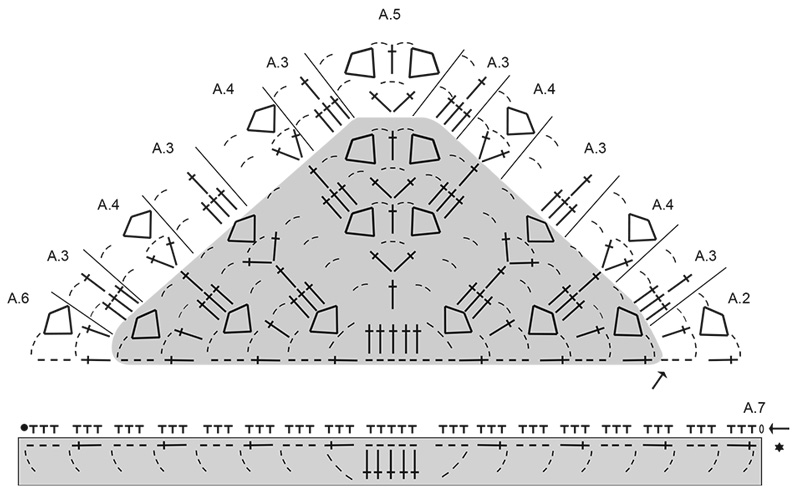
Pay particular attention to the grey area in A.7. As with the earlier charts, it is there to make the relationship between the new stitches and the already-worked section easier to understand.
After A.7 has been completed along the long side, cut and fasten the strand.
Why A.7 Is an Important Finishing Stage
The A.7 row gives the longest side of the triangle a defined crocheted edge before the cords are attached. This creates a natural place for the fastening details and helps complete the overall shape.
Because the main fabric is open and decorative, the finishing edge also acts as a visual transition between the fan-pattern section and the cords.
When working this section, keep the triangular piece oriented correctly and use the beginning, middle, and end portions shown in the chart as your guide. Avoid treating the grey section as new crochet; it is there to show how the row is constructed in relation to the existing fabric.
Creating the First Braided Cord
The cords are made after the main triangular fabric and the A.7 edge are complete.
For the first cord, cut 6 strands of DROPS Cotton Merino, each 80 cm in length.
Thread these strands halfway through the piece at the outermost point at one end of the long side. Because each strand is folded in half at the attachment point, the result is 12 strands of equal length.
This folded arrangement creates the material needed for the braided cord without requiring a separate sewn-on strip.
Divide the Cord into Three Bunches
Once the 12 strands have been positioned, divide them into 3 bunches of 4 strands.
Keeping the groups clearly separated makes the next step straightforward. The three bunches are then plaited together. Try to maintain reasonably even tension as you work so that the finished cord remains neat and consistent.
Continue plaiting until there is exactly 3 cm left.
At the end of the plait, tie a strand around it and fasten well.
- 6 original strands
- 80 cm length for each strand
- 12 equal-length strands after folding through the fabric
- 3 bunches
- 4 strands per bunch
- Plait until 3 cm remains
- Tie a strand around the plait
- Fasten securely
Repeat the Cord at the Other End
The second cord is made in exactly the same way at the opposite end of the long side.
Use another set of 6 strands of DROPS Cotton Merino, each 80 cm long. Thread them halfway through the outermost point at the other end, creating 12 equal-length strands. Divide those strands into three groups of four and plait until 3 cm remains.
Secure the end in the same manner by tying a strand around the plait and fastening it well.
When both cords are complete, the practical construction of the Moon Dust Bandana is finished.
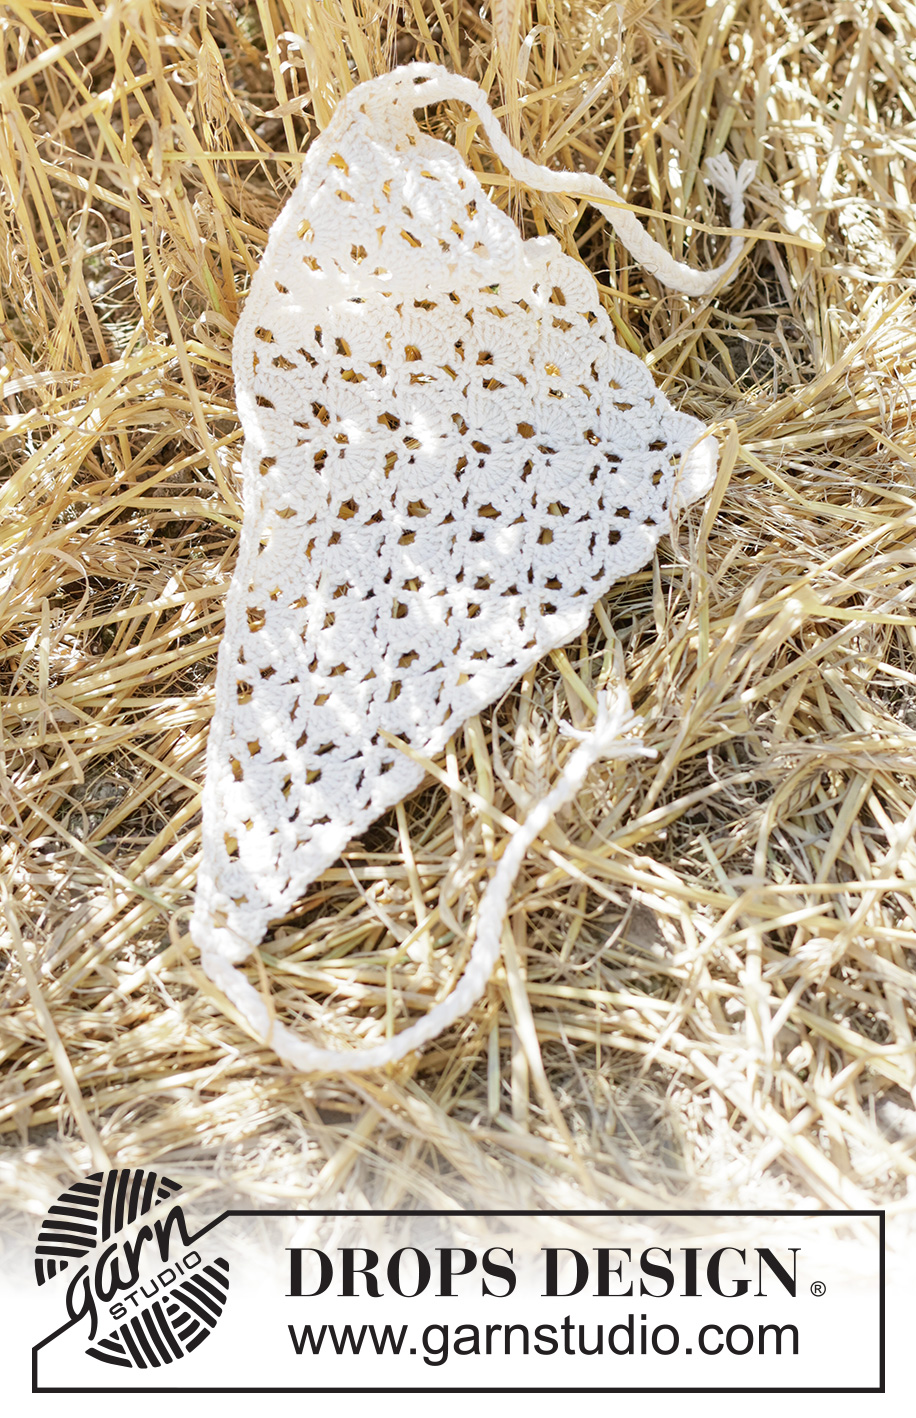
Visual Checkpoints Before Wearing
Before tying the finished bandana around your head, take a moment to inspect the completed piece.
- Confirm that the main piece has a triangular shape.
- Check that the height measured along the middle is 18 cm.
- Confirm that the length is 44 cm without the cords.
- Look for balanced development of the fan pattern on both sides.
- Check that the long side has the A.7 finishing row.
- Make sure both cords are attached at the ends of the long side.
- Check that each cord has been securely fastened.
These checks are especially helpful for a chart-based project because the finished appearance provides a useful confirmation that the construction progressed as intended.
How the Bandana Looks from Different Angles
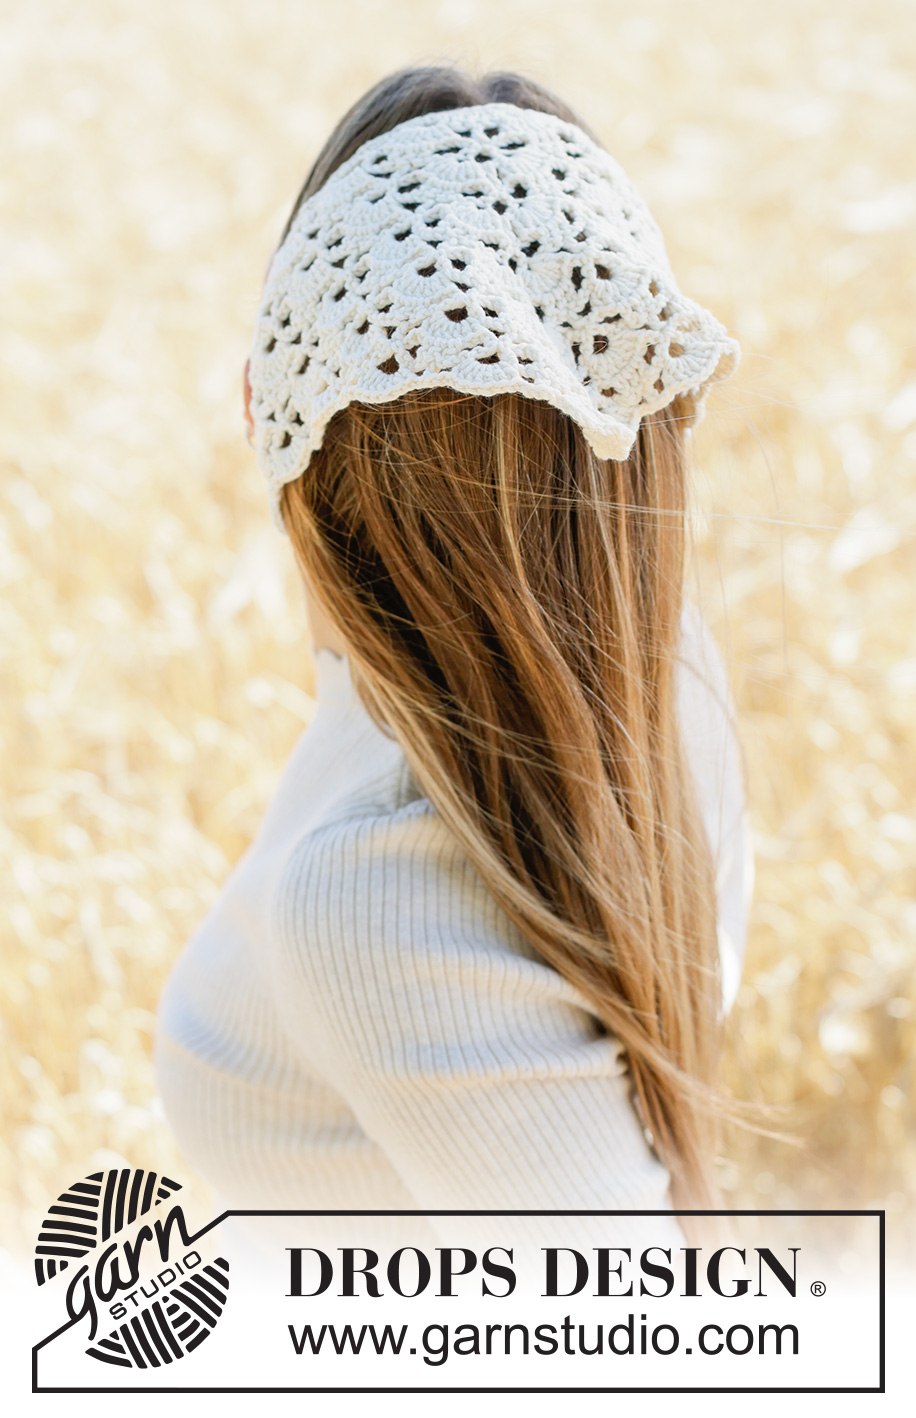
The design changes visually depending on how it is worn. From the side, the triangular fabric follows the head while the fastening cord extends toward the back. From the rear, the openwork spreads across the hair and the scalloped-looking lower edge becomes particularly noticeable.
The fan pattern is also easy to appreciate from the front because the repeating openings create a light decorative surface. The Off White yarn emphasizes these openings and allows the underlying hair to show through the lace-like structure.

The triangular construction is what allows the same crocheted fabric to provide both coverage and a decorative silhouette. The cords then provide the fastening point without adding bulky closures or additional hardware.
Beginner Tips for a Cleaner Result
Keep the Centre Visible
The chain space in the middle of A.1 becomes an important reference point later. Avoid losing track of it as the fabric grows.
Use the Grey Areas Correctly
The grey portions of A.2 through A.6 represent A.1 that has already been worked. They are visual guides rather than additional stitches that need to be crocheted again.
Watch the Two-Row Rhythm
After each two-row sequence in A.2 to A.6, the pattern has room for two additional repeats of A.3 and A.4 on each side. Use this expansion rhythm as a checkpoint.
Respect the 18 cm Measurement
Measure the piece along the middle and stop when it reaches 18 cm, while also making sure you finish after a complete repeat in height.
Do Not Cut the Working Strand Early
At the end of the triangular section, the instructions specifically say not to cut the strand because the next step is the A.7 finishing row along the longest side.
Keep Both Cords Consistent
Use the exact specified cord construction on both sides: 6 strands of 80 cm, folded to produce 12 equal strands, divided into three groups of four, and plaited until 3 cm remains.
Quick Technical Reference
For a convenient final check, keep the essential technical information together in one place:
- Pattern number: DROPS 265-7
- Design: Pattern cm-162
- Yarn group: B
- Yarn: DROPS Cotton Merino
- Amount: 50 g
- Colour: 01, Off White
- Hook: 3.5 mm
- Gauge: 20 treble crochets x 10 rows = 10 x 10 cm
- Finished length: 44 cm without cords
- Finished height: 18 cm
- Main diagrams: A.1 to A.6
- Finishing diagram: A.7
- Main fabric: Worked back and forth
- Shape: Triangle
- Cord strands: 6 strands per cord
- Cord strand length: 80 cm each
- Strands after folding: 12 equal-length strands
- Bunches: 3 bunches of 4 strands
- Plait ending: Stop with 3 cm remaining
- Cords: One at each end of the long side
Final Project Review
The Moon Dust Bandana is a compact crochet project, but its construction contains several useful techniques that make it rewarding to work. The main fabric is developed through charted fan motifs, the triangle grows through additional side repeats, and the longest edge receives a separate finishing treatment before the fastening cords are introduced.
The project becomes much easier to understand when it is divided into stages. First, establish A.1. Next, use A.2 through A.6 to expand the triangular fabric. After every two-row sequence, watch for the additional A.3 and A.4 repeats that appear on each side. Continue until the middle measures 18 cm and the required complete repeat in height is finished.
From there, the project changes direction. Instead of continuing the fan pattern, rotate the triangle and work A.7 along the longest side. This finishing row provides the foundation for the final functional element: the cords.
The cords themselves are simple once the strand arrangement is understood. Six 80 cm strands are folded through the fabric to create 12 equal strands. Those strands are divided into three groups of four and plaited until only 3 cm remains. The same construction is repeated at the opposite end.
When complete, the bandana measures 44 cm in length without the cords and 18 cm in height. Its Off White colour, open fan pattern, triangular silhouette, and braided fastening cords give it a distinctive handmade character.
For the smoothest experience, keep the charts visible throughout the project, use the centre of A.1 as your main orientation point, maintain the stated crochet tension, and treat the measurements and cord specifications as fixed technical checkpoints. With these details in place, the Moon Dust Bandana develops from a small starting section into a delicate triangular accessory ready to wear.