
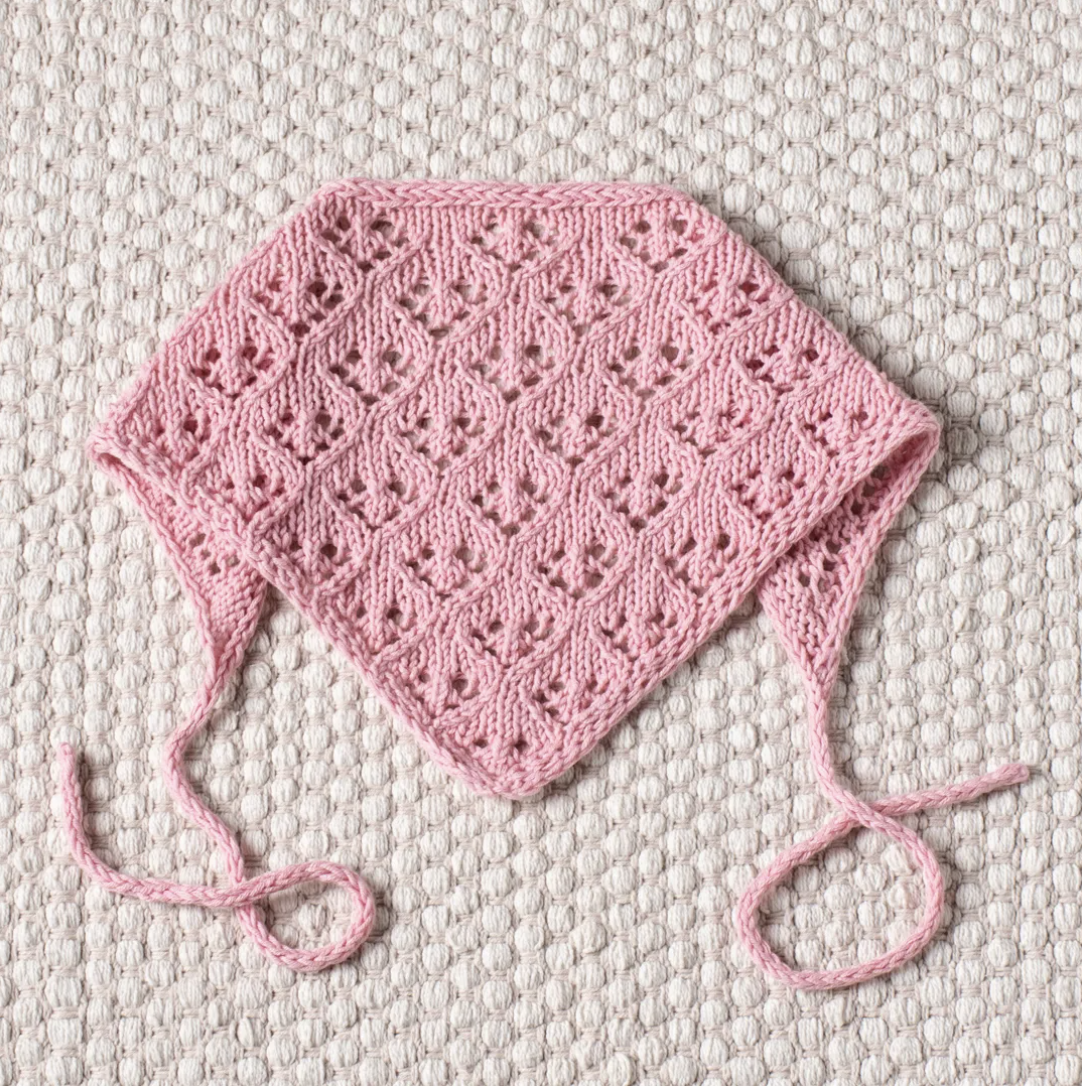
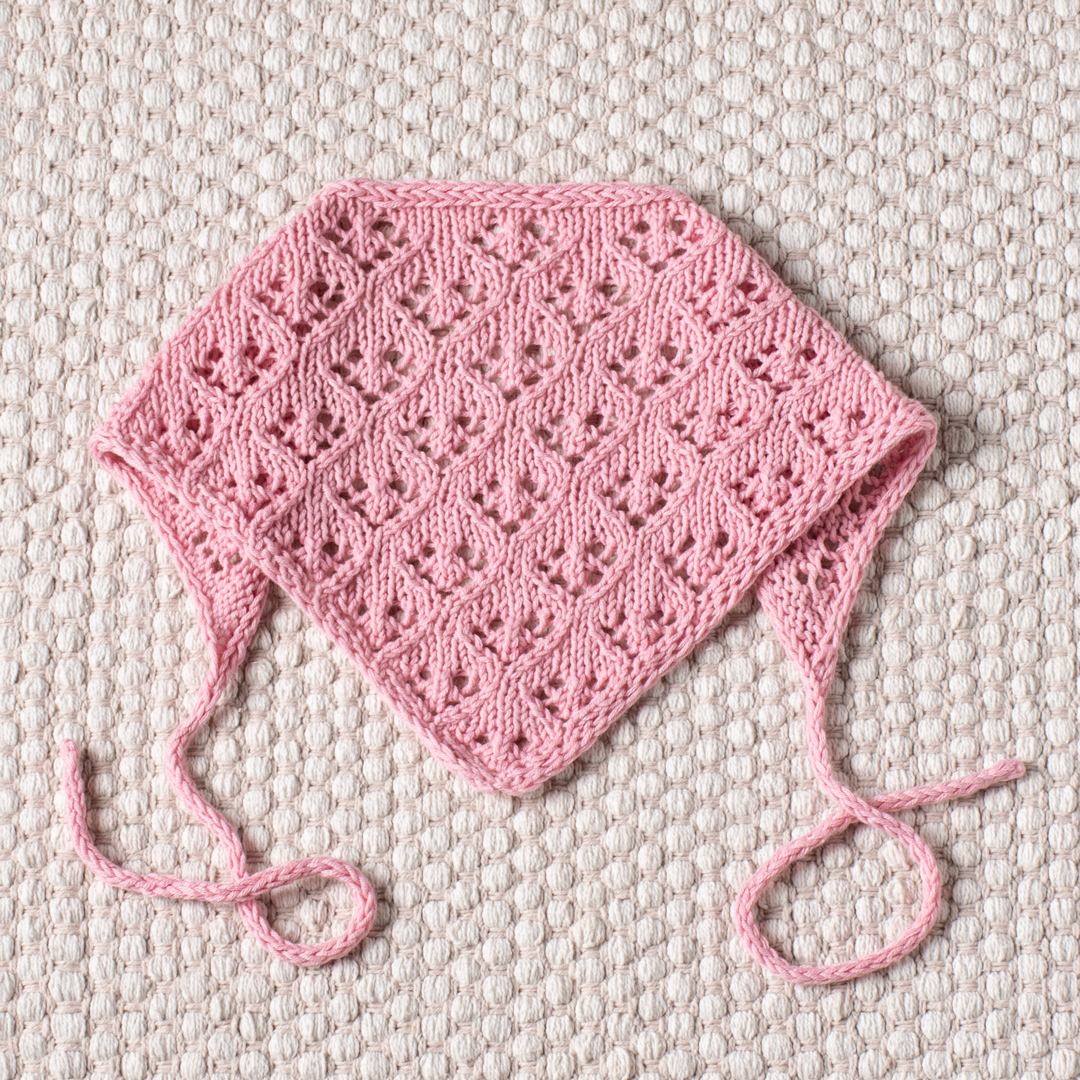
The In Bloom Bandana is a lightweight knitted accessory designed around a simple triangular shape, delicate lace stitches, and clean i-cord finishing. Worked in sport-weight cotton yarn, it is a compact project that brings together several useful knitting techniques without requiring a large amount of material. The finished bandana is suitable for spring and summer and can be adjusted in length by changing the number of lace-pattern repeats.
Unlike a project that is assembled from several separate pieces, this bandana is built primarily as one continuous knitted triangle. The work begins at the bottom edge with just 5 stitches. From there, the triangle expands through increases on the right-side rows. The lace pattern develops as the stitch count grows, while the first and last 2 stitches establish the neat i-cord edging.
After the triangular portion reaches the desired length, the construction changes from the main lace fabric to the first i-cord tie. The tie is then joined directly to the live stitches of the bandana. The i-cord is worked across the remaining stitches to create the edging, and the same 3-stitch i-cord continues into the second tie. This construction gives the finished accessory a coordinated border and eliminates the need to sew a separate decorative edging around the triangle.
This guide presents the complete pattern information in a structured way while keeping the original stitch counts, measurements, yarn information, needle sizes, and construction sequence intact.
Project Snapshot
- Pattern name: In Bloom Bandana
- Finished size: One size
- Length without ties: 46cm / 18in
- Height: 21cm / 8.25in
- Gauge: 10 x 10 cm (4x4in) = 24 sts x 32 rows in stockinette stitch after blocking
- Yarn: Drops Safran in light rose, uni color 77
- Yarn quantity: 1 ball
- Main needles: 3mm (US 2.5) knitting needles
- Tie needles: A pair of 3mm (US 2.5) DPNs
- Notions: Tapestry needle, measuring tape, and scissors
- Main construction: Worked back and forth
- Starting point: Bottom edge
- Shaping: Increases on right-side rows
- Border: 2-stitch i-cord edging
- Tie length: Approximately 30cm each
What Makes the Construction Special?
The most useful way to understand this pattern is to divide it into four construction stages: establishing the triangle, developing the lace, finishing the triangular fabric, and creating the continuous i-cord border and ties.
The first stage starts with only 5 stitches. Each right-side shaping row adds 2 stitches, one near each side of the center section. This balanced increase structure is what allows the project to expand into a symmetrical triangle.
The second stage introduces the repeating lace pattern. The main pattern consists of 8 rows. Rows 1, 3, 5, and 7 are the shaping and lace rows, while Rows 2, 4, 6, and 8 are worked on the wrong side using the established edge treatment.
The third stage uses two additional rows to continue the shaping before the yarn is broken. The live stitches remain on the needle because they will immediately become part of the i-cord edging construction.
The final stage starts with a 3-stitch i-cord tie. Instead of binding off the triangle and attaching a separate cord later, the first tie is connected directly to the live bandana stitches. The edging is then worked stitch by stitch until only 3 stitches remain, and these become the second tie.
Materials and Tools
Choosing the Specified Yarn
The original pattern uses Drops Safran in the color light rose, uni color 77, with 1 ball required. The yarn choice contributes to the lightweight character of the finished accessory and is appropriate for the spring and summer styling described in the pattern overview.
If reproducing the stated project as closely as possible is the goal, using the specified yarn and checking the gauge after blocking are important. Substituting a different yarn can affect stitch size, drape, dimensions, and the appearance of the lace openings.
Needles
The main fabric is knitted with 3mm (US 2.5) knitting needles. The i-cord ties use a pair of 3mm (US 2.5) DPNs.
The DPNs are useful for the narrow 3-stitch i-cord because the stitches can be moved from one side of the needle to the other without turning the work in the usual flat-knitting manner.
Notions
Only a few additional supplies are required: a tapestry needle, measuring tape, and scissors. The measuring tape is particularly useful for checking the 30cm tie lengths and the final dimensions of the bandana.
Abbreviation Reference
The lace section contains several increases and decreases, so it is worth reviewing every abbreviation before starting. Having these movements familiarized in advance can make the pattern much easier to follow.
- k – knit.
- k2tog – knit 2 stitches together.
- k3tog – knit 3 stitches together: slip the next 2 stitches knitwise (slip both stitches together, not one by one) to the right-hand needle, knit the next stitch, pass the 2 slipped stitches over the knit stitch.
- M1L – make 1 left.
- M1R – make 1 right.
- p – purl.
- RS – right side.
- sl – slip stitch as if to purl with yarn in front.
- ssk – slip 1 stitch knitwise, slip the next stitch knitwise, return the 2 stitches back to the left needle, knit those 2 stitches together through the back loops.
- WS – wrong side.
- yo – yarn over.
- *-* – repeat the instructions in between the asterisks the number of times specified.
Reading the I-Cord Edges Correctly
The first and last 2 stitches of every row are treated differently from the central lace stitches. On every row, the first 2 stitches are knitted, and the final 2 stitches are slipped with yarn in front.
This is the i-cord edging. It is not an optional decorative detail; it is part of the construction of the bandana. The edging gives the sides a neat appearance and helps prevent curling.
The pattern also gives an important tension instruction: do not tighten the edge stitches. The same principle applies to the increased stitches. Keeping these stitches relaxed helps the edge retain its intended structure and prevents unnecessary restriction along the growing triangle.
Starting with Five Stitches
Cast on 5 stitches.
The first row establishes the wrong-side structure:
Set-up row (WS): k2, p1, sl2.
The next right-side row introduces the first pair of increases:
Row 1 (RS): k2, M1R, k1, M1L, sl2 (7sts).
Then work:
Row 2: k2, p to last 2 sts, sl2.
At this point, the project has grown from 5 stitches to 7 stitches. The center remains clearly defined between the two edge sections, and the two increases establish the symmetrical shaping that will continue throughout the project.
Establishing the Lace Motif
The next rows begin introducing yarn overs and decreases while continuing to increase at the edges.
Row 3: k2, M1R, k2tog, yo, k1, M1L, sl2 (9sts).
Row 4: k2, p to last 2 sts, sl2.
Row 5: k2, M1R, k2tog, yo, k1, yo, ssk, M1L, sl2 (11sts).
Row 6: k2, p to last 2 sts, sl2.
Row 7: k2, M1R, k2tog, yo, k3, yo, ssk, M1L, sl2 (13sts).
Row 8: k2, p to last 2 sts, sl2.
Continue with:
Row 9: k2, M1R, k3, yo, k3tog, yo, k3, M1L, sl2 (15sts).
Row 10: k2, p to last 2 sts, sl2.
Understanding the Main Eight-Row Repeat
Once the set-up section is complete, the main body is formed by repeating an 8-row lace sequence. The repeat is responsible for most of the decorative appearance of the finished triangle.
Row 1
Row 1 (RS): k2, M1R, *k2tog, yo, k6* to last 5sts, k2tog, yo, k1, M1L, sl2 (2sts increased).
The asterisked section is repeated according to the instruction until the specified number of stitches remains. The beginning and end of the row maintain the shaping and edge structure.
Row 2
Row 2 (WS): k2, p to last 2 sts, sl2.
Row 3
Row 3: k2, M1R, *k2tog, yo, k1, yo, ssk, k3* to last 7sts, k2tog, yo, k1, yo, ssk, M1L, sl2 (2sts increased).
Row 4
Row 4: k2, p to last 2 sts, sl2.
Row 5
Row 5: k2, M1R, *k2tog, yo, k3, yo, ssk, k1* to last 9sts, k2tog, yo, k3, yo, ssk, M1L, sl2 (2sts increased).
Row 6
Row 6: k2, p to last 2 sts, sl2.
Row 7
Row 7: k2, M1R, *k3, yo, k3tog, yo, k5* to last 8 sts, yo, k3tog, yo, k3, M1L, sl2 (2sts increased).
Row 8
Row 8: k2, p to last 2 sts, sl2.
Repeat rows 1-8 7 more times or until you reach your desired length.
A Simple Way to Track Each Repeat
Because the main section consists of repeated groups of 8 rows, keeping a written record of completed repeats can prevent accidental omissions. This is especially helpful when the project is paused between knitting sessions.
A useful checkpoint is to identify the four right-side lace rows separately from the four wrong-side rows. Rows 1, 3, 5, and 7 contain the more involved stitch combinations and each adds 2 stitches. Rows 2, 4, 6, and 8 use the same wrong-side structure.
Do not assume that every lace row uses the same internal stitch arrangement. The placement of k2tog, yo, ssk, and k3tog changes from row to row. Follow each line exactly rather than attempting to substitute one lace row for another.
How the Shaping and Lace Work Together
One of the defining characteristics of this project is that the lace is not simply placed on top of an already-shaped triangle. The lace and shaping are integrated.
Each main right-side pattern row begins with k2, M1R and finishes with M1L, sl2. This means the outer edges continue to expand while the center portion develops the lace pattern.
Meanwhile, decreases and yarn overs within the central section create the openwork effect. The increases at the edges provide the additional stitches needed for the triangular growth, while the decreases within the lace prevent the stitch count from growing uncontrollably inside the motif.
For this reason, stitch-count awareness is more useful than simply looking at the fabric. The shape and lace are both controlled by the written instructions.
Completing the Triangle
After completing the required lace repeats, work these two rows:
Row 1: k2, M1R, k to last 2 sts, M1L, sl2.
Row 2: k2, p to last 2 sts, sl2.
Break the yarn, leaving a 10cm (4″) long tail.
Set the bandana aside while leaving the stitches on the needle as is. This point is important because the next construction stage uses the live stitches to form the i-cord edging.
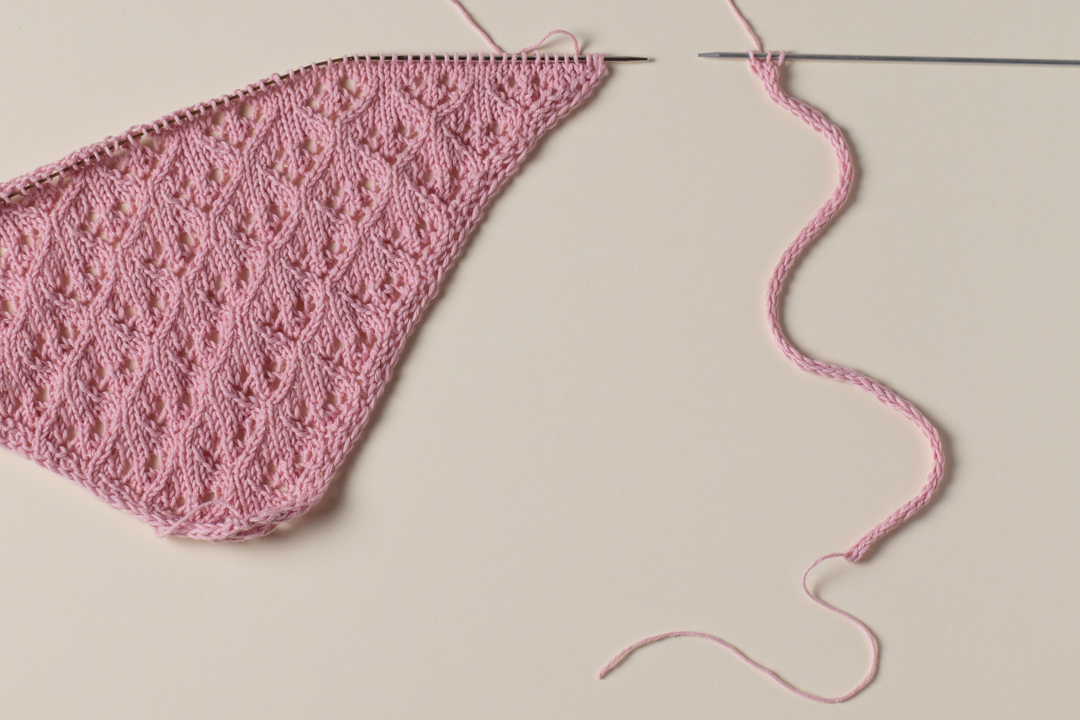
Building the First 30cm I-Cord
The first tie is worked separately before being joined to the bandana.
Cast on 3 stitches and do not turn.
Then repeat:
*Slip the 3 stitches to the right side of the needle. Knit 3.*
Continue until the tube measures approximately 30 cm.
Do not cut the yarn.
The instruction not to turn is central to i-cord construction. The 3 stitches are moved to the opposite side of the needle and knitted again, creating the small tube that gives the tie its characteristic cord-like appearance.
Joining the Tie to the Live Bandana
Transfer the 3 i-cord stitches to the needle, holding the live bandana stitches.
Next, knit the first two i-cord stitches, then work ssk, knitting the last i-cord stitch together with the first bandana stitch.
This joining technique transforms the free i-cord into the beginning of the bandana’s edging. The live stitches are gradually consumed as the edging moves across the triangular piece.
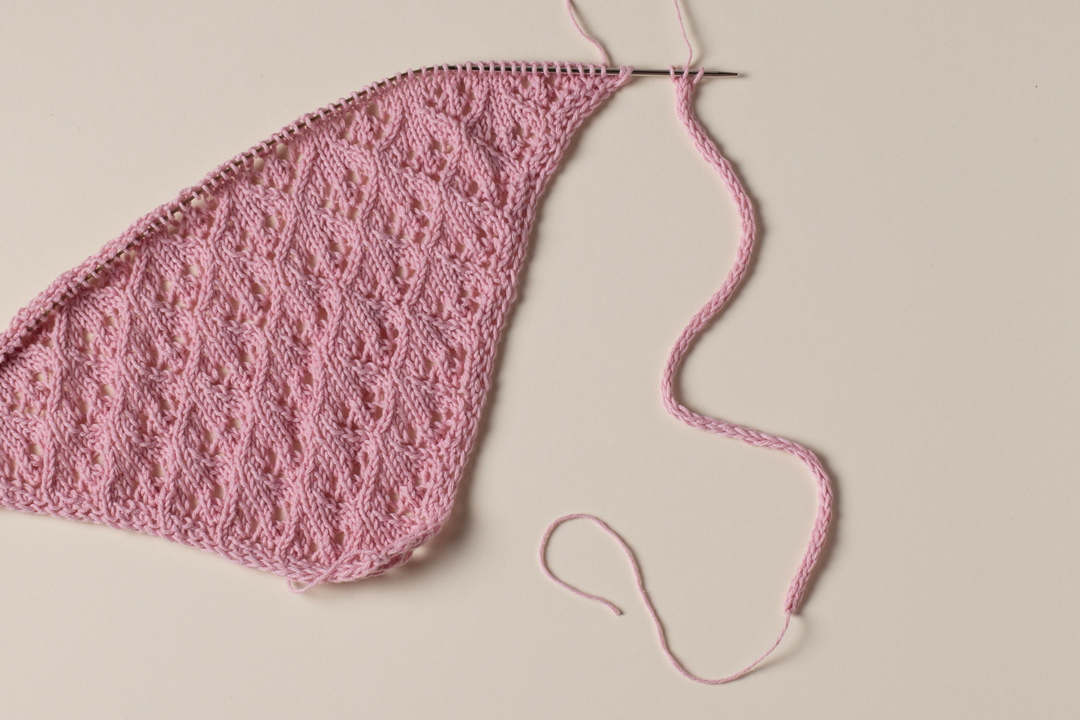
The pattern then instructs you to transfer the first 3 stitches to the needle while holding the live bandana stitches. This movement is repeated throughout the edging process.
Working the Continuous I-Cord Edging
Repeat:
*k2, ssk, transfer 3 stitches to the needle, holding the live bandana stitches*
Continue these steps until you have 3 stitches left.
The process is repetitive, but that repetition is what creates the continuous border. Each cycle works two i-cord stitches normally and uses the third i-cord stitch with the next live bandana stitch through ssk.
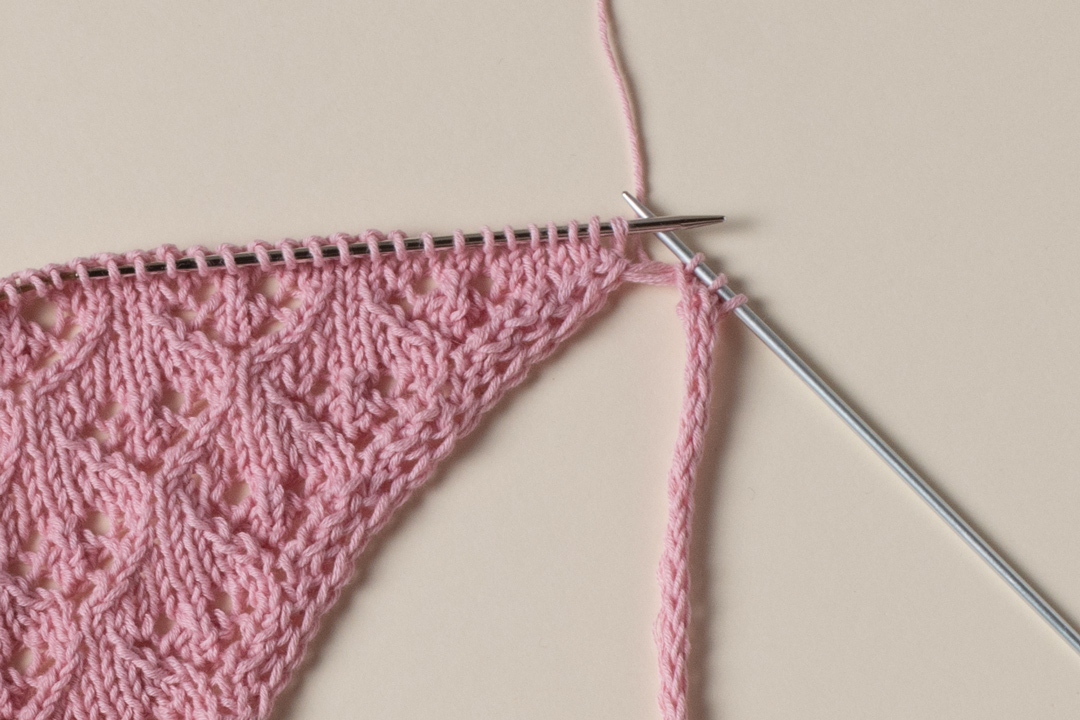
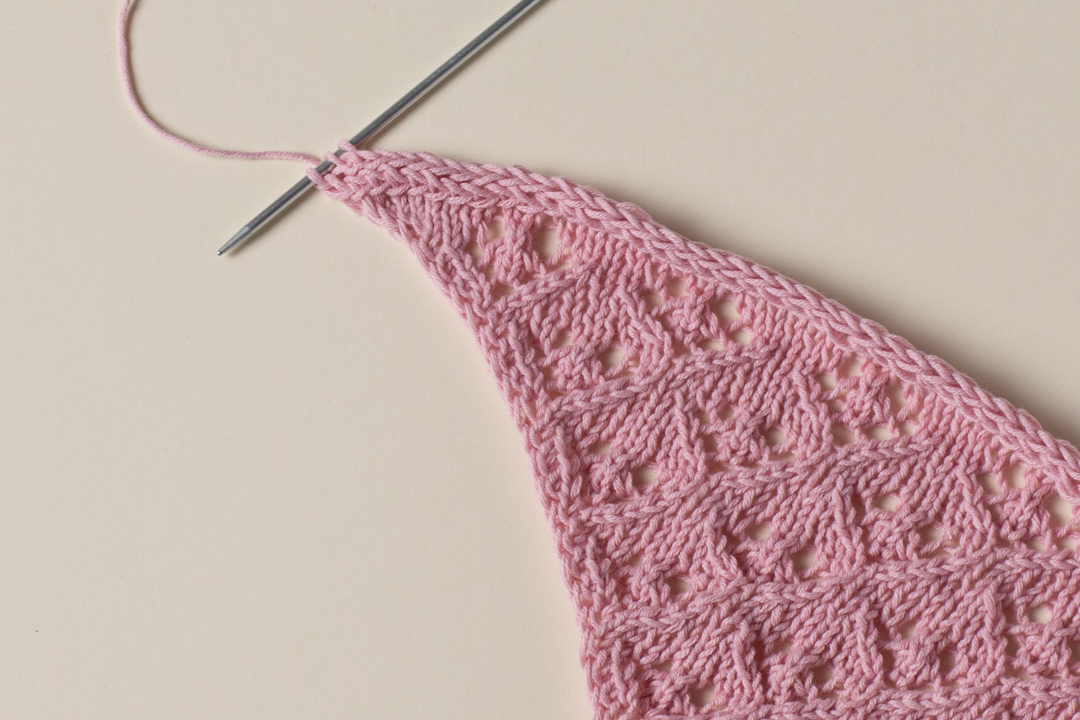
When only 3 stitches remain, the construction transitions naturally into the second tie.
The Second I-Cord Tie
Work the second tie exactly as the first:
*Slip the 3 stitches to the right side of the needle. Knit 3.*
Continue until the tube measures approximately 30 cm.
Unlike the first tie, the second tie ends the project, so once the correct approximate length has been reached, bind off, cut the yarn, and weave in the tails.
Pattern Checkpoints for Confident Knitting
Small projects can still become difficult to troubleshoot if a mistake is allowed to travel through several rows. The In Bloom Bandana provides several useful checkpoints.
- Beginning: cast on 5 stitches.
- After Set-Up Row 1: 7 stitches.
- After Set-Up Row 3: 9 stitches.
- After Set-Up Row 5: 11 stitches.
- After Set-Up Row 7: 13 stitches.
- After Set-Up Row 9: 15 stitches.
- Main lace shaping: each specified right-side pattern row increases 2 stitches.
- Final triangle section: work the two specified shaping rows before breaking the yarn.
- First tie: approximately 30cm.
- Second tie: approximately 30cm.
Tips for Managing the Lace Rows
The lace pattern becomes easier to handle when you treat the repeated 8-row sequence as a unit rather than trying to memorize the whole section. Keep the current row visible and mark each completed repeat.
When a row contains an asterisked instruction, pay attention to the point where the pattern tells you to stop repeating. The final stitches are written separately and should not be absorbed into the repeat.
Yarn overs should remain clearly visible as you work. If a lace section looks unexpectedly dense or open, compare the row against the written sequence before continuing. Because yarn overs and decreases work together, missing one movement can change the appearance of the motif and affect later stitch placement.
Maintaining the Intended Shape
The triangle grows because the right-side rows include an increase near the beginning and another near the end. The pattern notes that these increases are worked using M1R and M1L before and after the 2 i-cord edge stitches.
Do not tighten the increased stitches. Relaxed increases allow the new stitches to sit naturally within the fabric and help preserve the smooth expansion of the triangle.
Symmetry is easiest to maintain when both sides are worked with comparable tension. If one side looks noticeably tighter than the other, review the tension around the M1R and M1L stitches rather than attempting to compensate later.
Changing the Length
The pattern gives a useful customization option: you can add or subtract repeats to modify the size of the bandana. The main repeat is 8 rows, and the original instructions specify repeating rows 1-8 seven more times or until you reach your desired length.
This means the central construction remains consistent even when the number of repeats changes. The adjustment should be thought of as a change in the number of complete lace-pattern units, not a change to the stitch instructions within a unit.
Because the stated finished measurements are 46cm (18in) without ties and 21cm (8.25in) in height, use those dimensions as the reference point for the original version.
Gauge and Blocking
The stated gauge is 24 stitches x 32 rows over 10 x 10 cm (4x4in) in stockinette stitch after blocking.
The phrase “after blocking” matters when comparing your swatch to the specified gauge. Blocking can alter both stitch and row dimensions, so measuring before blocking may give you a different result from the gauge stated in the pattern.
Gauge is especially relevant if you substitute yarn or needles. A different gauge can affect the overall size of the triangle and the amount of yarn required. For the closest reproduction of the stated measurements, use the specified materials and needle size and consider the gauge after blocking.
Finishing Without Losing the Clean Look
The final finishing stage is deliberately simple. After the second i-cord reaches approximately 30cm, bind off, cut the yarn, and weave in the tails.
A tapestry needle is useful for securing the yarn ends neatly. Since the project relies heavily on clean edges and narrow i-cord ties, finishing the tails carefully helps preserve the polished appearance of the accessory.
Take care not to pull the woven tails so tightly that they distort the surrounding stitches. The finished fabric should retain its natural drape and triangular shape.
Troubleshooting Guide
I Missed an Increase
If a right-side row does not produce the expected 2-stitch increase, check both edge areas. The increase sequence uses M1R near the beginning and M1L near the end. Missing one of these can alter the symmetry of the triangle.
My Edge Is Curling
The pattern’s i-cord edging is designed to make the edges neat and prevent curling. Check that the first 2 stitches are knitted and the final 2 stitches are slipped with yarn in front on every row. Also review your tension, because the pattern specifically instructs you not to tighten the edge stitches.
I Keep Losing Track of the Repeat
Record each completed 8-row sequence. Since Rows 2, 4, 6, and 8 have the same wrong-side instruction, they can serve as easy transition points between the more detailed lace rows.
The Lace Looks Different from One Row to Another
This is expected. Rows 1, 3, 5, and 7 deliberately use different combinations of k2tog, yo, ssk, and k3tog. The lace motif changes as it develops across the triangle.
The I-Cord Is Difficult to Join
Keep the 3 i-cord stitches and the live bandana stitches clearly separated while setting up the join. The critical joining movement is the ssk that works the last i-cord stitch together with the next bandana stitch. Continue transferring the 3 i-cord stitches as instructed after each joining step.
Can the M1 Increases Be Simplified?
The pattern notes an optional simplification: if you want to simplify the pattern, you can replace the M1L/M1R with yo.
If you choose to use this simplification, remember that the original pattern’s written instructions use M1R and M1L. The substitution is presented in the source as an option for simplifying the technique rather than as a change to the original pattern data.
Complete Project Workflow
- Prepare 1 ball of Drops Safran in light rose, uni color 77.
- Use 3mm (US 2.5) knitting needles for the bandana.
- Have 3mm (US 2.5) DPNs ready for the i-cord ties.
- Cast on 5 stitches.
- Complete the set-up row and Rows 1-10.
- Begin the 8-row lace pattern.
- Repeat rows 1-8 seven more times or until you reach your desired length.
- Work the two final rows.
- Break the yarn with a 10cm (4″) tail and leave the live stitches on the needle.
- Cast on 3 stitches for the first i-cord.
- Work the first i-cord to approximately 30cm.
- Connect the i-cord to the live bandana stitches.
- Continue the i-cord edging across the bandana.
- Stop the edging when 3 stitches remain.
- Continue directly into the second i-cord tie.
- Work the second tie to approximately 30cm.
- Bind off, cut the yarn, and weave in the tails.
Frequently Asked Questions
Is the In Bloom Bandana knitted flat?
Yes. The bandana is knitted back and forth. It begins at the bottom edge and grows through increases on the right side.
How many stitches are cast on at the beginning?
The pattern begins with a cast-on of 5 stitches.
How large is the finished bandana?
The stated finished measurements are 46cm (18in) in length without ties and 21cm (8.25in) in height. The pattern is written for one size.
How much yarn is required?
The pattern specifies 1 ball of Drops Safran in light rose, uni color 77.
What is the recommended gauge?
The gauge is 24 stitches by 32 rows over 10 x 10 cm (4x4in) in stockinette stitch after blocking.
How long should the ties be?
Both i-cord ties are worked to approximately 30cm.
How many rows are in the main lace repeat?
The main repeat contains 8 rows.
How many times should the lace repeat be worked?
The pattern instructs you to repeat rows 1-8 seven more times or until you reach your desired length.
Why are the final bandana stitches left live?
They are needed for the i-cord edging. The first i-cord is joined directly to the live bandana stitches, and the edging then incorporates those stitches as it moves across the triangle.
What supplies are needed besides yarn and needles?
You need a tapestry needle, measuring tape, and scissors.
Final Review Before Finishing
- Check that the triangular section has the intended shape.
- Confirm that the i-cord edges remain neat and relaxed.
- Check the approximate 46cm (18in) length without ties if making the stated version.
- Check the approximate 21cm (8.25in) height.
- Measure the first tie at approximately 30cm before joining it.
- Measure the second tie at approximately 30cm before binding off.
- Make sure the second tie has been bound off securely.
- Weave in all remaining yarn tails.
- Use the stated post-blocking gauge as the reference when evaluating the fabric.
Final Thoughts on the In Bloom Bandana
The In Bloom Bandana is a compact project with a surprisingly useful collection of techniques. Its construction begins with a small cast-on and develops gradually through symmetrical right-side increases. The lace section adds visual interest without requiring a large knitted piece, and the repeating 8-row structure provides a clear framework for working through the body.
The i-cord edging is perhaps the most distinctive construction feature. Rather than treating the border as a separate finishing step, the pattern integrates the first tie, side edging, and second tie into one continuous process. This gives the bandana a unified appearance and creates neat edges around the triangular fabric.
The project also allows some flexibility. The stated version measures 46cm (18in) without ties and 21cm (8.25in) in height, but the pattern specifically allows the length to be adjusted by adding or subtracting repeats. The important thing is to preserve the complete 8-row lace sequence when making that adjustment.
For a successful result, focus on three things throughout the project: maintain relaxed tension at the i-cord edges and increases, keep careful track of the lace rows, and use stitch counts as checkpoints whenever they are provided. At the finishing stage, measure both ties and weave in the tails carefully so the final accessory retains its clean handmade appearance.
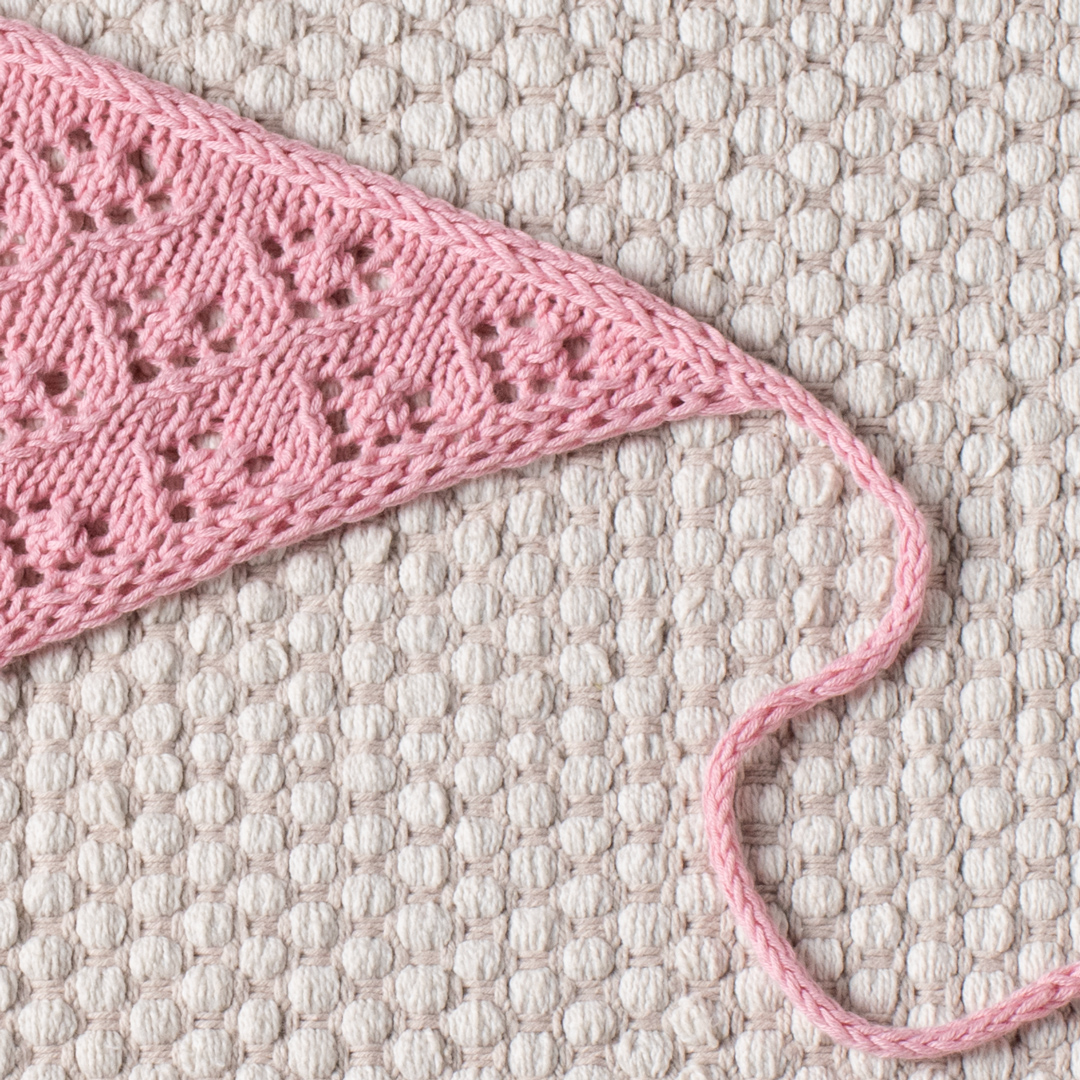
With sport-weight cotton, 3mm needles, a delicate lace stitch, and a continuous i-cord finish, the In Bloom Bandana offers a practical way to create a handmade warm-weather accessory while practicing several foundational knitting techniques in one project.
:::