How to Crochet a Summer Kerchief: A Four-Size Construction and Stitch Guide
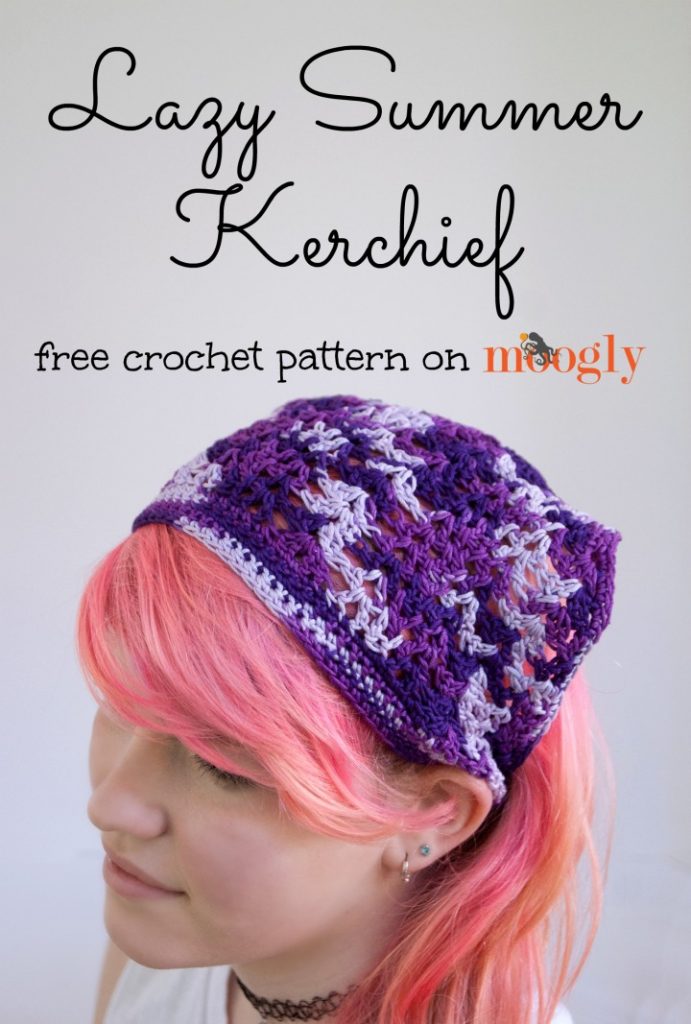
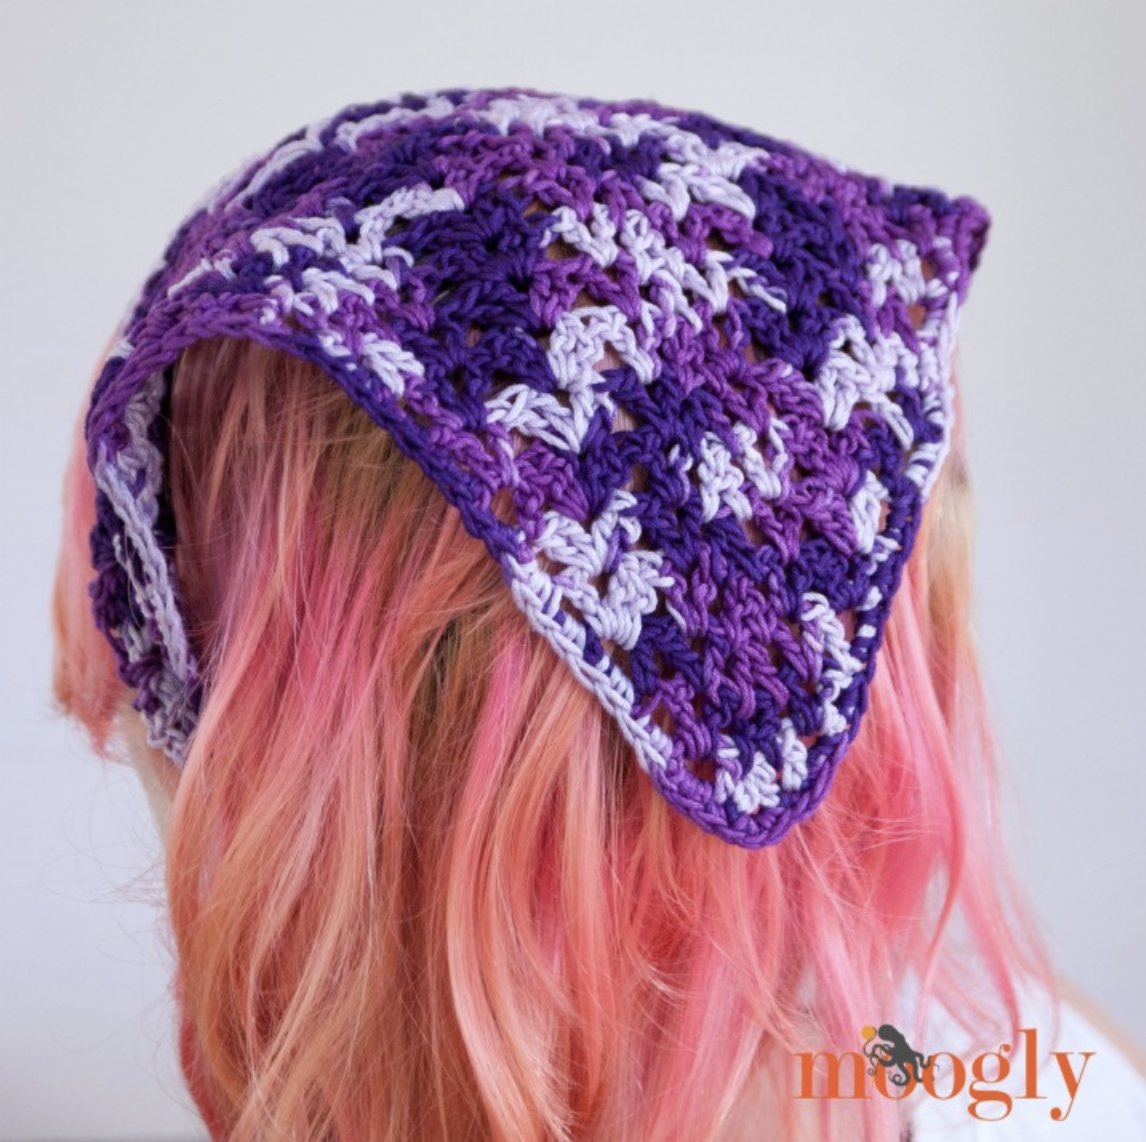
A crochet kerchief is one of those accessories that can be both decorative and wonderfully practical. The Lazy Summer Kerchief takes the familiar triangular appearance of a traditional bandana-inspired kerchief and gives it a different construction by using a hair band instead of ties. The result is a handmade summer accessory designed to be easy to put on and remove.
This pattern is available in four sizes, covering baby, toddler/child, child/teen, and adult head measurements. Rather than treating the kerchief as one fixed-size project, the pattern develops the central fabric through a repeated stitch sequence and then changes to a narrower band section that connects to an elastic hair band.
The project is also a useful way to practice several crochet techniques in one relatively compact accessory. The main fabric combines V stitches, double V stitches, double crochet, and the special wide double crochet two together decrease. The final section introduces single crochet and foundation single crochet while the hair band is enclosed during the edging.
What Makes This Kerchief Different?
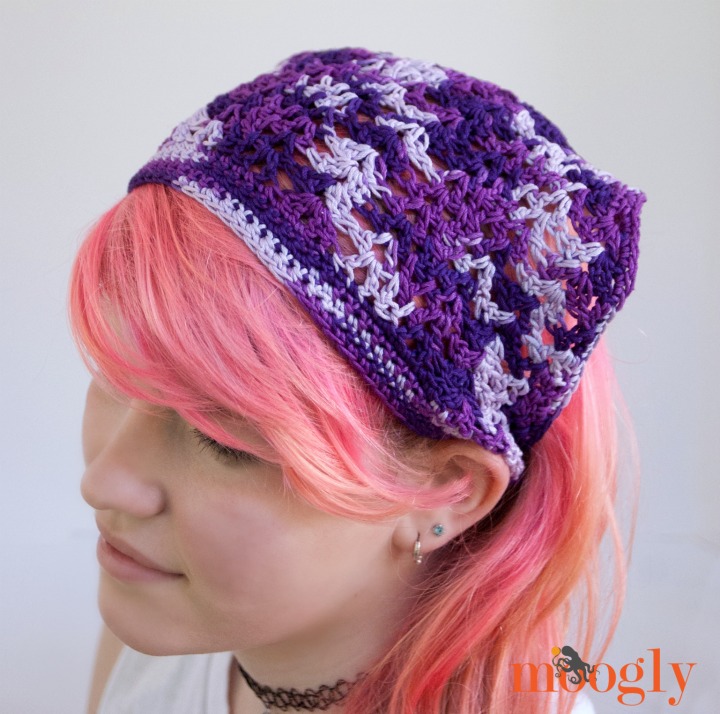
The defining feature of this project is the way the kerchief is secured. Instead of traditional ties, one hair band or elastic band is incorporated into the crocheted headband. This gives the accessory a simple on-and-off construction while preserving the recognizable kerchief shape.
The original design was inspired by a traditional kerchief used during a hot-weather trip. The story behind the pattern describes using bandanas as kerchiefs for protection from the heat and later imagining how useful a crocheted version could be. The published pattern ultimately developed into four sizes so that it could be made for different ages and head measurements.
Pattern Specifications at a Glance
Before beginning, gather the exact materials and check the size you intend to make.
- Hook: US H, 5.0mm
- Yarn: 70-100 yds Sport/5 ply yarn
- Sample yarn: Omega Sinfonia
- Fiber: 100% cotton
- Sample yarn quantity: 218 yds/199 m
- Sample yarn weight: 3.52 oz/100 g
- Sample colorway: #847
- Hair band: 1 hair band/elastic band
- Gauge: 16 sts x 22 rows = 4 inches in sc
The source does not provide separate yarn quantities for each of the four sizes. The specified amount remains 70-100 yards of Sport/5 ply yarn.
Choose the Correct Size First
The four size ranges are based on head circumference:
| Pattern Size | Head Measurement |
|---|---|
| Baby | 16-18″ |
| Toddler/Child | 18-20″ |
| Child/Teen | 20-22″ |
| Adult | 22-24″ |
Selecting the size before starting is important because the four versions do not all finish the triangular section on the same row. They also have different stitch counts when the headband section begins.
The Three Stitch Elements to Recognize
Although the pattern contains many row instructions, much of the visual construction depends on three recurring elements. Learning to identify these elements makes it easier to follow the longer rows.
V Stitch
The V stitch is written as [dc, ch 1, dc] in the same stitch. It creates an open V-shaped space that becomes a reference point for subsequent rows.
Double V Stitch
The double V stitch is written as [2 dc, ch 1, 2dc] in the same stitch. It is wider than the regular V stitch and contributes to the expansion of the kerchief.
Wide Double Crochet Two Together
The special wdc2tog is a wide double crochet two together decrease. The original definition describes it as a dc2tog worked in between the posts on either side of the dc2tog of the previous round.
The source gives a specific placement reminder: V stitches are worked into the V stitches below, and double V stitches are worked into the double V stitches below. This distinction should remain consistent throughout the main section.
The Opening: Building the Center
Every size begins with the same first-row construction. This makes the beginning of the project straightforward even though the later sizes extend for different numbers of rows.
Row 1: Ch 9, dc in the 5th ch from the hook (first v st made), dc2tog over the next 3 ch (skip center ch), v st in the last ch; turn.
Row 2: Ch 3 (counts as first dc), v st in next ch sp, wdc2tog, v st in ch sp, dc in top of ch 3; turn.
Row 3: Ch 4, dc in 1st st (first v st made), v st in next ch sp, wdc2tog. Vs st in next ch sp, v st in top of ch 3; turn.
At this stage, the project has already introduced the core rhythm: an opening chain, V-shaped spaces, and the central decrease. From here, the rows become wider while continuing to use the same visual vocabulary.
Developing the Main Triangle
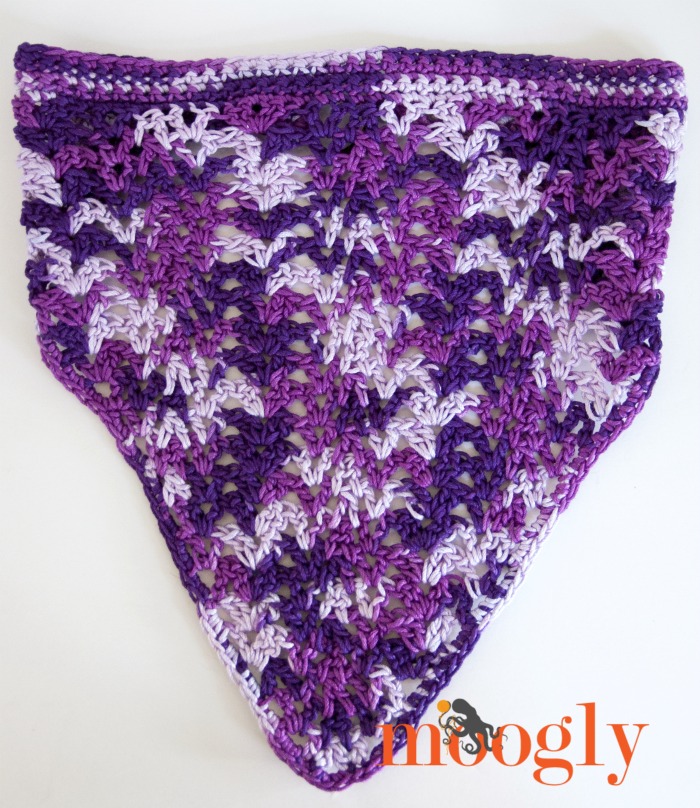
Rows 4 through 10 introduce more V stitches and the larger double V stitches. This is where it becomes especially useful to watch the actual stitch spaces rather than relying only on the written line.
Row 4: Ch 3, [dc, ch 1, 2 dc] in next ch sp, v st in next ch sp, wdc2tog, v st in next ch sp, [2 dc, ch 1, dc] in next ch sp, dc in top of ch 3; turn.
Row 5: Ch 3, double v st in next ch sp, v st in next ch sp, wdc2tog, v st in next ch sp, double v st in next ch sp, dc in top of ch 3; turn.
Row 6: Ch 4, dc in 1st st, double v st in next ch sp, v st in next ch sp, wdc2tog, v st in next ch sp, double v st in next ch sp, v st in top of ch 3; turn.
Row 7: Ch 3, v st in next ch sp, double v st in next ch sp, v st in next ch sp, wdc2tog, v st in next ch sp, double v st in next ch sp, v st in next ch sp, dc in top of ch 3; turn.
Row 8: Ch 3, dc in next st, v st in ch sp, double v st in next ch sp, v st in next ch sp, wdc2tog, v st in next ch sp, double v st in next ch sp, v st in next ch sp, dc in next st, dc in top of ch 3; turn.
Row 9: Ch 3, dc2tog working between first 2 sts of previous row and top of 3rd st of previous row, v st in next ch sp, double v st in next ch sp, v st in next ch sp, wdc2tog, v st in next ch sp, double v st in next ch sp, v st in next ch sp, dc2tog in top of next st and between last 2 sts, dc in top of ch 3; turn.
Row 10: Ch 4, dc in 1st st, wdc2tog, v st in next ch sp, double v st in next ch sp, v st in next ch sp, wdc2tog, v st in next ch sp, double v st in next ch sp, v st in next ch sp, wdc2tog, v st in top of ch 3; turn.
Working the Repeating Middle Rows
The center of the pattern becomes easier to understand when the repeated sequence is viewed as a group rather than as isolated stitches. The instructions repeatedly move between V stitches, the central wdc2tog, and double V stitches.
Row 11: Ch 3, *v st in next ch sp, wdc2tog, v st in next ch sp,** double v st in next ch sp; rep from * across, finishing last repeat at **, then dc in the top of the ch 3; turn.
Row 12: Ch 4, dc in 1st st *v st in next ch sp, wdc2tog, v st in next ch sp,** double v st in next ch sp; rep from * across, finishing last repeat at **, then v st in the top of the ch 3; turn.
Row 13: Ch 3, [dc, ch 1, 2 dc] in next ch sp, *v st in next ch sp, wdc2tog, v st in next ch sp,** double v st in next ch sp; rep from * across, finishing last repeat at **, then [2 dc, ch 1, dc] in last ch sp, dc in top of ch 3; turn.
Row 14: Ch 3, double v st in next ch sp, *v st in next ch sp, wdc2tog, v st in next ch sp, double v st in next ch sp; rep from * across, then dc in top of ch 3; turn.
Row 15: Ch 4, dc in 1st st, double v st in next ch sp, *v st in next ch sp, wdc2tog, v st in next ch sp, double v st in next ch sp; rep from * across, then v st in top of ch 3; turn.
Row 16: Ch 3, *v st in next ch sp, double v in next ch sp, v st in next ch sp,** wdc2tog; rep from * across, finishing last repeat at **, then dc in the top of the ch 3; turn.
Row 17: Ch 3, dc in next st, *v st in ch sp, double v st in next ch sp, v st in next ch sp,** wdc2tog; rep from * across, finishing last repeat at **, then dc in the next st, dc in the top of the ch 3; turn.
At this point, the Baby size moves directly into its single crochet transition row, while the larger sizes continue with additional shaping rows.
Where Each Size Changes
The most important difference between the four sizes is not the opening sequence but the number of shaping rows worked before the headband begins.
Baby
The Baby size finishes the triangular portion with:
Row 18: Ch 1, sc in each st and ch sp across; turn. (51 sts)
Toddler/Child
The Toddler/Child version continues through Row 20 and then uses:
Row 21: Ch 1, sc in each st and ch sp across; turn. (57 sts)
Child/Teen
The Child/Teen version continues through Row 21 and finishes the main section with:
Row 22: Ch 1, sc in each st and ch sp across; turn. (61 sts)
Adult
The Adult version continues through Row 22 and then finishes the main section with:
Row 23: Ch 1, sc in each st and ch sp across; turn. (65 sts)
These checkpoints are useful because they clearly identify when the main kerchief fabric is complete and the band construction is about to begin.
Toddler/Child Additional Shaping
For the Toddler/Child size, the additional rows between the common shaping sequence and the single crochet transition are:
Row 18: Ch 3, dc2tog working between first 2 sts of previous row and top of 3rd st of previous row, *v st in next ch sp, double v st in next ch sp, v st in next ch sp,** wdc2tog; rep from * across, finishing last repeat at **, dc2tog in top of next st and between last 2 sts, dc in top of ch 3; turn.
Row 19: Ch 4, dc in 1st st, wdc2tog, *v st in next ch sp, double v st in next ch sp, v st in next ch sp, wdc2tog; rep from * across, then v st in top of ch 3; turn.
Row 20: Ch 3, *v st in next ch sp, wdc2tog, v st in next ch sp,** double v st in next ch sp; rep from * across, finishing last repeat at **, then dc in the top of the ch 3; turn.
Child/Teen Additional Shaping
The Child/Teen version adds one more shaping row before the single crochet transition:
Row 21: Ch 4, dc in 1st st, *v st in next ch sp, wdc2tog, v st in next ch sp,** double v st in next ch sp; rep from * across, finishing last repeat at **, then v st in the top of the ch 3; turn.
Adult Additional Shaping
The Adult size has two additional rows in this final section:
Row 21: Ch 4, dc in 1st st, *v st in next ch sp, wdc2tog, v st in next ch sp,** double v st in next ch sp; rep from * across, finishing last repeat at **, then v st in the top of the ch 3; turn.
Row 22: Ch 3, [dc, ch 1, 2 dc] in next ch sp, *v st in next ch sp, wdc2tog, v st in next ch sp,** double v st in next ch sp; rep from * across, finishing last repeat at **, then [2 dc, ch 1, dc] in last ch sp, dc in top of ch 3; turn.
Building the Headband Section
Once the triangular portion is complete, the construction changes noticeably. The first band row begins with five chains, followed by single crochet stitches and four foundation single crochet stitches used to extend the row.
The source gives the same basic band construction for all four sizes, but the row numbers and stitch counts change according to the size.
Baby Band
Row 19: Ch 5, skip the ch closest to the hook, sc in the remaining 4 chs, sc in each st across, extend the row with 4 FSC; turn. (59 sts)
Rows 20-21: Ch 1, sc in each st across; turn. (59 sts)
Toddler/Child Band
Row 22: Ch 5, skip the ch closest to the hook, sc in the remaining 4 chs, sc in each st across, extend the row with 4 FSC; turn. (65 sts)
Rows 23-24: Ch 1, sc in each st across; turn. (65 sts)
Child/Teen Band
Row 23: Ch 5, skip the ch closest to the hook, sc in the remaining 4 chs, sc in each st across, extend the row with 4 FSC; turn. (69 sts)
Rows 24-25: Ch 1, sc in each st across; turn. (69 sts)
Adult Band
Row 24: Ch 5, skip the ch closest to the hook, sc in the remaining 4 chs, sc in each st across, extend the row with 4 FSC; turn. (73 sts)
Rows 25-26: Ch 1, sc in each st across; turn. (73 sts)
The source provides a separate tutorial link for extending a row with FSC. The technique is part of the original construction and should be followed according to that source rather than replaced with an assumed alternative.
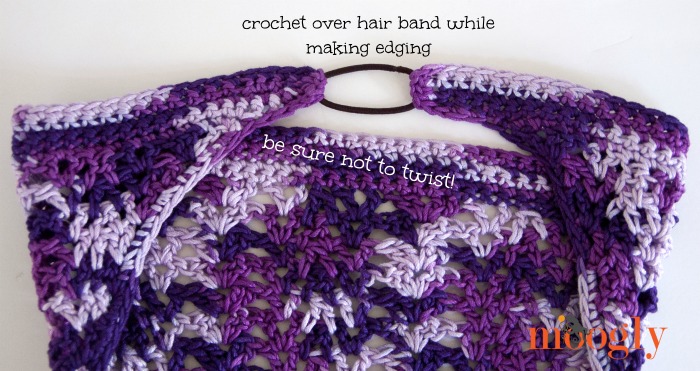
Attaching the Elastic Hair Band
The final row is both an edging row and the stage where the hair band is enclosed. This construction is repeated across the four sizes with different row numbers.
Baby Row 22: Ch 1, sc in each st across, turn to sc across the ends of Rows 22-19, enclosing the hair band in each st; turn again to sc along the other side of the band and along the two sides of the scarf; at the next end of the band, sc across the ends of Rows 19-22, enclosing the other side of the hair band; break yarn and finish off (but not before you try it on!).
Toddler/Child Row 25: Ch 1, sc in each st across, turn to sc across the ends of Rows 25-22, enclosing the hair band in each st; turn again to sc along the other side of the band and along the two sides of the scarf; at the next end of the band, sc across the ends of Rows 22-25, enclosing the other side of the hair band; break yarn and finish off (but not before you try it on!).
Child/Teen Row 26: Ch 1, sc in each st across, turn to sc across the ends of Rows 26-23, enclosing the hair band in each st; turn again to sc along the other side of the band and along the two sides of the scarf; at the next end of the band, sc across the ends of Rows 23-26, enclosing the other side of the hair band; break yarn and finish off (but not before you try it on!).
Adult Row 27: Ch 1, sc in each st across, turn to sc across the ends of Rows 27-24, enclosing the hair band in each st; turn again to sc along the other side of the band and along the two sides of the scarf; at the next end of the band, sc across the ends of Rows 24-27, enclosing the other side of the hair band; break yarn and finish off (but not before you try it on!).
Why the Fitting Step Matters
The final fit is affected by more than the number of crocheted stitches. The original instructions specifically explain that hair bands vary in size and elasticity. The crocheted yarn can stretch as well. That is why the pattern advises trying the kerchief on before cutting the yarn and recommends erring on the tighter side.
This instruction is especially important when using a hair band that differs from the one used for the sample. Rather than assuming that every elastic band will behave identically, use the fitting stage to determine whether the band needs adjustment.
The source explicitly permits adjusting the number of stitches in the band to create the perfect fit. This flexibility applies to the headband portion and does not require changing the stitch sequence of the main triangular kerchief.
A Practical Way to Read the Longer Rows
Long crochet instructions can look intimidating when they contain several repeated symbols. A useful approach for this particular pattern is to identify the anchor points first. Look for the beginning chain, the V-stitch spaces, the double V-stitch spaces, the wdc2tog, and the final stitch or chain-3 location.
Because the pattern states that V stitches are worked in V stitches below and double V stitches in double V stitches below, the completed row provides a visual map for the next one. This is especially useful once the project reaches the repeated middle section.
It is also helpful to pause at the end of a row rather than immediately turning and continuing. Compare the completed row visually with the previous row and confirm that the central decrease and surrounding stitch groups are positioned correctly.
Progress Checkpoints by Size
- Baby: 51 sts after Row 18, then 59 sts after Row 19.
- Toddler/Child: 57 sts after Row 21, then 65 sts after Row 22.
- Child/Teen: 61 sts after Row 22, then 69 sts after Row 23.
- Adult: 65 sts after Row 23, then 73 sts after Row 24.
These checkpoints are especially useful because each size increases from the final triangular-section count to the first full band row. If your number differs, stop and inspect the preceding row before continuing.
Keeping the Four Sizes Straight
Because the early rows are shared across the size instructions, it can be tempting to move between the size sections without clearly marking which version you are making. That can lead to confusion once additional rows begin.
A simple solution is to identify your size before starting and keep the corresponding final-section instructions immediately accessible. The critical transition points are different:
| Size | Single Crochet Transition | First Band Row | First Band Count |
|---|---|---|---|
| Baby | Row 18 | Row 19 | 59 sts |
| Toddler/Child | Row 21 | Row 22 | 65 sts |
| Child/Teen | Row 22 | Row 23 | 69 sts |
| Adult | Row 23 | Row 24 | 73 sts |
Troubleshooting the Main Fabric
The center does not look right
Review the wdc2tog placement first. This decrease is not simply described as an ordinary decrease in the source; it is specifically worked between the posts on either side of the dc2tog of the previous round.
The V stitches seem to drift
Check the placement rule given by the pattern. V stitches should be worked in the V stitches below. Double V stitches should be worked in the double V stitches below. If one group has been placed in an ordinary space instead, the visual alignment can change.
The final headband does not fit the intended head size
Do not rely on head circumference alone. The pattern specifically warns that hair bands have different sizes and elasticity. Try the kerchief on before cutting the yarn and adjust the number of stitches in the band if necessary.
I am unsure whether to finish the yarn
The source repeatedly emphasizes the fitting step. The final instructions say to break the yarn and finish off, but not before trying the kerchief on.
Frequently Asked Questions
Is this a beginner-friendly crochet project?
The source presents a relatively compact accessory that uses several techniques, including V stitches, double V stitches, decreases, single crochet, and foundation single crochet. A crocheter who is comfortable following stitch abbreviations and repeated instructions can use the detailed row-by-row pattern to work through the project.
What kind of yarn should I use?
The specified yarn category is Sport/5 ply, with 70-100 yards required. The sample uses Omega Sinfonia, 100% cotton, colorway #847.
What is the finished head size?
The pattern lists the intended head ranges as 16-18″ for Baby, 18-20″ for Toddler/Child, 20-22″ for Child/Teen, and 22-24″ for Adult.
Why is there an elastic band instead of ties?
The pattern’s concept combines traditional bandana-inspired styling with a hair band, making the kerchief easy to put on and remove.
Does every size have the same number of rows?
No. The common opening and central pattern are extended differently for each size. Baby transitions at Row 18, Toddler/Child at Row 21, Child/Teen at Row 22, and Adult at Row 23.
Final Assembly Perspective
By the time the last edging row is complete, the hair band is enclosed within the crocheted band and the two ends of the band are integrated into the kerchief. The construction therefore creates a finished accessory without relying on separate ties.
The final stage should be approached as both finishing and fitting. The source does not treat the hair band as a decorative afterthought; it is part of the functional construction. That is why the try-on instruction appears before the yarn is broken.

Final Checklist Before You Call It Finished
- Confirm the selected size matches the intended head measurement.
- Use the US H, 5.0mm crochet hook.
- Work with 70-100 yds of Sport/5 ply yarn.
- Use one hair band or elastic band.
- Keep the V-stitch and double V-stitch placement consistent.
- Follow the size-specific row count rather than assuming all four versions end at the same row.
- Verify the stated stitch count at the band transition.
- Try the kerchief on before cutting the yarn.
- Account for the stretching of both yarn and hair band.
- Enclose the hair band according to the final edging instructions.
- Only then break the yarn and finish off.
Final Thoughts on the Construction
The Lazy Summer Kerchief is a good example of how a familiar accessory can be given a different construction without losing its traditional character. The triangular fabric still has the visual language of a bandana, while the integrated elastic band changes the way it is secured.
Its four-size format also makes the pattern more versatile than a single fixed-size kerchief. The Baby, Toddler/Child, Child/Teen, and Adult instructions retain the same fundamental stitch vocabulary while extending the main section to different row counts.
The most useful approach is to focus on the structure of the pattern: establish the opening, maintain the V and double V stitch alignment, work the specified decreases, verify the size-specific stitch count, and then move into the single crochet band section.
Once the band is ready, the final fitting step becomes essential. Since the pattern uses an elastic hair band, the precise behavior of the finished kerchief depends partly on that band. Trying it on before cutting the yarn gives you the opportunity to make the permitted stitch adjustment and achieve the intended fit.
With those checkpoints in mind, the project can be approached as a clear sequence of construction stages rather than one long set of instructions. The result is a lightweight crochet kerchief with a practical hair-band finish and four original size options.