

Creamy and Tangy Greek Yogurt Popsicles
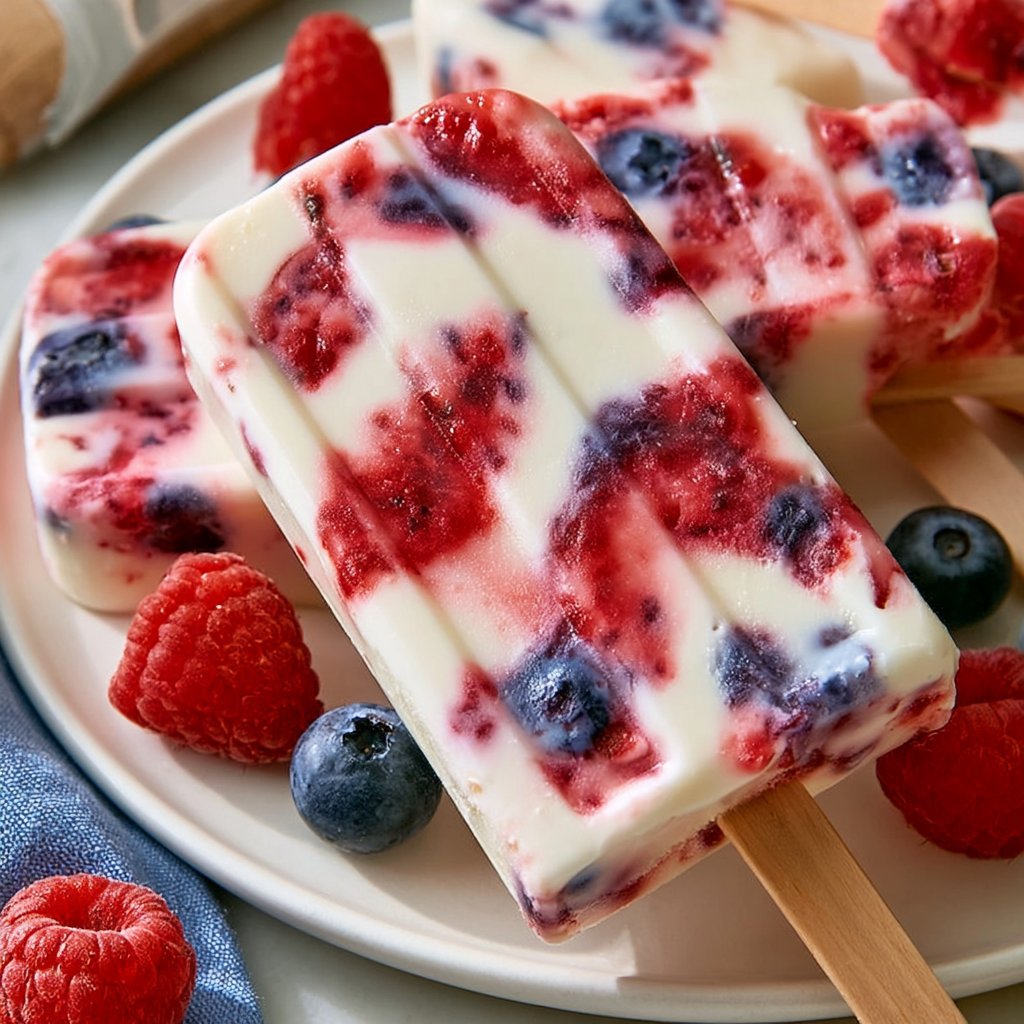
Hot days call for a refreshing treat, and what better way to cool down than with homemade Greek yogurt popsicles? These deliciously creamy and tangy delights offer a unique blend of textures and flavors that will please both kids and adults alike. The richness of Greek yogurt combined with the natural sweetness of honey and fresh fruit creates a delicious balance that’s hard to resist.
Perfect for breakfast on a hot summer morning, a sweet treat after lunch, or even as a light dessert at a gathering, these popsicles never fail to impress. Plus, whipping them up is a breeze, making it easy to enjoy homemade goodness at any time!
Nutrition & Recipe Details
Item Value Prep time10 minutes Cook time0 minutes Store time6+ hours (freeze time) Calories120 kcal per popsicle Protein5 g Carbohydrates15 g Fat2 g How to make Greek Yogurt Popsicles
Ingredients:
Ingredient Quantity Plain full-fat Greek yogurt2 cups (480g) Honey or maple syrup1/4 cup (80ml) Pure vanilla extract1 tsp (5ml) Fine sea salt1/4 tsp (1g) Fresh strawberries or blueberries1 cup (150g) Lemon juice1 tbsp (15ml) Step-by-Step Instructions:
- Place the Greek yogurt, honey, vanilla, and salt into a high-speed blender or food processor. Pulse until the mixture is completely smooth and slightly aerated.
- In a separate small bowl, mash or blend the chosen fruit with lemon juice until it reaches a chunky puree consistency.
- Spoon a layer of the yogurt base into the bottom of each of the 6 popsicle molds.
- Drop a spoonful of fruit puree into the center of each mold and use a toothpick or skewer to swirl it gently to create a marbling effect.
- Insert the popsicle sticks firmly into the center of the molds.
- Place the molds on a flat metal baking sheet in the freezer for at least 6 hours or overnight until solid.
Pro Tips:
Tip Description Optimize your fruit Use ripe, fresh fruit for the best flavor; overripe fruit can taste too sweet. Swap sweeteners If you’re looking for a sugar-free option, consider using stevia or another natural sweetener. Experiment with flavors Feel free to mix different fruits or add herbs like mint for a refreshing twist! Why You’ll Love This Recipe
These Greek yogurt popsicles stand out thanks to their creamy texture and tangy flavor, which is a delightful change from typical ice pops. The use of yogurt makes them not only delicious but also a bit healthier, given the protein content. They are perfect for those who are looking to enjoy a tasty treat while being mindful of sugar intake.
The versatility of this recipe is another bonus. You can adjust the fruit depending on what’s in season or what you enjoy the most. Whether you’re a fan of strawberries, blueberries, or even peaches, these popsicles can adapt. They’re also an excellent option for those following balanced diets or looking for a light dessert.
How to serve Greek Yogurt Popsicles
Presentation adds to the experience, and these popsicles can be shown off beautifully! Consider placing them on a colorful platter surrounded by fresh fruit or serving them with a small bowl of yogurt for dipping. For a fun touch, drizzle a bit of honey on top just before serving.
Pair these popsicles with refreshing beverages like lemonade or iced tea. They also make an excellent addition to a picnic or summer barbecue, providing a bright and cheerful treat that everyone will enjoy!
How to store Greek Yogurt Popsicles
To store these popsicles effectively, keep them in their molds in the freezer if they will be consumed within a few days. If you’re making a larger batch for later enjoyment, remove them from the molds after they are frozen solid, then wrap each popsicle in plastic wrap and place them in a freezer-safe bag. This allows them to last for about 2-3 months.
If you ever have leftovers, you can simply keep them in a zip-top bag in the freezer for a quick grab-and-go snack later.
Tips to make Greek Yogurt Popsicles
Ensure that your yogurt is at room temperature before blending; this makes it easier to achieve that silky smooth texture. For a touch of extra sweetness, adjust the honey or maple syrup to your taste. If you want to infuse some zest, consider adding a bit of lime or orange juice along with the lemon for a citrus kick.
It’s also essential to not overfill the molds, as the mixture will expand while freezing.
Variation
Try making vegan Greek yogurt popsicles using coconut yogurt or almond yogurt, and substitute the honey with agave or a maple syrup! If you prefer a low-carb option, you can use a sugar substitute and focus on berries as they are lower in carbs.
For a more exotic twist, experiment with adding spices like cinnamon or cardamom, or even swirl in some nut butters for a richer flavor.
Storage and Reheating
These popsicles are best served frozen, so reheating isn’t necessary. To enjoy them at their prime, just remove them from the freezer and allow them to sit at room temperature for a few minutes after taking them out, making it easier to peel off the molds.
If you want to soften them slightly before eating, simply leave them at room temperature for a few minutes or run them under warm water for a few seconds – this will give you that perfect bite.
Customization Ideas
Personalize your Greek yogurt popsicles by trying out different fruit combinations based on your preferences. You might layer various fruit purees for a more stunning visual effect or top them with granola or chopped nuts just before serving for added texture.
You can also experiment with flavor extracts like almond or mint to alter the taste profile. If you’re feeling adventurous, try including superfood ingredients like chia seeds or flaxseeds for an added nutrient boost!
Common Mistakes to Avoid
- Skipping the blending step: Not blending the yogurt well enough can leave chunks that aren’t pleasant in popsicle form, so blend until completely smooth.
- Overfilling the molds: Leaving room for expansion is crucial; otherwise, they could spill out and make a mess in your freezer.
- Using overly ripe fruit: Overripe or mushy fruit can compromise the fresh taste of your popsicles, so choose fruit that is ripe but firm.
- Not experimenting enough: Sticking too closely to the recipe might limit your creativity, so feel free to let your taste buds guide you!
- Forgetting about freezing time: Be sure to allow enough time for the popsicles to fully freeze, as biting into a partially solidified popsicle can be disappointing.
Serving Occasions
These Greek yogurt popsicles are perfect for numerous occasions. They’re ideal for summer barbecues, a light after-dinner treat, or even as a mid-afternoon snack on a hot day. You can also serve them at birthday parties, family gatherings, or as a fun and healthy edible favor at any celebration.
Why make this recipe
What makes these Greek yogurt popsicles special is their balance of creaminess and tanginess, coupled with the satisfaction of knowing you are serving something wholesome. Unlike many store-bought popsicles loaded with sugar and preservatives, these homemade varieties offer a fresh and natural taste you can feel good about enjoying.
With a short list of simple ingredients, you can whip together a treat that not only pleases the palate but is also flexible enough to meet varying dietary needs. It’s a fun way to involve kids in the kitchen, allowing them to choose and blend their favorite fruits while learning healthy eating habits.
FAQs
- Can I use low-fat Greek yogurt instead?
- Yes, you can substitute low-fat Greek yogurt if you prefer. However, this may slightly alter the creaminess of the popsicles.
- How long do they last in the freezer?
- When stored properly, these popsicles can last up to 2-3 months in the freezer.
- Can I use frozen fruit instead of fresh?
- Yes, frozen fruit works well; just allow it to thaw slightly before blending to achieve the ideal puree consistency.
- Are these popsicles suitable for kids?
- Absolutely! They are a nutritious snack option for kids and are free from artificial colors and flavors, making them a healthier alternative to store-bought treats.
- Can I double the recipe?
- Yes, you can easily double the recipe to make a larger batch; just ensure your blender is large enough to accommodate the increased volume.
Disclaimer
Please note that the nutritional values provided are approximate and may vary based on specific ingredients used. Always check the labels for accurate information. Enjoy your cooking experience!