

Peanut Butter Oreo Icebox Cake
When you’re craving a dessert that’s creamy, crunchy, and utterly indulgent, look no further than the Peanut Butter Oreo Icebox Cake. This delightful treat combines layers of whipped peanut butter mousse with crunchy Oreo cookies, resulting in a luscious cake that melts in your mouth. With its rich flavor and satisfying texture, this dessert is sure to please anyone with a sweet tooth.
This icebox cake is perfect for any occasion, from summer gatherings to cozy family dinners. It’s easy to prepare ahead of time and can be stored in the fridge until you’re ready to serve. Whether you’re celebrating a birthday or simply treating yourself after a long day, this cake hits the spot every time!
Nutrition & Recipe Details
| Item | Value |
|---|---|
| Prep time | 30 minutes |
| Cook time | 0 minutes |
| Store time | 4 hours (minimum) |
| Calories | 350 per serving |
| Protein | 7g |
| Carbohydrates | 30g |
| Fat | 24g |
How to make Peanut Butter Oreo Icebox Cake
Ingredients:
| Ingredient | Quantity |
|---|---|
| Cream cheese (softened) | 8 oz |
| Creamy peanut butter (no-stir, not natural) | 1 cup |
| Powdered sugar | 1 cup |
| Vanilla extract | 1 tsp |
| Heavy cream (cold) | 1 1/2 cups |
| Unsweetened cocoa powder | 1/4 cup |
| Extra powdered sugar | 3/4 cup |
| Oreos (regular, about one package plus extra) | 30 |
| Milk (for dunking) | 1/2 cup |
| Hot fudge or chocolate ganache (room temperature, for drizzling) | 1/4 cup |
| Peanut butter cups (chopped) | 6-8 |
| Crushed Oreos (for topping) | a few |
Step-by-Step Instructions:
-
Make the Mousse Layers: In a large mixing bowl, beat the softened cream cheese until smooth. Add the creamy peanut butter, powdered sugar, and vanilla extract, and mix until well combined. In another bowl, whip the heavy cream until it forms stiff peaks, then gently fold it into the peanut butter mixture until fully incorporated.
-
Assemble the Cake: Take each Oreo and dip it quickly in milk—just enough to soften, but not too soggy. Layer the dipped Oreos on the bottom of a 9×13 inch dish. Spread half of the peanut butter mousse over the Oreos, smoothing it out evenly.
-
Create More Layers: Repeat the dipping and layering process with more Oreos and mousse, finishing with a final layer of mousse on top. Drizzle hot fudge or chocolate ganache over the top, and sprinkle with crushed Oreos and chopped peanut butter cups.
-
Chill and Finish: Cover the dish with plastic wrap and refrigerate for at least four hours, but overnight is ideal. This allows the flavors to meld together beautifully. When ready to serve, slice and enjoy your delicious creation!

Pro Tips:
| Tip | Description |
|---|---|
| Chill Time | The longer you chill the cake, the better the layers will meld together, enhancing the flavor and texture. |
| Smooth Mousse | Ensure your cream cheese is softened to room temperature for easy mixing; this will prevent lumps in your mousse. |
| Dunk Oreos Wisely | A quick dunk in milk is enough; avoid soaking them so they maintain some crunch. |
Why You’ll Love This Recipe
This Peanut Butter Oreo Icebox Cake is a great example of dessert indulgence without being overly complicated. Its creamy peanut butter mousse offers a perfect balance of flavors, marrying the rich taste of peanut butter with the sweetness of Oreos. It’s hard to resist a slice of this delightful dessert, especially with that layer of chocolate drizzle on top.
The best part is how simple it is. With just a few ingredients and easy instructions, anyone can recreate this dessert. It’s perfect for busy home cooks who still want to impress! Moreover, it fits many diets by being nut-friendly (for those who can eat peanuts) and does not require baking, making it a versatile option for different gatherings.
How to serve Peanut Butter Oreo Icebox Cake
Presentation is key with this dessert. Serve it straight from the fridge in its dish for a casual vibe, or plate individual slices for special occasions. Adding extra toppings like whipped cream or a scoop of vanilla ice cream can enhance the visual appeal and flavor. Pair it with a rich coffee or a glass of cold milk to complement the flavors perfectly.
For side dishes, consider something light and refreshing, like a fruit salad, to balance out the richness of the cake. Freshberries or a citrus salad provide a nice contrast and will appeal to everyone at your gathering.
How to store Peanut Butter Oreo Icebox Cake
Storage options are straightforward for this cake. If you have leftovers (though they are rare with such a delicious treat!), simply cover the dish tightly with plastic wrap or transfer slices to an airtight container. In the fridge, it lasts about 3-4 days.
For longer storage, you could freeze the slices. Wrap each slice in plastic and place them in a freezer-safe bag. They should keep well for up to a month. Thaw them in the fridge before serving, and reconsider adding a fresh drizzle of hot fudge for that just-made taste.
Tips to make Peanut Butter Oreo Icebox Cake
- Pay attention to the heavy cream; ensure it’s cold when you whip it. Cold cream whips up better and holds its shape.
- If you find your mousse is too thick, you can add a bit of milk to loosen it up without compromising its flavor.
- Use a spatula to spread the mousse carefully; this will help maintain the layers and give a prettier finish.
- Customize the cake with different flavors of pudding for an exciting twist or try using gluten-free Oreos for a gluten-free version.
Variation
You can easily adapt this recipe to suit different dietary preferences. For a vegan version, use dairy-free cream cheese, non-dairy whipped topping, and vegan chocolate. Additionally, consider using gluten-free sandwich cookies to make it gluten-free.
For a chocolate lover’s twist, try incorporating chocolate mousse as an additional layer or switch to chocolate Oreos. Experimenting with different nut butters such as almond or cashew can also lead to a delightful variation.
Storage and Reheating
If you do freeze any leftovers, the best way to reheat is to let them thaw in the fridge overnight. If you want a warm dessert experience, consider using the microwave. Place a slice on a microwave-safe plate and heat for 15-20 seconds, checking every 10 seconds to avoid overheating.
Customization Ideas
There are plenty of ways to tweak this recipe to suit your tastes! Add layers of sliced bananas or strawberries for a fruity kick. If you love textures, include crushed pretzels or bits of toffee for a delightful crunch. You can even switch up the peanut butter for almond or cashew butter for a unique flavor!
Common Mistakes to Avoid
- Overmixing the Mousse: This can lead to a dense texture instead of a light and airy one. Mix just until combined.
- Soaking Oreos Too Long: If you leave them in the milk for too long, they will fall apart. A quick dunk is all you need!
- Not Chilling Long Enough: Skipping the chill time will result in a messier cake. It’s essential for the layers to set properly.
- Not Whipping Cream Enough: Make sure the cream is whipped to stiff peaks; otherwise, your mousse won’t hold its structure.
- Using Warm Ingredients: Make sure everything, especially the heavy cream, is cold to get the best texture in the mousse.
Serving Occasions
This icebox cake is perfect for a variety of occasions! It’s an ideal dessert for summer picnics, birthday parties, or just as a special treat during family movie night. The no-bake aspect makes it great for hot weather when you want to avoid turning on the oven, and it’s always a hit at potlucks.
Why make this recipe
The Peanut Butter Oreo Icebox Cake stands out among desserts because it combines familiar flavors with a fun, layered presentation. It’s not just a sweet treat; it’s an experience. Each bite offers a delightful crunch from the Oreos, the creaminess of peanut butter mousse, and the bliss of chocolate drizzle—all without any baking required.
Moreover, its straightforward recipe means you can whip it up even on busy days. The flavor is comforting and familiar, reminiscent of childhood favorites, making it a nostalgic treat for many.
FAQs
-
Can I use natural peanut butter?
While you can, it’s best to use creamy peanut butter that’s not natural, as it will yield the best consistency for your mousse. -
How long does the cake last in the fridge?
The Peanut Butter Oreo Icebox Cake lasts about 3-4 days stored in the refrigerator. -
Can I make this cake ahead of time?
Absolutely! This cake is perfect for preparing the day before serving. In fact, it tastes even better after it has chilled overnight. -
Is there a substitute for heavy cream?
If you want a lighter option, you can try using coconut whipped cream or a dairy-free alternative, but keep in mind the texture may vary. -
What else can I add to the layers?
You can add sliced fruit, nuts, or even sprinkles between the layers for added flavor and texture!
Disclaimer
Please note that nutritional information is approximate and may vary based on specific ingredients used. Always check your ingredient labels for the most accurate details.
Print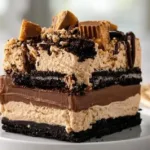
Peanut Butter Oreo Icebox Cake
- Total Time: 270 minutes
- Yield: 12 servings
- Diet: Vegetarian
Description
A creamy, crunchy dessert made with layers of peanut butter mousse and Oreo cookies, perfect for any occasion.
Ingredients
- 8 oz cream cheese (softened)
- 1 cup creamy peanut butter (no-stir, not natural)
- 1 cup powdered sugar
- 1 tsp vanilla extract
- 1 1/2 cups heavy cream (cold)
- 1/4 cup unsweetened cocoa powder
- 3/4 cup extra powdered sugar
- 30 Oreos (regular, about one package plus extra)
- 1/2 cup milk (for dunking)
- 1/4 cup hot fudge or chocolate ganache (room temperature, for drizzling)
- 6-8 peanut butter cups (chopped)
- a few crushed Oreos (for topping)
Instructions
- Make the mousse layers: In a large mixing bowl, beat the softened cream cheese until smooth. Add the creamy peanut butter, powdered sugar, and vanilla extract, and mix until well combined. In another bowl, whip the heavy cream until it forms stiff peaks, then gently fold it into the peanut butter mixture until fully incorporated.
- Assemble the cake: Take each Oreo and dip it quickly in milk—just enough to soften, but not too soggy. Layer the dipped Oreos on the bottom of a 9×13 inch dish. Spread half of the peanut butter mousse over the Oreos, smoothing it out evenly.
- Create more layers: Repeat the dipping and layering process with more Oreos and mousse, finishing with a final layer of mousse on top. Drizzle hot fudge or chocolate ganache over the top, and sprinkle with crushed Oreos and chopped peanut butter cups.
- Chill and finish: Cover the dish with plastic wrap and refrigerate for at least four hours, but overnight is ideal. This allows the flavors to meld together beautifully. When ready to serve, slice and enjoy your delicious creation!
Notes
The longer you chill the cake, the better the layers will meld together, enhancing the flavor and texture. Customize with fruits or different nut butters for variations.
- Prep Time: 30 minutes
- Cook Time: 0 minutes
- Category: Dessert
- Method: No-Bake
- Cuisine: American